Understand night photography for beginners
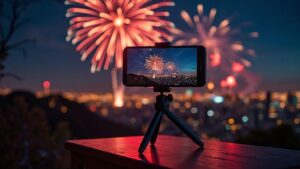
Night photography can feel tricky, but you have tools that make it simple. In this guide, Night Mode for Landscapes vs Portraits: Different Settings Explained for Beginners, we cover the essentials: shutter speed, aperture, and ISO so your image isn’t too dark or grainy. Think of your camera like a bucket: the longer the bucket stays open, the more light it catches. If you hold the shutter open too long, things blur; if you keep it short, you miss light. You’ll practice with small steps, and your photos will start to feel steadier and brighter. Start with a sturdy stance or a tripod, then try a few test shots to learn how each setting changes the look.
When you shoot at night, focus on balancing light and detail. Use a low ISO to reduce noise, a moderate aperture to keep texture, and a longer shutter time to reveal the city glow or starry sky. Keep a mental checklist: steady support, correct exposure, and sharp focus. If you’re unsure, shoot in a well-lit scene first, then move to darker scenes. Your eye will learn what changes in the settings do to the final image, and your confidence grows with each click.
Night photography rewards patience. You’ll learn to read light—the way a street lamp highlights a storefront or how distant cars create a light trail. You don’t need fancy gear to start; you just need to know how long to keep the shutter open, how bright your lens should be, and how sensitive your sensor is. Practice by going somewhere familiar at night, then compare results. You’ll see your progress in fewer blurry shots and more well-lit, crisp photos.
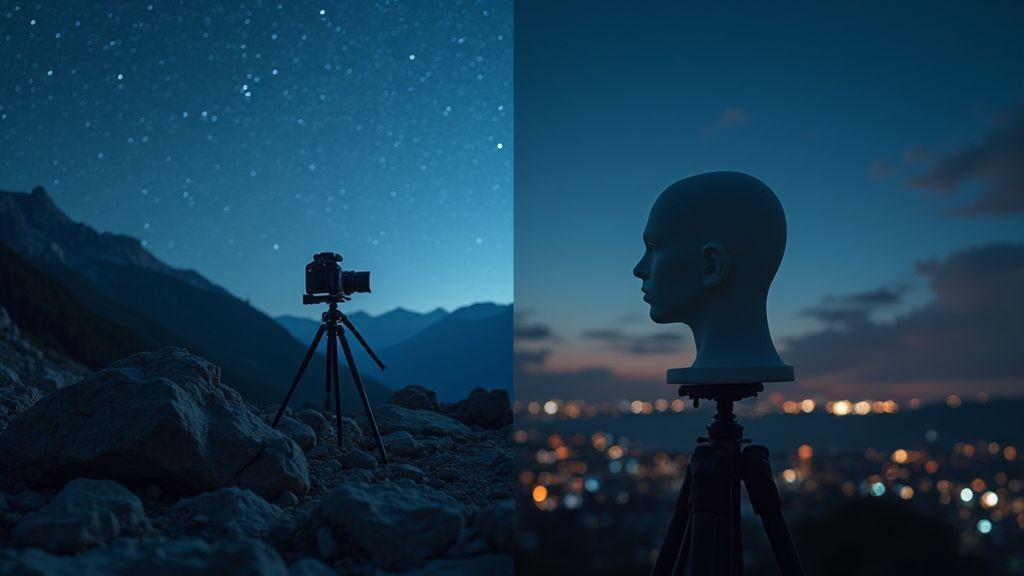
Compare night mode landscape settings
For landscapes at night, you want a wide view with depth. Set a small ISO to keep noise down, a narrow aperture to keep near and far objects sharp, and a longer shutter to catch ambient light like stars or city glow. If you’re using a tripod, you can push the shutter even longer without blur. Manual focus is often necessary because autofocus struggles in low light. Take a few frames at different exposures to blend later or choose the best one and lock your focus.
Your goal is texture and balance. Watch for a sky that isn’t blown out and foreground detail that doesn’t vanish into shadow. In bright urban areas, you might combine a longer shutter with a shorter one for a composite, but start simple: one steady shot with a low ISO, then adjust. Remember to turn off image stabilization on stands if you’re using a tripod, or you’ll waste frame sharpness. Night Mode for Landscapes vs Portraits: Different Settings Explained for Beginners.
Compare night mode portrait settings
Portraits at night demand smoother skin tones and a soft background. Start with a wider aperture to blur the background and bring your subject forward. Use a moderate ISO to keep skin free from grain, and a shutter fast enough to avoid motion blur if your subject moves. If you’re outside, you might add a gentle light source or rely on ambient light from street lamps to keep the face natural. A shorter shutter than landscapes helps keep expressions crisp.
You can push exposure a bit to reveal facial details that would vanish in pure darkness, but avoid overexposing highlights on the face. If possible, try a little bounce of light from a nearby surface to soften shadows. Practice with a friend or family member so you can see how changes in ISO, aperture, and shutter speed affect skin tone and mood. Night Mode for Landscapes vs Portraits: Different Settings Explained for Beginners.
Know camera vs smartphone night modes
When you compare, cameras usually offer more control and cleaner results in low light. A real camera lets you set shutter, aperture, and ISO precisely, and its sensor handles noise better. A smartphone often stacks multiple shots to brighten the scene, but you have less control over depth and texture. Your phone might produce a brighter overall look that can wash out small details. If you want truer texture and richer dynamic range, use a camera; if you want quick, bright scenes on the go, your phone is handy. Night Mode for Landscapes vs Portraits: Different Settings Explained for Beginners.
Set your shutter speed for long exposure night landscapes
Night landscapes hinge on shutter speed for brightness and the sky’s smoothness. Start with moderate long exposure times, like 15 to 30 seconds, and check your histogram. If the sky is too bright or stars trail unintentionally, adjust to a shorter or longer shutter speed. Your goal is a clean balance where the stars stay pinpoint and the land remains detailed.
For landscapes with light pollution or a visible Milky Way, use a longer shutter to capture more faint light, but watch movement. If you’re handholding, a long exposure will be painful—use a tripod and a remote or timer. Drop your ISO to keep noise down, and let the shutter do the heavy lifting. Night skies respond differently than daytime scenes; give your camera time to paint the night without blowing it out.
In practice, shoot a few frames at different shutter speeds to compare. For a tranquil night landscape, you might land on 20 seconds with ISO 800. For dramatic star trails, push to several minutes per frame or stack multiple short exposures later. Trial and error is your compass here. Keep notes on each shot so you learn what each shutter bite does to color, star sharpness, and foreground clarity.
Choose shutter speed for stars and light trails
- Stars: start with 15 to 25 seconds for a clean star field, then adjust. If the sky is too dark, nudge exposure up, but watch for noise. You want bright, tiny pinpoints, not a gray haze.
- Light trails: shoot 20–30 second frames over 10 minutes and stack later. Trails appear as bright lines while the foreground stays sharp. Experiment with interval timing to get the smoothest path.
Use night mode exposure settings for steady shots
Night Mode can be a helpful baseline, but best results come from manual control. In manual, you control shutter speed, aperture, and ISO. Night Mode often lifts shadows or blows highlights, especially in landscapes where you want star detail and ground texture. Use Night Mode as a reference, then dial in your own settings for consistency across frames.
When aiming for steady shots, stay in manual, set a fixed white balance, and keep ISO low. A low ISO reduces grain in the foreground, while a stable shutter speed keeps stars in place across consecutive shots. If you’re stacking images for noise reduction, you’ll want identical exposures, so write down your settings and reuse them.
Lock exposure with manual mode
- Locking exposure in manual gives repeatable results, essential for night landscapes. After dialing in a good exposure, switch to manual and use exposure compensation to maintain brightness. Some cameras let you lock exposure; use it so accidental metering changes don’t ruin your shot.
- In changing light (rising moon or city lights near the horizon), consider bracketing and choosing the best exposure later. For a steady night landscape, a single, locked manual exposure is your friend for stacking or comparison.
Adjust ISO and aperture for low light portraits
In low light, you want to capture enough light without making your subject look grainy. Start with a higher ISO and a wider aperture, then fine-tune so your subject stays sharp and the background adds mood, not noise. Think of ISO as your light boost and aperture as your subject separation dial.
Raise ISO slowly to avoid harsh grain. Indoors or at dusk, bump from ISO 100 to 400 or 800, then check the result. Pushing further invites noise in smooth areas like faces. Shoot in RAW to reduce noise later without losing detail. Portraits often crisper as you raise ISO just enough to brighten without blowing out colors.
Use wide aperture for subject blur and bokeh. A lens that can open to f/2.8 or wider helps separate subject from background. A wide aperture softens busy backgrounds, letting the subject shine. If your scene has texture behind the subject, a wide aperture will soften it so the person stands out. You’re trading some depth of field for light and mood, and that mood often wins for portraits.
Raise ISO slowly to control noise
Start at a comfortable base, then increase in small steps. Each step shows you how much brightness you gain and how much grain you gain. If your subject is moving or blinking, a slight bump in ISO helps freeze the moment without needing a faster shutter. Always review a tester image at 100% zoom to decide if the noise level is acceptable for skin tones. You’ll often find a sweet spot where the grain is fine and the exposure looks natural.
Pair ISO with a body-friendly shutter speed. A rule of thumb is to keep around 1/125s for handheld portraits, but in dim light you may drop to 1/60s if you’re careful with your breathing and stance. If your subject is still, you can push ISO a bit more and keep shutter low, but if they fidget, raise shutter and try to keep ISO in check. The key is to keep the compromise readable: brighter faces, minimal grain, and no motion blur.
Use wide aperture for subject blur and bokeh
Choose a lens with a large maximum aperture so you can blur the background while keeping your subject sharp. Your eyes will notice the difference in the final photo—the person pops while the surroundings melt away. If you don’t have a fast lens, you can still get some blur by stepping closer to your subject and pointing the camera at them, letting the closer distance create separation even with a smaller aperture.
Pair the wide aperture with steady hands or support. A tripod or leaning on a solid surface helps you hold your frame while you open the lens to f/1.8 or f/2.8. The background blur improves with distance between subject and background, so move your subject a step or two away from the backdrop. That little shift makes the bokeh more pronounced and your portrait more flattering.
Balance ISO, aperture and shutter
Balance by testing combinations and picking the one that gives you a clean, bright portrait with natural skin tones. Start with a wide aperture to separate the subject, then adjust ISO just enough to reach proper exposure without excessive noise. If the image starts to look soft, bump the shutter slightly to keep the subject sharp, then fine-tune ISO or aperture as needed. You want the main subject crisp, while the background remains shaping rather than distracting.
End with a quick check: are skin tones true, is there noise, and is there enough light on the eyes? If you get glow in the eyes or catch lights that look fake, dial back ISO a touch and open the aperture a notch. You’ll learn your camera’s limits by trying, noting where the noise appears and where the background loses detail.
Focus and stabilize your camera for sharp night shots
Sharpness comes from two easy habits: focus accuracy and steady handling. Lock your focus first, then keep the camera as still as you can. If your lens or phone struggles in low light, small tweaks—like a tiny nudge to reframe after autofocus—can make a big difference. Every extra breath before you press the shutter counts toward crisper edges in the final image. You want foreground, midground, and distant lights to hold their shape, not smear into soft blobs.
Set choices should serve speed and reliability. Keep ISO sensible so grain stays low, and use a slower shutter only when you’re sure your camera won’t shake. If you’ve got a moving scene, you’ll trade a bit of sharpness for the right exposure, but that’s a separate goal from camera shake. Think of focus and stabilization as the two anchors of a night shot: one fixes the point you want to read, the other keeps it from wobbling.
Finally, test small adjustments. Take a quick shot, inspect, and adjust. Night scenes reward you for learning how your gear behaves in real life—what works on one street corner may not on another. Your eye will learn to recognize what sharp feels like in the dark, and you’ll trust your instincts more with each click.
Use manual focus or focus peaking
Manual focus gives you direct control when contrasty edges vanish in the night. Switch to manual, zoom in on a bright landmark, and fine-tune until the edge looks crisp to your eye. If you have focus peaking, turn it on. It highlights in-focus areas with a bright outline, so you know when your subject is sharp without guessing.
If you’re using a phone, you might still have focus peaking-like aids or a magnified live view. Use them to pull focus from a distant streetlight to a closer storefront sign. Don’t rely on autofocus in deep night scenes; it often hunts or locks onto the wrong thing. With practice, you’ll quickly spot the point where the scene clicks and looks reliably sharp.
Test a few seconds of shutter to see how your focus holds up. If the subject shifts or the scene has moving elements, you may need to recheck focus after a few frames. Keeping a consistent focal point across shots helps your night sequence feel cohesive, not jumpy.
Apply smartphone night mode tips like timer and steady grip
Night mode on smartphones is a helper, not a shortcut. Use the timer to avoid touching the camera when you press the shutter. A two-second delay gives your hands time to settle, so you won’t blur the image with a tiny shake. If you can, prop your phone on a stable surface for the shot.
Grip matters more than you think. Hold your phone with both hands, elbows tucked in, and your body braced. Lean against a solid object if you can, or rest your phone on a steady surface. If you’re in a windy spot, a light weight on the bottom of your phone can steady the frame just enough. Small nudges and patience beat brute force every time.
When you set up a scene, think about how long you’ll be exposed. Longer exposures need steadier hands or a tripod, so adjust your timer and grip to the risk of movement. You’ll notice your night portraits or cityscapes become clearer when you respect the limits of handheld shooting.
Mount on a tripod or use a gimbal
A tripod is your must-have for true stability in night photography. Set it up, frame your shot, and lock it in. If you’re using a gimbal, balance your camera so it doesn’t drift with small hand movements. A smooth base means every light trail, star, or city line stays clean and readable.
If you don’t have a tripod or gimbal handy, improvise. Use a solid surface like a ledge or wall, or stack books to lift your camera to the right height. The key is to minimize jiggle during exposure. Even a small upgrade in stability pushes your night shots from okay to sharp.
Keep your setup simple: compose, lock focus, and press gently. You’ll thank yourself when you review the images and see the difference a steady base makes.
Compose and light your night portraits and landscapes
Night photography asks you to balance light, exposure, and mood. Plan both settings and timing before you press the shutter. Start by picking a scene you can control: a quiet street, a park with distant lights, or a skyline with a clear horizon. In your camera, set your base to manual so you can lock in the same look across shots. Use a low ISO to keep noise down, then open the aperture just enough to capture stars or neon without washing everything out. If you’re handheld, you’ll want a faster shutter, but if you’re on a tripod, you can go long for more light trails and soft backgrounds. Remember: night forces you to think in terms of light rather than color; your goal is a clear subject and a mood that feels real.
For portraits at night, add light where it matters most. A small, portable light or even an inexpensive LED panel can shape your subject’s face without harsh shadows. If you’re outside, bounce light off a pale wall or use a light diffuser to soften it. In close shots, aim for a gentle halo that separates your subject from the background. Keep the light source close enough to maintain natural skin tones, but far enough to avoid hotspots. If you’re in a dim setting, you can raise your ISO slightly, but hold your shutter steady with a tripod to prevent motion blur. Your goal is a warm, inviting look rather than a dramatic, over-contrasted mood.
In landscapes, foreground and horizon anchor the scene. Decide what will catch the viewer’s eye first: a rock, a tree, or a small stream. Place that element in the lower third of your frame to guide the eye upward toward the horizon. Use a small aperture to keep everything from foreground to distance in focus, and consider a longer exposure if you want star trails or a silky water feature. Compose with care so the night sky and landscape share the spotlight, not compete for it. Adjust white balance to preserve the natural coolness of stars while keeping ground colors believable.
Add small lights for portrait lighting in low light
You can craft flattering portraits in low light by using tiny, controllable light sources. A compact LED panel or a small handheld light works well when you’re close to your subject. Position the light at about 45 degrees to the side and slightly above the subject’s eye line to create gentle shadows that sculpt the face. If the light feels too harsh, soften it with a reflector or a white card held out of frame. In scenes with ambient glow, blend the small light with the background by dialing down the strength a bit and keeping your white balance consistent. Practice quick tests to see how the light interacts with your subject’s skin and hair, then lock in the best balance so your portrait looks natural in the room you’re shooting.
In tight spaces, you may not have room for a stand. A small clip-on light or pocket-sized LED can attach to your camera strap or sit on a tiny tripod. The key is control: keep the light steady, avoid flicker, and mute the intensity until your subject’s eyes glow with life. For a more dramatic look, tilt the light slightly downward to emphasize cheekbones or chin. Always check the shadows on your subject’s face under the actual scene lighting so nothing looks fake or blown out. The right amount of tiny light can turn a dull night portrait into something intimate and real.
Plan foreground and horizons when shooting landscapes at night
Your night landscape plan starts with a clear idea of foreground interest. Look for rocks, water, or silhouettes that anchor your frame. Decide whether you want a sharp, detailed foreground or a softer, misty look with a long exposure. If the foreground is busy, you might crop it tighter to keep the eye from wandering. If the foreground is simple, push more weight toward the horizon and sky to tell a broader story. Make a quick sketch or mental map of where you want the eye to travel, then set your tripod to a low, level base to avoid tilt that can ruin a straight horizon.
Timing matters as much as equipment. Scout your spot before full dark and note when the light quality changes—the blue hour often provides a gentle, even tone that helps both foreground and sky. Use leading lines to guide the viewer; a fence, a riverbank, or a road will pull your gaze toward the horizon. If you’re chasing stars, keep exposures longer and be mindful of light pollution from nearby towns. Patience and practice pay off with a landscape that feels calm and expansive, with every detail in its rightful place.
Use leading lines and stars to guide the eye
Leading lines direct attention from the foreground to the horizon or sky. A path, railing, or shoreline can pull the viewer into the frame. Position these lines so they start near a corner and run toward your main subject or the celestial focal point. In night scenes, bright elements like lighthouses, street lamps, or a distant building become pops of interest the lines lead toward. Keep lines clean and continuous; broken lines disrupt flow and can confuse the eye. If you’re using a long exposure, avoid moving elements that would smear the lines.
Stars act as natural guides when you shoot at night. A clear sky full of stars adds a dreamlike pull. Use a stable tripod, a wide lens, and medium to long exposure to capture star trails or a pin-point sky. If you want trails, stack your shots to adjust brightness without overexposing the sky. For beginners, try a shorter exposure with a higher ISO to capture stars as pinpoints, then gradually extend your shutter time as you gain confidence. The combination of leading lines and stars creates a night image that feels intentional and alive.
Edit and export with best camera settings night mode in mind
Lock in core decisions before exporting. Start with a baseline like ISO 800, a shutter around 1/60 to 1/125 for handheld night shots, and a wide enough aperture to pull in light without washing out detail. As you edit, treat Night Mode for Landscapes vs Portraits: Different Settings Explained for Beginners as a reference point—what works for a dark cityscape won’t always translate to a headshot in dim light. Keep a consistent white balance so greens and skin tones stay true, then bias slightly toward warmth if the scene feels cool from street lights. When exporting, choose a high-quality JPEG or TIFF if archiving, but keep a smaller JPEG for quick sharing to avoid bloated files.
Shape the image with intent. Preserve highlights and lift shadows just enough to reveal texture without creating artificial flatness. Use a soft touch on highlight recovery so you don’t blow out lamps or windows. Sharpening should be subtle; overdoing it can create halos around bright edges. Maintain a neutral curve to avoid excessive contrast that can amplify noise in dark areas. Document your settings in metadata when possible so you or someone else can recreate the look later.
Finally, test across devices. A photo that looks great on a phone can look off on a monitor with different brightness. Compare at multiple scales and ensure the overall feel remains natural. If you’re sharing, export a smaller version first to confirm color and contrast behavior before pushing a full-size master. The right balance keeps your Night Mode work usable and beautiful in real life, not just in your editor.
Reduce noise and sharpen details in post
Tackle noise by targeting the luminance channel. Start with light denoise and avoid crushing detail in texture, especially in skies or brickwork. If you shot with a tripod, you can push a bit more detail without introducing obvious grain. Too much noise reduction can blur edges; preserve the grit of night photography. When adjusting sharpness, apply it selectively—masking helps sharpen only edges and avoid flat areas.
Compare before and after on crops. Zoom into textures like fabric, leaves, or facade details to verify they still read as real. If you see halos around bright lines, back off sharpening and re-balance contrast. Watch for color noise in shadows; sometimes reducing luminance noise reveals faint green or purple specks. The final look should feel clean but not sterile, staying true to what you saw.
Keep color balance and boost shadows gently
Adjust white balance to hold skin tones and natural light color. If lighting is mixed, aim for a consistent, believable base rather than a perfect cast. A slight bias toward warmer tones can counteract a blue cast from street lamps, but test midtones to avoid overdoing it. Then lift shadows carefully—think of turning on a tiny lamp in the dark rather than blasting light everywhere. Use a targeted curve or selective color tool to keep greens, blues, and flesh tones natural.
Watch for color shifts after brightness changes. When you raise shadows, some colors shift hue; adjust saturation in those channels only if needed. If you blend multiple light sources, fine-tune hue and saturation to maintain a cohesive feel. Your final image should read as a single, believable night scene rather than a collage of mismatched tones.
Save RAW files and high quality exports
Save a RAW file for every night shot so you can re-edit with future improvements. RAW preserves all sensor data for maximum flexibility. For exports, choose a high-quality JPEG with minimal compression or a TIFF for archival depth. If you’re sharing online, keep a web-optimized JPEG as a secondary copy, but retain the RAW master for future adjustments. You’ll be glad you didn’t delete the source when you revisit the scene with new settings or mood.
Quick takeaway: Night Mode for Landscapes vs Portraits: Different Settings Explained for Beginners
- Night Mode settings differ: landscapes favor long exposures and small ISO for star detail; portraits favor wider apertures and controlled lighting for skin tones.
- Manual control beats automatic modes for consistency across frames, especially when stacking images for noise reduction.
- Stabilization (tripod or solid surface) is vital for sharp night shots.
- Start simple, test often, and document your settings to recreate or refine your night scenes.
Frequently asked questions about Night Mode for Landscapes vs Portraits: Different Settings Explained for Beginners
- Why should I shoot in manual mode for night photography? Manual mode gives consistent results across frames, which is crucial when stacking images for noise reduction and for maintaining the same mood across shots in Night Mode for Landscapes vs Portraits: Different Settings Explained for Beginners.
- How do I choose between landscape vs portrait settings at night? Start with the scene’s priority: maintain foreground detail in landscapes or smooth skin tones in portraits; then adjust ISO, aperture, and shutter to balance exposure and mood.
- What’s the best way to export night images for sharing vs archiving? Export RAW-derived TIFFs or high-quality JPEGs for sharing; save a RAW master for future edits to preserve flexibility for Night Mode for Landscapes vs Portraits: Different Settings Explained for Beginners.

Smartphone Night Photography Enthusiast & Founder of IncrivelX
Vinicius Sanches is a passionate smartphone photographer who has spent years proving that you don’t need an expensive camera to capture breathtaking images after dark. Born with a natural curiosity for technology and a deep love for visual storytelling, Vinicius discovered his passion for night photography almost by accident — one evening, standing on a city street, phone in hand, completely mesmerized by the way artificial lights danced across wet pavement.
That moment changed everything.
What started as a personal obsession quickly became a mission. Vinicius realized that millions of people were carrying powerful cameras in their pockets every single day, yet had no idea how to unlock their true potential after the sun went down. Blurry shots, grainy images, and washed-out colors were robbing everyday people of memories and moments that deserved to be captured beautifully.
So he decided to do something about it.
With years of hands-on experience shooting city streets, starry skies, neon-lit alleyways, and creative night portraits — all with nothing but a smartphone — Vinicius built IncrivelX as the resource he wished had existed when he was just starting out. A place with no confusing jargon, no assumptions, and no gatekeeping. Just honest, practical, beginner-friendly guidance that actually gets results.
Vinicius has tested dozens of smartphones from every major brand, explored dark sky locations across multiple states, and spent countless nights experimenting with settings, compositions, and editing techniques so that his readers don’t have to start from scratch. Every article on IncrivelX comes from real experience, real mistakes, and real lessons learned in the field.
When he’s not out shooting at midnight or writing in-depth guides for the IncrivelX community, Vinicius can be found exploring new cities with his phone always within reach, looking for the perfect shot hiding in the shadows.
His philosophy is simple: the best camera is the one you already have — you just need to learn how to use it in the dark.