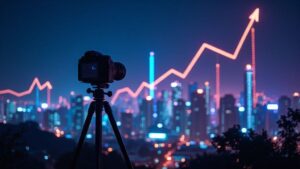
Pick the best night photography apps
You want apps that help you capture clear stars, city lights, or low-light scenes without fighting with your camera. Start by judging how easy the app is to use in the moment. Look for a clean interface, quick access to exposure and ISO controls, and a simple way to lock focus. If an app makes you hunt through menus, you’ll miss the moment. When you find one that feels natural, you’ll take steadier shots and waste less battery.
Next, check if the app supports long exposure and stacking. These features can turn a noisy night shot into something usable. A good night photography app should let you shoot multiple frames and combine them to reduce noise. If you can do this without exporting to a desktop, that’s a big win. Your goal is to get a solid shot with as little fuss as possible.
Finally, consider sharing options. You want an app that lets you save the RAW file and also share a finished image quickly. Some apps export ready-to-post images for social media. If you value control, a format that preserves detail without heavy compression is best.
Compare top night mode and low-light tools
When you compare top night mode tools, look for how they handle exposure stacking. Some apps stack a dozen frames to reduce noise, while others use a few frames with noise-reduction sliders. In dark rooms or dim streets, you’ll notice the difference in the final image’s clarity. You want a tool that delivers clean images without turning shadows into gray blobs.
Next, examine live view and low-light preview quality. A good tool shows you what your final image will look like while you adjust. If the preview looks muddy, you’ll overshoot or undershoot exposure. Try shooting with a steady hand and use a timer or remote when available to avoid camera shake. Focus peaking can also help you nail sharp stars or street details.
Finally, look for scene modes tailored to night scenes. Some tools offer options like star mode, city-light mode, or neon night. These presets save time and provide a solid baseline. If a mode pushes you toward a look you don’t want, you can switch off or customize later. Remember: you’re building a portfolio, not chasing every trendy filter.
Look for RAW support and noise reduction
RAW support is non-negotiable for flexibility. RAW files keep more detail, so you can recover highlights and texture in shadows. If your app saves only JPEGs, edits will be limited. A RAW workflow keeps options open when polishing later.
Noise reduction is essential. Night shots are noisy by design. Look for effective noise reduction that preserves detail. Test by shooting a dark scene and comparing grain after processing. Too-aggressive noise reduction can smear textures; too little leaves speckled shadows. Find a balance you can repeat for future night images.
Also check how the app handles post-processing non-destructively. Layered edits and smart masks help you adjust only parts you want, like brightening a starry sky without blowing out city lights. Real-time previews save time and frustration on shoot night.
Test app speed and battery use
Speed matters in the dark. Open and switch modes quickly so you don’t miss moments. If an app laggs, you’ll end up with blurred composites or missing frames. Run field tests to see how fast it reads RAW data and saves stacked images.
Battery life is another big factor. Night photography drains power fast, especially with long exposures and live previews. Use lower screen brightness and monitor how much juice the app uses during a typical session. If you notice rapid drain, plan to carry a power bank or limit the number of frames per session.
Edit low-light shots on your phone
You’re in the glow of a city night or a dim indoor scene, and your phone is your main camera. Start by viewing your shot at 100% to spot what truly needs fixing. Your goal is to bring out details without turning the photo into a flat, noisy mess. When you edit, focus on what the scene actually looked like, not what you wish it looked like. If the image feels flat, push a bit of contrast and color pop, but avoid oversharpening. A balanced edit keeps skies subtle, people soft, and textures like brick or fabric readable. Tiny tweaks beat big, dramatic changes that look fake. This simple approach helps your night photos feel honest and alive.
Another trick is to edit on a steady surface or use a tripod feature on your phone. Shaky hands create blur you’ll notice after editing, especially in low light. If you can’t shoot again, use edits to reduce blur’s impact by sharpening only edges and leaving skin tones untouched. Watch color balance; night scenes tend to lean blue or orange. A gentle white balance adjustment can make highlights sing without washing out shadows. Your edits should serve the story of the photo, not dominate it. Build your consistency by naming edits and noting which settings worked for each scene.
When you’re happy, review the final version on different screens. A bright phone screen can exaggerate noise, while a laptop screen might smooth some details you want. If you notice too much grain, apply light denoise sparingly and keep textures intact. Save a high-quality version for archiving and export a smaller version for social sharing.
Use mobile editing apps for night photos
Pick a handful of trusted mobile editing apps and stick with them. Each has a slightly different workflow, but most share tools like exposure, contrast, highlights, shadows, and noise reduction. Start with a basic preset tailored for night shots, then fine-tune to the scene. If a filter makes the night look too polished, dial it back to keep the mood authentic. Begin with global corrections (exposure, contrast) before localized edits (selective highlights or shadows). The right app helps you reproduce your look across multiple shots, saving time.
Balance noise reduction carefully. Night photos tend to grain, and aggressive noise reduction can blur fine details. Adjust highlights to recover detail in bright areas, and lift shadows slightly to reveal more information, but avoid flattening the scene. If your app supports curves, use them sparingly to shape tonality. Practice with different night scenes to find which app gives you the most natural results for your style.
Color grading for night photos matters. A subtle split between warm highlights and cool shadows adds atmosphere, but avoid heavy shifts. Shooting in RAW gives more latitude to adjust white balance and tonal range without losing quality. Save favorite combinations as presets for quick, consistent looks across future night shots.
Adjust exposure, highlights, and noise carefully
Exposure is your main control for night photos. Increase exposure just enough to reveal details, then compare with the original to avoid washing out elements. If backlit, add a touch of fill light but keep it natural. Lift highlights only where you want detail in lamps, windows, or reflections, and avoid clipping the brightest spots.
Noise is your constant companion in low light. Use noise reduction sparingly to preserve edges and textures. Focus reduction on flat areas like skies or walls, leaving fine textures readable. After reducing noise, nudge sharpness back up slightly, but avoid sharpening everywhere. If possible, shoot a quick burst and pick the sharpest frame to reduce post-processing and keep natural detail.
Keep a quick before-and-after routine as you adjust. If the image has both bright highlights and dark shadows, adjust exposure selectively so midtones stay true. Your goal is a photo that feels true to the moment—real, not over-processed.
Save edits as presets for fast work
When you find a successful combination, save it as a preset you can reuse on similar night scenes. Presets keep edits consistent and reduce decision fatigue. Name presets simply to reflect lighting conditions, like City Night Glow or Doorway Neon. This helps you build a recognizable portfolio style over time.
Tag presets by scenario: urban night, indoor dim, neon signs, or twilight street scenes. This makes it easy to apply the right look to a batch of night photos. If your app supports layers, save a base preset first, then create additional layers for tweaking exposure, color, or noise. This layered approach makes it easier to adapt presets to new shots without losing the core look.
Build and organize your mobile photo portfolio
You want a portfolio that’s easy to navigate and highlights your best night photos. Start with a simple goal: feature your strongest work front and center and make it easy to add new pieces. Think of your portfolio as a map for viewers—clear paths, not a cluttered maze. Focus on speed, consistency, and a visual story you can update anytime. Remember that viewers skim first, then dive in, so arrange content to guide their eye.
Your workflow should be fast and repeatable. Create a routine that fits your phone, apps, and cloud services. When you know how you work, you’ll spend less time organizing and more time shooting. Balance structure with flexibility to grow as your night photography improves. Each new image should slot into the right place without a big overhaul.
Think of your portfolio as a personal gallery. It should reflect your voice and your night scenes—city lights, quiet suburbs, or starry skies. You don’t need every shot, just the ones that tell your story best. Keep selections tight and the format consistent to make your work easy to browse.
Use folders, tags, and star ratings
Use folders to group by theme or shoot: Downtown Night, Suburban Skyline, or Long Exposure. This keeps images easy to find later and helps you compare similar shots side by side. Tags add clarity, like neon, reflection, or star trails. They let you locate photos by detail, not just folder, so you can remix your collection for different projects.
Star ratings are your quick quality check. Give best images four or five stars, and reserve lower stars for experiments you might rework. This speeds up pulling your strongest work for a gallery or client previews. If you shoot with multiple apps, keep a consistent tagging system across them so your library stays sane.
Back up originals to cloud storage
Back up originals to cloud storage so you don’t lose night shots to a phone failure. Enable automatic uploads from your camera app or editor, and keep a separate backup for RAW files if possible. Cloud backups provide peace of mind and make sharing easier since you can pull files from anywhere. Regularly verify backups contain what you expect.
Choose a reliable service that syncs quickly and doesn’t drain your battery. If you prefer local backups too, keep a compact external drive or a secondary device. Name folders consistently so you can find, for example, Downtown Night 2024-11-01 in seconds.
Keep a simple, consistent file naming system
Keep file names simple and consistent so you can find shots fast. Use a pattern like Location-Date-Subject-Sequence, for example: DowntownNight-2025-04-10-NeonSign-001. Add a version tag for multiple versions, like V1, V2, etc., to keep comparisons clean. A consistent naming scheme across apps, backups, and galleries saves time and avoids mix-ups.
Share and showcase on portfolio platforms
You want your night photos to shine, not just sit on your hard drive. When you share on portfolio platforms, tailor images for quick, smooth viewing and a strong first impression. Make sure the platform renders darks and highlights faithfully, and test how your top shots look in browser previews.
Choose portfolio platforms for photographers 2026
Choose platforms that emphasize images over noise, support large file sizes, and offer clean, distraction-free layouts. If you shoot city lights or long exposures, ensure the platform renders deep blacks and bright highlights well. Test how your favorite top shots look on each site’s preview to ensure your night tones read clearly.
Consider audience and community. Some platforms attract professionals; others cater to beginners. If you’re seeking clients, pick sites where editors and art directors browse. If you want feedback, choose communities with constructive critiques. Also prioritize mobile experience—fast-loading sites keep viewers engaged.
Optimize images for fast page load
Start by resizing images to balance quality and speed. Export optimized JPEGs around 1500–2048 pixels on the long side for portfolio pages. Compress gently to retain sharpness on mobile devices.
Enable progressive loading where possible. Progressive JPEGs load in layers, giving viewers a quick impression before details appear. Use modern formats like WebP if supported, with a fallback for older browsers. Test page loads on slow connections to ensure your hero night shots grab attention quickly.
Add short captions and EXIF info
Write concise captions that add context without clutter. Include a short EXIF snippet—aperture, shutter speed, ISO, and focal length—so fellow photographers can learn from your setup. Captions should be informative and evocative. Keeping EXIF visible builds credibility and invites interaction. If possible, add notes on post-processing decisions to show your thinking, not just the final image.
Build Your Mobile Night Photography Portfolio: Top Apps & Platforms for 2026
A focused toolkit helps you implement the workflow described above. Build Your Mobile Night Photography Portfolio: Top Apps & Platforms for 2026 by selecting apps and platforms that support RAW capture, reliable noise reduction, and easy sharing. Consider Lightroom Mobile, Snapseed, ProCamera, NightCap, and other RAW-capable editors, plus portfolio platforms like 500px, Behance, Adobe Portfolio, Flickr, and Instagram for exposure and growth. Align your app choices with your shooting goals and keep your process consistent across rounds of night photography.
Sell and license night photos from your phone
You can turn night shots into earnings by selling and licensing them right from your phone. Start with a few standout images that highlight light trails, neon reflections, and moody skies. Describe each image clearly with location, time, and what makes it unique to build buyer trust and speed up licensing. You don’t need a fancy camera to get paid; good exposure, composition, and timing on your phone can do the job.
Set up a simple workflow: edit on your phone for a consistent look, export with metadata (location, time, and a short story), and upload only your best edits. Create thematic collections—cityscapes, starry skies, street-light patterns—so buyers can browse quickly. When licensing requests come in, respond fast with clear pricing and usage notes. Watermark rough drafts, not final files, to protect your rights while enabling previews. Offer standard, exclusive, and extended rights, and track sales to grow your business.
Use marketplaces that accept mobile uploads
Some marketplaces welcome mobile uploads and guide you through easy submissions. Group images by theme and add keywords describing the scene, light sources, and mood. Look for platforms with simple contracts and clear pricing.
Check payments and rights management. Favor sites offering non-exclusive licenses to sell broadly while keeping track of where your images appear. If you’re just starting, choose marketplaces with clear guidelines and quick payouts. Regularly refresh your portfolio on these sites to keep buyers returning.
Keep a simple upload routine: create a ready-to-upload folder on your phone with the best version stored separately. Use consistent naming like city-theme-date to stay organized. Before submitting, ensure the image is sharp, noise is controlled, and you’ve included a few lines about the scene.
Read licensing terms before you upload
Licensing terms define what buyers can and cannot do. Skim duration, territory, usage type, and whether you retain any rights. If anything is vague, ask for clarification before uploading. Clear terms protect your work and reduce disputes.
Pay attention to attribution and releases. Some licenses require photographer credit; others don’t. Understanding these details helps you set expectations with buyers and can influence pricing. If unsure, read sample licenses on the site or compare with another platform’s terms. A quick question now saves back-and-forth later.
Note any restrictions on derivative works or edits. If a buyer wants to alter your image, ensure you have the right license. Keep a copy of the license for reference.
Keep model and location releases handy
Having reusable release templates saves headaches. Use releases for people you photograph and recognizable locations. Store scanned or digital copies with your night-shot files so you can pull them quickly if a buyer requests proof.
Improve your night mode shooting skills
Night mode can feel tricky, but you can improve fast with a simple plan. Think about the moment you want to share—city street, cozy cafe, or starry sky—and plan your shot around that light. Your goal is clean, sharp images with just enough glow to feel real, not blown out or flat.
Small steps add up: set up your scene, hold steady, and shoot in usable light. If you get a blurry image, adjust your grip or stance next time. Night photography rewards patience, so take a moment to learn from each shot.
Over time, you’ll sense your phone’s limits and how to push them. You’ll know when to delay the shutter, or when to brighten a corner just right. Each photo becomes a lesson in how light behaves in low settings. You’ll move from trial to confident, repeatable results.
Follow night mode smartphone photography tips
Find a stable hand position—feet shoulder-width apart, elbows tucked in, and your device steady. If possible, lean against a wall or bench to reduce shake and improve sharpness.
Adjust focus and exposure by tapping the screen to set a bright spot, then balance brightness. If it’s too dark, gently increase exposure or raise ISO if allowed. Higher ISO adds grain, so keep it conservative. Review the display at 100% to spot noise or blur you might miss in thumbnails.
Experiment with different light sources around you. Neon signs, street lamps, or glowing storefronts add color and mood. Frame your subject against a brighter background for depth, but avoid strong lens flare by keeping light sources off-center. With practice, you’ll know when to wait for a moment when the balance of light and shadow settles.
Use a tripod or steady support when possible
Sharper images come from a stable base. A small portable tripod or resting your phone on a solid surface makes a big difference in long exposures. If you don’t have a stand, brace against a solid object and use the timer to fire the shutter to avoid jostling.
Lock your framing before you press the shutter. Recheck horizons outdoors, or use a slow, deliberate press to minimize shake. A tripod helps with longer shutter speeds in low light. If you can’t use one, suggest bracing and timers to reduce camera motion.
Learn to shoot in RAW for better editing
RAW files preserve more detail than JPEGs. Shooting in RAW gives you more latitude in editing—the shadows won’t clip easily, and color shifts stay gentler. After shooting, adjust white balance, exposure, and color so the final image looks natural rather than over-processed.
If your phone supports RAW, enable it in the camera settings and review images in a photo editor to fine-tune brightness and contrast. Don’t overdo edits; a touch of clarity and a slight exposure lift can restore the scene you saw. The goal is a balanced, true-to-life version of the night you witnessed.

Smartphone Night Photography Enthusiast & Founder of IncrivelX
Vinicius Sanches is a passionate smartphone photographer who has spent years proving that you don’t need an expensive camera to capture breathtaking images after dark. Born with a natural curiosity for technology and a deep love for visual storytelling, Vinicius discovered his passion for night photography almost by accident — one evening, standing on a city street, phone in hand, completely mesmerized by the way artificial lights danced across wet pavement.
That moment changed everything.
What started as a personal obsession quickly became a mission. Vinicius realized that millions of people were carrying powerful cameras in their pockets every single day, yet had no idea how to unlock their true potential after the sun went down. Blurry shots, grainy images, and washed-out colors were robbing everyday people of memories and moments that deserved to be captured beautifully.
So he decided to do something about it.
With years of hands-on experience shooting city streets, starry skies, neon-lit alleyways, and creative night portraits — all with nothing but a smartphone — Vinicius built IncrivelX as the resource he wished had existed when he was just starting out. A place with no confusing jargon, no assumptions, and no gatekeeping. Just honest, practical, beginner-friendly guidance that actually gets results.
Vinicius has tested dozens of smartphones from every major brand, explored dark sky locations across multiple states, and spent countless nights experimenting with settings, compositions, and editing techniques so that his readers don’t have to start from scratch. Every article on IncrivelX comes from real experience, real mistakes, and real lessons learned in the field.
When he’s not out shooting at midnight or writing in-depth guides for the IncrivelX community, Vinicius can be found exploring new cities with his phone always within reach, looking for the perfect shot hiding in the shadows.
His philosophy is simple: the best camera is the one you already have — you just need to learn how to use it in the dark.