Optimize your Instagram profile for night photos
Your night work shines when your profile is polished. Start with a clear, memorable handle and a profile photo that reflects your low-light style. Your bio should tell visitors what you shoot and why it matters, using keywords like night photography, cityscapes, and long exposures. Keep it concise and add a short call to action, such as DM for collaborations or Follow for nightly edits. Aim for a cohesive grid by sticking to a consistent editing style and color tone. Enable professional tools if eligible for deeper insights and a contact option. Your profile is your storefront, so keep it neat and easy to understand.
Your username and name field are prime discovery real estate. Include your niche in both if possible. If your name is common, add a descriptor in the name field, such as Alex — Night City Photographer. Add a portfolio link and refresh it with new projects. Highlights act like a gallery aisle—curate 4–6 themes that feature your best night sets. Pin a couple of key highlights at the top, like City Nights or Long Expos, so newcomers get a quick sense of your style. Use cover images that match your vibe so every highlight looks intentional. Post consistently and engage quickly; replies within a few hours show you’re active.
Remember to optimize contact options. Provide an email and a note about collaboration opportunities if relevant. Your location can help local brands or venues find you, but be mindful of privacy. If you run trainings or sell presets, mention it in your profile and link to a dedicated page or shop. Keep your latest project pinned at the top of your feed so first-time visitors see your strongest night work. Small updates keep your profile feeling alive. Your goal is for visitors to know your niche within seconds and want to see more.
Write a clear bio that says what you shoot
Your bio should be a tight snapshot of your work. Start with a bold claim like I shoot night cityscapes and street light moods. Add a second line that explains your approach—long exposure, tripod work, or grainy film-like edges. A few keywords help readers grasp your style at a glance. End with a call to action, such as Follow for nightly edits or DM for collaborations. If you have notable clients or awards, mention them only if they add value.
Keep the bio scannable with line breaks or sparing emojis as separators. Emojis can cue attention (e.g., a crescent moon for night shots), but don’t overdo it. Include a link to your portfolio and refresh it as projects shift. Your bio should promise a result or experience, like Capturing quiet city nights or Textures of streetlight and rain, to help new followers decide if your feed matches their interests. This approach aligns with Instagram Growth Hacking 2026: Building a Night Photography Account from Scratch.
Use highlights for best night sets
Highlights are your quick intro reel. Choose 4–6 sets that cover your range: City Nights, Rainy Streets, Long Expos, Aurora Moments (if applicable), and Behind the Shots. Each highlight should have a crisp cover image that matches your palette so the grid reads as a single artwork. Keep captions minimal and let the cover speak for itself. Use highlights to show progression—early cityscapes, mid-career edits, and recent experiments—so newcomers see growth. If you work with brands or galleries, add a collaboration highlight for social proof.
When adding new night sets, place them in the appropriate highlight and maintain logical order. If you shoot often in the same location, create a Locations highlight to group sets by place. Review highlights monthly to prune outdated content and keep the showcase fresh. A strong highlight structure tells a clean story and reduces friction for new followers.
Profile checklist for night photographers
- Clear bio that states what you shoot
- Cohesive profile grid with a consistent editing style
- Bio includes a contact method and call to action
- Highlights organized into 4–6 themes with crisp covers
- Portfolio link in bio, updated regularly
- Regular posting cadence and timely engagement
- Profile picture clearly representing you or your brand
- Keywords in name field for easier search
- About section that hints at your process (long exposures, tripod work)
- Professional tools enabled if eligible
- Pinned top post featuring your strongest night work
- Accessibility notes: alt text on images where possible
Edit night photos with a simple workflow
Night photography aims for mood, color, and motion. A simple workflow keeps you moving forward rather than getting stuck tweaking sliders. Start with a plan: shoot RAW for maximum data, then apply light noise reduction to keep night images clean. Edit to balance highlights, shadows, and color so the scene reads true to what you saw and pops on screens. The goal is a finish you’re proud to share, not a battle with a wall of sliders. This approach aligns with Instagram Growth Hacking 2026: Building a Night Photography Account from Scratch, helping your feed stay cohesive.
Night photos need room to breathe. Shoot RAW to recover detail in darks and preserve highlights, then apply noise reduction softly to keep texture. In edit, watch blown highlights from street lamps and car headlights, and push shadows enough to reveal detail without introducing noise. Keep color true to the scene while preserving atmosphere.
Focus on a result you want: a share-ready image that looks good on phones and larger displays. A simple workflow gives you consistency, so your feed gains a recognizable style. You’ll learn what to adjust first, what to leave alone, and how to keep color faithful. With this path, your night photos become easier to polish and post, one clear step at a time.
Shoot RAW and apply noise reduction
RAW provides the most latitude to recover details in darks and preserve texture in bright lights. After shooting, apply light noise reduction to keep grain from stealing clarity. Address color noise in shadows carefully and avoid over-smoothing, which can erase texture. Balance NR with sharpness to keep edges crisp. If you tripod-shot, you can nudge exposure a touch in RAW before NR to preserve midtones. The goal is clarity without losing the night’s mood.
Balance highlights, shadows, and color
Avoid blown highlights where signs glow or headlights flare by lowering them enough to retain detail. Lift the shadows to reveal texture without flattening the image. For color, night scenes often rely on artificial light; adjust white balance gently to feel natural while preserving atmosphere. Skin tones, neon accents, and street lighting should read true without turning into an unrealistic glow.
Simple edit workflow checklist
- Shoot RAW
- Apply light noise reduction
- Preserve detail in highlights and shadows
- Balance highlights and shadows
- Correct color temperature and tint
- Refine white balance
- Add a touch of clarity or texture
- Check crops and mobile previews
- Finish with a final contrast nudge
Make Reels that boost night photo reach
Create Reels that grab attention quickly. Start with a strong hook in the first seconds: a striking light trail, starry sky, or skyline moment. Use bold text overlays to highlight the wow moment and keep the preview short. Be consistent, but only if it fits your style. You’ll see more saves and shares when previews promise useful tips or a mood that matches your photos.
Structure Reels around your best night shots: the capture, the setup, and the final look. Use quick cuts to avoid dull moments and add a concise caption that invites reaction, such as Which edit do you prefer? This builds engagement and watch time, which Instagram rewards. End with a strong CTA—direct followers to your feed for more deep dives or a night photography challenge. Reels should feel like a doorway into your world, not a one-off clip.
Film short BTS and timelapse clips to show the real work behind your night photos. Capture 5–15 second BTS moments of tripod setup, camera tweaks, or long exposures. Stitch BTS into a cohesive mini-story: present the problem, show the attempt, and end with the successful shot. Keep edits simple with fast cuts and a subtle soundtrack. Small details—ISO hand gestures, lens swaps, or a light source just out of frame—remind viewers that great night photos come from repeatable steps.
Pair clips with trending audio and captions. Choose clips that fit a mood (mysterious, calm, energetic) and sync cuts to the beat. Use a caption with a quick hook and a prompt for engagement, like Which lens gave this glow? Reply to comments promptly to maintain momentum. If a sound performs well, consider a follow-up Reel in a similar structure that stays true to your night aesthetic.
Reels posting quick tips
- Post at peak times but don’t chase every trend
- Include a strong cover image and bold text overlays
- Use a CTA to guide viewers to your feed or save for later
- Batch-create Reels to keep a steady stream of fresh content
Use hashtag and caption strategy for night shots
Captions and hashtags should work together to boost visibility and engagement. Tell a tiny story or ask a question in your caption to invite replies. Think of captions as a bridge between image and audience: add context, mood, or a quick tip. Keep sentences short and sprinkle natural keywords for search visibility. Pair captions with thoughtful hashtags that match the shot’s vibe and subject.
Hashtags matter for reach. Mix niche terms (like #CityNights or #NeonNightsCity) with broader ones (like #NightPhotography or #PhotographyLovers). This ladder approach helps you reach both enthusiasts and general fans. Vary the order and refresh terms over time to avoid spamminess while maintaining discoverability. Short hooks, a couple of details, and a prompt for engagement work well. End with a question or a CTA like What’s your favorite night spot to shoot? to foster comments.
Mix niche and broad hashtags for reach
Balance niche tags with broad hashtags. Niche tags connect you to people who live in your exact space (e.g., #UrbanNightPhotography), while broad tags pull in wider audiences (e.g., #NightShots). Use a handful of location-, technique-, and mood-specific tags, plus a couple of brandable or personal tags. If you post a moody forest night photo, mix tags like #ForestNight, #LongExposure, #DarkAndMysterious, and #NightLovers. Track what works and replace underperformers over time to build a library of effective tags.
Write search-friendly captions with keywords
Include keywords people search for in a natural way. For a blue-hour cityscape, use phrases like blue hour cityscape, night street photography tips, or long exposure city shots. Avoid keyword stuffing; aim for clarity and storytelling. Vary sentence structure to keep readers engaged. End with a prompt or tip to invite interactions, such as I used a 20-second exposure to smooth the water—what’s your go-to night tip?
Hashtag pack template
Use this starting point and customize with your location, mood, and subject terms:
- Primary niche tag: #NightPhotography
- Secondary niche tag: #CityNights
- Location tag: #YourCityNights
- Technique tag: #LongExposure
- Mood tag: #MoodyNight
- Broad reach tag: #PhotographyLovers
- Broad reach tag: #NightShots
- Personal brand tag: #YourBrandName
Apply engagement hacks and build your community
Grow your audience by making engagement a habit. Start by watching comments and asking a simple, clear question in your caption to invite tips or locations. Thank commenters quickly to make readers feel seen and more likely to stay engaged.
Share learning in small, actionable bites. Post a quick carousel with one shooting trick from a recent night session or a before/after RAW vs final edit. Keep responses brief and link to related posts to keep readers in your world. The goal is to convert casual scrollers into active followers who return for more tips and insights.
Recognize your community. Highlight helpful commenters, feature fan shots, or run mini challenges. Elevate others to create a positive feedback loop: more engagement, greater visibility, and genuine connections. This is how you grow a loyal audience around your night photography.
Reply fast to comments and DMs
Aim for quick acknowledgement: respond to new comments within an hour during active hours, and follow up thoughtfully within 24 hours. Use concise replies that add value, and offer to share tips or behind-the-scenes details. A simple template helps: greet, acknowledge, add value, and invite continuation. If a question needs more detail, propose a longer chat or direct them to a relevant post.
Monitor sentiment and adjust. If a technique is unclear, post a clarifying follow-up with a short video or screenshot. Speedy, thoughtful responses build trust and keep people in your loop.
Collaborate with other night photographers
Collabs amplify reach. Propose joint mini-series, such as two photographers swapping locations and sharing edits in a side-by-side format. Coordinate a location with dramatic lighting or reflections for a distinctive edge. Tag each creator to cross-pollinate audiences and publish clearly labeled collaborations.
Plan practical collaborations: a weekly night-swap post, a shared challenge, or a joint Instagram Live discussing settings, gear, and storytelling. Use a shared hashtag so fans can find both accounts easily. Collaboration should be about giving first—credit, celebrate each creator’s strengths, and keep things collaborative.
This mindset ties into the broader growth approach of Instagram Growth Hacking 2026: Building a Night Photography Account from Scratch.
Weekly engagement routine
Set a predictable weekly routine: one post where you reply to every comment, one collaboration pitch to a partner, and one behind-the-scenes reel about your night shoots. Block time for these tasks to make them non-negotiable. Add a Friday engagement sprint: 20 minutes to reply to comments, thank new followers, and visit two other night photography accounts to leave thoughtful comments. Review what worked at week’s end and refine your plan for the next week. The aim is steady, genuine engagement that grows your night photography tribe.
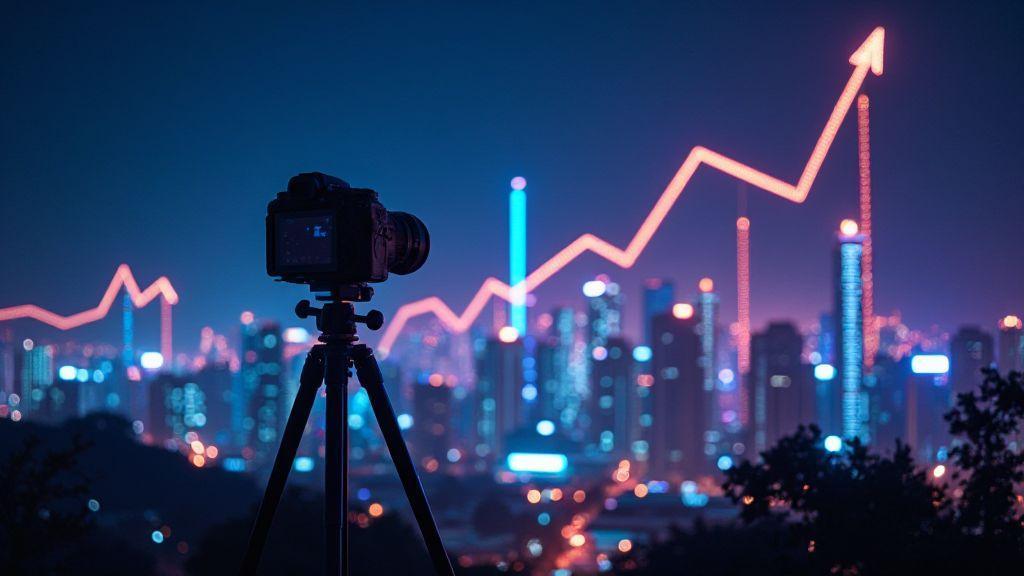
Track analytics and learn the Instagram algorithm
Analytics show what works and what doesn’t. Focus on three core signals: saves, reach, and engagement rate. Saves indicate value worth revisiting; reach shows exposure; engagement rate aggregates likes, comments, shares, and saves. If saves are high but engagement is low, offer more actionable tips in captions. If reach is dropping, rethink hashtags and posting times. Use data to guide edits, captions, and posting habits to improve over time.
Review metrics within 24–48 hours of posting. Look for patterns in edits, captions, and tags that drive saves, reach, and engagement. If a vivid sky or bold contrast earns more saves, lean into that style. If a Reel about your editing process outperforms stills, shift more content toward short tutorials. Build a rhythm where edits align with what your audience finds valuable.
Monitor saves, reach, and engagement rate
Saves reflect long-term value. Posts saved frequently likely offer a repeatable tip or palette. Track patterns to see which edits drive saves. Reach gauges visibility; a dip may signal niche focus or hashtag misalignment. Engagement rate shows how those who see your post respond. A higher rate means you hit the right chord with your audience.
Post-mortems help: after each post, note the dominant edit style, caption approach, and used hashtags. Compare high-saves posts to lower-saves ones and ask if a step-by-step tip or a standout night detail was included. Over time, you’ll learn which elements pull saves, widen reach, and lift engagement, then adjust your next session and rotation.
Test post times after sunset and compare results
Post timing matters for night photos. Start with a window shortly after sunset, then trial adjustments in 30-minute to 1-hour steps. Keep a simple log: date, time, primary edit style, and outcomes in saves, reach, and engagement. Build your own best posting hour map for your audience.
When comparing results, look for consistency. If certain times yield more saves and engagement, stick with them. If another time increases reach but reduces saves, you may be appealing to a broader audience—adjust captions to encourage saves or use that time for discovery posts. The goal is a balance that grows reach and meaningful interactions.
Instagram Growth Hacking 2026: Building a Night Photography Account from Scratch
- This section crystallizes the core framework: strategic profile optimization, consistent branding, bite-sized, actionable content, and data-driven iteration.
- It highlights how to align bio, highlights, and visuals with a clear night photography niche.
- It offers a compact checklist to keep you on track while scaling your night photography presence in 2026.

Smartphone Night Photography Enthusiast & Founder of IncrivelX
Vinicius Sanches is a passionate smartphone photographer who has spent years proving that you don’t need an expensive camera to capture breathtaking images after dark. Born with a natural curiosity for technology and a deep love for visual storytelling, Vinicius discovered his passion for night photography almost by accident — one evening, standing on a city street, phone in hand, completely mesmerized by the way artificial lights danced across wet pavement.
That moment changed everything.
What started as a personal obsession quickly became a mission. Vinicius realized that millions of people were carrying powerful cameras in their pockets every single day, yet had no idea how to unlock their true potential after the sun went down. Blurry shots, grainy images, and washed-out colors were robbing everyday people of memories and moments that deserved to be captured beautifully.
So he decided to do something about it.
With years of hands-on experience shooting city streets, starry skies, neon-lit alleyways, and creative night portraits — all with nothing but a smartphone — Vinicius built IncrivelX as the resource he wished had existed when he was just starting out. A place with no confusing jargon, no assumptions, and no gatekeeping. Just honest, practical, beginner-friendly guidance that actually gets results.
Vinicius has tested dozens of smartphones from every major brand, explored dark sky locations across multiple states, and spent countless nights experimenting with settings, compositions, and editing techniques so that his readers don’t have to start from scratch. Every article on IncrivelX comes from real experience, real mistakes, and real lessons learned in the field.
When he’s not out shooting at midnight or writing in-depth guides for the IncrivelX community, Vinicius can be found exploring new cities with his phone always within reach, looking for the perfect shot hiding in the shadows.
His philosophy is simple: the best camera is the one you already have — you just need to learn how to use it in the dark.