Pick your phone and tripod
You’ll boost your night shots when you choose the right gear and set it up solidly. Your phone choice matters, but the tripod is the real game changer for clean, sharp images. If you’re chasing Lunar Landscapes: Capturing Stunning Moon Photos with Your Galaxy S25 Ultra and iPhone 17, you’ll want both parts working together. Your goal is steady frames, steady hands, and steady light.
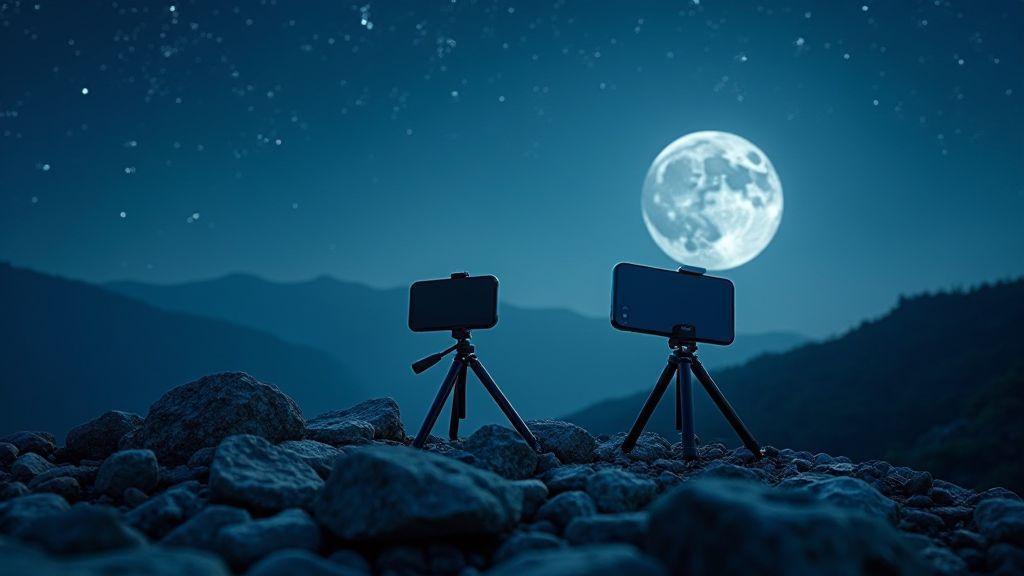
With your Galaxy S25 Ultra or iPhone 17, you’ll find features that help you shoot in the dark, but nothing replaces a good tripod. A stable base lets you use longer exposures without shake. If you’ve ever tried hands-free low-light shots, you know how tiny tremors become big blur. So, pick a lightweight, sturdy tripod you can carry on a night hike. A phone mount that keeps your device level matters more than extra gadgets. Your setup should feel simple, not fiddly, so you stay in the moment and focus on composition.
Think about weight, height, and heat. A tall tripod helps you frame landscapes without crouching, while a compact one fits in your bag. If you shoot from a hill or balcony, a small tripod with a stabilizing hook can handle gusts. And don’t forget a remote shutter or timer—your finger on the screen can introduce micro-motions. With the right tripod, you’ll see clearer stars, crisper moon edges, and fewer accidental bumps that ruin the shot.
Galaxy S25 Ultra lunar landscape photography for you
Your Galaxy S25 Ultra shines when you let it work with the night’s light, not against it. You’ll want to switch to Pro or Night mode and lock exposure so you don’t chase changing brightness. Live long exposures let you tease out stars and the moon’s glow without washing out the scene. Use a low ISO to cut grain, and a longer shutter to pull in enough light. Your phone can still snap fast, but for lunar landscapes you’ll appreciate stacking or combining multiple frames later.
When you frame, look for a clean horizon and a clear moon arc. Moonlight can be bright on one side and dim on the other, so think about shadows and silhouettes in the foreground. If you can, shoot two versions: one that holds the moon’s detail and another that emphasizes the landscape’s texture. Your Galaxy device likes a consistent tripod height and a level mount, so take the time to level the camera. You’ll notice details in craters and mountains that would disappear in a single long shot. Remember to enable a focus lock so the moon and ground stay sharp as you adjust brightness. This approach fits the Lunar Landscapes: Capturing Stunning Moon Photos with Your Galaxy S25 Ultra and iPhone 17 ethos.
Moon photography tips iPhone 17 for you
Your iPhone 17 will surprise you with how well it handles starry skies when you plan ahead. Start in Night mode, but don’t rely on it alone—use a timer and exposure fix to keep things steady. A quick burst can help you pick the best frame, then you lock focus on the moon or a bright star. For landscapes, shoot with a wider angle to keep the scene balanced, then zoom if you need a closer moon edge in post. You’ll want to shoot in RAW if possible so you have full control over contrast and color when you edit later.
In composition, think about foreground interest—trees, rocks, or a calm lake can add depth and scale to Lunar Landscapes: Capturing Stunning Moon Photos with Your Galaxy S25 Ultra and iPhone 17. Use the rule of thirds to place the moon off-center or to align it with a mountain ridge. If you’re stacking, you’ll appreciate consistent exposure and white balance across frames. Your iPhone 17 is forgiving, but small motions still blur in long shots, so a steady tripod and a quiet shutter are your friends.
Stabilize with your tripod or mount
A solid tripod is your best friend for night work. A stable mount keeps your phone aligned and lets you use longer exposures without blur. If you’re hiking, a compact, adjustable tripod helps you find the right angle quickly. Always double-check the mount’s grip and ensure your phone sits flat and level. A small level on the mount can spare you later edits. If wind hits, ground anchors or a weight hook can keep everything steady, so your moon and landscape stay sharp.
Fine-tune your camera settings
You’re about to dial in the best night shots, so start with your baseline and tune from there. In low light, small changes make big differences. You’ll notice crisper stars, cleaner moon glow, and less blur when you lock in your settings early. Think of it like seasoning a dish: you want just enough to bring out the flavor without overpowering the natural scene. Keep your ISO as low as possible, your shutter as steady as you can manage, and your white balance consistent so the night doesn’t look off-green or too warm. The goal is clean shadows, smooth skies, and enough detail in the moon to see its craters without blowing out the highlights.
Take a moment to test, then adjust. If your night sky looks grainy, drop the ISO and extend the exposure a touch, letting your camera accumulate light without making the image noisy. If the moon looks blown out, raise your shutter speed and lower the ISO, so you keep texture in the lunar highlights. You’re building a small toolkit in your settings: exposure compensation for bright moons, a longer focal length to frame the scene, and a warm or cool white balance that feels true to your location. With practice, you’ll know your Galaxy S25 Ultra and iPhone 17 can work in harmony to capture the glow of distant lights and the quiet drama of the night.
You’ll also want a reliable focus plan. Night scenes demand intentional focus decisions, not auto-pilot. By prioritizing sharpness where you want detail—like the edge of a distant building or the moon’s edge—you keep your composition clean. Your camera’s histogram is your friend here: you want it balanced, not bunched at the right side from blown highlights. When you lock your focus, you’ll notice less hunting and more consistent results across multiple shots. The more you practice, the more you’ll see how small tweaks in shutter, ISO, and focus combine to deliver crisp Lunar Landscapes: Capturing Stunning Moon Photos with Your Galaxy S25 Ultra and iPhone 17.
Consistency matters. If you’ve found a reliable triple-setup for a given scene, jot it down as your night photography routine. You’ll save minutes on future shoots and reduce the chance of missing the moment you want to capture. Your goal is repeatable excellence: crisp moons, soft skies, and silhouettes that feel true to your location. Keep experimenting, but remember the basics—stay steady, keep noise down, and let the light tell your story. This is all part of Lunar Landscapes: Capturing Stunning Moon Photos with Your Galaxy S25 Ultra and iPhone 17.
Use manual mode for best camera settings for moon Galaxy S25 Ultra
Manual mode is where you take control. You’ll set the shutter, ISO, and focus so you don’t rely on automatic decisions that struggle in night light. Start with a moderate ISO, then adjust based on your histogram. A practical starting point for the Galaxy S25 Ultra is ISO 800 with a 1/125s exposure to hold the moon’s detail while keeping the sky dark. If the sky looks too gray, lower ISO to 400 and lengthen the shutter a touch. If the moon pixels bloom, push ISO lower and shorten the shutter. Your goal is to retain the moon’s texture without turning the rest of the scene into a gray wash.
Next, lock focus manually. In moon photography, you’ll often focus around infinity with a precise tweak to keep the crater edges sharp. Use focus peaking if your phone shows it, but don’t rely on autofocus for the moon unless you’re in bright enough conditions. You’ll want a little foreground detail in the scene too, so you may adjust focus to place that element where you want it. If your shot lands with a milky sky, try a longer exposure and bring down ISO a notch. Manual mode gives you the latitude to fine-tune, and that control translates into better Lunar Landscapes: Capturing Stunning Moon Photos with Your Galaxy S25 Ultra and iPhone 17.
When you’re ready, shoot in RAW if your device supports it. RAW gives you more latitude in post-processing, which is essential for night scenes. A quick tip: shoot a burst of 3–5 frames, then pick the one with the best balance of sky and moon texture. You’ll save time in editing and avoid re-shoots when you’re chasing a fleeting lunar glow. Manual mode isn’t flashy, but it’s your secret weapon for consistent, high-quality results that make Lunar Landscapes: Capturing Stunning Moon Photos with Your Galaxy S25 Ultra and iPhone 17 stand out.
Follow the iPhone 17 lunar photography guide to tweak your settings
The iPhone 17 guide gives practical tweaks you can apply to your own shots. Start by setting a fixed ISO and exposure so your sequence stays uniform across multiple frames. You want your moon texture to stay stable, not wander as you reframe. If your guide suggests a particular white balance, try it and compare—you’ll quickly see which gives the moon its true color and keeps the sky from looking dull. Don’t be afraid to switch between night mode and standard mode to find which gives you crisper details for the lunar surface.
Another tip from the guide is to use a light touch on HDR. Night HDR can help pull out details in the darker parts of your frame, but too much can flatten contrast. You’ll want to test a few frames to see how much texture in the stars and foreground you’re comfortable with. Remember, the goal is to preserve the moon’s grit and the night’s quiet mood. Following these tweaks helps you build on your technique, so you can craft images that feel like you’re standing under a calm, moonlit sky.
Finally, keep your shots tight to the moon and the sky, then widen your frame for context. You’ll discover a balance between the power of a moon-centered shot and the storytelling of a broader scene. The guide’s steps shorten your learning curve and help you achieve reliable results faster, letting you focus more on composition and less on fumbling with settings.
Lock focus and exposure on your phone
Locking focus and exposure is your fastest route to consistent night shots. You’ll press and hold on the moon or a bright area until you see the lock icon or exposure indicator lock in. This keeps the camera from readjusting when you reframe or your light changes, so your moon doesn’t drift or shift brightness mid-shot. If the sky suddenly brightens from a passing plane or a streetlight, you’ll be glad you locked exposure ahead of time. Your goal is stable brightness so the texture in the moon stays sharp and the rest stays balanced.
You’ll also want to test a quick two-shot technique: one with the exposure locked for the moon, another for a darker sky to capture stars. This helps you pick the best balance for the final image. When you’re ready, shoot with confidence knowing your focus and exposure won’t wander, and you’ll be happy with the result.
Use your telephoto and zoom well
You’ll get the sharpest moon and night-sky details when you lean on your telephoto and zoom. Your goal is to isolate distant subjects without sacrificing clarity. Start by setting your camera to the longest usable focal length, and stabilize with a tripod or steady surface. The tougher part is hand-holding: if you must, brace your elbows in and use a slower shutter than you think you can pull off, because the telephoto lens magnifies every shake. Pay attention to exposure: brighter isn’t always better. You want contrast-rich nights, where the moon’s edge holds texture and craters without washing the scene white. If you’re aiming for sharp results, lock focus and switch to manual if your device lets you, so the camera doesn’t chase ephemeral light. When you pair a stable frame with a clean exposure, your night shots stop looking soft and start looking deliberate and detailed.
Your moon shots will benefit from a careful balance of distance and clarity. Use your telephoto to pull in the moon’s craters and maria, then back off slightly to keep the full disk in view without edge distortion. If you shoot a cityscape or tree line, let the moon sit as a bright anchor in the distance while your foreground stays readable. A telephoto also lets you capture star clusters or brighter planets with less sky noise. Remember to watch your shutter speed: faster for crisper edges, slower only if you’re confident in your stability or stacking multiple frames later. In short, your telephoto is your best friend for revealing astronaut-like detail without wandering into blur.
Try telephoto moon shots Galaxy S25 Ultra for closer detail
When you point the Galaxy S25 Ultra at the moon, you’re maximizing detail with a built-in zoom that behaves differently from software crops. Use the optical zoom first; avoid digital zoom until you absolutely need to frame a tighter crop. Handhold if you must, but a tripod is worth its weight in quiet skies. The phone’s stabilization helps, but it won’t fix a wobbly shot. Shoot in RAW if your model supports it, so you have leverage in post to pull out texture without introducing grain. You can also take a quick burst and pick the cleanest frame, then stack later for more punch. The result should feel like you’re peering through a powerful scope—craters and ridges stand out, not smeared across a glossy glow.
Explore different distances. A closer moon lets you study shuttle-like details, but too close and you risk blowing out highlights. If the moon feels overexposed, try a lower exposure or a manual mode to tame the brightest bits while pulling texture from the dark edges. You’ll notice color differences too: the moon often reads slightly warm in night shots, so you may want to shoot a frame in neutral and one with a cooler balance to compare. This approach helps you build a small library of starry, lunar textures you can weave into a bigger night-scene story.
Avoid heavy digital zoom when capturing moon details with smartphone
Digital zoom on a phone often softens edges and adds artifacts, which ruins the moon’s fine textures. You’re better off using the optical zoom or stitching multiple frames later than magnifying a single frame digitally. If you must crop, do it later in post rather than rely on digital zoom during capture. Your goal is to keep as much native detail as possible, so you preserve the moon’s craters and the subtle shading around the terminator. Brightness, contrast, and clarity controls can help you extract the most from a clean, well-exposed shot instead of chasing pixels with digital zoom.
Keep the moon in a clean frame. If you’re near buildings or trees, you may get unwanted halos or flares from reflections. Use a lens hood or shield your lens with your hand to avoid stray light that can degrade sharpness. If you’re observing the sky’s gradient, shoot a short sequence and pick the frame that shows the moon with the most defined edge and the least bloom. Remember, a tiny crop after a crisp capture will still reward you with sharp lunar detail without the baggage of digital zoom.
Crop later to keep your detail
Always plan to crop in post rather than rely on the lens to do the heavy lifting. When you crop after a sharp capture, you preserve more megapixels for the important edges. Your moon’s texture stays intact, and you can reframe the shot to include a nearby landscape without sacrificing detail. If you’re shooting a night cityscape, cropping lets you emphasize the moon as a bright focal point while keeping the foreground legible. Your future self will thank you for the flexibility to adjust composition without re-shooting, ensuring Lunar Landscapes: Capturing Stunning Moon Photos with Your Galaxy S25 Ultra and iPhone 17 stays as strong in edits as it looked on set.
Master night mode on your iPhone 17
You’re about to unlock a new level of night photography. Night mode on the iPhone 17 isn’t magic; it’s smart software paired with your steady hand. You’ll see brighter, cleaner shots in low light, with less blur and more detail in the shadows. Start by turning on Night mode whenever you’re shooting after dark. The phone will automatically recognize low light and prompt you to use Night mode, but you can adjust the exposure and timer to control how much light you bring in. Practice a few quick snaps in a dim cafe, then compare the difference between a standard photo and one taken with Night mode. You’ll notice how the ISO stays reasonable and the highlights stay balanced, not blown out. This is your tool for capturing candid moments, city lights, or cozy late-night scenes without lugging a tripod.
Next, you’ll want to experiment with how long you hold the shot. Night mode uses longer exposure to pull in more light, but your hand needs to stay still. If you’re in a moment where your subject isn’t moving, you can let the phone handle the exposure and let the software do its work. If you’re moving or someone else is, adjust the exposure to a shorter setting so you don’t blur the results. You’ll gain confidence by trying a few varied scenes: a quiet street, a dim restaurant, or a park with distant lamps. You’ll notice the balance between brightness and motion blur improves as you learn the right exposure for each scenario.
Finally, you’ll keep the image clean by cleaning the lens and choosing a stable stance. A steady grip matters as much as the Night mode itself. If you can, brace your arms or lean against a wall, and keep your feet planted. You’re not waiting for perfect light; you’re guiding the camera to use the light you have. The result is sharper details in the textures of brick, glass, and fabric that would vanish in ordinary shots. With a little practice, you’ll turn ordinary night scenes into share-worthy photos that pop on your feed.
Use night mode moon photos iPhone 17 when skies are dark
When the sky wears a deep shade, you’ll want to lean on Night mode to capture lunar scenes without washing out the moon. Start by framing the moon with a little foreground interest—like a building silhouette or a tree line—to give your shot context. Night mode helps preserve the moon’s outline and subtle shading, while the foreground stays gently exposed. You’ll want to keep the exposure modest to avoid blown highlights on the moon, then let the software do the rest. If you’re patient, you’ll capture the crater texture and the glow around the moon without losing the surrounding stars or city lights. The key is to shoot in bursts, compare the results, and keep the one that has the best balance of sky and moon.
Next, you’ll think about color. Moonlit scenes can feel cool and blue, but you might want a warmer vibe for drama. Try a slower shutter and slightly warmer white balance in Night mode to bring out the moon’s gentle halo and the silhouettes in front. If you’re near water, you’ll see reflections that add depth. Don’t overdo it; you want a natural look that still feels magical. With these tweaks, you’ll end up with a Moon photo that looks clean, crisp, and just the right amount of glow.
Use the exposure timer to steady your shot and reduce blur
Harness the exposure timer to keep your hands steady and your scene sharp. When you set a timer, you’re taking your own shake out of the equation, which is huge for night scenes. Tap the timer option, pick a short delay like 2 seconds, and you’re good to go. This gives you time to press the shutter without jostling the phone. It’s especially helpful for longer Night mode exposures, where even a tiny nudge can blur the image. The timer also forces you to pause and compose, so you get a cleaner frame with better alignment.
Now, apply the timer to real-life moments. Try a street corner with glowing signs, or a bench with a distant lamppost. You’ll notice details stay crisp—letters on a storefront, the texture of a brick wall, the shimmer on a puddle. The more you use it, the more you’ll see how much blur you save with that few-second delay. It’s a small step that makes a big difference in the final shot, and it ties back to Lunar Landscapes: Capturing Stunning Moon Photos with Your Galaxy S25 Ultra and iPhone 17.
Compose your lunar landscapes
You’ll love how night lets the moon glow against quiet scenes. Start by picking a dark location with a clear sky and an easy foreground your eye can read. You want contrast: bright moon, dark surroundings, and something to anchor your shot. Practice a few angles as the moon climbs, so you know where it sits in your frame. Your goal is to guide the viewer’s eye from foreground to moon, not just snap a pretty sky.
Choose a foreground that adds depth without stealing attention from the moon. A still lake, a calm beach, or a silhouette of trees works well. If you don’t have water, look for a fence line, rocks, or a path that leads toward where the moon will rise or sit. Keep your camera steady, and think about how much space the moon will take in your composition. You want balance, not a crowded frame.
Experiment with exposure so the moon stays bright but not blown out. Start with a shorter shutter, then bump up the ISO or aperture slightly if the moon looks dim. If you’re using a tripod, you can hold a longer exposure for the foreground without washing out the moon. Remember to lock focus on the moon, then recheck the foreground once you frame your shot.
Use smartphone lunar landscape techniques to add foreground interest
Smartphones can capture rich details when you add a foreground element. Use a longer focal length to compress the scene and bring the moon closer to your foreground. If your phone has night mode, switch to it and let it compose a balanced exposure between moon highlights and foreground textures. Try bracketing exposures if your device supports it; this gives you options to blend later for a cleaner look.
Include texture in your foreground to keep the image dynamic. Look for a fence, rocks, or a reflective surface that catches the moonlight. Move around to find lines and shapes that point toward the moon. If you shoot from a low angle, the foreground feels larger and more intimate, while a higher angle can show more sky and moon. A simple, steady tripod or even a sturdy surface helps your smartphone lock in sharp details.
Play with color and mood. Moonlight can reveal cool blues and subtle grays. If your setting has lights nearby, watch for color casts that can warm or cool your scene. You can shoot in RAW if available, so you have flexibility when editing brightness and contrast later. Don’t fear a little post-processing—gentle adjustments can bring out the texture in the foreground and the Moon’s edge.
Frame the moon with nearby subjects to give your shot scale
You can show how big or small the Moon feels by pairing it with nearby subjects. A person, a tree, or a building silhouette creates instant scale. Position your foreground element so its height or width guides the eye toward the Moon. If you include a person, tell them to stand slightly off-center and look toward the Moon; the eye will travel from person to moon with ease.
Use natural framing to sharpen the composition. Look for arches, doorways, or branches that frame the Moon and pull attention inward. A strong frame can be as simple as a tree silhouette around the Moon, or a window opening that makes the Moon pop. The frame should feel intentional, not accidental, so you look like you planned the shot.
Keep the horizon low if you want to emphasize the Moon’s presence. A low horizon gives you more sky and a bigger Moon, while a higher horizon can balance a dramatic foreground. If you’re near water, the Moon’s reflection can add a second path for the eye to follow, making the shot feel alive.
Use rule of thirds for strong composition
Place the Moon along a vertical or horizontal third line to create balance. If you rotate your composition, you’ll see the Moon drift toward a third, which tends to feel more natural than a centered ball in the middle. Don’t be afraid to tilt slightly if you want a more dynamic look, but keep the Moon on a third line to maintain harmony.
Balance foreground interest with the Moon’s brightness. If the Moon sits on the top third, give the lower third something engaging—like a tree silhouette or a shoreline—to stabilize the frame. If you place the Moon on the left third, add a foreground element on the right that leads the eye back to the Moon.
Always check your edges and avoid cutting the Moon’s edge with a building or tree unless it’s intentional. The aim is a clean, purposeful alignment where both Moon and foreground support each other. Practice with different foregrounds and times to see how a small move changes the feel.
Edit and share your moon photos with mobile apps
You’ve captured a crisp moon shot, now it’s time to polish and share. Mobile apps let you fine-tune detail, contrast, and color without dragging files to a laptop. You’ll want apps that can handle RAW or high-quality JPGs so you don’t lose moon texture as you edit. Start with a quick crop to remove distractions and center the moon if you want a stronger composition. Then, adjust exposure by nudging shadows and highlights just enough to keep lunar craters visible without washing out the glow. As you tweak, keep your eyes on texture: you want fine rims and surface details to pop, not look smeared. Use a light touch to avoid oversharpening, which can create halos around the moon.
Next, explore lunar-specific adjustments. Increase clarity to pull out craters, but don’t overdo it—your moon should look natural. Play with structure or dehaze carefully; a little boost can deepen the contrast between maria and highlands, giving a three-dimensional feel. If your app offers white balance presets, aim for a cooler tint to emphasize the night scene, or keep neutral if you want a true sky tone. When you’re happy with the look, save a master copy in high resolution so you don’t lose detail during later tweaks or exports. Finally, add a subtle vignette to guide the eye toward the moon, which helps your shot feel deliberate rather than just photographed.
Sharing is the last step, and it deserves a smart approach. Export settings matter: choose high-quality JPEG or a lossless format if your app supports it, so you preserve the detail. Include a short caption that mentions the scene and gear, which boosts engagement. If you cross-post, keep the edit consistent across platforms so Lunar Landscapes: Capturing Stunning Moon Photos with Your Galaxy S25 Ultra and iPhone 17 feel cohesive. Add tags and location if relevant, but avoid clutter—let the moon be the star.
Use smartphone astrophotography Galaxy S25 Ultra iPhone 17 tools to boost detail
Your Galaxy S25 Ultra and iPhone 17 come with tools made for night skies. Start with a steady base: a tripod or a stable surface keeps your moon from blur. If your phone supports an exposure timer, firing a short burst can help you pick the best frame with the most crater detail. Look for focus peaking or manual focus options to lock onto the moon’s edge, so you don’t drift into the dark sky. RAW capture is a game changer; it gives you latitude in post to recover texture in shadows and preserve fine lines along the limb.
Use a small aperture look‑alike effect in your editing apps to sharpen the moon without increasing noise. On these devices, you’ll often find a dedicated lunar or astro mode that balances ISO, shutter speed, and exposure automatically. Take several shots at slightly different settings, then compare to choose the one with the cleanest texture. When you edit, push clarity and texture just enough to reveal craters, but watch out for haloing around bright areas. A light dose of dehaze can add depth, yet stay mindful of noise in the dark sky.
If you want more control, try stacking options available in some apps. Stacking can reduce noise and bring out fine details you miss in a single frame. Don’t overstack, though, or you’ll end up with a plastic look. Finally, consider color subtlety: the moon reads fairly neutral, but a touch of cool temperature can give a crisp, night‑sky vibe that matches your Galaxy S25 Ultra or iPhone 17’s color science.
Improve contrast and sharpness with editing moon photos mobile apps
Contrast is your friend when you want the moon to stand out against a dark sky. Start by increasing the contrast slightly so the craters pop without making the sky feel harsh. A gentle use of curves or levels can help you pull the lunar texture into view, especially along the terminator where light and shadow meet. Pay attention to the edges; you want crisp rims, not jagged outlines. If your app has local adjustments, boost contrast a notch specifically on the moon, leaving the sky softer to keep the scene natural.
Sharpening is a fine art for moon photos. Apply a tiny amount to bring out the ridges and crater walls, but avoid over-sharpening which creates halos around bright spots. If your app supports masking, sharpen only the moon and leave the sky alone. You can also try a very light unsharp mask with a low radius to get a crisp surface without adding noise. Remember to preview the effect at different zoom levels; what looks good on a small screen might look harsh on a larger one.
Color balance matters, too. The moon often looks blueish in long exposures or very cool nights, so a slight shift toward neutral or a touch warmer can feel more natural. If your app has a histogram, keep the midtones balanced so the lunar texture isn’t washed out while the sky remains rich. Finally, save a few edits with different looks so you can choose later, or compare side‑by‑side to decide which version captures your mood best.
Export your edits at full resolution
Export at full resolution to keep every crater line intact. Choose the highest quality setting and avoid compression that blurs details. If you can, export as a lossless format first, then re‑save as JPEG for sharing, so you retain a pristine master. Name your file clearly so you can find it later—something like MoonFullRes_01 helps. If you’re posting online, consider shrinking only for preview while keeping the original master safe in your cloud or device.
This Lunar Landscapes guide aims to help you capture stunning Moon photos with your Galaxy S25 Ultra and iPhone 17. By combining steady gear, thoughtful composition, precise camera settings, and careful post‑processing, you’ll produce images that resonate with the quiet drama of the night. Use these steps to build a repeatable routine and keep refining your skills for breathtaking Lunar Landscapes: Capturing Stunning Moon Photos with Your Galaxy S25 Ultra and iPhone 17.

Smartphone Night Photography Enthusiast & Founder of IncrivelX
Vinicius Sanches is a passionate smartphone photographer who has spent years proving that you don’t need an expensive camera to capture breathtaking images after dark. Born with a natural curiosity for technology and a deep love for visual storytelling, Vinicius discovered his passion for night photography almost by accident — one evening, standing on a city street, phone in hand, completely mesmerized by the way artificial lights danced across wet pavement.
That moment changed everything.
What started as a personal obsession quickly became a mission. Vinicius realized that millions of people were carrying powerful cameras in their pockets every single day, yet had no idea how to unlock their true potential after the sun went down. Blurry shots, grainy images, and washed-out colors were robbing everyday people of memories and moments that deserved to be captured beautifully.
So he decided to do something about it.
With years of hands-on experience shooting city streets, starry skies, neon-lit alleyways, and creative night portraits — all with nothing but a smartphone — Vinicius built IncrivelX as the resource he wished had existed when he was just starting out. A place with no confusing jargon, no assumptions, and no gatekeeping. Just honest, practical, beginner-friendly guidance that actually gets results.
Vinicius has tested dozens of smartphones from every major brand, explored dark sky locations across multiple states, and spent countless nights experimenting with settings, compositions, and editing techniques so that his readers don’t have to start from scratch. Every article on IncrivelX comes from real experience, real mistakes, and real lessons learned in the field.
When he’s not out shooting at midnight or writing in-depth guides for the IncrivelX community, Vinicius can be found exploring new cities with his phone always within reach, looking for the perfect shot hiding in the shadows.
His philosophy is simple: the best camera is the one you already have — you just need to learn how to use it in the dark.