How to Photograph Christmas Lights at Night Without Overexposing: Step-by-Step
This guide, How to Photograph Christmas Lights at Night Without Overexposing: Step-by-Step, shows you how to use manual exposure to keep delicate lighting detail while avoiding blown-out highlights. You’ll learn practical settings, focusing, and composition tips so your night shots stay rich and true to life.
Put your camera in manual for night lights
You’ll get the cleanest, most controllable night photos when you switch to manual. In this mode, you decide the aperture, shutter, and ISO, not the camera. This control helps you prevent halos and lets you freeze twinkle or capture motion blur as you prefer. Start in M, adjusting one setting at a time while the others stay fixed. If you’re new to night shooting, think of it like tuning a guitar: small tweaks make big differences.
Manual mode gives you a predictable baseline. Lock in a look for multiple frames, even if the scene changes slightly. With night lights, you want consistency, so set a starting point and fine‑tune. If you see bright flare or blown highlights, dial back the exposure. If the scene is too dark, you can safely push one control without wrecking the rest. This builds a repeatable workflow for Christmas light photos.
Take a moment to practice with a familiar scene, like your own street or a neighbor’s display. You’ll notice shapes, colors, and motion respond to your settings in real time. By the end, you’ll understand how the camera responds to each dial click. This confidence turns a casual shot into a reliable night photo.
Manual mode Christmas light photos: set aperture, shutter, ISO
Start with the aperture. Set a middle value like f/5.6 or f/8 to keep multiple light sources reasonably sharp. A larger opening (smaller f-number) is faster but can blur backgrounds; a smaller opening (larger f-number) will keep more in focus but needs more light. Choose your preference and keep it stable as you adjust the other controls.
Next is the shutter. For steady, crisp lights, try 1/60 to 1/125 second. If lights are moving or you want a little motion blur, slower shutters around 1/30 can work. If you want sharp pinpoints of light, keep the shutter shorter. The longer the shutter, the more the sensor drinks in light—and the more motion blur you risk from tripod movement or subjects. Lock in a shutter you’re comfortable with before touching ISO.
Finally, set the ISO. Start at ISO 100 or 200 to keep noise down. Night scenes and bright lights can tolerate a lower ISO if aperture or shutter isn’t too restricted. If the image is too dark after your chosen aperture and shutter, raise ISO in small increments. Each bump adds noise, so go slowly and review on the screen. A sweet spot often emerges that keeps clean shadows with crisp lights.
Use your low ISO to cut noise and glare
Low ISO is your best friend for clean Christmas light photos. Noise shows up as tiny speckles that ruin sharpness. Start at ISO 100 or 200 and see how your exposure holds. With a well‑balanced aperture and shutter, you rarely need more. If you do, push ISO in small steps and review. You’ll be surprised how little you need to raise it.
Glares and hot spots on reflective ornaments or glass can spike with higher ISO. Staying low helps highlights stay controlled. If you see glare, try a slightly smaller aperture and a slower shutter instead of raising ISO. Low ISO keeps the scene looking natural, like you’re there in the glow.
Lock your exposure with manual settings
Your exposure balances aperture, shutter, and ISO. Lock these three to prevent frame‑to‑frame brightness shifts. Once you reach a good combination—bright enough lights, no blown highlights, minimal noise—stick with it for the whole scene. If something drastic changes, pause and recalculate. For static Christmas lights, a fixed manual exposure keeps photos consistent.
Control your exposure to avoid overexposed Christmas lights
To let Christmas lights glow without blowing out to white, control exposure. Start with a low ISO, then use a medium to small aperture so lights stay crisp and not smeared. The goal is to keep the brightest parts from clipping while still retaining shadow detail. Shoot in manual to lock a consistent look. Keep the shutter at a reasonable length; too long, and lights bloom; too short, and the scene loses glow. If the tree is your anchor, adjust exposure to preserve its detail, letting the lights carry their own character. Small changes in shutter or aperture can shift mood from sparkling to washed out, so test a few frames.
Lighting changes with position and metering. If the sky behind is bright, trim exposure a touch. If you’re on a darker porch, push exposure a touch to keep the lights legible. Verify main subjects stay defined while the lights twinkle.
Night photography Christmas lights: cut shutter time to darken highlights
To keep tiny bright highlights under control, cut your shutter time. Shorter shutters hold back hotspots, keeping whites from turning into blobs. A sweet spot is often around 1/60 to 1/200 second, depending on light brightness and steadiness. If hands shake, use a tripod or lean on a solid surface. The aim is to freeze motion enough to keep lights clean while letting nearby movement add life.
Bracket a few shots at your chosen aperture and ISO: one frame brighter, one darker, one in between. This provides options if color or detail in the lights is off in one frame. For moving subjects, you’ll need shorter shutter speeds to avoid motion blur in those areas while preserving light detail.
Use exposure compensation for Christmas lights when needed
Exposure compensation nudges brightness without changing your baseline. If lights look dull, add 1/3 or 2/3 EV. If they’re already bright, pull back -1/3 EV to protect details. Your goal is a middle ground where darks stay dark and lights glow. This helps when the camera’s meter is fooled by bright bulbs, preventing washed‑out results. Tiny adjustments keep color balance intact and avoid an artificial look.
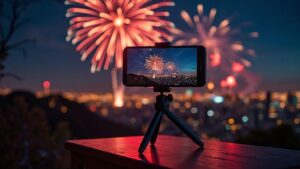
Use long exposure and set your tripod for night lights
Long exposure lets glow linger without blur. Balance exposure, ISO, and tripod steadiness to reveal trails and storefronts without sacrificing sharpness. A sturdy tripod is essential to keep frames crisp as you frame twinkling lines and reflections. Place the tripod on stable ground, away from feet or doors, and use a level head to prevent drift. With the tripod locked, lights look cleaner and more intentional.
Before you press the shutter, decide how long the exposure will be and how bright you want the scene. If unsure, start moderate and adjust after a quick test shot.
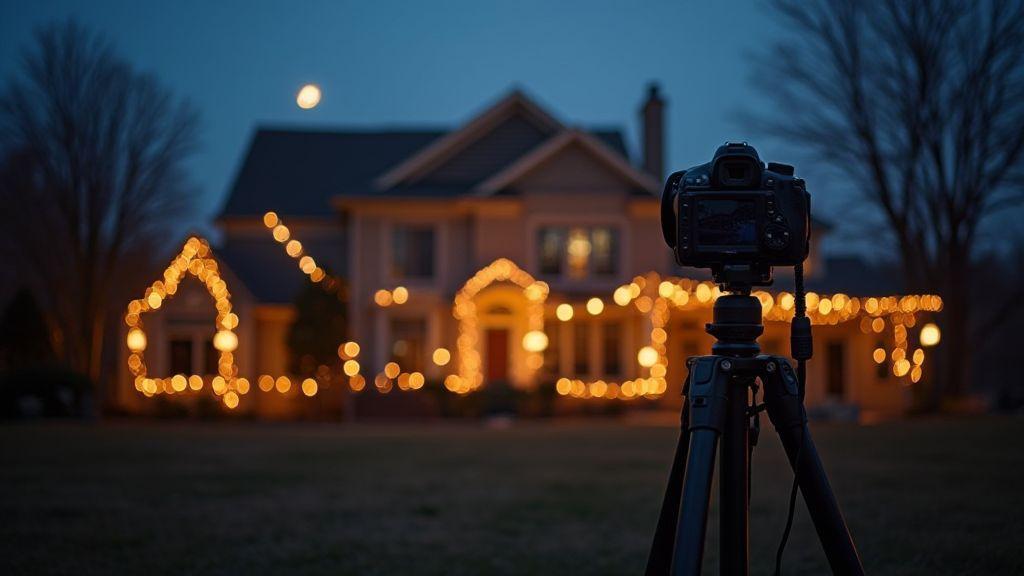
Tripod settings for night lights: steady feet and level head
Choose tripod feet that won’t sink into soft ground. Extend legs evenly and lock them tightly. Use the built‑in level or a quick horizon check. A level head prevents drift during exposure. Position the frame to capture the brightest lights without blowing highlights, aligning trees or building edges for a grounded composition. Tighten all knobs after adjustments so nothing moves when you shoot.
Keep the shot simple. Don’t crowd the frame with too many bright points. Let the main lights lead the eye, and, if possible, tilt the tripod slightly downward from a standing position to capture street reflections without distorting perspective.
Use a remote or your timer to stop camera shake
A remote or timer lets you press the shutter without touching the camera, avoiding micro‑movements. If you don’t have a remote, set a 2–10 second self‑timer and step back. A two‑shot approach can help: a shorter exposure for star-like highlights, then a longer exposure for trails and ambient glow. Compare results and keep the cleaner frame. A remote is especially valuable from a balcony or stairs, reducing wobble and keeping the scene deliberate.
Use bulb mode for very long exposures
Bulb mode gives you control over how long the shutter stays open. For very long shots, expose until the scene feels balanced, then monitor as the glow fills the frame. Test a few durations to learn how lights behave. If hotspots appear, shorten the exposure or adjust ISO. If the scene seems too dark, extend exposure slightly or adjust brightness in post. Bulb mode rewards patience—pair with a stable tripod, timer, and careful framing for a clean night‑light photo.
Set your focus and white balance for clear night photos
Crisp focus and accurate color are the foundation of good night photos. Use a sturdy stance or a tripod, and start with a mid‑range ISO to avoid excess noise. Manually focus to lock onto bright bulbs or string lights, ensuring sharp bulbs and smooth backgrounds. Your goal is precise focus with balanced color.
White balance matters as much as sharpness. For LED or warm string lights, a warmer preset often works best. If lighting is mixed, consider a custom white balance by photographing a neutral gray card under the same light, then applying that in post. Steadying the camera with a remote or timer minimizes shake. If you must handhold, use a shorter shutter and brace your elbows.
Switch to manual focus for sharp light bulbs
When you switch to manual focus, you lock in crisp bulbs and avoid autofocus hunting in the dark. Focus on a single bright bulb, zoom in if possible, and fine‑tune until edges look crisp. Once one bulb is nailed, recompose and check a few more to ensure consistency.
Set white balance for LED or warm string lights
Choose a WB setting that mirrors your light sources. For warm string lights, lean warmer to render bulbs as orange‑gold rather than gray. If LEDs flicker with cooler tones, a slightly cooler balance can help. Quick test frames on the LCD can guide you to a natural glow.
Zoom in live view to focus precisely
Use live view zoom to check sharpness on key bulbs and edges. Zoom to 100% or 200% and verify filaments, reflections, and details are crisp. If anything looks off, nudge the focus and recheck.
Use bracketing and HDR to save your highlights and shadows
Bracketing and HDR give you control over the scene’s extremes. Take multiple exposures to preserve bright bulbs and shadow detail, then blend them in post. Plan three or more shots: highlights, midtones, and shadows. Use a tripod, remote, or timer to prevent shake between frames.
Set your base exposure in the middle of your bracketing range, then capture underexposed and overexposed frames without changing framing. More frames aren’t always better—keep it manageable for clean merging.
Bracketing HDR Christmas lights: capture multiple stops
Capture at least three exposures: normal, one stop darker, and one stop brighter. For high contrast scenes, add a fourth at two stops. Lock focus and framing, then take the underexposed and overexposed shots. If available, use three‑shot or five‑shot bracketing with fixed intervals.
Merge exposures carefully to avoid halos and ghosting
In post, align frames and blend to preserve texture without halos. Use a gentle weight map favoring midtones. Avoid aggressive sharpening during merging, which can emphasize halos. If halos appear, adjust exposure steps or masks and re‑merge until the glow looks natural.
Keep your base exposure one stop under for safety
Starting one stop under helps protect highlights during merging. Shoot a test frame and adjust brighter and darker frames by one stop to ensure you don’t lose detail in bright bulbs.
Compose your shot to photograph Christmas lights at night
Plan your frame before you press the shutter. Look for a strong foreground, interesting shapes, or a simple background that won’t compete with the lights. Set up your tripod for stability and find a spot where the lights won’t wash out the scene. A simple composition—house outline, tree branches, and a path—works well. If unsure, shoot two or three options and decide later. This is where you control the mood, not just the lights.
Think about the feeling you want to evoke. A calm, snowy street can feel magical; a busy display can feel festive. Use a wide to standard lens to capture the whole scene, or zoom in to highlight a favorite display. Place a person or object in the foreground to add scale. A small foreground element helps guide the eye toward the glowing displays. Use a moderate aperture (around f/8) to keep foreground and background sharp, or open up (around f/5.6) to soften the foreground and push the lights into bloom.
Include foreground or silhouettes to add scale and mood
Foreground adds depth and makes the lights feel larger. Frame with a fence, bench, or branch. Silhouettes can add mystery when lights glow behind. Place silhouettes off-center to draw the eye into the scene. A low foreground helps guide the gaze toward the brightest displays. If including people or pets, keep them off-center so they lead toward the main lights. Adjust aperture to balance sharpness of foreground and background.
Try long exposure Christmas light photography for light trails
Long exposure turns lights into silky trails, transforming a quiet street into a theater of motion. Use a steady tripod and a timer or remote to avoid shake. Start with 2–4 seconds for a gentle trail, then extend to 6–15 seconds for longer lines. Moving cars or people can add life with a touch of blur. Use a small ISO and a midrange aperture (around f/8) to keep lights sharp and background detail visible. If halos appear, shorten exposure or adjust composition and recheck.
Use low ISO Christmas light photography for clean shots
Low ISO helps keep noise out of night photos. Start at ISO 100 or 200 and only raise if you need more brightness, not more grain. A low ISO pairs well with a tripod and longer shutter. Keep white balance in check, and consider a warmer WB for warm bulbs. Check histogram to prevent clipping on the brightest bulbs. A clean base makes layering in post easier for contrast and depth.
This step-by-step approach helps you photograph Christmas lights at night without overexposing—delivering crisp bulbs, natural colors, and a scene that feels magical rather than blown out. For quick reference, remember the guiding idea: shoot in manual, control exposure carefully, and use stabilization and smart bracketing to preserve both highlights and shadows. How to Photograph Christmas Lights at Night Without Overexposing: Step-by-Step is your go-to framework for consistently stunning results.

Smartphone Night Photography Enthusiast & Founder of IncrivelX
Vinicius Sanches is a passionate smartphone photographer who has spent years proving that you don’t need an expensive camera to capture breathtaking images after dark. Born with a natural curiosity for technology and a deep love for visual storytelling, Vinicius discovered his passion for night photography almost by accident — one evening, standing on a city street, phone in hand, completely mesmerized by the way artificial lights danced across wet pavement.
That moment changed everything.
What started as a personal obsession quickly became a mission. Vinicius realized that millions of people were carrying powerful cameras in their pockets every single day, yet had no idea how to unlock their true potential after the sun went down. Blurry shots, grainy images, and washed-out colors were robbing everyday people of memories and moments that deserved to be captured beautifully.
So he decided to do something about it.
With years of hands-on experience shooting city streets, starry skies, neon-lit alleyways, and creative night portraits — all with nothing but a smartphone — Vinicius built IncrivelX as the resource he wished had existed when he was just starting out. A place with no confusing jargon, no assumptions, and no gatekeeping. Just honest, practical, beginner-friendly guidance that actually gets results.
Vinicius has tested dozens of smartphones from every major brand, explored dark sky locations across multiple states, and spent countless nights experimenting with settings, compositions, and editing techniques so that his readers don’t have to start from scratch. Every article on IncrivelX comes from real experience, real mistakes, and real lessons learned in the field.
When he’s not out shooting at midnight or writing in-depth guides for the IncrivelX community, Vinicius can be found exploring new cities with his phone always within reach, looking for the perfect shot hiding in the shadows.
His philosophy is simple: the best camera is the one you already have — you just need to learn how to use it in the dark.