Edit for low light: low light photography tips Pinterest
You’re editing night shots, and you want them to pop on Pinterest without looking fake. Trust your eyes over the numbers. Start by judging mood first, then adjust exposure to reveal shadow detail without clipping highlights. If a photo feels flat, a gentle exposure nudge can reveal city lights, stars, or reflections you missed in-camera. Aim for a natural balance that feels vivid yet believable. Edit to tell the night’s story, not just to chase brightness.
Expose with intention and protect your highlights. Bright lamps or car headlights can blow out quickly. Lift shadows slightly to recover detail, but guard the brightest spots from washing out. Check the histogram to avoid crushed blacks or blown whites. If you see spikes at the top, back off slightly. Your goal is a glow around light sources while preserving surrounding texture so viewers experience the scene as you did.
Mood matters more than perfect pixels. Keep the color cast that gives the night its flavor—neon greens, pinks, or cool blues—while avoiding color noise. If the color feels off, adjust white balance toward cooler or warmer tones. A subtle vibrance boost helps colors breathe without oversaturation, and a touch of dehaze can add depth to fog or mist. Keep edits small and repeatable so you can apply the same look to a batch of night photos.
Raise exposure and protect highlights
Raise exposure in small steps. Start with 0.25 to reveal shadows, then decide if more is needed. Watch highlights as you go; lamps and windows should glow without turning into blobs of white. If a key area clips, back off slightly and use selective adjustments to recover detail. Your goal is a scene bright enough to read while preserving texture in bright sources.
Use a targeted approach to keep important areas intact. Brighten underexposed foregrounds or architectural details with a local adjustment brush or mask, while leaving the sky and bright signs alone. This preserves contrast where it matters and avoids a flat overall look. Keep some shadows for depth, so the image still reads as night.
Reduce noise and sharpen selectively
Night photos often suffer from noise, especially in shadows. Balance luminance noise reduction carefully—smooth grain without erasing texture in bricks, leaves, or reflections. Overdoing NR can dull edges and make the image feel mushy. Apply NR globally, then dial back on delicate areas with a mask.
Sharpen where it counts, not everywhere. Focus on edges of buildings, window frames, and lights; avoid sharpening flat areas like skies or smooth water, which can exaggerate grain. Light sharpening on bright spots helps the eye follow the scene without halos.
Export sRGB JPEG web size
When you’re ready to share, export as an sRGB JPEG in web size. This keeps colors accurate across screens and Pinterest boards. Choose moderate quality, around 80–85%, to balance detail with reasonable file size. Name the file descriptively for easy reference and gallery organization.
Crop and size with platform in mind. For Pinterest, a vertical ratio around 2:3 works well, but export to the dimension that suits your primary audience. Save a full-resolution backup for future edits or prints so you can post now and re-edit later if trends shift.
Improve shadow contrast and optimization for Pinterest
You’ll get cleaner night photos by tuning shadow contrast to reveal detail without flattening the image. Start by lifting exposure enough for stars and lights to glow, then push shadows back to reveal texture in buildings, trees, or silhouettes. Watch color shifts; if blues turn muddy, back off a touch. This is where you decide how dramatic your night scene should feel—subtle can be immersive, bold can stand out in crowded feeds.
Boost shadow contrast to create separation between dark areas and bright highlights. Use a light hand and compare with the original to avoid overdoing it. If the sky looks noisy or posterized, back off and protect natural gradients. The goal is a balanced look where the night reads as night, with shadows containing discernible detail.
Pinterest audiences respond to clarity and mood. A well-balanced shadow contrast helps your image pop in feeds without shouting. Practice with different nights—urban lights, rural skies, or waterfront reflections—to find the right level of contrast for each scene. The result should feel true to the moment, not forced.
Use local contrast and curves
Local contrast sharpens the most important parts while keeping surroundings softer. Apply a touch to bring out brick textures, window lights, or tree silhouettes, but avoid overdoing it. Curves give precise tonal control: lift the midtones to brighten the scene without blowing out highlights, then nudge the shadows to maintain depth. Test curves at 100% zoom to avoid clipping. If highlights spike, pull the curve down; if shadows feel flat, raise the lower end. Subtle adjustments keep your night shot legible at thumbnail size.
Keep blacks rich without clipping
Rich blacks are essential, but clipping can destroy texture in deep shadows. If you see crushed blacks, lift them slightly and recheck overall contrast. This preserves texture in railings, silhouettes, and distant towers, creating depth rather than a flat void. Use a power curve or a black-point slider to retain detail in the darkest regions and avoid halos around bright spots. The aim is a deep, believable night with recognizable shadows.
Save a version with lifted shadows
When you’re happy with lifted shadows, save a version that preserves those edits. A lifted shadows file is handy for Pinterest, as it reads clearly in thumbnails while keeping mood. Use a descriptive filename like NightPhotoLiftedShadowsV1 to locate it quickly for tweaks or re-uploads.
Write SEO-friendly pins: optimize pin descriptions for dark photos
Your night photos can shine on Pinterest if you optimize pin descriptions. Start with a clear pin name matching your shot, such as night city lights skyline or starry park bench at dusk. Write a concise pin description with short sentences and active verbs, outlining the scene, mood, and value viewers gain by saving or clicking. Include terms like low light, noir vibes, and long exposure. A strong call to action nudges viewers to save or visit your profile for more tips. This approach helps search and saves.
Map keywords to intent: use primary keywords near the description’s start (e.g., night photography tips, dark city photography, how to edit night scenes) and sprinkle secondary keywords naturally. Describe the scene vividly so readers visualize it before clicking. Check spelling and maintain an authentic, friendly voice.
Pair the description with a striking cover image that mirrors the mood. A focal point—like a bright streetlamp or a glinting window—helps capture attention in the feed. Use a vertical crop with generous negative space for text overlays to stay readable. Clear wording, strong keywords, and a compelling cover keep your nights from getting lost.
Use keywords and clear calls to action
Keywords should match what people search for when seeking night photos. Start with a few primary keywords describing your shot, such as night cityscape, low light photography, or night editing tips. Place these at the start of the pin description. Add secondary keywords related to technique or mood, like long exposure stars, noir style, or color grading for dark photos. Keep language natural to preserve readability and findability.
Your call to action should be direct and useful. Examples: Save this for your next night shoot, Click for step-by-step editing tips, or Follow for more night photography ideas. Make the action specific and valuable, offering a promise like learn how to brighten shadows without washing out highlights or balance color in dark scenes. Clear CTAs boost engagement and saves, signaling Pinterest that your content matters.
Include social proof where possible. Mention others using your edits as a reference, or note quick results like instant improvement in exposure balance. Maintain a friendly, helpful tone—readers respond to genuine advice.
Add camera and edit details for search
Detail your camera settings succinctly: camera model, lens, ISO range, shutter speed, and key post-processing steps. For example: Canon R5, 50mm prime, ISO 800, 1/60s; edited with selective shadow brightening and blue-toned color grading. This helps learners replicate your approach. Describe your editing workflow plainly: the software, the order of edits, and key adjustments that bring out night detail without noise. If you have a preset, invite readers to try it with a CTA like save this guide for your next night edit. This transparency builds trust.
When listing gear and steps, keep it relevant to the image. Prioritize details that influence what viewers see: noise, color balance, and how highlights were handled. The goal is a clear path from capture to finished edit, so readers can adapt to their setup.
Include alt text and source link
Alt text should describe the scene accurately for accessibility and indexing. Example: Night city street with bright neon reflections on wet pavement. Note silhouettes or anonymity if people are present. This helps search engines understand your image and improves accessibility.
Always add a source link if you used references or tutorials, pointing readers to your profile, a blog post, or gear page for more. Alt text and sources boost credibility and searchability for your night photography content.
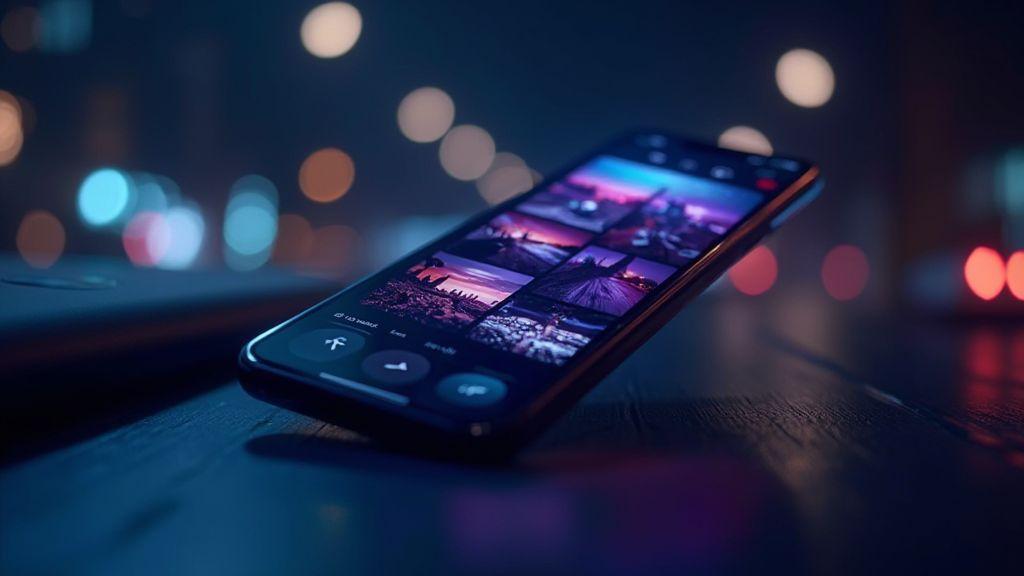
Pick the right crop and size: Pinterest night photography 2026
To make night photos pop on Pinterest, start with the right crop and size. Think about how users scroll: they skim. A clean crop tells the story quickly. Keep composition simple and avoid clutter that hides your subject in the dark. Cropping trims distractions and guides the viewer’s eye to what matters. In 2026, vertical crops outperform on mobile, but also prepare a square or short rectangle version for saves. Crop to emphasize the mood—neon lights, silhouettes, or a lone path through fog.
Size matters for load speed and display quality. Consistency matters more than chasing every trend. Use a high-resolution vertical image so details stay sharp on retina screens. If you resize, keep the subject clear and avoid deep zoom on tiny details that don’t translate when viewed larger. A clean, well-sized image loads fast and feels trustworthy, which reduces scrolling.
Test how your image looks in common Pinterest views. A strong, uncluttered crop helps beginners grasp the scene in seconds, which is perfect for saves. The right crop and size are small choices that yield big visibility gains.
Use vertical 2:3 aspect ratio
Using a vertical 2:3 aspect ratio is a simple win for Pinterest night photography. It fills more screen space on mobile, where most users pin from, helping subjects stand out and preventing ambient details from getting crushed. Frame tall and concise for immersion. If the original isn’t 2:3, crop to preserve the main subject with breathing room. A consistent 2:3 rhythm across your night series helps boards feel cohesive.
Keep subjects away from edges
Move subjects inward to avoid awkward crops and crowded edges. Edge placements can feel unfinished or cut off in pins. Leaving space around the subject also helps you accommodate Pinterest’s auto-cropping. Use negative space on the sides to let background lights or silhouettes peek in, keeping the focal point quick to read at a small thumbnail.
Preview mobile thumbnail before pinning
Always preview the mobile thumbnail before pinning. The thumbnail is the first thing users see and a strong thumbnail boosts saves. Ensure the subject remains clear at small sizes and that mood details like lights don’t blur in the thumbnail. If details vanish on small screens, adjust the crop or contrast to keep the scene legible.
Match the Pinterest algorithm: dark imagery 2026
Dark imagery can perform well on Pinterest when you tailor it to the algorithm’s preference for fresh, engaging content. Treat each image as a tiny story: identify the mood, light sources, and a hook in the title that invites save or click. Maintain a strong, specific theme for each pin and keep styling cohesive across your profile.
Caption to tease the moment behind the shot without over-sharing. Add a small intriguing detail that invites interaction—like a clue about location or emotion. Your pin should promise value, whether it’s a technique, location cue, or story, to encourage saves. Group multiple night photos into themed boards for easier discovery. Consistency helps the algorithm see you as a reliable source.
Pair pins with relevant keywords in titles and descriptions. Use natural language and indicate you’re sharing a practical process, not just pretty images. Test layouts—carousels, single-image pins, and idea pins—to see what resonates. The more you experiment, the better you’ll understand audience preferences for saves, shares, and returns.
Post fresh pins rather than duplicates
Fresh pins show you’re a creator adding new value. Edit a new version of your night photo with different lighting, contrast, or color balance, and pair it with a new caption. Fresh pins keep your profile lively and provide new signals to the algorithm. Plan a small weekly batch of edits: 3–5 night shots with varied angles or moods. Posting these as separate pins, rather than variations of the same image, helps followers explore your work and signals ongoing creation.
Maintain a consistent workflow: choose a set of thumbnails and overlays, then test different caption angles. Keep pins properly sized and optimized before publishing. Fresh pins should feel intentional, not rushed. If you’re testing ideas, label drafts to compare performance later without mixing concepts. The goal is to offer new angles, not just new pixels.
Pin when your audience is active
Study when your followers are online and schedule accordingly. Mornings and evenings often see higher activity, though niche audiences may differ. Track engagement for several weeks to identify patterns—do saves spike on weekends or weeknights? Time your posts to reach viewers when they’re most likely to engage.
Plan mini-batches for peak times: a few fresh pins landing during prime time can boost saves and signal relevance to the algorithm. Align pins with ongoing events or seasonal moments to keep your content timely and connected to current interests.
Keep a simple routine: record posting times, saves, comments, and your overall timing sentiment. A weekly review helps refine your schedule and improve visibility for your night photos.
Promote and test to boost Pinterest impressions for night images
You’ll test how nights perform on Pinterest by tweaking what you share and how you present it. Start with a simple system: two to three thumbnail ideas, two overlay styles, and two caption angles. Track impressions, saves, and clicks to see which combination works best. If a pin looks flat, brighten overlays, increase contrast, and choose a thumbnail that hints at glow from streets or stars.
Keep a quick sheet to compare performance by day and event. Identify patterns and push more of the successful style. The goal is a repeatable system that signals Pinterest you deliver high-quality night visuals. Protect image quality: color accuracy, clean stars, and readable overlays. If a pin appears muddy, readers will scroll away. Maintain the core of your photo and let overlays boost mood, not overwhelm it.
A/B test thumbnails and overlays
Run two thumbnail concepts for the same shot to compare saves and clicks over a week. Try different overlays—one bold title, another a glow around bright elements—and identify which pairing wins. Use readable fonts and high-contrast colors to ensure overlays stay legible on small screens. If a thumbnail feels busy, simplify.
Pin to niche boards and use rich pins
Pin to boards focused on specific night themes—urban nights, starry skies, rainy streets, neon reflections. Narrow boards improve discovery by the right audience. Enable Rich Pins to add details like camera settings or location. Rich Pins add credibility and usefulness, boosting saves and followers. Refresh a few core boards with new night shots to keep a cohesive niche presence.
Schedule and track performance metrics
Post three to five pins per week from your best night images. Schedule during peak activity times and monitor three metrics: impressions, saves, and click-throughs. If a pin underperforms for two weeks, swap the thumbnail or caption and re-test. Export monthly reports to spot trends by day, board type, and overlay style. Use insights to refine future pins. If a pin saves often but gets few clicks, tweak the description to clarify the scene and invitation.
Pin when your audience is active
Timing matters. Observe when your audience is online, with baseline patterns showing mornings and evenings as high-activity windows. A weekly review helps refine your schedule and keep night photos visible without shouting into a void. Align posts with current moments and seasonal events for heightened relevance.
Final note: Pinterest & Dark Imagery: Optimize Your Night Photos for Maximum Visibility in 2026
Pinterest & Dark Imagery: Optimize Your Night Photos for Maximum Visibility in 2026 emphasizes clarity, mood, and consistent styling to rise in feeds. By editing for precise exposure, shadow detail, and color harmony, selecting camera and editing details, and crafting SEO-friendly descriptions, your night shots can achieve higher impressions and saves. Regularly test thumbnails, overlays, and formats across niche boards to fine-tune what resonates with your audience. With a disciplined approach, you can build a cohesive, searchable collection of nocturnal imagery that thrives on Pinterest in 2026.

Smartphone Night Photography Enthusiast & Founder of IncrivelX
Vinicius Sanches is a passionate smartphone photographer who has spent years proving that you don’t need an expensive camera to capture breathtaking images after dark. Born with a natural curiosity for technology and a deep love for visual storytelling, Vinicius discovered his passion for night photography almost by accident — one evening, standing on a city street, phone in hand, completely mesmerized by the way artificial lights danced across wet pavement.
That moment changed everything.
What started as a personal obsession quickly became a mission. Vinicius realized that millions of people were carrying powerful cameras in their pockets every single day, yet had no idea how to unlock their true potential after the sun went down. Blurry shots, grainy images, and washed-out colors were robbing everyday people of memories and moments that deserved to be captured beautifully.
So he decided to do something about it.
With years of hands-on experience shooting city streets, starry skies, neon-lit alleyways, and creative night portraits — all with nothing but a smartphone — Vinicius built IncrivelX as the resource he wished had existed when he was just starting out. A place with no confusing jargon, no assumptions, and no gatekeeping. Just honest, practical, beginner-friendly guidance that actually gets results.
Vinicius has tested dozens of smartphones from every major brand, explored dark sky locations across multiple states, and spent countless nights experimenting with settings, compositions, and editing techniques so that his readers don’t have to start from scratch. Every article on IncrivelX comes from real experience, real mistakes, and real lessons learned in the field.
When he’s not out shooting at midnight or writing in-depth guides for the IncrivelX community, Vinicius can be found exploring new cities with his phone always within reach, looking for the perfect shot hiding in the shadows.
His philosophy is simple: the best camera is the one you already have — you just need to learn how to use it in the dark.