Choosing auto vs manual night mode
When you’re shooting at night, you want clean, bright photos without a lot of grain. Auto mode is your first friend because it handles exposure, ISO, and shutter speed for you. That means you can focus on composition, not technical fiddling. In many everyday situations, auto does a solid job and keeps noise low by nudging ISO up only as needed. If you’re new to night photography, start here and let the camera decide how much light to let in. You’ll still get sharp photos because modern phones balance exposure and noise automatically. But auto can surprise you when the scene has tricky lighting, like bright street lamps or moving subjects.
Manual mode gives you true control over light, and that matters after the sun goes down. You’ll set shutter speed, ISO, and aperture (where available) to shape how long light hits the sensor and how the noise behaves. This is where your creative voice comes out. With manual, you can keep ISO low to preserve detail in highlights and use longer shutter times to reveal movement—think car trails or flowing water. It also helps you fix tricky scenes where auto would wash out contrast or blow out a highlight. If you’re chasing a specific look, manual lets you craft it, not just capture whatever the camera happens to see.
If you want a practical path, try auto first and shoot a few frames. If the result looks good, you’re done. If not, switch to manual and adjust one dial at a time: lower ISO to reduce noise, slow the shutter to brighten the scene, or open the aperture where possible. You’ll soon learn the rhythm of night light and how your device reacts. The key is practice and noting how your photos respond to small changes. Auto is convenient, manual is precise, and both can help you nail stunning night shots.
When auto mode handles exposure and noise
Auto mode does a solid job when the scene has balanced lighting, like a street with even lamps or a well-lit storefront. In these cases, the camera reads the scene quickly and chooses shutter speeds that prevent blur from hand shake and keep noise low. Fewer grainy patches in the shadows and natural colors without intervention are common outcomes. If you’re chasing quick results, auto mode keeps you moving.
Auto mode also shines when you’re not sure what your subject will do. If a friend moves through the frame or a dog runs by, auto can adapt on the fly to keep exposure reasonable. It’s like having a helper who nudges settings behind the scenes so you don’t miss the moment. For most casual night snaps, this is a reliable path that delivers consistent results without technical frustration.
However, auto can struggle with bright lights in the frame or mixed lighting. A neon sign might cause underexposure of the rest of the scene or blown-out highlights. If you want accurate shadows and preserved details in both dark and bright areas, manual mode becomes the better option. Auto might flatten drama, so switch to manual for tricky lighting.
When manual gives you true control over light
Manual mode lets you dictate how long light enters the sensor, how sensitive the sensor is to that light, and how big the opening is. Keep ISO low to minimize grain and use a longer shutter to collect more light for a bright scene. If you’re capturing moving people or vehicles, adjust shutter speed to freeze motion or blur it for a sense of movement. This is your sandbox to refine mood and texture in your night shots.
With manual, you’ll also shape shadow detail. Lower ISO preserves texture, while a longer exposure can push more light into darker corners. You’ll get richer color and better dynamic range when you balance exposure intentionally rather than leaving it to the camera’s default. It takes a bit of trial and error, but the payoff is photos that look exactly how you pictured them. If you’re after a consistent, controlled look across a whole set, manual is your go-to.
If you’re new to manual, start with a stable tripod or surface. Then set a baseline: choose a low ISO (like 100–400), a moderate shutter speed (1/30–1/60 sec for still scenes, longer if you’re okay with a little blur), and adjust until your exposure meter sits nicely in the middle. As you gain confidence, you’ll learn to push or pull exposure on purpose to keep highlights bright without sacrificing shadows.
Simple decision checklist for night shots
- Is the lighting even and straightforward? Auto is fine.
- Do you need to preserve detail in shadows and highlights? Manual gives you control.
- Will there be movement you want to freeze or blur? Manual helps you choose the right shutter.
- Are you shooting on a stable surface or tripod? Manual is easier with a stable base.
- Do you want a quick result or a crafted look? Auto for quick, manual for precision.
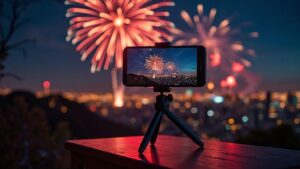
Auto vs Manual Mode: Choosing the Best for 2026 Night Shots on iPhone 17 & Pixel 10
In 2026, both the iPhone 17 and Pixel 10 offer advanced Night Modes with smart processing. Auto mode is great for quick, reliable results, while Manual mode shines when you want deliberate exposure, controlled noise, and a specific look. Use Auto for everyday night snaps and switch to Manual when scenes throw off auto metering—like strong light contrasts, color casts, or moving subjects you want to freeze or emphasize. The right choice depends on your scene and how much control you want over mood, texture, and dynamic range.
Manual exposure basics for low light
You’ll get the best night photos when you learn how exposure works. In low light, every click of brightness matters. You control it with three knobs: ISO, shutter speed, and aperture. Since the iPhone 17 has limited aperture control, you’ll lean on ISO and shutter speed to dial in the look you want. The goal is to balance noise (grain) and motion blur while keeping enough light on your subject.
When you tweak exposure, you’re deciding how much light your camera collects in that moment. Faster shutter speeds freeze action but let in less light. Slower shutter speeds gather more light but can blur moving subjects. Higher ISO makes the image brighter with more grain. Lower ISO keeps things clean but darker. For night portraits, you want enough light on your subject’s face while avoiding too much grain in the background. Your goal is a clean, legible photo where details aren’t lost in the dark.
If you combine a steady hand or a tripod with a careful ISO and shutter balance, you’ll notice less noise and sharper faces. You’ll get familiar with seeing how your screen’s brightness shifts as you adjust each control. It’s a little like tuning an instrument: small changes produce noticeably better results. With practice, you’ll know which combinations give you the cleanest night shot without staring at your screen for minutes.
How ISO and shutter speed change brightness
You control brightness by changing ISO. Bump ISO up, and your image gets brighter quickly, but you’ll see more grain. Lower ISO keeps things clean but darker. At night you often need a higher ISO to keep faces visible, but not so high that you ruin skin tones with noise. Think of ISO as the image’s sensitivity to light.
Shutter speed is the other lever. Shorter (faster) shutter speeds let in less light, so the image is darker. Longer (slower) shutters stay open longer, pulling in more light and brightening the scene. The catch is motion: a long shutter will blur anything that moves. If you’re shooting a still scene, you can go slower to brighten without much motion. If your subject is moving, you’ll need a faster shutter to keep them sharp, even if the image is a bit darker. Your best results come from testing different pairs of ISO and shutter speed to find what looks right for your situation.
A quick trick: set your phone on a steady surface or use a handheld stabilizer, then start with a mid ISO and a moderate shutter speed. If faces look underexposed, nudge the ISO up first before you push the shutter slower. If you see motion blur on your subject, speed up the shutter and compensate with a touch more ISO if needed. This method keeps the balance between brightness and clarity.
Best manual settings iPhone 17 night shots
Start with a stable base: a tripod or steady surface. ISO around 100–400 for dark scenes, and don’t go much higher unless you need brightness on a very quiet scene. Pair this with a shutter speed around 1/30 to 1/60 second for static subjects; if there’s movement, use 1/60 to 1/125 second to keep things crisp. If you’re shooting people, lean toward 1/60 to 1/125 and raise ISO only if faces look too dark.
If the picture remains too dark, increase ISO a notch first rather than slowing the shutter too much. If you notice grain, lower ISO and try a brighter subject or a steadier stance. For dramatic skies or city lights, you can push ISO to 800 or 1000, but expect more noise. In those moments, keep the subject as bright as possible with careful framing and a steady hold.
Safe manual ranges to try
- Static scenes: ISO 100–400, shutter speed 1/30–1/60 second. Details stay crisp with minimal noise.
- People or moving subjects: ISO 400–800, shutter speed 1/60–1/125 second. Capture expressions while stopping motion.
- Dim scenes with city lights: ISO 800–1600, shutter speed 1/30–1/60 second. Brighten the scene, trim noise in post if needed.
How computational night processing affects results
Computational night processing shapes every photo you take when the light drops. You’re not just snapping; your phone stacks multiple frames, boosts shadows, and reduces noise to reveal what your eye barely sees. The final image can look cleaner and brighter, but it may be a touch softer or stylized. You’ll often get more detail in dark areas, but fine texture can blur if processing is aggressive. Your choice of settings directly affects how much processing your phone does and how natural the result feels.
Because processing happens after the shutter, you won’t always see the final look immediately. A quick preview may shift as frames finish stacking. A steadier hand yields less aggressive merging, preserving texture; in darker scenes, more aggressive merging keeps exposure even but can reduce micro-detail.
Phone software updates matter too. A newer algorithm can change how night shots look. Keep an eye on updates and how they alter results.
What phone algorithms do in Night Mode
Phone algorithms in Night Mode stack multiple frames to create one brighter image. They adjust exposure by combining short and long exposures, align frames to prevent blur, and denoise the final composite. You’ll notice brighter skies, lighter shadows, and more visible textures. The balance is keeping natural color while avoiding an overly processed glow.
Algorithms also decide how aggressively to sharpen edges and reduce noise. Too much sharpening can make surfaces look jagged, while aggressive noise reduction can wash out texture. The best Night Mode finds a middle ground that keeps you recognizable and true to color. Try different light levels to see how each algorithm performs.
Expect a short delay as frames align and merge. If you’re moving, you’ll get more blur because the device stabilizes while processing. A sturdy stand helps keep Night Mode capture crisp.
Pixel 10 night mode comparison 2026 and what to expect
In 2026, the Pixel 10 uses advanced stacking and denoising for cleaner night images. You’ll see improved night-sky color and better brick tones in street scenes. It preserves texture in shadows better than older models, especially when you keep the phone steady. Expect a natural look with less artificial brightness, compared to earlier Pixels.
Compared to other phones, Pixel 10 often favors more accurate color under mixed lighting. Slightly warmer skin tones in low light feel more true to life once you get used to it. When you want dramatic brightness, you can push exposure, but the default is balanced and less noisy. Ultra-high-contrast scenes might not pop as much as with some competing modes.
Day-to-day results: clearer portraits, better texture in sidewalks and clothing, and fewer stray color casts. If you crave airier night skies, you can tweak exposure slightly, but Pixel 10’s strength is consistency and natural shading rather than over-processed glow.
Handheld night-shot tips for sharper photos
You want crisp shots after dark without a tripod. Start with a steady stance: plant your feet, tuck your elbows, and hold your phone close to your chest. When you press the shutter, don’t slam it—squeeze gently or use a 2-second timer. The goal is to keep the phone from shaking during exposure. If you can, lean against a wall or railing for extra support, and exhale as you shoot to minimize shakes. Also, check if your camera has a built‑in stabilizer—this is a big help in night conditions.
Lighting matters as much as technique. Look for a light source you can align with, like a streetlamp or shop window, and angle your shot so the light hits your subject from the side to create depth and reduce noise in shadows. When noise creeps in, raise your ISO only as high as you can tolerate. If your phone offers Night Mode or long exposure, use it cautiously: stay steady or risk blur. Tap to focus on your subject, then lock exposure if possible to prevent hunting mid-shot.
Practice makes perfect. Take quick bursts of the same scene, then pick the sharpest one. Compare results with and without stabilization, and note how small changes—like a slight grip shift or a different angle—improve clarity. For moving subjects, anticipate their motion and shoot slightly ahead to stay crisp. Treat every shot as a test: the more you experiment, the more you’ll learn what your phone can do in low light.
How to steady your phone without a tripod
You don’t always have a tripod, but you can still steady your phone for night shots. Start with your body: stand with feet shoulder-width apart, elbows tucked, and your phone near your chest. This rigid posture minimizes tremor, especially when you press the shutter. Lean into a solid surface like a wall or car door for extra support. If you don’t have a nearby surface, curl your fingers around the phone and hold your breath briefly as you capture. A deliberate, slow breath reduces fidgeting and helps you stay still.
Another trick is to use your environment. Rest your hand on a stable object, or rest your elbows on a railing. If your scene has a bright window, position yourself so light hits at an angle rather than straight into the lens. This improves detail and reduces glare. Some phones offer a long-exposure or night mode—keep the phone still during exposure and use a timer to avoid shake. If you’re alone, place your phone on a flat surface and shoot with a timer or voice command. Small changes add up to big sharpness.
You can also reduce shake with camera settings. Turn on grid lines to help frame and align the horizon. Use the lowest ISO that still gives brightness; higher ISO amplifies shake and noise. If RAW capture is supported, use it for better post-processing control over sharpness and noise. Practice a few steady holds in a row to learn your strongest positions and when you need a surface for support.
Handheld night shots iPhone 17 vs Pixel 10 practical tips
You’ll want practical, side-by-side tricks for both devices. On the iPhone 17, enable Night Mode and let the phone decide the best exposure, then tap to lock focus on your subject and use the exposure slider to brighten or darken as needed. If you’re shooting multiple subjects, try the 2x optical zoom with stabilization on to keep edges clean. The Pixel 10 tends to render slightly brighter images in night mode, so you might need to nudge exposure down to avoid blown highlights. For both, keep a steady stance and use a short burst to capture the moment. If you’re holding still, the phones will stack multiple frames for a crisper result.
Practical tips you can use today: use a timer to avoid touch shake, and avoid touching the screen right after you press the shutter. Shoot with a lower ISO when possible and switch to Night mode for longer exposures when you’re not moving. If you’re in a crowded place, brace your elbows and tuck your phone against your body. When you compare shots later, you’ll notice iPhone 17 may render more natural colors in street lights, while Pixel 10 often shows clearer details in darker areas. Use both cameras if you can and compare results to choose what looks best for your scene. Stay patient and practice with different angles.
Quick handheld checklist
- Steady stance: feet planted, elbows tucked, phone close to your chest.
- Support: lean on a wall or stable surface when possible.
- Focus and exposure: tap to focus, lock exposure, and use a timer if available.
- Lighting: align with a light source, avoid direct glare into the lens.
- ISO and shutter: use the lowest ISO that still gives brightness; avoid long shutter times when moving.
- Night mode and burst: enable night mode if available; take a quick burst and keep the best shot.
- Posture and breath: steady breathing helps your hands stay still during the shot.
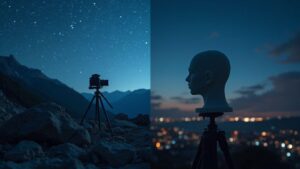
Long exposure and astrophotography basics
Long exposure helps you capture stars and light trails without blurring camera shake. Think of it as giving your sensor more time to collect light, so faint night details pop. The goal is to keep noise down while letting stars shine. Long exposure isn’t magic—it’s technique. Keep your camera steady, use a tripod, and pick a dark sky away from city glow. For star trails, leave the shutter open longer; for pinpoint stars, shorten exposure to avoid blowing out the brightest points. Your fingers are on the dial, but your eyes guide the balance.
This guide provides practical setups for common night scenes. You’ll compare Auto vs Manual Mode: Choosing the Best for 2026 Night Shots on iPhone 17 & Pixel 10 as you decide where to trust the device and where to take control. You’ll also get quick reminders to keep your gear simple and effective so you stay in the moment.
When to use long exposure for stars and light trails
For star trails, set a long shutter and let the sky write its path. If you want crisp star points, cap the exposure and stack shorter frames to reduce noise. Light trails from cars or planes work best with longer exposures that reveal continuous lines. If you’re in windy conditions or with moving foreground subjects, shorter exposures help keep the foreground sharp.
If the sky shows faint nebulas or the Milky Way, push ISO a bit but keep the shutter to a duration that won’t blow out the stars. Use RAW so you can recover details later. A warmer white balance helps stars look natural. Note wind, dew, and battery life—they matter when shooting all night.
Long exposure Pixel 10 astrophotography 2026 considerations
With the Pixel 10, rely on computational features but still use real controls for best results. Longer exposures are great for trails, but avoid pushing ISO too high to keep noise down. Use a sturdy tripod and a remote or timer to avoid shake. Test dark frames if supported to subtract noise later. Keep the lens clean and avoid drastic temperature changes that cause condensation.
For stars, plan a sequence: center a bright target, set a modest exposure, and review. Stack multiple frames to improve signal and reduce grain. Balance light pollution by choosing a dark site or using a light pollution filter if supported. Remember that Pixel 10 processing may apply its own adjustments, so compare RAW results to processed images to decide how much you want to rely on internal algorithms.
Night-shot workflow: shoot, edit, export
You’re about to take night photography from meh to wow. Start with a plan: shoots first, edits second, exports last. In the dark, aim for consistent framing, stable exposure, and clean files you can push in post. Capture raw data, lock in a solid base exposure, and balance ISO and shutter speed. In editing, crop, adjust white balance, and lift shadows without crushing highlights. Export at the right resolution and file type so your image looks sharp on screens or in print. If you follow this flow, your night shots will feel deliberate, not accidental.
Build a repeatable workflow: set up your camera or phone to capture clean data in low light. Use a tripod or steady surface, keep ISO low, and use a longer shutter for motion trails or smooth water. In post, balance exposure, color, and sharpness to keep edits minimal but precise, preserving the scene’s realism.
As you finalize, tidy up your file metadata and maintain a consistent naming system. Export a master version with all layers intact for future edits, ensuring color and detail look sharp whether online or in print. A clear shoot-edit-export loop keeps editing time down and results improving over time.
Why check ISO shutter speed Pixel 10 night photography metadata
You always start by knowing what you captured: ISO, shutter speed, and other settings. Pixel 10 metadata tells you how bright the scene was and how long the camera collected light. If you see grain, the ISO climbed higher; if you see blur, check shutter speed. Metadata helps you learn what to adjust next time so you don’t waste shots. Review patterns: streetlights blowing out at high ISO, or stars fading with too-slow shutter. Use this info to plan better shoots and faster edits.
Your workflow should include a quick data check after every shot. Test a scene with different ISO/shutter combos and compare results side by side. This habit saves time in editing, helping you know which settings yield the cleanest base file. Over time, you’ll build a mental map: where to push exposure, where to protect highlights, and where noise becomes a problem. Metadata becomes your night-school teacher—telling you what happened so you can prevent it next time.
Pixel 10 auto night mode tips for fast edits
Auto night mode can be a lifesaver when you need fast results, but you’ll get quicker wins by knowing its quirks. First, trust Auto Night to pick a base exposure, then fine-tune with manual tweaks for small nudges. If tones appear warmer, adjust white balance early so edits aren’t chasing color later. Next, lock focus on a bright edge in your scene, then let Auto Night do the rest to save time and catch sharper details.
To speed edits, shoot scenes you know well—neon signs, reflections, or city silhouettes—and keep a consistent composition. This consistency makes batch adjustments faster. If you spot noise, a quick luminance push in a few sliders can clean up without destroying texture. With practice, you’ll push the right buttons almost automatically while respecting the scene’s mood.
Fast export settings for web and print
For fast exports, aim for two solid targets: crisp web previews and print-ready files. Export web versions at around 1900–2400 px on the long edge for social posts or portfolios, using sRGB for color compatibility. For print, export at 300 dpi with a resolution matching your print size, and keep a TIFF or high-quality JPEG option for labs. Always export a master version with all layers intact if you’re editing later, and name files clearly so you know which shot is which. Keeping these presets saves time and ensures your final images look sharp wherever they land.

Smartphone Night Photography Enthusiast & Founder of IncrivelX
Vinicius Sanches is a passionate smartphone photographer who has spent years proving that you don’t need an expensive camera to capture breathtaking images after dark. Born with a natural curiosity for technology and a deep love for visual storytelling, Vinicius discovered his passion for night photography almost by accident — one evening, standing on a city street, phone in hand, completely mesmerized by the way artificial lights danced across wet pavement.
That moment changed everything.
What started as a personal obsession quickly became a mission. Vinicius realized that millions of people were carrying powerful cameras in their pockets every single day, yet had no idea how to unlock their true potential after the sun went down. Blurry shots, grainy images, and washed-out colors were robbing everyday people of memories and moments that deserved to be captured beautifully.
So he decided to do something about it.
With years of hands-on experience shooting city streets, starry skies, neon-lit alleyways, and creative night portraits — all with nothing but a smartphone — Vinicius built IncrivelX as the resource he wished had existed when he was just starting out. A place with no confusing jargon, no assumptions, and no gatekeeping. Just honest, practical, beginner-friendly guidance that actually gets results.
Vinicius has tested dozens of smartphones from every major brand, explored dark sky locations across multiple states, and spent countless nights experimenting with settings, compositions, and editing techniques so that his readers don’t have to start from scratch. Every article on IncrivelX comes from real experience, real mistakes, and real lessons learned in the field.
When he’s not out shooting at midnight or writing in-depth guides for the IncrivelX community, Vinicius can be found exploring new cities with his phone always within reach, looking for the perfect shot hiding in the shadows.
His philosophy is simple: the best camera is the one you already have — you just need to learn how to use it in the dark.