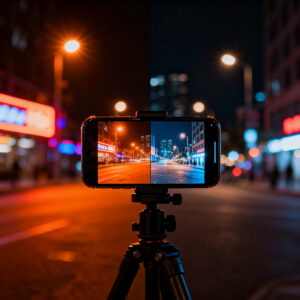
Why your night photos get a green or purple tint
Green or Purple Tint in Night Photos: Causes and Step-by-Step Fix for All Brands is a common issue in low-light photography. This guide explains why night shots can show a green or purple glow and provides clear, brand-agnostic fixes you can apply quickly to make your images look natural again.
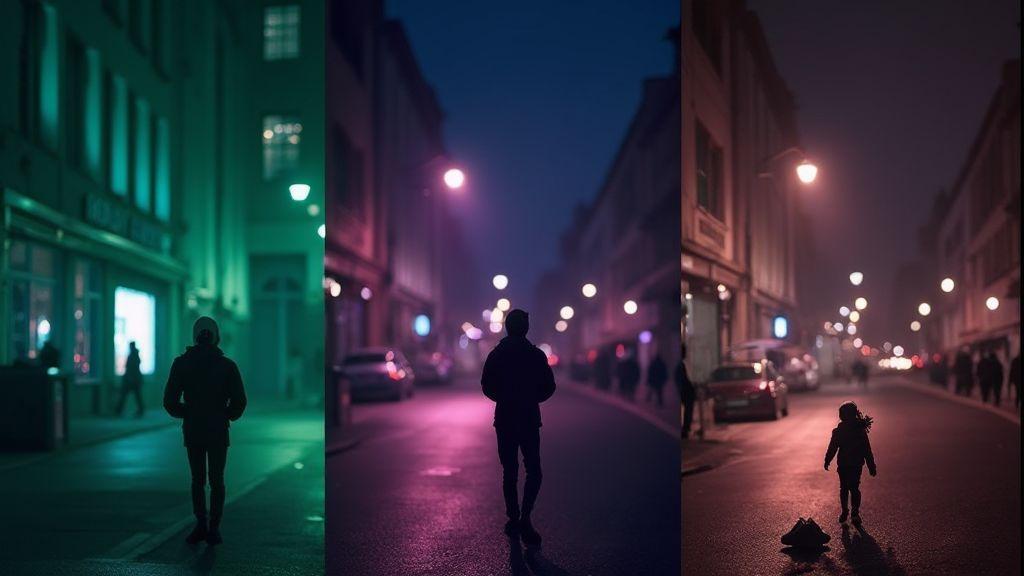
Color shifts happen because your camera has to guess colors in very dim scenes. Mixed artificial lights and shadows throw off white balance, and the camera’s attempts to balance color can produce greens, purples, or blues. You can reduce this by adjusting settings, lighting, or editing after the shot—think of it as tuning a camera like a musical instrument.
Learning the main causes helps you fix it quickly, yielding better night photos you’ll actually want to share. Let’s break down what causes these tints and how you can address them.
White balance issues in night photography
White balance acts like a color filter to keep whites looking white. At night, mixed lights—street lamps, screens, and cars—confuse the filter, causing green or purple hues. Fix this by adjusting white balance or letting the camera auto-adjust in a more uniform scene. If you shoot in night mode, see if you can lock white balance for consistency.
A quick test: photograph a white object under the same lights and compare. If whites look off, white balance is the culprit. Shooting in RAW lets you adjust white balance later without losing detail, giving you control when scenes vary between frames.
Purple tint night photos causes from mixed lighting
Purple tints usually come from mixed light sources—neon signs, LED street lights, and screens—that trip the camera’s color sensors. When blending these colors, a purple cast can emerge. Higher ISO in low light also amplifies color noise and shifts tones toward magenta. To combat this, simplify the lighting in the frame, choose neutrally lit spots, or use a lens hood to reduce glare. Adjust white balance toward warmer or cooler to nudge purple tones away. Editing can help, but capture quality matters first.
How to tell if it is a sensor or software problem
To diagnose, observe patterns across shots. If most photos are grainy or show a consistent color shift, the sensor may be at fault. If only a few shots are problematic, the camera app or processing might be the culprit. Watch exposure: crushed highlights or muddy shadows point to processing, not a bad sensor. Your best bet is to compare multiple samples from different apps and modes to see where the problem repeats. If issues disappear with a different app or mode, it’s likely software.
Another clue is how changes to settings affect the image. If noise persists at low light regardless of ISO, or color casts stay the same across lighting, the sensor may struggle to capture accurate colors. If color shifts or artifacts appear only after saving or uploading, post-processing or compression software is likely involved. Compare textures, such as stars or distant lights, which should stay sharp with proper processing. A persistent soft look or shadow blocks across all apps suggests a hardware issue.
Test consistency across lighting. If you shoot the same scene with the same settings and get different results, software or processing quirks could be at play. If you can reproduce the problem with one app or device profile, you’ve isolated the cause. If it persists across apps, you may be facing a sensor or hardware limitation. Reliability matters more than a single perfect shot.
Test with RAW files and third‑party apps
Shoot RAW if you can. RAW preserves more data, letting you see true sensor behavior without aggressive in-camera processing. Open a RAW file in a third‑party editor and compare to the JPEG the phone saves by default. If RAW looks clean while JPEG is noisy or color-skewed, the issue is software; if both show the same tint or noise, the sensor is the culprit. RAW gives you more latitude to fix problems later.
Next, try a reputable third‑party camera app. Different processing pipelines can reveal whether the stock app over‑sharpens, over‑compresses, or applies harsh noise reduction. If the scene looks better in a third‑party app, you’ve found a software bottleneck. If the problem persists across both stock and third‑party apps, you’re looking at hardware. Compare color fidelity, sharpness, and noise levels side by side. If third‑party apps reduce the tint, software is to blame.
Also test with different white balance presets in RAW and in third‑party apps. If tints persist across apps and presets, sensor or lens color accuracy is off. If changing white balance in one app fixes the tint but not in another, software handling is inconsistent. These checks guide fixes—firmware, app updates, or potential hardware service.
Compare shots under different light sources
Switch light sources and compare. Night photos under street lamps, LED screens, or the moon reveal how the camera handles mixed light. If colors look off or you consistently see a green or purple tint under certain lights, the issue often stems from sensor color processing or software white balance. Note which light yields the most natural skin tones to fine-tune white balance and distinguish sensor vs software causes.
Photograph a neutral gray card or white object under each light. If the gray card stays gray in all lights and apps, the sensor color calibration may be off. If the card is fine in some apps but not others, the issue leans software. Edge detail and highlights can reveal dynamic range limits; patterns of tint across lights point to processing, while inconsistency points to the sensor.
Simple tests to isolate sensor vs app
Run basic, repeatable tests. Use the same scene, frame, and settings across at least two apps. If problems appear in one app but not another, the issue is software. If both apps show the same issue, the sensor or hardware is at fault. Include a RAW test to compare unprocessed data and see how the app alters the image versus the sensor capture.
Also test with and without night mode, if available. If tint changes dramatically with night mode off, you’re seeing software processing or optimization masking a sensor issue. Try manual exposure or ISO settings to see if control improves color accuracy. These checks help you pinpoint fixes.
Quick phone settings fixes you can try now
When night photos look off, you don’t have to wait. You can fix things quickly with settings you already have. Tiny adjustments can yield noticeable improvements—like tuning a guitar for the right tone. Here are practical steps you can try right away.
First, reduce the camera’s reliance on aggressive night processing. Low-light modes often raise ISO or sharpen excessively, adding noise or color shifts. Look for manual or advanced settings to curb this behavior. Keep the image clean and natural, not grainy or overprocessed.
Second, switch to a more deliberate mode. If you’ve been auto, try Pro, Manual, or Night Pro to control exposure time, ISO, and white balance. This steadies color and detail, especially for faces and scenes.
Third, keep stabilization on. If handheld, use a steady surface or tripod. Stabilization minimizes blur and helps the camera lock a true white balance, resulting in crisper, truer colors.
Manually set white balance or color temperature
Setting white balance manually helps keep colors accurate. In low light, phones can drift toward yellow, blue, or green. Start with a common preset like Incandescent or Daylight, then nudge toward warmer or cooler until the scene reads naturally. Use a neutral gray or white object in frame as a reference. If your app lacks WB controls, look for a color temperature option (in Kelvin). Typical starting points: indoor lamps around 3200K–3800K, outdoor lights around 4200K–5500K.
Turn off aggressive night mode or use Pro mode
Night mode can overdo things, boosting brightness and adding processing that creates green or purple tints. If a shot looks odd, switch back to standard or manual modes. Pro mode provides independent control of exposure time, ISO, and white balance. If you must keep Night mode, adjust its strength or use a longer exposure with lower ISO to reduce noise and preserve color. Experiment in test shots to find your sweet spot.
Smartphone night mode green purple correction steps
When a tint appears, turn off aggressive color processing and switch to Pro or Manual. Set white balance to a neutral point, then fine-tune color temperature warmer if greens feel loud or cooler if purples dominate. Test with a neutral subject to verify natural skin tones and fading tint. If the tint persists, capture a second shot with a different exposure or ISO and compare. Small, deliberate changes beat big shifts. If needed, shoot RAW for better post-processing flexibility. Correct color after capture by adjusting white balance and tint carefully; the result should be true-to-life night photos.
When firmware and app updates can fix the cast
Updates often fix green or purple casts in night photos. Firmware and apps frequently include color balance, noise reduction, and white balance improvements. Keeping these up to date prevents many tint problems before they start. Think of updates as regular tune-ups for your camera.
First, updates improve how hardware talks to software, giving your phone fresh instructions for darkness, shadows, and light sources. This can correct misreads that lead to a green or purple tint in night photos.
Second, updates enhance overall image quality beyond color—HDR, exposure, and noise handling all get better with updates. Skipping updates misses a straightforward path to better night photography.
Check for camera firmware and app updates
Open Settings and check for software or system updates. If there’s a camera-specific update, install it. Then check the camera app for an update as well. A single update can fix tint glitches you’ve been dealing with. After updating, test a few night shots. If tint persists, proceed with the other steps, but logs of updates can help identify recurring issues.
Follow brand support for known tint bugs
If a tint problem appears after an update, check your brand’s support page. Manufacturers publish known issues and quick workarounds for green or purple tint in night photos, helping you avoid guesswork. Brand guidance may include compatibility notes with accessories and a timeline for fixes. Use their steps as a baseline to minimize risk.
Firmware update fix green tint camera
If a persistent green tint remains after updates, it may relate to white balance thresholds in firmware. A targeted firmware update can adjust these thresholds to reduce greens in night scenes. After updating, test in dim and streetlight scenes. If tint shifts toward natural tones, you’ve found the fix. If not, explore other steps, but firmware is a common starting point.
How to remove green or purple tint in post
Post-processing can correct stubborn tints. Start with RAW, which preserves color information for accurate edits. Open the RAW file in a preferred editor and focus on white balance. Small adjustments can erase greens or purples more cleanly than editing JPEGs. RAW gives you a neutral canvas to work from.
Use temperature and tint sliders to fine-tune. Temperature shifts warm or cool the image; tint shifts toward green or magenta. Make small adjustments and reassess—the goal is natural-looking colors rather than a dramatic edit. If greens overwhelm, desaturate slightly after correcting white balance. Save a copy to compare with the original.
Use RAW editing to correct white balance exactly
In RAW, set white balance to a neutral target around 5200K–5600K as a baseline, then adjust. If greens dominate, push warmer; if purples appear, aim for neutral or warmer. Use a neutral gray or white reference point to lock WB accurately. Review skin tones and natural objects to confirm realism.
Use temperature and tint sliders to correct purple tint
For purple tint, move temperature toward warm to counter cooler tones, then adjust tint to reduce magenta toward green or balance toward magenta if needed. In night photos, a slight magenta bias can help balance color, but avoid overdoing it. Monitor skies, streetlights, and skin tones for natural results.
Remove green cast night photos smartphone
Green casts often stem from streetlights or sensor quirks. After WB adjustments, target greens specifically with HSL if available: reduce green saturation slightly and lift green luminance to keep foliage visible without shouting green. Recheck WB with a neutral reference and adjust temperature warmer if needed. Save a separate edit to compare with the original.
How to prevent color casts when you shoot at night
To avoid green or purple tints, identify mixed light sources, sensor warmth, and automatic white balance limitations. Lock white balance, stabilize shots, and lower ISO to curb noise. If the scene includes multiple light sources, balance them by choosing a dominant light or a color temperature that suits most of the area. Keep lighting consistent by muting bright, mixed lights in the frame to help your camera lock onto a single color temperature.
With practice, you’ll see fewer odd tints in your images. When a tint appears, pause to adjust white balance and retake. You’ll learn when a scene is too mixed and when to wait for more uniform lighting. Your night photos will feel more natural with these habits.
Use steady shots, lower ISO, and consistent light
Use a tripod or stable surface to keep the frame fixed. A steady shot helps your camera lock accurate white balance and reduces color shifts from shake. Lower ISO minimizes grain that can distort colors. Keep light sources consistent by avoiding abrupt changes in brightness or color within the frame, or choose a scene with one main light. If multiple lights are present, shoot when they’re more uniform to improve color accuracy.
Calibrate color with a gray card or reference photo
A gray card provides a neutral color reference. Shoot the card in the same lighting as your scene, then adjust white balance to match. If you don’t have a gray card, snap a quick reference photo of a neutral object and use that in post or in-camera to fine-tune WB. This habit anchors your colors for consistent results across shots.
Manual color calibration night photos
Manual color calibration puts you in control. Start with a WB preset, then fine-tune temperature (blue toward warm) and tint (green toward magenta). If lighting is mixed, include a neutral gray in the frame to help calibration. This approach helps you maintain accurate colors across scenes rather than chasing auto balance perfection.

Smartphone Night Photography Enthusiast & Founder of IncrivelX
Vinicius Sanches is a passionate smartphone photographer who has spent years proving that you don’t need an expensive camera to capture breathtaking images after dark. Born with a natural curiosity for technology and a deep love for visual storytelling, Vinicius discovered his passion for night photography almost by accident — one evening, standing on a city street, phone in hand, completely mesmerized by the way artificial lights danced across wet pavement.
That moment changed everything.
What started as a personal obsession quickly became a mission. Vinicius realized that millions of people were carrying powerful cameras in their pockets every single day, yet had no idea how to unlock their true potential after the sun went down. Blurry shots, grainy images, and washed-out colors were robbing everyday people of memories and moments that deserved to be captured beautifully.
So he decided to do something about it.
With years of hands-on experience shooting city streets, starry skies, neon-lit alleyways, and creative night portraits — all with nothing but a smartphone — Vinicius built IncrivelX as the resource he wished had existed when he was just starting out. A place with no confusing jargon, no assumptions, and no gatekeeping. Just honest, practical, beginner-friendly guidance that actually gets results.
Vinicius has tested dozens of smartphones from every major brand, explored dark sky locations across multiple states, and spent countless nights experimenting with settings, compositions, and editing techniques so that his readers don’t have to start from scratch. Every article on IncrivelX comes from real experience, real mistakes, and real lessons learned in the field.
When he’s not out shooting at midnight or writing in-depth guides for the IncrivelX community, Vinicius can be found exploring new cities with his phone always within reach, looking for the perfect shot hiding in the shadows.
His philosophy is simple: the best camera is the one you already have — you just need to learn how to use it in the dark.