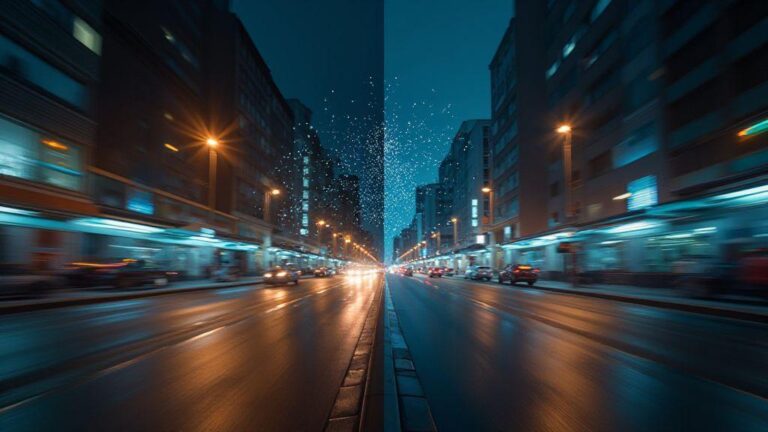
Why Night Mode Looks Different on Every Phone Brand (iPhone vs Samsung vs Google)
How your camera sensor size changes night photos
Your camera’s sensor size is the biggest driver of how clean your night photos look. A bigger sensor catches more light, so you see less noise and more detail when the sun goes down. You’ll notice smoother skies and crisper edges on brighter stars or streetlights. If you’ve ever compared two phones with different sensor sizes, you’ll see that the one with the bigger sensor generally produces a more natural, less grainy image at night. This matters most in low light where every photon counts.
Because a larger sensor gathers more light per pixel, you can keep a reasonable shutter speed without boosting ISO too high. That means fewer motion blur and less color distortion from long exposures. You’ll also get better dynamic range, so bright lights don’t blow out while shadows still hold some detail. In plain terms: bigger sensors give you more usable night photos you’ll actually enjoy sharing.
But size isn’t everything. A phone with a huge sensor can still underperform if its lens or software isn’t helping. You’ll want a balance: a sensor big enough to drink up light, paired with smart processing that keeps colors accurate and noise low. In practice, pick phones that show clean night shots, not just ones labeled as night mode.
Why pixel size matters in low light
Pixel size is the square area each pixel covers on the sensor. Bigger pixels mean more light per pixel, so your images stay brighter with less noise. In the dark, that translates to clearer stars, lighter shadows, and colors that don’t look muddy. You’ll notice less speckly grains and more true-to-life tones when you zoom in a little.
Smaller pixels can be faster and pack more total pixels into the same sensor size, but they drink light less efficiently. That can show up as noise, color speckles, and a flatter look in night mode. If your phone uses many tiny pixels, it might rely more on software tricks to save the photo. You’ll see that in images that look processed rather than real.
If you care about night shots, look for phones that keep a healthy pixel size while still delivering good overall image processing. You’ll get better midtone detail and less smudgy color in your night photos.
camera sensor lens impact on night mode
Your lens helps decide how much of the night scene reaches the sensor. A sharp, well-coated lens reduces reflections and flare from street lamps. That means you get cleaner highlights and truer colors, not blown-out circles of light. The lens also determines you can open wide enough to gather more light without too much distortion at the edges.
A fast lens (one with a wide aperture) lets in more light in the same moment. In night mode, that extra light helps the camera keep ISO lower and shutter speeds reasonable. You’ll see less grain and smoother transitions from dark to light areas. However, a great lens must be paired with solid autofocus and noise control; otherwise, you’ll still fight blurry edges in tricky scenes like a moving crowd or passing cars.
So, when you’re choosing a phone, consider both sensor size and lens quality. A great lens can unlock more of your sensor’s potential in night mode, giving you brighter, clearer photos that feel less like a compromise.
Check sensor specs before you buy
Before you settle on a phone, peek at the sensor size in millimeters and the pixel pitch. A bigger sensor with larger pixel pitch generally means stronger night performance. Cross-check reviews that compare real-world night shots, not just marketing talk. Look for examples in low light and at night under street lamps to see how the camera handles highlights and shadows. You’ll want a balance between sensor size, lens quality, and the phone’s processing power to get true, natural-feeling night photos.
Why lens aperture and optics matter at night
Your night photos live or die by the light that reaches your sensor. The glass and the lens opening shape that light, so you can actually capture a scene instead of a dark blur. When you’re out after dark, every little advantage in optics translates to clearer details, less grain, and better color. Think of your phone’s camera like a tiny window: the bigger the window and the cleaner the glass, the more you see through it.
The first thing you notice is how the lens gathers light. If the glass has flaws or scratches, you’ll notice reduced contrast and odd color shifts. If the opening is too small, you’ll miss light and end up with noise and dim pictures. Your eye can compensate for a lot, but your camera relies on those tiny optical choices to give you a clean night shot. That’s why the quality of glass and how well the lens is designed matters as soon as the sun goes down.
Finally, optics aren’t just about brightness. They affect focus, flare, and edge sharpness. High-quality glass reduces distortions at the edges of the frame and keeps colors accurate in low light. You’ll see scenes that feel more natural, not washed out or smeared. In short, solid lenses keep your night photos crisp, true to life, and far more enjoyable to share.
How wider apertures let in more light
A wider aperture is like opening a bigger door for light to come in. When you set your phone to a larger f-stop number, you’re actually reducing the amount of light that hits the sensor. Wait, you want more light, so you pick smaller f-stop values, which let more light in through the bigger opening. That extra light helps you shoot in darker places without pushing ISO too high or slowing down the shutter too much.
With more light, you get two big wins: less grain and faster shutter speeds. Less grain means cleaner pictures, especially in scenes with shadows. Faster shutter speeds freeze motion, so you don’t end up with blurry faces at a late-night party. You’ll notice smoother skin tones and more visible details in the background, like window frames or streetlights, rather than a muddy blob.
But wider apertures aren’t magic. They can make the depth of field shallower, which means parts of your shot may blur more easily. You’ll want to be mindful of focus points, especially if there’s a lot going on in the foreground. If you’re shooting a person in a dim street, a wider aperture can blur the background nicely while keeping the face sharp—when you nail the focus.
Role of stabilization and glass quality
Stabilization helps you keep that bigger aperture’s benefits without trembling hands ruining the shot. With optical or sensor stabilization, you can hold your phone steadier, so you don’t need to push the shutter as hard. That means you can use a slower shutter without turning the image into a blur. Stabilization lets you capture clearer night portraits and city scenes, even in low light.
Glass quality matters here, too. Higher-quality glass reduces micro-movements and lens flare, so your night photos look more natural. Cheaper glass can introduce halos around bright light sources and soften edges. When you pair good stabilization with strong glass, you’ll notice your night shots feel sharper, with colors that stay true rather than blowing out in highlights.
Prefer phones with larger apertures
If you want to see the night clearly, prioritize phones with larger apertures. A wider opening means more light hits the sensor, so you don’t have to crank up ISO or slow the shutter as much. You’ll get brighter, cleaner images with less noise in darker scenes. Bigger apertures also support better autofocus in low light, helping you capture people and scenes without constantly adjusting.
Look for models that advertise f/1.8, f/1.6, or even wider. These aren’t just numbers; they’re your doorway to night photos that feel alive. Pair that with solid stabilization and quality glass, and you’ll notice a real difference when you’re out at night. You’ll also see better contrast and more accurate colors in street scenes, cafes, and dimly lit rooms.
Why Night Mode Looks Different on Every Phone Brand (iPhone vs Samsung vs Google)
Night mode isn’t identical across brands. Each manufacturer uses different algorithms, processing power, and sensor behavior that change the final image. You’ll find some phones lean toward warmer tones, others punch up contrast, and some smooth textures differently. If you’ve ever compared close-up shots side by side, you might have noticed these quirks. That’s why it matters to know what your phone’s lens and aperture can do, and to test shots in similar lighting to understand what you actually get.
The core idea is this: each brand builds its own night mode processing stack. That starts with how the camera sensor captures light, then how software cleans up shadows, reduces noise, and preserves color. Your phone’s goal is to make a night photo look natural, but the path it takes changes. That means two phones in the same room can produce noticeably different results.
If you want consistency, you’ll learn to shoot with an eye for a brand’s strengths. You might prefer iPhone’s clean daytime-like look, Samsung’s punchy highlights, or Google’s balanced color. Knowing what to expect lets you adjust exposure or hold steady longer so your night shots match your taste.
How your phone’s ISP and chipset shape night mode
Your night photos depend on more than the lens. The ISP, or image signal processor, is the brain behind every pixel you see in the dark. It decides how long to expose, how bright to make shadows, and how much noise to remove. If your ISP is strong, your phone can squeeze detail from a dim scene without washing out highlights. When the ISP is slower or less capable, you’ll notice grainy textures and muddy color. This matters because night shots are a tight balancing act between light and noise, and your ISP controls that balance.
The chipset drives speed and efficiency. A faster processor lets the phone run more complex calculations without stuttering. When you point the camera at a dark street, the ISP quietly stacks several frames. The chipset must keep up with those stacks so you don’t get flicker or lag between frames. If your chipset is sluggish, you’ll see delays, and the final image may look softer. In short, a faster chip means you get cleaner results faster, especially in motion or changing light.
Understanding these parts helps you pick a phone for night photography. If you want crisp nights with clear stars or sharp streetlights, look for a strong ISP and a speedy chipset. They’re the quiet heroes that shape how your night mode looks before you even touch the shutter.
What an ISP does in low light processing
The ISP takes raw data from the sensor and turns it into a usable image. In low light, it reduces noise and preserves detail where shadows hide. It decides how much color to keep in dim areas and how to avoid color shifts when light is scarce. This is where your night mode becomes a picture you actually recognize, not a gray blur.
The ISP also controls exposure bracketing and fusion decisions. It blends multiple frames into one. That blending helps you get a brighter photo without overexposing bright spots. If the ISP isn’t strong, you’ll notice awkward transitions between frames or halos around lights. A good ISP smooths those edges and makes textures more natural, like brick walls looking like brick and not mush.
When you’re shooting in night mode, the ISP’s choices show up in the final image more than you expect. You’ll notice how the color palette stays true and how the darks don’t become muddy. That’s the ISP doing its quiet work, so you can trust what you’re seeing on screen.
Neural engines and speed affect stacking
Neural engines speed up the heavy lifting in night mode. They run the machine-learning parts that decide which pixels to align when you stack shots. The faster the engine, the more precise the alignment and the better the final texture. If your neural engine is slow, you’ll see softer edges and more artifacts in the merged image.
Speed also matters for how many frames the phone can stack. A quicker engine lets you stack more frames without sacrificing real-time preview. That means you get brighter shots with less noise, even when your subject is moving slightly. If the engine can’t keep up, the phone might drop frames or degrade the merge quality, leaving you with a grainy result.
With a capable neural engine, your night photos feel crisper and more accurate. The differences aren’t huge at first glance, but you’ll notice better contrast and cleaner lights, like a city at night where the lamps glow without blooming.
Faster chips enable better multi-frame merges
A faster chip lets you combine more frames smoothly. You can capture more light without increasing blur, giving you a cleaner night shot. The result is brighter, richer, and closer to what your eye sees in the moment.
How computational photography night mode differences appear
When you snap at night, your phone uses a lot more math than you might expect. Your images depend on how the camera stacks multiple frames, reduces noise, and brightens shadows. This is why two phones can look so different in the same dark scene. You’ll notice color shifts, different contrast, and sometimes skin tones that look off. The core idea is that each phone’s software decides how to combine data from many frames to make one bright photo. That choice—how many frames, how much denoising, and how it sharpens—changes the final look. You can think of it like cooking with the same ingredients but different recipes.
Next, think about exposure choices. Night mode isn’t just longer shutter time; it’s smarter stacking. Your phone may pull more light from shadows or clamp highlights to prevent blown-out lamps. The result? Images that feel warmer, cooler, or more dramatic depending on the algorithm. If you compare two phones side by side, you’ll notice one preserves more detail in the dark stairs, while another serves up a smoother, almost dreamy background. It’s not randomness; it’s a program deciding what to keep and what to smooth.
Finally, the look you get depends on how aggressively the software edits textures. Texture smoothing can erase noise but also steal fine detail. Some cameras boost micro-edges to sharpen glass and metal, others keep grain for a more film-like vibe. Your identity in the shot—your skin, your clothes—will appear differently because of those hard choices the software makes to balance light, noise, and realism. It’s why your night photos won’t all look the same, even if you point at the same scene.
Smartphone night mode algorithms explained
Your smartphone uses a pipeline with several steps that matter most. First, it captures multiple frames, sometimes with slight shifts. This helps the camera gather more light than a single shot. Then, the software aligns those frames so they line up as one scene. Misalignment creates ghosting or blur, so this step is critical. After alignment, the phone blends the frames to reduce noise. The blend is where a lot of the mystery lives: you’ll get a cleaner image but with choices about how much smoothing to apply.
Next, the phone estimates depth and lighting to decide how to render shadows and highlights. That estimation guides tone mapping and color rendering. If the device thinks a lamp is very bright, it may clip those highlights to avoid blowing them out. If it thinks the shadows are too dark, it might pull detail from midtones to brighten them. The end result is a look that reflects the device’s personality as much as the scene itself. You’ll notice some phones render cooler blues in night skies, others punchy warm tones.
The final stage is noise reduction and sharpness. The software decides how much detail to keep and how smooth to make it. Too much smoothing, and you lose texture; too little, and the image can look grainy. Your personal preference matters here, because some people prefer a crisp, almost digital look, while others want a softer, more cinematic feel. This step is where you’ll see the biggest difference between devices with the same scene.
Why different AI models change the look
Different AI models are trained on different data and goals. If a model was trained mostly on indoor lighting, it will guess colors and brightness in a night street differently than one trained on city nights. Some models prioritize skin tones, others emphasize architectural lines or reflections. That means the same scene can end up looking warmer on one phone and cooler on another. You’ll notice this in things like neon signs, car headlights, and building glass.
Another factor is how aggressively the model tries to reduce noise. Some AI engines smooth more to hide grain, which can blur fine textures like leaves or brick textures. Others keep texture sharp, making every little edge stand out, including the noise. The choice affects mood: a soft, painterly night or a crisp, documentary-style night. Your eye picks up these cues, and that’s why you’ll see distinct personalities across brands.
Finally, the models’ handling of motion can change the look. If you’re shooting a moving subject or a flickering light, some AI will prioritize stable exposure over perfect color, which can give a strange glow or motion blur in your image. These model decisions are why two phones may produce different color casts in the same scene.
Why different AI models change the look
The same scene can look very different because each model has its own rules. Different training data makes the model notice colors and brightness in unique ways. Some models emphasize natural skin tones, others prefer punchy colors to grab attention. You’ll see this in how skies turn out blue or purple, or how streetlights look more amber or white.
Additionally, models differ in how they balance noise reduction and detail. A model that smooths a lot will look cleaner and less grainy, but you lose fine texture. A model that leaves more texture will show more grain and micro-details. You’ll feel the difference when you zoom in on a brick wall or a tree. The software’s goal guides your photos’ final vibe more than you think.
A last piece is color science. Some AI engines push vivid colors to look exciting; others aim for true-to-life tones. This choice can make the same photo feel friendly and warm on one phone and cool and clinical on another. The bottom line: the model you’re using shapes not just brightness, but mood and realism.
Software decides much of the final image
What you see in night mode is mostly software, not pure camera hardware. The algorithms decide how many frames to stack, how aggressively to denoise, how to sharpen, and how to color the scene. Because of this, the same lighting can render differently on iPhone, Samsung, or Google. You are looking at a blend of sensor data and software taste.
That’s why you might love one device’s night shots and not another’s. The software’s choices about exposure shaping, noise handling, and color rendering directly affect your photo’s feel. Your best move is to test a few phones side by side and pick the look that matches your eye. Remember: why Night Mode looks different on every phone brand (iPhone vs Samsung vs Google) is because each brand trains and tunes its own recipe for night photography.
How exposure stacking and HDR change brightness
Exposure stacking and HDR are like teamwork for night shots. When you take multiple frames and blend them, you can push brighter parts without overdoing the darks. You’ll notice your photos have more detail in the lights and shadows, not a washed-out look or an image that’s TOO dark. In practice, exposure stacking adds up the light from several frames, increasing brightness where it matters while keeping noise low. HDR, meanwhile, blends different exposures into one image so the bright areas stay clear and the dark areas gain texture. The result is a photo that feels closer to what your eye saw, not just a bright screen with blown-out highlights. If you’re curious about the vibe, think of HDR as giving you a cleaner canvas where both neon signs and alleyways share the spotlight.
With the right balance, you’ll see less grain and more clarity in night scenes. Exposure stacking reduces noise because you’re averaging many frames rather than pushing a single capture to its limits. HDR protects against harsh glare by keeping highlights in check while lifting the shadows enough to reveal details. You get a brighter scene overall, but the brightness is distributed more naturally across every part of the image. If brightness feels uneven, tweaking the stacking count or HDR strength can help you fine-tune the result. It’s about finding the sweet spot between too bright and too dim, so your photo feels real, not staged.
In everyday use, you’ll notice the difference when you compare a single long exposure to an HDR or stacked shot. You’ll see more balance, with streetlights readable and sky still visible. The key is to experiment: more frames can increase brightness but may slow processing and introduce motion blur if things move. Fewer frames can be smoother but less bright. Your goal is a crisp, lively night photo where the bright spots shine without dulling the rest. That’s the core of how exposure stacking and HDR change brightness.
Exposure stacking HDR night mode
Exposure stacking in night mode catches more light by combining several shots. You’ll see the scene brighten without turning the whole image milky. The camera aligns frames so stars, signs, and car lights stay sharp while noise drops. This makes your night photos feel closer to real life, not a glossy poster. When you enable HDR within night mode, the camera picks the right blend of exposures to keep both dark corners and bright highlights readable. The result is a photo with depth, where you can spot textures in the sidewalk and definitions in the clouds or sky.
In practice, you’ll notice two big wins: less grain and better overall exposure. Exposure stacking reduces noise by using many frames, so you don’t have to push a single frame to the limit. HDR helps prevent blown-out lights by balancing bright areas with darker areas. If your subject moves—even a little—the stacking can struggle because the camera can’t perfectly line up every frame. That’s where you’ll see ghosting or a slight blur. You’ll want to stay relatively still or choose a shorter exposure stack to minimize motion problems. It’s all about matching your scene to the right mode and frame count.
For casual shots, night mode with HDR is a quick win. You get brighter roads, readable signs, and less noise, all without a lot of fiddling. If you’re chasing ultra-clean photos, you might lock in a lower ISO and a modest stack, then review the result. The key is to understand when to let the camera stack more frames and when to back off to avoid blur. That balance keeps your images bright and true-to-life.
How timing and motion affect stacking quality
Timing and motion are the silent deal-breakers in exposure stacking. If everything stays still, you’ll get a clean composite with smooth brightness. If people walk through the frame or cars move, you can get ghosting or double images where something isn’t aligned. You’ll notice this in storefronts with moving signs or pedestrians in the frame. The fix is simple: plan your shot, ask for a moment of stillness, or choose a shorter stack so motion blur doesn’t ruin the blend.
Motion also affects how quickly the camera can finish stacking. If you wait for too long while the scene changes, the camera has more work aligning inconsistent frames. That can lead to artifacts or odd brightness shifts. You’ll want to keep your subject steady and avoid long exposure stacks when your scene is busy. Sometimes, a quick burst with a smaller stack gives you a usable result with fewer motion problems. Your best bet is to pick a scene with limited movement and steady hands.
If you’re outdoors at night, you can embrace small motions to add life while staying sharp. A parked car’s taillights in a still frame can blend nicely, but a moving bike can blur. Understanding this helps you decide when to use exposure stacking or HDR, and how many frames to stack. It’s all about reading the moment and choosing the right timing for the best brightness balance.
HDR choices make photos brighter or softer
HDR choices can push brightness up or soften the look. If you want bright highlights without harsh edges, pick a gentler HDR setting. This keeps lights readable while preserving texture in shadows. If you love contrast and a punchy vibe, a stronger HDR boost will push brightness into the scene, but you risk losing subtle detail in bright spots. The trick is to test different levels and see what matches your scene and taste.
Your phone’s default HDR style often leans toward a balanced look, which suits most street scenes. If you’re photographing a skyline, a stronger HDR might help you preserve the glow of the city lights without washing out the sky. For interior shots with lamps and reflections, a softer HDR can keep the ambience without burning the highlights. The right choice depends on what you want the viewer to notice first: the glow of the lamps or the texture in the walls and floors.
How noise reduction and sharpening trade-offs shape detail
In night photography, your phone has to decide how much to smooth noise and how much to sharpen edges. Noise reduction removes grain but can blur fine lines, while sharpening brings back edge contrast but can make noise stand out or create halos around objects. You’ll notice that when noise reduction is strong, your sky looks smooth but the texture of brick walls or leaves vanishes. When sharpening is heavy, tiny specks of noise can look like chalky sparks, especially in dim streetlights. The key is finding a balance that makes your main subject pop without turning the whole image into mush.
Your brain sees detail where contrast edges meet. If noise reduction is too aggressive, those edges fade and your photo feels flat. If sharpening is too aggressive, edges become separated from their surroundings, and you get that gritty, artificial look. In practice, think of it like editing a charcoal drawing: you want clean lines but not a complete wipe of texture. A good approach is to let the camera handle noise to keep the scene smooth, then add a touch of sharpen to recover edge clarity without exaggerating noise.
When you’re testing, try two versions: one with lighter NR and moderate sharpening, and another with stronger NR but gentler sharpening. Compare how the night sky looks and whether the city textures stay believable. Your eyes will tell you which combo keeps the scene crisp without shouting processed.
How sharpening adds contrast but creates artifacts
Sharpening increases contrast along edges, which makes everything pop against the dark backdrop. The effect is immediate: signboards glow a bit more, windows stand out, and you read textures faster. But artifacts can sneak in. You might notice halo effects around bright highlights or a ring around fine lines, especially when parts of the image have different brightness levels or noise remains pronounced.
If you want preserving natural textures, keep sharpening to the minimum needed to separate objects from the night. A gentle touch often feels more realistic than a bold punch. When a picture looks too crispy, pull back a notch or two; if it looks washed out, a little extra sharpening can help, but stop before you introduce halos. The right amount makes your photo feel sharp and alive, not manufactured.
Think about a street corner with a neon sign. A light touch of sharpening emphasizes the letters without turning the glow into a harsh glow halo. In a dark alley with bricks, light touch helps edges stand out but keeps the rough texture intact. You’ll learn what enough looks like by practice and comparing several captures side by side.
Tuning balance alters grain and clarity
Your balance choice shifts grain visibility and edge clarity. Bump NR a notch and you’ll notice less grain in the sky, but possibly a softer wall texture. Lower NR reveals more grain but keeps fabric textures and fine details intact. If you’re chasing realism, aim for a mid point where the grain is present but not overwhelming, and edges stay crisp without halos.
A practical workflow: shoot in RAW if you can, start with a moderate NR and sharpening, and adjust per scene. Keep an eye on sky areas where grain can become obvious, and on bright signs where halos might appear. With time, you’ll learn how your specific phone brand handles these controls in different night scenes.
How color temperature and white balance set the mood
When you snap at night, the light around you acts like a mood setter. Color temperature is how warm or cool the scene feels. A warm tone, like orange streetlamps, makes you look cozy and inviting. A cool tone, like blue neon, can feel calm or eerie. Your phone uses different sensors and settings to pick up those tones, and that choice changes the whole vibe of your photo. You’ll notice this most when you compare a lit doorway or a car’s headlights—the colors shift based on the balance you choose or your phone chooses for you.
Your camera’s white balance is the dial that tells the sensor what true white should look like in that moment. In plain terms, it tries to keep whites from looking too yellow or too blue. If you want the scene to feel warm and intimate, you’ll push toward a lower temperature. If you want the night to feel crisp and modern, you’ll push toward a higher temperature. Getting this right is like tuning a radio so the music isn’t muddy; the right balance makes every other color pop in the scene.
The final mood comes from how you combine temperature and white balance with the available light. If streetlights are yellow, you might cool the white balance a notch to keep faces from turning muddy. If you’re near a bright sign, you may warm up the white balance so the sign doesn’t wash out your subject. The mood you want guides these tiny, precise choices, and the better you tune them, the more your night photos feel like a scene you’d actually want to hang on a wall.
color temperature white balance night mode
Night mode uses a different color temperature approach to brighten shadows without washing out highlights. You’ll see the scene lift with more detail in darker areas, but the color fingerprint still shows through. Your phone’s default white balance may shift slightly to maintain natural skin tones under low light, which means some colors lean warmer or cooler than you expect. If you adjust this manually, you’ll notice how a warmer setting makes streetlights look more orange, while a cooler setting keeps the scene closer to how your eye sees the night air.
If you rely on night mode alone, you’ll often get softer edges and more light in the darker corners, but the hue can drift. That drift happens because automatic choices try to balance brightness first, then color. Your best move is to set a deliberate white balance that matches the scene: a warm balance for a cozy alley, or a cool balance for a neon-drenched corner. This control keeps your subject’s skin from turning weirdly green or pink, which can happen when the camera tries to squeeze brightness from chaos.
How AWB errors shift hues and warmth
Auto White Balance (AWB) tries to guess the right color cast, but it isn’t perfect in every night scene. When AWB misreads the light, colors can tilt. Your subject may look too blue in a warm-lit room, or too orange under a cooler street. You’ll notice it most when your jacket and the wall behind you don’t match the actual colors you remember from your eyes. These misreads shift warmth and hue, making photos feel off.
Understanding this helps you chase accuracy rather than rely on luck. If you see a yellowish cast on everything in a tunnel, that’s AWB thinking the overall light is warmer than it is. You can fix it by nudging the white balance toward cooler temperatures or by locking a manual setting before you shoot. The moment you stop hoping AWB will be perfect and give it a deliberate color target, your night photos gain clarity and honesty.
Color tuning defines final atmosphere
Color tuning is your secret weapon for setting the scene after the shutter clicks. You choose how warm or cool to render skin tones, street lights, and the shadows. That final tweak defines whether your photo feels intimate, spooky, or vibrant. When you adjust color tuning with purpose, you’re painting the mood you want your viewer to feel. It’s not just about making things look natural; it’s about creating the story you want to tell in a single frame.
Night mode processing pipeline iOS Android differences
Your iPhone processes night shots with a pipeline that blends multiple frames. It stacks images to reduce noise and then uses software to pull light from darker parts without making colors look too washed out. This can give you bright, clean shadows and smooth skies, but sometimes it can lean toward a softer overall feel. Expect subtle grain suppression and careful color preservation.
On Android, the pipeline changes by brand and even by model. Some Samsung phones push contrast and saturation a bit more, which makes lights pop but can clip highlights. Google phones often aim for neutral color and natural brightness, trading some punch for realism. The core idea is the same—stack frames, reduce noise, and refine details—but the balance point shifts.
Your takeaway: iOS leans toward clean, bright results; Samsung emphasizes pop and contrast; Google seeks natural, balanced tones. When you compare, you’ll see these tiny decisions in every scene, from street lamps to starry skies.
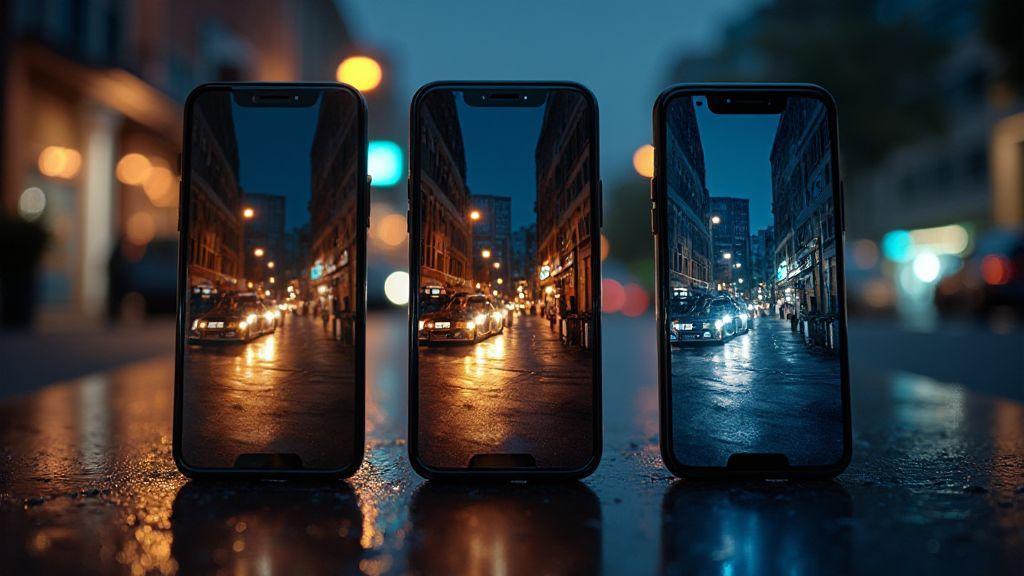
iPhone vs Samsung vs Google night mode comparison
In iPhone night mode, you’ll notice softer contrasts and a clean finish. Shadows come up smoothly, and colors stay closer to what your eye saw. If you shoot a moonlit street, the lights won’t scream, and you’ll get a calm, almost editorial look. That predictability helps if you want consistent results across shots.
Samsung night mode often boosts brightness and saturation a bit. The photo can feel more dramatic—lights gleam, skies stay dark, and textures pop. If you want a city vibe with energy, Samsung tends to deliver it. But you might see a little clipping in bright lights or greener greens in foliage.
Google night mode aims for balance. Colors stay true enough, and the exposure feels natural. You’ll get good detail in both shadows and highlights without leaning too far to either side. If you want a reliable, versatile baseline, Google’s approach is comfortable.
Platform APIs and updates change processing
Platform APIs and software updates can nudge how night mode works. A single iOS or Android update can tweak how many frames are stacked or how aggressively noise is reduced. If you notice a change after an update, that’s not your camera—it’s the software getting smarter or adjusting the balance.
Keeping your phone’s camera updated matters. Updates can fix color shifts, improve skin tones, or adjust how highlights are preserved. Your best bet is to test a few night shots after every major update to learn the new look.
How your settings and apps influence night results
When you shoot at night, your choices matter a lot. Your camera app, burst mode, and exposure tweaks can mean the difference between grainy chaos and a clear night scene you’re proud of. If you turn on Night mode, you’re letting the phone stack light over several frames; if you don’t, you’re asking for more noise. Your decision to use a tripod or steady hand also changes results—small movements become big blurs in dim light. In short, you control how much light your sensor captures, and you control how long it spends polishing that light.
Your phone’s built-in tools guide the final look, but your apps can bend it further. Third-party apps with raw capture, manual controls, or dedicated night filters give you more levers to pull. If you want brighter stars or sharper edges, you’ll tweak ISO, shutter, and white balance. But beware: higher ISO brings noise, while longer shutter speeds risk blur if you’re not perfectly still. The right combo depends on your scene and your patience.
Finally, remember that processing happens after the shutter. Some apps push contrast to punchy, others keep colors closer to reality. Your screen’s brightness and color balance can also trick you into thinking a photo is better or worse. Trust your eyes, not a single preset. The more you understand your settings, the more you can dial in shots that look natural instead of canned.
Low light image processing iPhone Samsung Pixel
Your phone brand shapes how it processes night images by default. iPhone tends to prioritize smooth tones and less noise, sometimes sacrificing a hint of texture for clarity. Samsung often leans toward punchier colors and a brighter result, which can look vivid but slightly artificial. Google Pixel usually aims for a balanced, natural look, with strong night algorithm work behind the scenes. Each approach affects sharpness, grain, and color more than you might expect.
If you want to compare, shoot the same scene in Night mode on each device and look for texture in shadows, star points on the sky, and edge clarity around lights. You’ll notice iPhone may blur tiny details less aggressively, Samsung may keep colors vivid, and Google may keep natural tones with clean noise reduction. Your choice of app and settings can amplify or mute these tendencies, so pick based on what you value: realism, color pop, or crisp scenes.
To optimize, start with the default night mode and then adjust exposure and ISO carefully. Try slightly lowering ISO on Samsung to reduce grain, or using longer exposure on Pixel with a tripod for brighter skies. If you hate processed looks, switch to RAW capture if your app supports it and post-process on your computer for true control.
How scene detection switches algorithms automatically
Scene detection is the phone’s automatic brain. It looks at what you’re shooting and decides how to stack frames, how much noise to reduce, and how bold to make colors. Night scenes with lights, water, or moving people push the phone to switch to a different algorithm than a dark landscape. You’ll notice differences in tone, sharpness, and texture as the phone decides whether to emphasize glow or preserve detail.
Sometimes you’ll see a scene split happen mid-shot. The phone may start in one mode and switch as the lights change, like a street turning from bright signs to deep shadows. This automatic switch can surprise you, but it’s usually meant to improve clarity without you lifting a finger. If you don’t like the result, switch to manual mode or lock exposure to keep the same algorithm running for the entire shot.
Your choices plus the scene detection work hand in hand. If you want a consistent look across a sequence, use manual controls or lock exposure. Otherwise, you’ll get a natural, evolving result that changes as the scene shifts.
Your choices and apps change the final photo
Your final photo isn’t just what your camera sees; it’s how you shape it. Using a tripod, choosing RAW, and testing different exposure levels all tilt the result toward your preference. Programs that let you control white balance, ISO, and shutter speed give you more predictability. If you want a specific vibe, pick an app that supports your preferred workflow and stick with it, so your night shots stay consistent.

Smartphone Night Photography Enthusiast & Founder of IncrivelX
Vinicius Sanches is a passionate smartphone photographer who has spent years proving that you don’t need an expensive camera to capture breathtaking images after dark. Born with a natural curiosity for technology and a deep love for visual storytelling, Vinicius discovered his passion for night photography almost by accident — one evening, standing on a city street, phone in hand, completely mesmerized by the way artificial lights danced across wet pavement.
That moment changed everything.
What started as a personal obsession quickly became a mission. Vinicius realized that millions of people were carrying powerful cameras in their pockets every single day, yet had no idea how to unlock their true potential after the sun went down. Blurry shots, grainy images, and washed-out colors were robbing everyday people of memories and moments that deserved to be captured beautifully.
So he decided to do something about it.
With years of hands-on experience shooting city streets, starry skies, neon-lit alleyways, and creative night portraits — all with nothing but a smartphone — Vinicius built IncrivelX as the resource he wished had existed when he was just starting out. A place with no confusing jargon, no assumptions, and no gatekeeping. Just honest, practical, beginner-friendly guidance that actually gets results.
Vinicius has tested dozens of smartphones from every major brand, explored dark sky locations across multiple states, and spent countless nights experimenting with settings, compositions, and editing techniques so that his readers don’t have to start from scratch. Every article on IncrivelX comes from real experience, real mistakes, and real lessons learned in the field.
When he’s not out shooting at midnight or writing in-depth guides for the IncrivelX community, Vinicius can be found exploring new cities with his phone always within reach, looking for the perfect shot hiding in the shadows.
His philosophy is simple: the best camera is the one you already have — you just need to learn how to use it in the dark.