Why Instagram’s 2026 Algorithm Crushes Your Night Photos (And How to Beat It)
How the Instagram 2026 algorithm update affects your night photos
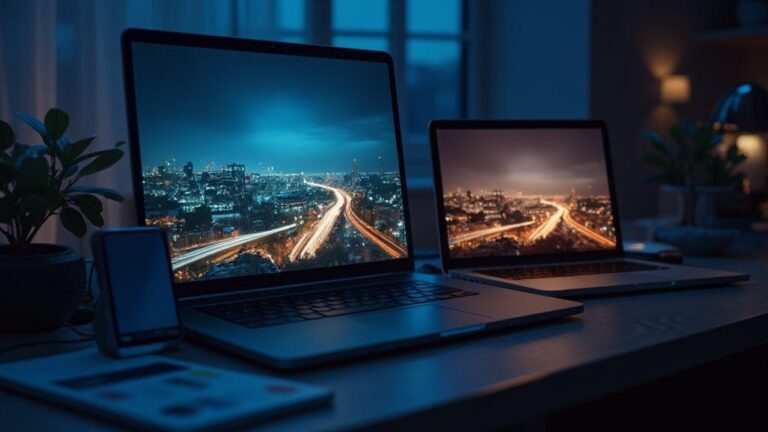
Your night photos are a special moment you want to share, but the 2026 algorithm treats them differently. This update focuses on signals you can control, not just the pretty pixels. You’ll notice that clarity, brightness, and contrast are not the only things that matter; how you engage with your audience matters more. If you want your night shots to reach more people, you need to optimize captions, timing, and how you prompt interactions. Your goal is to make people stop, like, comment, and share, not just scroll past. This approach aligns with Why Instagram’s 2026 Algorithm Crushes Your Night Photos (And How to Beat It).
The update also rewards consistency. If you post the kind of night photo you love and you show up with fresh content regularly, you’ll build trust with the algorithm. Your followers will expect your style, and the algorithm will bug you less about why your posts aren’t getting traction. So plan a simple rhythm: a few high-quality edits each week, a few story posts to keep people around, and a shared moment that invites replies.
Finally, authenticity wins. The new rules push for natural engagement rather than forced virality. You’ll win by showing your real process—how you picked your scene, what you adjusted in editing, and what you learned. Stories and carousels that tell a little tale perform better than single, perfect shots. Be honest, be helpful, and your night photos will travel farther.
What signals make low light images rank lower for you
Low light images get punished when your audience doesn’t engage quickly. If your post sits with no likes, comments, or saves in the first hour, the algorithm may quietly bury it. You should aim for a burst of early engagement: ask a question in your caption, invite opinions about your settings, or prompt people to share their own night photo tips. This initial spark signals you care about conversation, not just pretty pixels.
Your editing choices can hurt or help. Over-processed lights, heavy grain, or obvious fake light can make viewers skim and scroll. Keep your edits natural and let the scene breathe. If your image looks noisy, mention in the caption how you worked with a difficult light and what you’d do differently next time. Real stories and practical tips keep people around longer, and that boosts your ranking.
The content format matters too. A single image might underperform a carousel or a short video where you show your editing steps. If you provide a before-and-after sequence or a quick reel about your night shoot, you give the algorithm more signals: longer dwell time, more saves, and more comments. Diversify how you present your low light work to keep the feed curious about your next post.
How night photography engagement Instagram influences your reach for you
Engagement is your strongest lever. When you prompt conversation, you push your reach higher. Try What’s your go-to night edit? or Which setting would you try here—long exposure or tripod HDR? People will answer, and their replies count as engagement. The more you respond, the more the algorithm sees you as active and worth boosting.
Another key is community signals. If you reply to comments thoughtfully and invite others to share their tips, you create a positive loop. People feel seen, and their friends join in. Engagement isn’t a one-and-done moment; it’s an ongoing dialogue. Your captions can invite this by offering a tiny lesson or a bite-sized puzzle about your editing choices.
You’ll also win with content that travels. If a night post starts a discussion, it’s more likely to be saved and shared. That ripple effect tells the algorithm your content matters beyond your direct followers. Aim for content that people want to re-share—like a quick, useful night photography hack or a relatable behind-the-scenes moment from your shoot.
Key algorithm facts to watch
- The algorithm values early engagement, consistent posting, and authentic conversations over flashy but empty hype.
- Formats that keep people on the app longer (carousels, reels, and short videos) typically perform better than single static posts for night photography.
- Honest storytelling about editing and shooting processes increases saves and shares, which boosts reach.
Edit techniques to boost Instagram visibility for night shots
You want your night shots to pop where it counts: on Instagram. Start by recognizing that editing isn’t just about making things pretty—it’s about making details readable and colors true, even in low light. Use a clean, controlled workflow: contrast boosts the subjects you care about, global warmth can set the mood, and a touch of clarity helps edges feel crisp. If you keep your edits focused, your night photos won’t feel muddy or over-processed. Remember, the goal is to guide the viewer’s eye to your subject, not to win an editing award.
Your edits should be deliberate, not dramatic. Begin with gentle adjustments that preserve natural tones. Increase exposure just enough to reveal details in the shadows without blowing out highlights, then back off highlights so stars or light sources still feel real. Add a touch of saturation or vibrance to keep colors from drifting gray, but avoid oversaturation that makes the scene look fake. Finally, check the overall contrast so the image reads at a glance on a mobile screen. By keeping these steps calm and measured, you ensure your night shot looks like reality, just a better version of it.
If you normalize your workflow, you’ll see your engagement rise. When you edit for Instagram visibility, you’re crafting a visual story that feels immediate and honest. A consistent style—like a slight lift in shadows paired with cool tones—helps followers recognize your work quickly. Your audience will spend more time on your post and scroll less if the edits feel cohesive with your feed. That consistency is what Instagram’s algorithm notices.
Use noise reduction and sharpening to make your shot readable
Noise can hide the details that grab attention. Start with moderate noise reduction to smooth out grain without erasing texture in the sky or buildings. Don’t wipe out star specks or the subtle texture in fabrics by overdoing it. After you reduce noise, apply a small amount of sharpening to restore edge clarity. Focus on edges around your main subject—windows, silhouettes, or street lights—so they feel defined, not harsh. If you’re seeing halos around lights, back off sharpening a notch and smooth with a light mask. Your goal is a readable image where the night elements feel intentional, not noisy or blown out.
Think of noise reduction and sharpening as a duet: one cleans, the other defines. You’ll often see two easy mistakes: over-softening night skies or over-sharpening to the point of halos. Avoid them by checking at 100% zoom on your phone and a laptop screen if possible. If a sky still looks speckled after noise reduction, try a selective brush to leave the sky alone and keep textures on the ground sharp. The right balance will keep readers focused on your subject instead of the grain.
Balance exposure so you don’t wash out dark details in your image
Exposure balance is where your night photo finally feels right. If you brighten too much, you’ll wash out dark textures—like building bricks or tree silhouettes—which kills mood. Instead, push exposure slightly to uncover shadow detail while keeping highlights intact. Use a graduated adjustment so the brightest lights don’t steal the show. If some areas still look flat, tweak contrast subtly to bring back depth without adding artificial HDR-y rings.
A practical tip: check your histogram. If it tilts too far to the right, you’re blowing highlights; too far left, you’re losing shadows. Adjust until the graph sits in a balanced arc. When you post, keep the overall look cooler in tone for night scenes; this helps blues and teals pop and signals a real night vibe to viewers. Your goal is clarity with mood, not a bright daytime replica.
Simple edit checklist to follow
- Start with exposure and contrast to protect shadows and highlights.
- Apply gentle noise reduction, then subtle sharpening to define edges.
- Tweak color balance toward cool tones for night ambiance.
- Fine-tune saturation to keep colors true, not punchy.
- Review details by zooming in; fix halos or noise in key areas.
- Check your grading consistency with your feed’s style.
Optimize low light photo settings before you post
You know those night shots that look flat when you post them? You’re not doomed. First, you adjust the basics before you touch the edits. Turn on your camera’s grid to line up the horizon and keep subjects straight. Use a lower ISO only as needed to avoid grain, and drop your shutter speed or raise your aperture so lights don’t become a muddy blur. If you’re shooting with a phone, switch to Pro or Night mode and lock exposure on your main subject. When you preview your image, look for blown highlights in bright signs or windows and tucked shadows around people’s faces. If you can, shoot a quick second frame with a steadier hand or a small tripod—your future self will thank you. These steps keep your night photos crisp and ready for clean edits, not a noisy mess you have to fight later.
Next, think about your composition. Night photography shines when you guide the eye. Use leading lines from streetlights or storefronts to pull attention toward your subject. Frame people a little off-center for a more dynamic look. If you have motion, let it blur intentionally in the background while keeping your subject sharp. This balance makes your post feel intentional, not accidental. Finally, shoot in RAW if you can; you’ll have more levers to pull during editing without sacrificing quality. You’re setting yourself up so your later tweaks feel natural, not forced, when you’re posting to Instagram.
When you’re ready to post, do a quick sanity check on color balance. Night scenes often lean blue or orange due to street lighting. If you can, adjust WB (white balance) a notch toward warmer tones to bring back natural skin tones, then tame any color cast that makes your photo look fake. You don’t want your night portrait to glow neon. A subtle, accurate color feel makes your audience believe in the moment, not a processed filter. With the right base settings, your edits have room to enhance rather than correct. This method aligns with Why Instagram’s 2026 Algorithm Crushes Your Night Photos (And How to Beat It).
Resize and compress images the right way for Instagram
Your image size matters. If you post a huge file, Instagram will compress it anyway and you lose detail. Resize your photo to a clean, predictable dimension—ideally around 1080 pixels on the long edge. This keeps your image sharp without bloating the file. Then choose a reliable compression level that preserves detail but trims the file size. A good target is under 1 MB for quick loading with minimal quality loss. If you’re posting multiple shots in a carousel, keep the files similarly sized for a consistent experience.
Next, watch the file type and color profile. JPEG is usually your friend for photos, but keep quality high with low compression. Avoid PNG for full-resolution night photos because it swells the file size. Make sure you’re saving with sRGB color space; Instagram uses it, and your colors will look closer to what you expect. Also double-check metadata. Stripping unnecessary metadata can shave a few kilobytes without affecting appearance, and it makes uploads a bit faster. You want speed and clarity, not a file that fights you at upload.
When you export, test a couple of crops. Instagram crops to a square in some views, so ensure the important details stay visible in both landscape and square formats. If you’re unsure, export two versions: a 4:5 portrait for feed emphasis and a square for profile thumbnails. Your goal is to keep the subject intact so your viewer isn’t surprised by a cut-off face or an edge that vanishes in the feed. Your process should feel repeatable, not like a last-minute scramble.
Preserve natural color and contrast to help low light photo optimization
Color should feel real, not flashy. You want a natural skin tone and clear contrast so your photo reads well on any screen. Start by correcting white balance to get rid of the blue cold or orange warmth from street lamps. After that, tweak contrast carefully—don’t crush shadows or blow out highlights. A touch of clarity can sharpen edge detail without making the scene look artificial. If you’ve got color noise in the shadows, reduce it gently so the picture remains smooth and believable.
Next, keep highlights in check. Night scenes often have bright windows or streetlights that can wash out. Lower the highlights a notch and lift the shadows a little to recover texture in people’s faces. You want depth where your subjects stand out from the background, not a flat gray. If you’re editing with a preset, personalize it. presets can save time, but you’ll thank yourself for dialing in warmth and contrast to match the real scene. The goal is a natural look that still feels punchy when scrolled quickly. This approach aligns with Why Instagram’s 2026 Algorithm Crushes Your Night Photos (And How to Beat It).
When you’re done, preview the photo on mobile. Instagram is mostly mobile, so what looks good on desktop can read differently on a phone. If the image still seems off, small, targeted tweaks beat big overhauls. Your audience will notice the effort without feeling overwhelmed by edits. Keeping colors honest helps your night shots connect with viewers who want to feel the moment, not just see a pretty Snap.
Export settings that improve upload quality
Export at around 1080 pixels on the long edge, with a high-quality JPEG (quality 85–90). That balance keeps detail sharp but file size friendly for fast uploads. Set color space to sRGB and disable any unnecessary metadata to trim weight. If you’re working in RAW, you’ll want to compress minimally, then save a copy for the web with the exact settings you just read. Your uploads should feel polished without the dramatic delays some people see when a file is too big or poorly encoded.
Finally, run a quick test before you post. Open the exported file on a phone and a tablet if you can. If it loads fast and looks right across devices, you’ve cracked the code. If not, tweak the quality or resolution slightly and re-export. Small adjustments now save you from chasing issues after you publish. You’re aiming for clean uploads that keep your night photos looking true to life. This aligns with Why Instagram’s 2026 Algorithm Crushes Your Night Photos (And How to Beat It).
Caption strategies for night photos that get more comments
You want your night photos to spark more conversations, not just likes. The key is captions that invite people in and feel easy to read. Start with a hook that hints at the moment you captured: a street light glow, a window reflection, or a quiet alley that told a tiny story. Keep sentences short and punchy, and mix in a few bold words to catch the eye. Use a friendly tone as if you’re telling a story to a friend over coffee. If you share a tiny detail about your process, your followers will feel closer to you and more likely to reply. The goal is to create curiosity, not a full lecture. When your photo lands, your caption should feel like a handshake—confident, inviting, and a little playful.
Next, guide your audience to reply. Ask a direct question that’s easy to answer and tied to the image. You might ask what color stands out most in the scene, or what kind of night moment they’d like to see next. Make it one clear question so people know exactly what to reply. You can also offer two quick options to vote on in comments, which nudges people to engage. Always acknowledge replies with a quick, warm response: a nod to their observation or a tiny extra detail. That back-and-forth keeps the conversation alive and tells your followers you care about what they say. This approach is in line with Why Instagram’s 2026 Algorithm Crushes Your Night Photos (And How to Beat It).
Finally, keep your caption readable on mobile. Break lines to create a rhythm, add a few relevant emojis to emphasize mood, and bold a key idea to anchor the post. Save a few go-to prompts for when you’re short on time: What city at night would you shoot here? or Which light source do you notice first? These fast prompts make posting effortless and consistently inviting. If you want more comments, avoid long walls of text. Short, bright, and personal wins in the night-feed game.
Ask a clear question to make your followers reply to you
Your question should be simple and specific. Ask about a detail you can see in the photo, like Which window light would you follow first in this scene? or What color stands out most to you in this shot: blue, amber, or neon pink? A single, crisp prompt is easier for people to answer quickly. You’ll see more replies and faster conversations because there’s no guesswork. When you get a reply, drop a quick comment back. Acknowledge their choice and add a tiny, relatable thought, like Nice pick—that glow feels magical, right? This small back-and-forth signals you’re present and values your community.
Keep the prompt relevant. If your photo shows a rainy street, ask, Do you love rain-night vibes or city neon more? If you’re in a quiet alley, try, Which shadow in this shot tells the bigger story? You’ll get more comments when questions connect to the mood you’ve created and the details viewers can actually see.
Use short stories and emojis to hold attention on your feed
Short stories pull people in fast. Start with a one-sentence vignette: I waited for the bus, and the streetlamp whispered hello. Then add a line that invites a reaction: What’s your most memorable streetlight moment? Use emojis to set tone and pace, but don’t overdo them. A couple of well-placed emojis can guide the eye and signal mood—a sparkles emoji for magic moments, a rain cloud for drizzle, a streetlight for warmth. The trick is balance: emojis should highlight key ideas, not overwhelm.
Keep each beat tight. A mini-story works best in three short lines: setup, moment, and question. If you’re sharing a tiny triumph or mishap, you’ll sound relatable, and people will want to reply with their own tiny stories. The result isn’t just a comment; it’s a small conversation that makes your night photo feel alive.
Caption formula you can reuse
- Hook: a quick, vivid line about the night moment.
- Detail: one or two specifics you noticed in the frame.
- Question or prompt: invite a reply directly tied to the image.
- Sign-off: a warm, human close that feels like you.
Example: Streetlight whispers in amber. I waited as the rain paused. What color draws your eye first in a night shot? Share your pick below. You can swap details or questions, but keep the flow: hook, detail, prompt, close. This template keeps captions consistent and easy to recreate when you’re posting from your camera roll at midnight.
Hashtags for night photography that actually reach fans
You’re aiming to pull in people who love night shots, not just random scrolls. Use hashtags that capture the vibe you create after sundown. Think about the mood, the city lights, and the moment you’re sharing. By mixing precise terms with broad ones, you’ll attract both niche fans and general photography lovers. The goal is for your post to surface in feeds where night imagery belongs, not lost in a sea of daytime pics. When you craft your tags, you’re telling the algorithm exactly what you’re delivering: a night photo you’ve edited to glow, not just snapped in the dark.
Mix niche and broad tags to help your discovery
Your first move is a smart combo. Pair a few ultra-specific tags like #BrooklynNightShots or #LongExposureCity with broader ones like #NightPhotography or #UrbanLights. This keeps you visible to people who search for the exact place or technique and also to those who hunt general night vibes. If you’ve got a recognizable style, tag it too—things like #CinematicNight or #MoodyNightEdit can become your signature. Use variations that focus on mood, color, and technique so you catch multiple search threads at once. The more angles you cover, the more chances your post has to land in the right hands.
Add location and community hashtags so local fans find you
Local is powerful. Add the city or neighborhood to help nearby fans and venues find you fast. Try tags like #NYCNight or #SoHoPhotography to anchor your work to a place. Include community tags that photographers in your area share, like #NYCPhotoCommunity or #QueensNightPhotography, so you appear in local collabs and meetups. If you shot at a landmark, drop a tag for that spot too—people love tracing scenes to familiar places. This isn’t just about visibility; it’s about building a local street-team who cheer your edits and come to your events.
How image metadata affects Instagram ranking for your photos
Your night photos aren’t just about what you see; they’re about how Instagram understands them. When you add metadata, you’re giving Instagram a map of your shot: where it was taken, what device you used, and when the light changed. This helps the app categorize your image with similar posts and show it to people who care about night scenery, city lights, and street photography. If you skip metadata, you’re making Instagram guess, and guesses can miss the people who would love your work. By being deliberate with metadata, you can improve your reach, engagement, and the chances your photo lands in local and interest-based feeds. Think of metadata as the backstage crew that helps your star photo shine in the right theater.
Your goal is to create a story Instagram can easily place in the right scene. When your metadata lines up with your content, the platform can connect you to night photography communities, local audiences, and people browsing by location. This isn’t about tricking the system; it’s about giving accurate signals so your photo isn’t buried under generic shots. For example, a city-night skyline with precise time and location helps the app show your photo to users who scroll through Night or City tags near your city. You’ll notice more meaningful saves, shares, and comments when the metadata matches your image’s vibe. The better your signals, the more Instagram understands what your post is truly about.
To make metadata work for you, keep it honest and organized. You’re enriching your post with details you’d want a friend to know about the shot: where you stood, what gear you used, and when the light changed. That clarity helps Instagram’s algorithms group your photo with similar light, color, and mood. It also improves accessibility because descriptive data can help search and recommendation systems. When you approach metadata with intention, you’ll see your night photos surface to the people who appreciate the glow of street lamps, reflections on wet pavement, and long exposure trails. Your job is to ensure the signals you send are precise and aligned with the image you’re sharing.
Add location metadata to help local discovery of your night shots
Location data is your map to local discovery. When you tag a nearby landmark or your city, you’re telling Instagram where the magic happened. This is exactly what helps locals and nearby travelers find your work during their own night hunts. You don’t need to flood the metadata with every pin drop; a clear, single-location tag that matches the photo’s setting is plenty. If you’re shooting a busy downtown corner or a quiet riverside, a precise tag helps your post appear in local feeds and city-specific searches. Your night vibe becomes more relatable to people scrolling through their hometown or a place they’re visiting soon.
Location data also boosts authenticity. Your audience can feel the scene in real time when they know where you shot it. It makes your storytelling stronger and your edits more meaningful because the place and moment line up. You’ll notice more saves and replies from people who recognize the setting or want to visit the spot themselves. Just keep it accurate; exaggerating a location can backfire and erode trust. You want readers to feel the journey you took to capture that glow, not a pretend postcard. Your night photos will gain a stronger local presence with honest, well-placed location metadata.
Quick metadata steps to apply
- Rename your file with a descriptive, scene-focused title.
- Ensure EXIF data includes camera, exposure, focal length, and location if possible.
- Add a precise location tag in the caption and metadata when you post.
- Review your settings to keep location and time data intact during export.
Alt text and accessibility tips to boost visibility for your night photos
You want your night photos to reach more people. Good alt text helps everyone, including people who use screen readers. It also boosts your search results. By describing what’s in your image clearly, you help search engines and readers understand your photo fast. You’ll see more people finding your work when you pair great visuals with thoughtful alt text. Keep your descriptions specific, and keep the focus on what matters in the shot—the lights, the scene, and the mood.
Accessibility is more than a checkbox. When you write alt text that paints a quick picture, you’re inviting readers to connect with your photo before they even click. You’ll improve engagement because readers know what to expect. If your image shows a city street with neon reflections, your alt text should mention the glow, the rain-slick pavement, and the motion of passing cars. That clarity helps your content feel inclusive and trustworthy, which your audience will notice.
Think of alt text as a tiny guidebook for your image. You’re showing, not just tagging. The better you describe, the more likely someone who can’t see the screen will feel like they’re walking through your scene with you. That shared experience can lead to longer reads, more shares, and higher chances of your night photos being discovered and enjoyed.
Describe the scene clearly so screen readers and SEO pick it up
Your description should answer the basics: what’s in the frame, where you are, and what mood you captured. Start with the most important elements—night sky, city lights, street, or a landmark. Mention colors that pop, like electric blue or warm amber, and note motion if it’s part of the shot. This helps screen readers convey a full picture and helps search engines match your image to related searches.
Don’t cram every detail in. Keep it concise but vivid. Phrases like a quiet street at midnight with rain-slick pavement and neon signs reflecting on puddles tell a story without overwhelming the reader. If you include people, note actions or expressions briefly, for example: a lone cyclist under a streetlight. The key is accuracy and clarity—no guesswork. You want someone to get the vibe immediately, even before they click.
Include relevant keywords naturally without stuffing your alt text
Place a small, natural keyword in your alt text when it fits. For example, weave in phrases like night photography in the city or neon reflections after rain. Don’t force keywords into every sentence. The goal is readability, not search bot bait. If your image features a famous landmark, mention it only if it’s relevant to what’s visible and helps context. Keep the tone conversational and true to what you shot.
If you use a series of photos, you can vary your wording slightly while keeping the core description intact. This helps avoid repetitive alt text across multiple images and gives each photo a unique hook for search engines and readers alike. Always maintain honest representation—your audience will notice when you overstuff or mislead.
Alt text template you can copy
Alt text template: Night photography of a [scene element] in [location], featuring [color/lighting details], [weather condition], and [any motion or mood], captured at [time or setting].
Copy-ready example: Night photography of a rain-soaked city street in downtown Seattle, featuring neon blue and amber reflections, soft drizzle, and a lone cyclist under a streetlamp, captured at 11 PM.
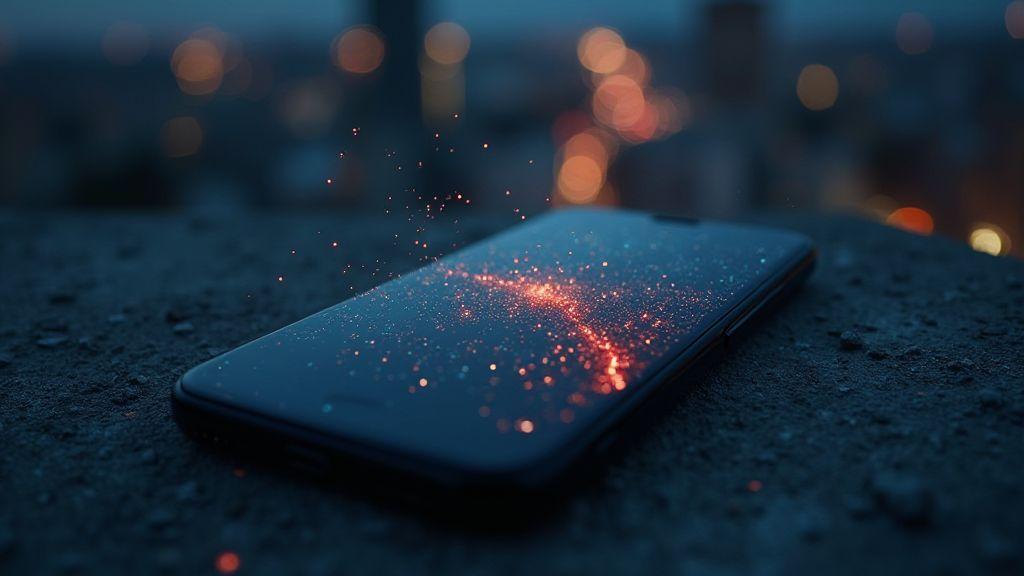
Why Instagram’s 2026 Algorithm Crushes Your Night Photos (And How to Beat It)
Your night shots deserve to shine, even with the new rules. The 2026 algorithm favors posts that grab attention quickly, keep viewers watching, and invite saves and shares. That means bright previews, clear visuals, and captions that add context without slowing people down. Use bold colors, striking contrasts, and a clear focal point to hook early. You want users to pause, not scroll past. This aligns with Why Instagram’s 2026 Algorithm Crushes Your Night Photos (And How to Beat It) by emphasizing rapid engagement and value-added captions.
Pair your visuals with thoughtful alt text that supports accessibility and helps your post surface in discoveries. Your caption should give a quick story or tip that adds value without turning into a novel. Encourage engagement with a simple question or a call to action. If you show a night scene with reflections, ask, What’s your favorite neon color to shoot under rain? Short prompts win. Stay true to your vibe, test a few approaches, and iterate based on what your audience actually clicks on and saves. This is a practical application of Why Instagram’s 2026 Algorithm Crushes Your Night Photos (And How to Beat It) in real posting.
Remember, consistency beats hype. Post regularly, keep a recognizable style, and learn what works for your audience. If a certain angle or location resonates, do more of it. Night photography is about mood as much as technique—let your voice, your edits, and your subject matter align. With clear alt text, accessible descriptions, and a straightforward post that honors the moment you captured, you’ll beat the algorithm while staying real to your craft. This is the essence of Why Instagram’s 2026 Algorithm Crushes Your Night Photos (And How to Beat It).
Best posting times for night photos to catch active followers
You want your night photos to shine when your audience is awake, not just when you snapped them. Think of it like handing a flashlight to your friends when they’re awake and scrolling—your post then becomes easy to find and hard to miss. The best posting times aren’t random; they’re when people are already online and looking for something to see. Use real cues from your audience: comments, likes, and when your posts tend to get the most attention. Schedule your night shots to appear during those windows, and you’ll see more eyes on your work without waiting for luck. This strategy echoes the principles in Why Instagram’s 2026 Algorithm Crushes Your Night Photos (And How to Beat It), which stress timely engagement and consistent rhythm.
Your posting plan should match real life, not a rumor. If your followers are spread across time zones, find common wake times across those zones and target them. You can also pair your most striking night photos with captions that invite engagement, like What would you shoot next in this spot? Quick questions pull people in and boost early activity. Remember, early momentum matters: when your post gets activity in the first hour, the platform is more likely to show it to more people.
Consistency beats surprise every time. If you post at slightly different times, your audience will learn your rhythm and adjust. Keep a core window where you reliably share your best night shots—even if it changes a bit with seasons. This steady pattern signals that you’re active and worth following for fresh, nighttime content. This is consistent with the Beat-It guidance in Why Instagram’s 2026 Algorithm Crushes Your Night Photos (And How to Beat It).
Post when your audience is awake, not just when the photo was taken
Your photo’s dream run starts when your audience is scrolling. You may capture an amazing night scene at 2 a.m., but most of your followers are awake between 7 p.m. and 11 p.m. Your goal is to align your posting with their routine, not your shooting time. If you post during their prime hours, you’ll ride the wave of daily activity instead of fighting against it. A simple trick is to mirror your editing pace with your posting pace: trim the wait between final edits and posting so you don’t miss the peak window. This is in line with the strategies outlined in Why Instagram’s 2026 Algorithm Crushes Your Night Photos (And How to Beat It).
Test a few time slots on a regular basis. Try posting on weekdays at different hours and note when engagement climbs. Your audience’s awake window can shift with holidays, events, or local routines. By staying flexible and tracking results, you’ll pinpoint the sweet spots where your night photos get the most like, share, and comment momentum.
Test weekday vs weekend times and track night photography engagement Instagram
Weekdays often see a steadier flow of active users, while weekends can bring bursts or quiet spells depending on your niche. You’ll need to compare: does a Friday night photo spark more comments than Tuesday? The quickest way is to keep a simple log: date, time posted, engagement (likes, comments, saves), and a quick note on what the image shows. Over a few weeks, patterns emerge. You’ll notice certain themes—like city lights on weekends or serene night skies on midweek—that perform better with your followers. Use those insights to schedule future posts and keep your night photography visible when it counts. This aligns with the timing discipline you’ll find in Why Instagram’s 2026 Algorithm Crushes Your Night Photos (And How to Beat It).
Track engagement not just in likes. Save counts, shares, and comments reveal intent. A post with many saves often means people want to revisit your scene later, a good sign for long-term reach. If a post underperforms, adjust the time, caption, or call to action and rerun the test. Small tweaks compound into big wins over time.
Time-testing routine for better reach
Create a simple routine: pick two or three time slots you’ll test for a month. Post a night photo in each window, keeping your captions similar so you’re comparing apples to apples. At the end of each week, tally the numbers and pick the top performer. Then shift a small percentage of posts into a slightly different hour within that top window to push for even better reach. This steady, data-driven approach turns guesswork into a clear path to catching active followers.
Engagement tactics for low light images to beat the algorithm
Your night photos can shine, even when the feed feels crowded. The key is to make your post irresistible before anyone scrolls away. Start by choosing a strong thumbnail that clearly shows your subject in the dark. Your caption should promise a story or a quick tip, not just a description. Use bold words to stress the big win: crisp stars, natural glow, or hidden details. When you present a tiny, real moment—a streetlight you noticed, a friend’s grin in low light—you create a pull that gets people to stop, read, and react. Remember, your goal is to spark curiosity and emotion in under a few seconds. This aligns with Why Instagram’s 2026 Algorithm Crushes Your Night Photos (And How to Beat It) by emphasizing quick engagement and value.
Your photos need a clear value hook. Tell viewers what they’ll learn or feel by swiping or watching. If you edited the shot, share a brief before/after note so followers see the effort you put in. Add a call to action that’s specific, not vague: double-tap if you’ve seen this color before, or comment your favorite night memory. Tags matter too. Use a couple of precise, location-based tags and a relevant topic tag to join a tiny, engaged conversation instead of a broad, noisy one. Consistency helps, too—post at times your followers are most active and keep your tone steady so people recognize your work.
Your post should feel exclusive and personal. Open with a short, punchy line that asks a relatable question or shares a quick win. For example: Did you know night shots pop more when you pull the ISO down and let the light glow? Your audience will feel like you’re coaching them, not selling. That connection makes people more likely to comment and save your post for later, which signals quality to the algorithm. If you can, show a tiny moment of your editing journey—one slider you touched and why—so followers learn without feeling overwhelmed.
Use Stories and Reels to prime your followers before posting
Prepping your audience with Stories and Reels is a smart move. Post a quick Story showing a behind-the-scenes glimpse of your night shoot—your tripod, the street scene, or a glimpse of your screen with the edits. Keep it short, friendly, and visually coherent with your post so people feel a then-and-there connection. Use a clear, bold sticker or text like Night Shoot Prep to grab attention, and add a poll or question to boost interaction before the main post goes live. When you keep the vibe tight and genuine, your followers will be primed to engage deeper when the post lands.
Reels give you a bigger stage. A 15- to 30-second reel can introduce the mood, show a quick edit montage, or reveal a clever technique you used for night shots. You should lead with your strongest frame, then cut to 2–3 quick shots of the edits, finishing with a bold takeaway. Include a caption that promises a practical tip, not just a compliment. End with a direct prompt like Save this for your next night shoot or Comment your favorite glow in a city scene. The goal is to build momentum so that your main post pops with a ready-made audience.
Stories should feel like a conversation, not a broadcast. Share one or two questions about night photography to invite quick replies, and respond fast. If you can, tag a location or a small business you shot around; it builds community and helps your post surface in local searches. When your followers see your Stories and know you’re active, they’re more likely to support your main post with shares and comments, boosting exposure before the feed algorithm weighs your content.
Engage back fast in the first hour to increase your post’s momentum
In the first hour, you’re setting the pace for the algorithm. Reply to every thoughtful comment with a warm, specific reply that adds value, like a quick tip or a tiny anecdote from the shoot. Acknowledge questions, thank people for their kind words, and keep the conversation moving. Quick, genuine replies feel human and push more people to join the chat, which signals that your post is worth pushing higher. This strategy reflects the timing and engagement emphasis of Why Instagram’s 2026 Algorithm Crushes Your Night Photos (And How to Beat It).
If you notice a few early commenters are from your close-knit circle, reach out to them with a DM that says thanks and invites them to share their own night-photo tips. Personal touches create loyalty and bring more authentic engagement in future posts. Remember to like meaningful comments and gently steer conversations toward topics you want more of—like gear, settings, or editing tricks—so your audience learns consistently from you.
Timing matters. If you see a lull in comments after the first wave, post a quick follow-up Story or a mini Reel answer to a common question you received. This keeps your momentum alive and signals to the algorithm that your post is still active. Fast, friendly, and relevant replies make your audience feel seen, and that feeling translates into more saves and shares.
Quick engagement play to run each post
Right after you publish, drop a simple, high-contrast question in your caption: Which glow in this shot would you try next time? or What’s your favorite night light trick? Keep it direct so people can answer in one or two words. Pin a comment early with a tip or an invitation to share their own night-photo struggles. Pinning helps early interactions stay visible, nudging more people to join the conversation.
Encourage saves and shares with a practical prompt: Save this to reference when you shoot at night, or Share this with a friend who loves night photography. A small prompt like this can boost your post’s reach as saves and shares are strong signals to the algorithm. Stay light and helpful—your goal is to make the viewer feel like they’re getting a tiny win from engaging with you.

Smartphone Night Photography Enthusiast & Founder of IncrivelX
Vinicius Sanches is a passionate smartphone photographer who has spent years proving that you don’t need an expensive camera to capture breathtaking images after dark. Born with a natural curiosity for technology and a deep love for visual storytelling, Vinicius discovered his passion for night photography almost by accident — one evening, standing on a city street, phone in hand, completely mesmerized by the way artificial lights danced across wet pavement.
That moment changed everything.
What started as a personal obsession quickly became a mission. Vinicius realized that millions of people were carrying powerful cameras in their pockets every single day, yet had no idea how to unlock their true potential after the sun went down. Blurry shots, grainy images, and washed-out colors were robbing everyday people of memories and moments that deserved to be captured beautifully.
So he decided to do something about it.
With years of hands-on experience shooting city streets, starry skies, neon-lit alleyways, and creative night portraits — all with nothing but a smartphone — Vinicius built IncrivelX as the resource he wished had existed when he was just starting out. A place with no confusing jargon, no assumptions, and no gatekeeping. Just honest, practical, beginner-friendly guidance that actually gets results.
Vinicius has tested dozens of smartphones from every major brand, explored dark sky locations across multiple states, and spent countless nights experimenting with settings, compositions, and editing techniques so that his readers don’t have to start from scratch. Every article on IncrivelX comes from real experience, real mistakes, and real lessons learned in the field.
When he’s not out shooting at midnight or writing in-depth guides for the IncrivelX community, Vinicius can be found exploring new cities with his phone always within reach, looking for the perfect shot hiding in the shadows.
His philosophy is simple: the best camera is the one you already have — you just need to learn how to use it in the dark.