White Balance Explained: Why It’s Critical for Night Photography
Why white balance matters at night
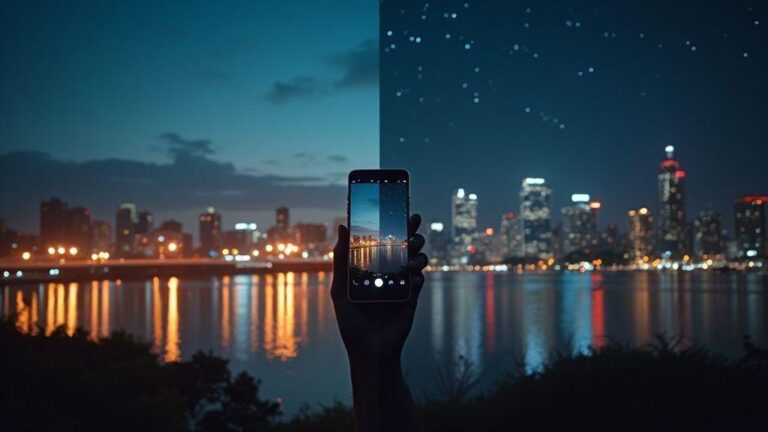
When you shoot after dark, your camera sees light differently than you do. White balance is the dial that tells your camera which color temperature to trust as white. If you guess wrong, blues look blue and lights turn orange. Getting it right helps night scenes feel natural. Skin tones, street signs, and reflections snap into place when white balance matches the lighting you’re capturing. Artificial light sources—street lamps, neon, and car headlights—have strong color hues that can shift an entire photo. With proper white balance, night photos feel accurate, not off.
Understanding white balance at night gives you control. You can preserve a scene’s mood—cool, moody blues by a river, or warm yellows in a café doorway. When you tune white balance, you decide how the camera interprets the color spectrum around you. Ignore it, and your image may drift toward the brightest light in frame, forcing post-processing fixes. By setting white balance consciously, you keep night shots cohesive across frames and cut down editing time.
White balance isn’t a fixed rule; it’s a tool to tell your camera how to read the scene. You’ll learn to match what your eyes see by testing presets or using a custom setting. With practice, you’ll know when to warm up for a cozy glow or cool down for a crisp urban feel. This keeps night photography straightforward, fast, and consistent.
White balance night photography basics
At night, start with a practical preset like Tungsten or Fluorescent to gauge the scene. If lights are warm, you’ll often want a cooler setting (Daylight or a custom cool balance) to counter the yellow glow. Do quick test frames and adjust from there. You can also set a custom white balance using a gray card or a white sheet to lock in a neutral reference point. This helps you reproduce the exact look you want without chasing color in post.
A good habit is to shoot in RAW. RAW gives you flexibility to adjust white balance after the fact without losing detail. Start with Auto WB to see where you stand, then switch to manual or Kelvin to dial in the mood you want.
How light color affects your image
Light color is the story of your photo. Warm street lamps pull orange, cool neon pulls blue, and a neon sign can cast a magenta glow. If you let those hues rule white balance, whites turn colored and fidelity drops. Whites on gloved hands, car headlights, and building façades reveal color accuracy.
To counter this, consider the dominant light source. Warm bulbs? push toward cooler values. Neon dominates? tilt warmer to recover natural skin tones or object colors. Observe the color cast before you press the shutter to avoid guessing in post.
Quick rule to spot color cast
If your image looks off, test a quick reference: point the camera at something white or gray in the scene, shoot, and compare. If that white item looks tinted, your white balance is off. Adjust toward neutral until the cast fades from whites and lights. This tiny check saves hours of color correction later.
Color temperature explained
Your camera sees the world in light temperatures, not just colors. Color temperature tells you how warm or cool a scene looks and guides white balance to keep whites true. Night lighting—from street lamps, neon, and the moon—has different temperatures. Use this as a tool to set the mood of your photo. Understanding color temperature helps avoid muddy blues or yellow blobs and yields cleaner, truer images.
Think of color temperature as seasoning. A little warmth adds coziness; a cooler pinch adds crispness. The goal is to match the light you’re shooting with the camera’s white balance. Nail this, and your colors stay honest and your night shots feel intentional.
With practice, you’ll notice certain lights pull to different temperatures: sodium lamps are very warm, cool neon skews blue, and the moon is often neutral to cool. Know which light you’re facing and choose a balance that keeps whites white and blues honest. Over time, color temperature becomes a quick check rather than a puzzle.
Color temperature night photos scale
Night scenes don’t have one fixed scale; you’ll juggle a range. Recognize the main light sources: streetlights, signs, and the sky. Warm sources push toward amber or orange, cool sources toward blue. Mixed lighting can introduce greens or magentas if you don’t balance well. The goal is a believable result.
As you grow, use a simple internal scale: very warm, warm, neutral, cool, very cool. Very warm evokes cozy cafe lights; very cool feels urban and neon-lit. Neutral keeps skin tones natural, which helps if people appear in your shots. Practice this scale to predict how the image will look after you shoot.
Mixed lighting can skew the scale. If you mix warm streetlamps with a cool shop window, adjust accordingly. RAW or a custom white balance that matches the dominant light can help. The scale becomes a cheat sheet for faster, better nights.
Kelvin numbers you need to know
Kelvin (K) numbers are the language of color temperature. A lower value means warmer light; higher values mean cooler light. Practical anchors:
- 1000–2000 K: Candlelight, very warm. Amber glow.
- 2000–3000 K: Streetlamp orange. Cozy urban nights.
- 3500–4500 K: Neutral white. Solid default for many city scenes.
- 5000–6500 K: Daylight to overcast. Clean and cool; good with blue skies or cool neon.
- 7000–9000 K: Very cool, like some LED signs or twilight with blue cast.
If unsure, start at 3500–4000 K for a neutral baseline. If too yellow, move toward 5000–5500 K. If too blue, dip toward 3000–3500 K. You’re not locked in—shoot RAW, check a quick histogram, and tweak Kelvin to taste.
Auto white balance limits
Auto White Balance (AWB) is a helpful default, but not perfect in every situation. It aims to keep colors natural across lighting, but strong hues, mixed lighting, or unusual sources like neon can trip it up. AWB can bias toward a warmer or cooler cast, especially in skin tones or whites. It works well in neutral scenes with even light, but in scenes dominated by a single color, AWB can shift the whole frame.
If you want clean whites and consistent skin tones, consider fixed white balance or a gray card to dial in a correct color.
Auto white balance limitations night
Night scenes throw AWB a curveball. Tiny, mixed light sources create unusual color blends that AWB can’t reconcile. Expect skin tones to skew, whites not reading true white, or colors looking off. In low light, AWB tends to skew cooler because the sensor struggles to lock a neutral target. You’ll see two symptoms: color shifts in highlights and shadows, and whites drifting away from true white. If sodium lamps push everything orange or LEDs tint everything green, AWB may overcorrect or undercorrect. Switch to a fixed value or a night-friendly preset for predictable colors.
For night, shoot RAW and use a manual value that fits the scene, or set Kelvin around 3200 K for tungsten-like lights and 4000–4500 K for mixed LED/cool neon. Verify skin tones and white objects, then lock in a baseline.
When AWB makes wrong choices
If AWB creates color casts that don’t match the scene, switch to a more stable approach. Indoors with warm lighting or during golden hour can mislead AWB. Lock in a white balance preset or use a manual Kelvin value to keep colors honest. For portraits with mixed lighting, set a fixed white balance near the subject’s needs and tweak from there. After adjusting, test a quick frame and review on the back LCD or viewfinder. Small adjustments can prevent large color shifts later.
When to switch off AWB
Switch off AWB when the light is unusual or highly colored. If reds, greens, or blues dominate, AWB struggles to find a neutral base. Lock in a preset or dial in a Kelvin value for consistent results across a shoot. If you shoot RAW, you still benefit from a solid white balance value—RAW helps you adjust later without degrading color. Use a gray card when possible to calibrate, and note the value for similar scenes.
Manual white balance techniques
Manual white balance (WB) gives you precise control so skies stay blue, skin tones stay natural, and you don’t chase tints later. It’s a tool to tune the camera’s color dial to match the scene. Manual WB isn’t one-size-fits-all; in mixed light you’ll balance multiple colors at once. With practice, you’ll know when to push cooler or warmer tones depending on the mood you want. Consistency matters as much as perfection.
Manual white balance low light using Kelvin
In low light, color shifts quickly. Use Kelvin to freeze that shift. Start warm around 3400–4200 K for cozy indoor light, then move to 4000–4500 K if the subject looks too orange. If greenish, push toward 3600–3800 K. Test a few values on the fly, making small adjustments. Memorize go-to numbers for common indoor scenes to save time and keep colors honest.
Use camera presets and sliders
Presets and sliders speed up consistency. Use a preset for typical indoor or mixed-light setups, then fine-tune with sliders. Start neutral (around 5200 K) and adjust toward cooler (5000 K) or warmer (5600 K) as needed. Don’t guess in changing light—if light shifts, adjust WB in small increments and test a frame. The goal is a chain of images with the same color tone.
Set manual WB before shooting
Before pressing the shutter, set WB in a steady moment. Frame a neutral gray card or white surface under the lighting you’ll shoot, then set WB to match. Take a quick test shot to confirm. If not aligned, adjust by small steps and test again. This habit saves post-processing time and builds a reliable color profile for your project.
Custom white balance steps
You’ll gain control by setting a custom white balance step by step. Start in manual WB mode. Pick a neutral target (gray or white) and place it in representative light. Sample the card and lock the balance. Take a quick shot to verify; adjust if needed. The aim is consistent skin tones and whites across images so you don’t chase colors later.
In mixed light, color shifts appear in shadows or highlights. A custom WB step helps dial in the exact tone you want. If indoors under tungsten, you may lean yellow; with LEDs or mixed sources, you’ll see broader shifts. The more you practice this step, the quicker your camera snaps to the right tone. Your goal is consistency so night shots look natural, not orange or cold. White Balance Explained: Why It’s Critical for Night Photography.
Custom white balance for night scenes with gray card
Night scenes can trap you in artificial glow. With a gray card, neutralize street lamps, neon signs, and indoor bulbs. Place the card in the brightest area that still represents the scene. Set your camera to custom white balance and measure from the gray card. Take a shot and confirm the balance by reviewing a test image. If colors still feel off, adjust exposure or white balance slightly and retest. Carry a small gray card or white balance card; in low light you may need to raise ISO or widen the aperture after balancing to maintain exposure.
White Balance Explained: Why It’s Critical for Night Photography.
How to make a neutral reference shot
A neutral reference shot is your color safety net. Place a gray card in the same lighting as your subject, set WB to custom, and capture the neutral patch in frame. Review the shot; if it looks warm or cool, re-shoot with a better representation of the scene. Use the balance on remaining frames to keep colors stable across angles or lighting mixes.
Practice makes this second nature. The more you do it, the faster you’ll recognize when a shot needs another reference. Think of it like calibrating a monitor: once you’ve got a neutral target, colors stay on track no matter shifts in the room. White Balance Explained: Why It’s Critical for Night Photography.
Save custom preset in camera
Saving a custom preset saves time for future shoots. After dialing in the perfect balance with a gray card, save the setting under a short, memorable name. Save presets for indoor tungsten, mixed LED, and daylight environments so you’re ready to shoot without second-guessing. Label presets by light source or scene type for quick recall on location. This keeps your color home base consistent. White Balance Explained: Why It’s Critical for Night Photography.
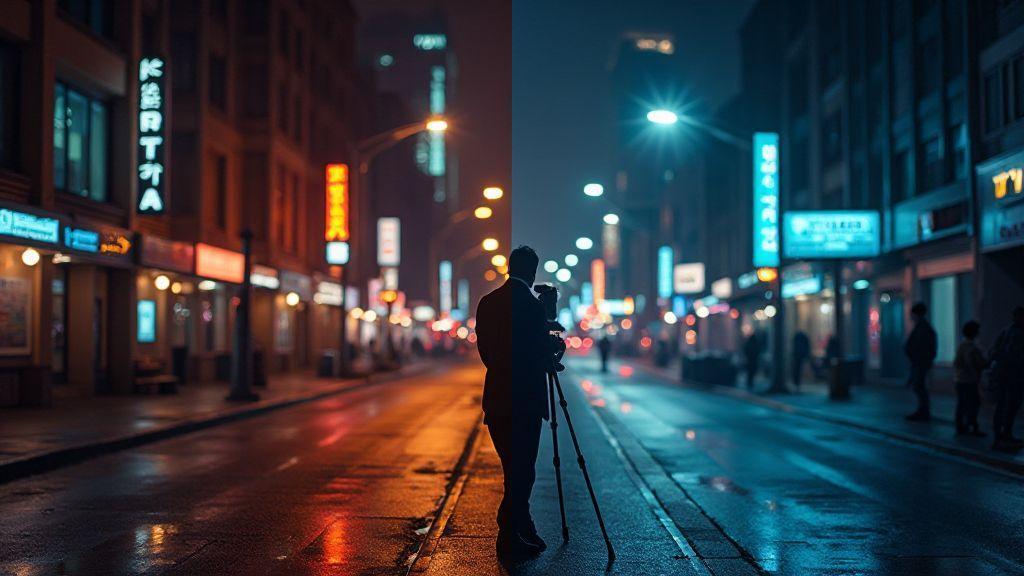
Tungsten versus daylight at night
Colors can look off at night. Tungsten light from street lamps is warm; daylight feels cool. Keep colors accurate without losing mood. Choose tungsten or daylight based on the dominant light and desired look. Tungsten yields rich oranges and ambers; daylight nudges toward blues and whites. You can use either, depending on whether you want a cozy vibe or a crisper scene. Remember to match white balance to the light, or colors will fight post.
Tungsten light changes across neighborhoods. Some lamps are very warm and push skin tones orange; others are milder. To keep skin tones natural under tungsten, lean toward a cooler white balance or a preset that reduces warmth. For daylight, the blue cast can be cinematic; balance to prevent shadows from washing out. Treat street lamps as the primary color source and harmonize the rest with white balance.
Tungsten versus daylight night shooting facts
Tungsten is warmer, pushing toward orange; daylight presets pull toward blue. Under tungsten, you’ll often dial down warmth; too warm skin tones call for a cooler Kelvin or a balance less biased toward yellow. For daylight, keep the blue cast in check so highlights stay bright and shadows readable. The light source sets your baseline; your white balance can bend that baseline.
Often, tungsten performs better with a slightly higher Kelvin than pure tungsten (3200K) due to real-world bulb variation. For daylight, push toward 5200–6500 K to keep whites honest in mixed scenes. The exact value isn’t magic; it’s a starting point, then you fine-tune by eye. Skin tones should read naturally, and the scene should feel balanced.
How street lamps differ from sunlight
Street lamps emit narrow bands of color—orange or amber—often uneven across frame. Shoot RAW to tweak white balance without losing detail, and consider a custom WB to neutralize dominant hues. The result is a more consistent look.
Sunlight at night is faint but acts as a softer fill. It can bring out cool blues in shadows. Highlights on glass or metal gleam with a cold edge. If you want a cinematic feel, lean into that blue light; for warmer street scenes, rely on tungsten to fill warmth. The trick is to treat street lamps as the primary color source and harmonize the rest with white balance.
Pick the right preset or Kelvin
Start with a preset that matches the main light source. To honor street lamp mood, use a tungsten preset around 3200 K and adjust to taste. For daylight vibes, use a 5200 K preset and tweak toward 5500–6000 K for a cooler look. Don’t be afraid to go manual: set a Kelvin that makes skin tones read right, then adjust exposure and contrast to preserve detail in shadows and highlights. The goal is a natural tone that feels true to the scene while preserving the mood.
Shooting RAW for WB flexibility
Shooting RAW captures more data, so white balance decisions aren’t locked in at capture. You have a bigger palette to adjust later, which is powerful for accurate colors across different lights. You can fix tricky lighting after the fact without losing detail in shadows or highlights. RAW is a safety net, keeping color flexible for smarter WB choices in editing.
RAW preserves color information from all channels, giving you precise WB control. You’ll see more accurate skin tones and less clipping in bright areas. If a scene mixes window light with warm lamps, RAW lets you balance both without sacrificing detail. This leads to cleaner, more professional photos you’re proud to share.
White balance RAW workflow benefits
RAW lets you separate exposure from color so you can adjust WB without redoing exposure. Lift shadows and recover highlights while dialing in believable color temperature. Non-destructive edits mean WB changes stay as metadata until you export. You can try bold shifts and revert instantly if needed. When you export, you can pick a WB that feels most true to the scene, ensuring consistent color across your gallery.
Shooting RAW and keeping data
RAW keeps image data intact, giving you maximum flexibility for WB later. You preserve luminance and color detail that JPEGs would flatten. If in doubt, RAW is your best bet for editing latitude and color precision.
Fixing color casts in post
Color casts sneak in when lighting is off. You don’t need to toss a shot—neutralize unwanted tones in post. Start with white balance, then adjust tint and specific color channels. You’ll notice skin tones stop reading green or blue and the scene reads more like your memory. Think of it as correcting a canvas left too long in different light.
If you fix color casts, you’re adjusting your camera’s memory of the scene. Start with a neutral reference like a gray or white patch, then compare the rest of the image. In mixed lighting, balance sources so elements sit together naturally. The goal is believability unless you’re aiming for a creative look.
Practice helps. Open a batch from the same shoot and apply a single white balance correction across them if lighting was similar. Save time and keep consistency. Small shifts in temperature or tint can dramatically affect skin tones and skies. Your eye will thank you for tidy, predictable results that match the scene.
Post processing white balance correction steps
Begin with a neutral reference in your editor. Use an eyedropper on gray or white to set a baseline. If you lack a neutral patch, zoom in on mid-gray and guess, then refine with temperature and tint. Push temperature warmer if the image is too blue, cooler if it’s too warm. Subtle tint shifts—magenta vs. green—can fix casts that temperature alone cannot.
Lock the correction and check skin tones and foliage. If people look too orange or green, nudge the sliders slightly. For night scenes, tilt toward cooler temperatures to neutralize streetlights while keeping the sky believable. Compare before/after to confirm no new issues. Save a preset if you find a reliable balance for similar scenes.
Correcting color cast night images fast
Night images often show strong casts from artificial lights. Start with a global white balance shift toward neutral, then skim for warm streetlights and cool moonlight in separate areas. Downplay orange/yellow tones from lamps and boost blue in shadows if needed. For a dominant sky, use a cooler baseline to keep stars or city lights visible. Apply the same white balance to batches for speed, then fine-tune if necessary.
Use eyedropper or sliders
Between speed and precision, use the eyedropper on a neutral patch to establish a baseline, then fine-tune with sliders. Eyedropper is fast and repeatable; sliders dial in exact temperatures and tints. Combine both: measure with the patch, then polish with targeted tweaks for consistency across a series.
Calibrating for long exposures
Long exposures require patience and precision. Set a base exposure and lock constants across shots. Use a sturdy tripod, remote or timer, and maybe a mirror lock to avoid shake. Check exposure with a live histogram and test frames. If highlights or shadows clip, adjust base settings rather than chasing it in every shot. The goal is clean, usable data for stacking or blending later.
Develop a repeatable workflow. Keep a steady routine to minimize drift: stable setup, test frame, review histogram, cooldown, then shoot again. Heat and sensor drift can affect color; plan for post-processing and consistent in-camera controls. Your long-exposure kit should be predictable, yielding results that feel magical rather than sloppy.
Calibrating white balance for long exposures method
Begin with a WB preset that matches the scene—around 3200 K for tungsten-like lights, or 4000–4500 K for mixed urban lighting. If shooting RAW, you can adjust later, but mood matters: warmer balances city lights; cooler balances the night air.
Test a few frames with small WB shifts. If a cast remains, adjust in small increments. Use a gray card or neutral target when possible for a trustworthy reference. Long exposures can drift as the sensor heats, so lock a stable balance and stay with it.
Finally, shoot a light trail or star trail without changing balance. Compare frames for consistency. If drift appears, you may prefer RAW post-correction, but keep the balance stable across the series for easier blending and cleaner results.
Avoid heat and sensor shifts in long shots
Heat is a quiet enemy in long shots. Keep distance from heat sources, allow cooldown between bursts, and consider shorter bursts with pauses if stacking. The time between shots matters almost as much as the shot itself. Sensor temperature shifts can also affect color. Use a lockable exposure and keep your camera in shade when possible. If you’re in cold night air, note that cooler conditions can reduce noise but shift balance differently. Maintain a consistent workflow so you don’t chase a moving target.
Check and tweak between exposures
Between exposures, review the last frame for detail: histogram, clipping, and color balance. If you notice a shift, adjust WB or exposure slightly before the next shot. Small, deliberate tweaks beat large, frequent changes. Keep tripod and gear secure; a tiny nudge can ruin a long shot. If you’re stacking, ensure overlaps match so the final blend is seamless.
Final note: White Balance Explained: Why It’s Critical for Night Photography
White Balance Explained: Why It’s Critical for Night Photography. Mastering white balance is the backbone of natural-looking night photography. With deliberate presets, Kelvin tuning, RAW flexibility, and a steady post-processing workflow, you’ll produce cohesive, true-to-life images that capture mood without fighting the light.

Smartphone Night Photography Enthusiast & Founder of IncrivelX
Vinicius Sanches is a passionate smartphone photographer who has spent years proving that you don’t need an expensive camera to capture breathtaking images after dark. Born with a natural curiosity for technology and a deep love for visual storytelling, Vinicius discovered his passion for night photography almost by accident — one evening, standing on a city street, phone in hand, completely mesmerized by the way artificial lights danced across wet pavement.
That moment changed everything.
What started as a personal obsession quickly became a mission. Vinicius realized that millions of people were carrying powerful cameras in their pockets every single day, yet had no idea how to unlock their true potential after the sun went down. Blurry shots, grainy images, and washed-out colors were robbing everyday people of memories and moments that deserved to be captured beautifully.
So he decided to do something about it.
With years of hands-on experience shooting city streets, starry skies, neon-lit alleyways, and creative night portraits — all with nothing but a smartphone — Vinicius built IncrivelX as the resource he wished had existed when he was just starting out. A place with no confusing jargon, no assumptions, and no gatekeeping. Just honest, practical, beginner-friendly guidance that actually gets results.
Vinicius has tested dozens of smartphones from every major brand, explored dark sky locations across multiple states, and spent countless nights experimenting with settings, compositions, and editing techniques so that his readers don’t have to start from scratch. Every article on IncrivelX comes from real experience, real mistakes, and real lessons learned in the field.
When he’s not out shooting at midnight or writing in-depth guides for the IncrivelX community, Vinicius can be found exploring new cities with his phone always within reach, looking for the perfect shot hiding in the shadows.
His philosophy is simple: the best camera is the one you already have — you just need to learn how to use it in the dark.