What Causes Grainy Night Photos on Smartphones in 2026 and How to Fix Them
Why your night photos look grainy
When you shoot at night, your camera sees very little light. The camera’s sensor pushes to extract information from what’s available, which introduces noise. You’ll notice grain as specks or salt-and-pepper texture, especially in shadows and dim streets. Cranking exposure can wash out highlights and make the image feel busy. The practical fix is to add light or reduce noise in post, but some grain remains in very dark scenes.
On small smartphone screens, grain can look worse because the display magnifies texture. If you share quickly, the grain may stand out more than the subject. Grain isn’t a flaw; it signals the phone is doing its best with limited light. You can minimize it by adjusting in-camera settings and applying post-processing noise reduction, aiming for a natural balance of light, detail, and grain.
If people are in the frame, grain can soften faces. Plan your shot in a brighter area, hold the phone steady, and shoot at a lower ISO when possible. Newer phones handle night scenes better, but grain rarely vanishes completely. Accept that some grain is part of night photography and work with it rather than fighting it.
What Causes Grainy Night Photos on Smartphones in 2026 and How to Fix Them
Grain comes from sensor noise, high ISO, and insufficient light. In 2026, small sensors and compact pixels mean more dependency on image processing. Use RAW when possible and apply careful post-processing to mask grain. Dial down ISO, stabilize, and let longer exposure bring in light without washing out detail. Proper lighting and steady technique help keep grain in check.
Why are night photos grainy on smartphones 2026
Night shots on smartphones in 2026 still show grain when light is scarce. A small sensor and tiny pixels struggle in darkness. Multi-frame stacking helps, but noise persists in shadows and low-lit corners. The noise becomes more noticeable when you zoom or post publicly.
The image processor tries to denoise, which can blur details. Pushing ISO to maintain exposure increases grain; lowering ISO with longer exposure risks motion blur. The key is choosing the right mode for the scene, plus stabilization. Some phones denoise better in software; others rely on hardware improvements. In short, grain remains a factor, but smarter processing reduces its impact with the right settings.
To beat grain, use night modes, tripods, and longer exposure when allowed. Shoot in RAW if supported, then apply targeted noise reduction in post. The goal is to maximize light collection while controlling noise, not to chase perfectly clean shots in every situation.
Why smartphone low-light noise causes 2026
Noise stems from limited light, sensor size, and processing. Smaller sensors yield smaller pixels that collect less light, pushing denoising and potential edge softening. More digital brightening adds grain. Heat from processing and rapid shooting can introduce noise, and aggressive compression can reveal grain at full size. Lens quality also matters; some lenses gather less light, increasing grain at edges and corners.
Your habits matter: shaky hands, bursts, or insufficient stabilization increase grain. Use night mode with stabilization, keep ISO low, and let the camera pick exposure you can hold steady. The physics are unkind: smaller sensors are harder to shoot cleanly in low light.
Sensor limits and light shortage
A sensor can only collect so much light per second. When light is scarce, boosting the signal also boosts noise. Grain appears in flat areas and becomes more visible when zoomed. The best move is more light—find a brighter spot or stabilize for longer exposure. If available, enable night mode that stacks frames to reduce grain without blurring the subject.
How sensor size and ISO create noise
Night photography is a fight for light. Sensor size and ISO act as teammates: bigger sensors gather more light per pixel, enabling lower ISO and cleaner results. On smartphones, you often get a suite of tiny sensors, so noise intrudes more easily. The trick is to manage ISO and let the camera use slower shutter speeds in brighter frames or better light sources nearby.
Smartphone processing attempts to smooth noise, but in very dim scenes, grain can still show as rough texture in skies or shadows. You can avoid this by keeping ISO low and allowing the camera to use longer exposure or a brighter nearby light. Practice helps you learn when to raise ISO and when to rely on longer shutter speeds.
Think of it like painting at night with a small flashlight. A broader light source (larger sensor) yields more even color; a small sensor yields patchy light and quicker grain. Keep ISO low, use longer exposure where possible, and steady your hand to reduce noise.
Sensor size and ISO noise smartphone cameras 2026
Sensor size shapes how clean night shots can be. Bigger sensors collect more light per pixel, letting you keep ISO low and retain detail. In 2026, many high-end phones still use compact sensors, but advances in processing push noise down. Compare phones by their night performance at similar ISO; small differences in sensor size can mean the difference between grainy and smooth results.
ISO amplifies both signal and noise. If your phone auto-raises ISO in low light, you’ll see more grain, especially in shadows and skies. Keep ISO low when possible, or choose devices with better night-processing software. The practical tip is to minimize ISO and maximize light capture with longer exposure on a stable platform.
Pixel size, aperture, and light capture
Pixel size matters: larger pixels collect more photons and yield cleaner signals. Wider apertures pull in more light per photon, helping keep ISO down. Larger pixel sizes and brighter apertures reduce grain in practice. Steadying the shot or using a tripod lets you extend exposure without blur, further lowering ISO and noise.
When choosing phones, look for larger pixel sizes or brighter apertures. You’ll notice fewer grain specks in the final image when the camera gathers more light per pixel. Your technique matters too: stabilize, or use a tripod to allow longer exposure with less noise.
Higher ISO equals more grain
Pushing ISO amplifies both signal and noise, producing visible grain. Keep ISO as low as feasible while capturing enough light. If you must raise it, do so in small increments and compare results. Expect grain first in dark areas, then across the frame as ISO climbs.
Lower ISO yields smoother skies and shadows. If you need more brightness, use longer exposure, brighter ambient light, or multi-frame night modes to hide noise. Grain isn’t a camera flaw; it’s physics. Work around it with technique.
Best settings to reduce night photo noise
Shooting at night, you’re fighting grain and fuzzy details. With smart settings and a steady hand, you can turn a dim street into something cinematic. You’ll notice less noise, truer colors, and fewer post-editing headaches.
- Start with a baseline that keeps noise low while preserving detail. Use night or low-light mode, then fine-tune with manual controls. Keep shutter speed reasonable to avoid motion blur.
- Aim for even exposure: prioritize mid-tones and shadows over blown highlights for a natural look.
In practice, be prepared, steady, and deliberate. Small tweaks make big differences. A tripod or stable surface and a timer help you avoid blur. Accept that noise is inevitable but controllable, and experiment with settings tonight.
best settings to reduce noise in night photos smartphone
Your best starting point is RAW when possible. If RAW isn’t available, capture at the highest quality and keep ISO around 400–800 as a ceiling for most scenes. Use a longer exposure on a tripod and enable night mode if offered, but fine-tune exposure and focus manually to avoid over-processing. In post, apply moderate noise reduction to preserve texture.
lower ISO, wider aperture, longer exposure
Lower ISO reduces noise but requires more light. A wider aperture helps gather light, and a longer exposure lets the sensor collect more light without boosting ISO excessively. On hand-held shots, stay around ISO 400 with faster shutter speeds; on a tripod, you can extend exposure for richer detail. The goal is a consistent balance: more light with less ISO, keeping motion blur at bay.
choose manual or pro mode
Manual or Pro mode gives direct control over ISO, shutter, and focus, crucial for dialing out grain. If available, shoot in RAW, lock exposure, and stabilize. Typical starting point: ISO ~400, shutter 1/15–1/60s, aperture as supported. Lock autofocus or switch to manual focus to avoid hunting in the dark. In Pro mode, adjust white balance and exposure compensation to keep colors accurate and reduce post-processing.
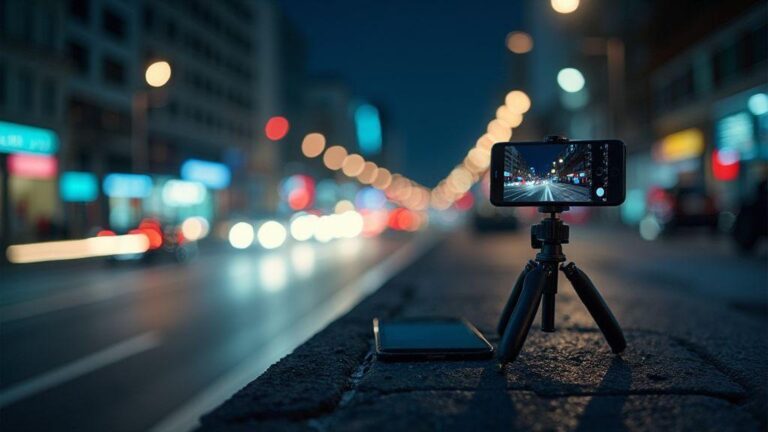
Stabilize for cleaner long exposures
Long exposures reveal light trails and glow, but any shake becomes blur. Stabilize first: two hands, steady stance, or a tripod. For moving lights, a tiny wobble becomes a smear. Breathe slowly and press the shutter gently; a short pause after pressing helps prevent micro-movements. If possible, place the phone on a flat surface and use a timer, so you don’t touch it during the exposure. The goal is a solid, unmoving foundation.
Some phones stabilization is software-based and limited in low light. When possible, switch to manual or Pro mode to set shutter and ISO. Shorter shutter speeds require brighter scenes but reduce blur; for trails or stars, steady the setup to maximize light without mushy results. Stabilization is the foundation that lets your camera see more light without turning into mush.
stabilization and long exposure techniques for low light smartphone
If you don’t have a tripod, brace against a wall or railing. For windy or uneven surfaces, add weight to the setup. Even a tiny tremor can ruin a night shot, so choose your stabilization method based on shutter length and darkness. A steady base pays off with crisper night photography.
avoid handshake blur with support
Always use some form of support. If you must hand-hold, brace your elbows and hold your breath briefly when pressing the shutter. A remote shutter or timer helps a lot.
How night mode AI reduces noise in 2026
In 2026, night mode AI looks at many tiny details and decides what to keep or discard. The result is clearer images with less speckle and color patches, preserving edges and natural textures. AI learns from your typical scenes and adapts over time, improving exposure balance and denoising without flattening details.
night mode noise reduction AI 2026
AI targets dark areas to reduce grain while maintaining texture and edge sharpness. You’ll see better skin tones and less posterization on bright signs. When zoomed in, 2026 night modes show less noise and more true-to-life detail, especially in trees, bricks, and fabrics. The AI improves with firmware updates and user habits, offering a more natural look with less work in post.
multi-frame stacking and AI merging
Multi-frame stacking takes several quick captures and combines them to reduce noise. The AI blends frames to prevent blown highlights and preserve shadows. Even with minor movement, the result stays closer to the scene’s truth, with fewer artifacts and improved color balance.
Use computational denoising tools effectively
Noise can look rough and muddy at night. Computational denoising uses smart algorithms to separate noise from real detail. Pick tools that understand your phone’s light capture and apply denoising while preserving edges and texture.
- Start with the camera’s built-in denoise option, then test a second shot with a different exposure and blend later to preserve detail.
- Shoot in RAW when possible for more data to work with during denoise. If not, use night modes or longer exposures, then denoise in post. Compare different versions to choose the best result.
When editing, use selective denoise rather than global smoothing. Protect faces, textures, and edges; a light touch helps keep texture while reducing grain. If color noise appears, target it specifically without dulling overall contrast.
Shoot RAW and fix noise in post
RAW retains more sensor data, giving you flexibility in post. RAW files retain color and brightness details that JPEG compresses away. Use RAW with a tripod or steady hand to keep the image sharp. In post, reduce luminance noise and adjust color noise carefully to preserve skin tones and textures.
Compare processed RAW with the original to ensure you didn’t erase too much texture. Higher bit-depth exports (TIFF or DNG) help maintain tones during editing. Patience and small adjustments beat broad, heavy edits.
use RAW and post processing to remove noise smartphone
Starting with RAW gives you more control over exposure and denoise. Correct exposure first, then apply targeted luminance and color denoise to maintain texture. Zoom into noise hotspots to apply denoise selectively, then sharpen edges to keep detail crisp.
selective denoise and sharpening workflow
Mask the sky and bright highlights, protect faces and textures, then denoise shadows and midtones. After denoise, apply modest sharpening to maintain edge clarity without halos. A micro-contrast adjustment can help texture pop without reintroducing grain. Keep the workflow tight: denoise, sharpen, recheck exposure and contrast.
export high‑bit files for editing
Export edited RAW-derived work as high-bit TIFF or high-bit-depth DNG to preserve tone and detail. Store the master file safely for future edits.
What Causes Grainy Night Photos on Smartphones in 2026 and How to Fix Them
Grain arises from sensor noise, high ISO, and insufficient light. You’ll notice it in shadows and dim sidewalks. The phone’s image processor tries to guess color and brightness, which adds grain when light is scarce. Start with RAW, then perform careful post steps: calibrate exposure, reduce noise where it matters, and sharpen only the necessary edges.
Dial down ISO and stabilize to reduce grain. Post-work should focus on smoothing noise in shadows while preserving textures. With practice, you’ll recognize grain patterns and apply the right amount of denoise without washing out the scene.
Keep apps and firmware updated to cut grain
Keeping your phone updated helps cut grain by improving image processing, noise reduction, and night modes. Regular updates bring smarter ISO control and better HDR stacking.
- Camera app updates often reduce night photo grain by refining denoise and exposure handling.
- Firmware fixes can add new denoise algorithms and toggles for exposure, frame fusion, and hotspot reduction.
camera app updates reduce night photo grain 2026
Updates can improve night processing, balance exposure, and tighten sharpness versus noise. New toggles—like low-light presets or a noise reduction slider—let you tailor results. After updating, test with quick dim-room shots to observe the improvement.
firmware fixes, new algorithms, and toggles
Firmware tweaks refine light handling at the sensor, improving grain control at the source. Expect better multi-frame stacking, updated HDR, and quieter shadows. Read changelogs to understand changes and test by comparing night shots before and after updates.
check updates and changelogs regularly
Regular checks help you stay ahead of grain issues. Look for notes about noise reduction and night-mode improvements. After updating, try dim shots to gauge the impact.
Quick, practical fixes you can try now
You don’t need fancy gear to improve night photos. Small tweaks can make a big difference.
- Hold steady, trim excess noise, and use built-in features. Stabilize with a tripod or solid surface when possible.
- Light matters: more light allows lower ISO and cleaner results.
- Test a few presets to learn what works for your model. Night modes vary, but the principle remains: collect light longer, keep ISO sensible, avoid forced brightness that introduces noise.
How to fix grainy night photos smartphone 2026
Grain often signals too much ISO or insufficient light. Balance exposure, noise control, and shutter speed to keep the image sharp.
- Switch to Night Mode or manual mode if available, use longer exposure with a stable hold, and adjust exposure compensation to brighten shadows without blowing highlights.
- Clean the lens and shoot in scenes with even lighting or diffuse light to reduce the need for high ISO.
simple steps: steady, lower ISO, use night mode
Steady your hands or use a tripod, keep ISO low, and let Night Mode stack frames to brighten the scene with less grain. If the phone asks for longer hold, stay patient and avoid touching the screen during capture.
test shots and compare before/after
Take a few test shots with old settings, then try recommended tweaks and compare. Look at grain, color accuracy, and edge sharpness. If the after shot is clearer and more detailed, you’ve found a winning setup for that scene. Keep notes of scene type, lighting, and whether you used Night Mode or a lower ISO to speed future shoots. Your phone will behave differently in each environment, so quick tests become your personal guideline.

Smartphone Night Photography Enthusiast & Founder of IncrivelX
Vinicius Sanches is a passionate smartphone photographer who has spent years proving that you don’t need an expensive camera to capture breathtaking images after dark. Born with a natural curiosity for technology and a deep love for visual storytelling, Vinicius discovered his passion for night photography almost by accident — one evening, standing on a city street, phone in hand, completely mesmerized by the way artificial lights danced across wet pavement.
That moment changed everything.
What started as a personal obsession quickly became a mission. Vinicius realized that millions of people were carrying powerful cameras in their pockets every single day, yet had no idea how to unlock their true potential after the sun went down. Blurry shots, grainy images, and washed-out colors were robbing everyday people of memories and moments that deserved to be captured beautifully.
So he decided to do something about it.
With years of hands-on experience shooting city streets, starry skies, neon-lit alleyways, and creative night portraits — all with nothing but a smartphone — Vinicius built IncrivelX as the resource he wished had existed when he was just starting out. A place with no confusing jargon, no assumptions, and no gatekeeping. Just honest, practical, beginner-friendly guidance that actually gets results.
Vinicius has tested dozens of smartphones from every major brand, explored dark sky locations across multiple states, and spent countless nights experimenting with settings, compositions, and editing techniques so that his readers don’t have to start from scratch. Every article on IncrivelX comes from real experience, real mistakes, and real lessons learned in the field.
When he’s not out shooting at midnight or writing in-depth guides for the IncrivelX community, Vinicius can be found exploring new cities with his phone always within reach, looking for the perfect shot hiding in the shadows.
His philosophy is simple: the best camera is the one you already have — you just need to learn how to use it in the dark.