Using Neon Signs as Natural Light for Night Portrait Photography: Complete Guide
Using Neon Signs as Natural Light for Night Portrait Photography: Complete Guide
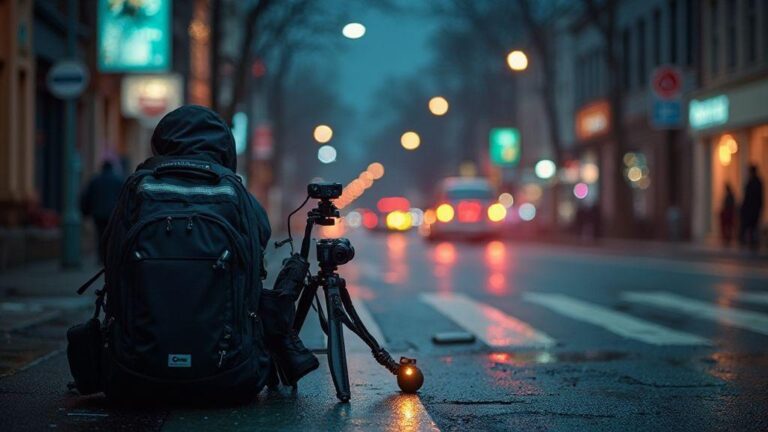
Neon signs can be more than decoration; they’re a practical, dynamic light source for night portraits. This guide shows how to use neon as the main light or as a color kick, shaping mood, color, and texture without washing out your subject. Think of neon as a bold, friendly neighbor lighting your portrait with character and edge. This is Using Neon Signs as Natural Light for Night Portrait Photography: Complete Guide in action.
How Neon Signs Light Your Subject
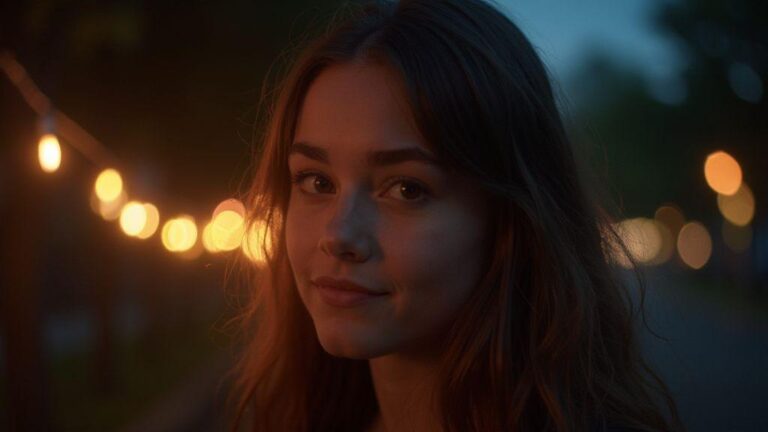
Neon signs add a lively glow that can make your subject pop when used as a main light or an accent color. Place yourself so the neon hits the right spots without washing skin or flattening features. Test angles quickly—step to the side to see how the glow wraps the cheeks and jawline. For drama, keep neon low and to one side for moody shadows. For a softer, cheerful vibe, raise the light so it wraps more softly. Balance neon with ambient light or your fill to prevent color clashes and skin tones that look wrong. Set exposure so the neon color isn’t blown out, then fine-tune with a touch of brightness on the face.
Neon brightness and distance
Getting close to neon yields bold color and a strong glow; step back for a softer wash and more texture. If a sign is very bright, lower exposure to prevent clipping; if it’s dim, boost exposure to keep skin tones warm. Shoot quick test frames at your chosen distance to learn how brightness falls off and how color shifts with distance. Distance also affects how neon color reads on skin: closer = direct color; farther = color mixes with ambient light, cooler or warmer depending on the sign.
How color affects skin tone
Neon colors can either flatter or flatten skin, depending on hue and intensity. Saturated pink can flatter warm undertones but may cast magenta on cooler skin; blue neon can make pale skin look icy; amber can add a warm sunlit flush. For warm undertones, cool neon (blue/cyan) can provide contrast without looking off. For cooler complexions, warmer signs (orange/magenta) add warmth. Watch your camera’s histogram or white balance to avoid muddy hues. Keep neon as an accent rather than the sole light source, and use a little fill from another light to keep skin natural and eyes lively.
Light falloff rules
Neon falls off with distance, sharpening falloff the closer the sign is to the subject and softening it from the edges. If you want control, keep the neon within a small angle of the subject and add a touch of fill from a secondary light. For a more dramatic look, let the neon sit farther away, letting the glow wrap softly into a moody gradient. Use a low ISO and a moderate aperture to hold detail where the neon hits; add fill or a reflector if needed to smooth shadows without washing the glow.
Camera Settings for Neon Portraits
Neon portraits demand a balance between sharp subject detail and the surrounding glow. Shoot in manual so you control the scene. Keep the subject in frame and avoid letting the neon overwhelm skin tones; monitor the histogram and adjust exposure sparingly. The neon should feel like a halo around the person, not a blur across the frame.
Shutter speed and motion blur
Shutter speed controls motion blur. Start around 1/125 to 1/200 for a walking subject; 1/60 can work if the subject is still or moving slowly, provided the neon remains crisp. If the subject is moving, brace or stabilize to keep the subject sharp while the neon trails slightly. The neon glow may smear a little at slower speeds, so find the right balance between motion and clarity.
Aperture for depth of field
Aperture shapes depth of field. For neon portraits, an aperture around f/2.8 to f/4 keeps the subject crisp while the neon reads as a vibrant frame. If you need more background detail, go toward f/4; tighter apertures require more light or ISO. Test a couple frames to find what looks natural for your scene.
ISO noise control
Neon nights push ISO up, so keep ISO as low as possible without sacrificing exposure. Start around ISO 400–800 and adjust as needed. If you’re handheld at slower shutter speeds, higher ISO may be necessary. In post, use light noise reduction on shadows while preserving skin texture and neon color. The glow often masks noise better than you’d expect, but keep it in check.
White Balance for Neon Light Portraits
White balance keeps skin tones natural while neon provides bold color. Start with a quick shot under neon to check skin hues, then adjust. Neon isn’t pure white light, so you’re balancing multiple hues. Shoot in RAW for post flexibility and use a gray card or white card in frame for a baseline WB. Auto WB can be unreliable with neon; custom WB offers predictable results, especially when the color spectrum shifts from cobalt to magenta to lime.
Auto vs custom white balance
Auto WB can drift as you pan; custom WB locks color for consistent results. Set a reference mid-tone gray under the dominant neon hue, or shoot RAW and adjust in post. If you’re moving locations, you can shoot a provisional WB around 4500–5000K to keep skin from drifting, then refine later. Custom WB helps keep neon color on track while the skin stays natural.
Fixing mixed color light
Neon mixed lighting can push skin tones off their natural hue. Balance the environment first: decide if neon should dominate or stay as a backdrop. Use a neutral WB and consider a subtle CTO or CTB gel on your key light to shift skin toward a pleasing baseline, then let the neon handle the rest. A small neutral fill can balance shadows and color spill, minimizing reflections that distort the face. If you can’t avoid color casts, angle yourself to keep the subject away from strong reflective surfaces.
Neon Sign Exposure and Metering Tips
Shooting with neon requires a careful exposure plan: neon glow should read, but the subject must remain visible. In manual, set exposure to keep the neon bright without clipping and adjust as needed. In auto, meter for the subject’s midtones and tweak exposure compensation to keep skin tones warm. If the neon dominates, underexpose slightly and lift shadows in post or with fill. If the subject needs more detail, add light to the person while preserving the neon’s glow. Bracket shots to compare different exposures and protect neon highlights from clipping. Shooting RAW helps recover color and detail if color shifts occur.
Spot meter on skin tones
Spot metering on the face gives you a natural baseline. Aim at the visage, not the sign. If skin looks too bright, dial back exposure; if it looks flat, nudge it up a touch. After locking skin exposure, ensure the surrounding neon still glows without stealing light. Quick test shots and histogram checks help keep skin warm and the background colorful.
Preserve neon highlights
Protect neon highlights to keep their texture and color. Meter for the brightest sign area, then reduce exposure enough to retain glow. Shoot with neon as a backlight or rim light and provide front fill to keep the subject separate. If needed, lower ISO slightly and lengthen shutter to maintain sign brightness while keeping skin tones correct.
Expose for skin
Expose for skin to keep facial color readable, letting the neon’s glow fill in behind. A touch of fill can prevent a flat look while preserving the neon. Adjust white balance to maintain true colors; neon can cast odd hues, so verify in-camera or in post.
Posing and Composition Under Neon Signs
Neon baths the scene in colored light, so you can shape portraits without studio lamps. Position the sign’s glow to wrap the subject, adjusting distance to keep skin tones from washing out. If the sign sits above, tilt the head toward the light to catch color without harsh shadows. Let small shifts in angle or distance alter the color cast on skin and shoot a few test frames to lock in your preferred look.
Composition should be intentional yet relaxed; the neon acts as a frame, not a distraction. Place the subject off-center with the sign in the opposite frame edge to create negative space and a clear focal point. The sign’s lines can guide the viewer toward the face while avoiding clutter. Use neon as a color highlight that enhances mood. A wider shot reveals city texture; a close-up emphasizes eyes and expression. Make the neon a character in the scene, not background lighting.
Position your subject to shape light
Stand slightly to the side so neon wraps around the face, creating gentle definition without hard shadow lines. If you want softer results, back away a step for more ambient fill; for a bolder look, lean closer to the sign to emphasize the color cast.
Use reflections and negative space
Wet pavement or glass reflections extend drama and depth. Shoot at a low angle to exaggerate glow, but keep reflections clean and not overly busy. Let negative space balance the frame, guiding attention to the subject.
Lead with the eyes
Eyes should do most of the talking under neon. Have your subject look slightly above the lens or directly into it with a confident, relaxed expression. Reflections in the eyes from the sign can become a bright anchor. If glasses are worn, angle to minimize glare. Aim for natural eye contact that feels intimate and alive.
Color Mixing in Neon Light Portraits
Neon colors offer bold mood shifts. Understand how primary colors combine on skin and in shadows. Begin with a dominant neon hue that flatters the subject, then introduce a secondary color to define features or separate from the background. Subtle color touches around the eyes can add life, while a gentle warm halo behind the head helps separation. Lower ISO, keep a steady shutter, and use a narrow aperture to preserve detail in bright neon. With practice, you’ll discover color pairings that enhance the subject without overpowering the portrait.
How Mixed Colors Set Mood
Warm hues (red, orange, pink) create intimacy; cool hues (blue, green, purple) add calm or suspense. Change one color to see how mood shifts. A touch of magenta on hair can glow playfully; a cool shadow adds mystery. Balance is key: let one color lead and others support. If the subject wears neutral clothing, neon hues will carry the mood clearly; if clothing is bright, choose colors that soften or contrast without clashing.
For consistency, work in layers: place a dominant neon color on the subject, then add a secondary hue to define features or separate from the background. Subtle color touches near the eyes can spark life, while a warm halo behind the head separates hair from the night. The mood you want will guide which colors to mix and where to place them.
Balance Warm and Cool Hues
Balancing warm and cool tones yields a natural look under neon. Start with a warm key light at a gentle angle to illuminate the face, then add a cool secondary light from the side or behind for depth. If you overdo the warmth, skin may look too orange; if the cool light dominates, the face may disappear. Small adjustments—move the cooler light a few inches or tweak color temperature—help you achieve natural separation: warm front light and cool edge that outlines the subject. The goal is a portrait with life and dimension, where the warmth on the skin and the cool background coexist harmoniously.
Avoid Color Casts
Color casts can derail night portraits. Pre-shoot white balance to keep skin tones natural under neon, and add corrective gels if needed. Guard against stray reflections by blocking spill with flags or black cards. If you can’t dodge a cast, frame to push it into a creative corner rather than letting it control the look. Clean portraits come from actively managing color casts in-camera, not reacting to them later.
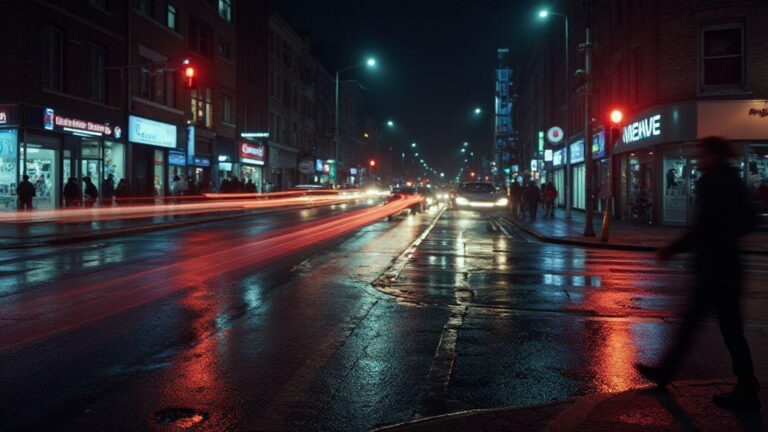
Low Light Portrait Techniques with Neon
Neon adds bold color and modern mood. When balanced correctly, you can keep skin tones natural while neon does most of the dramatic work. Distance and angle matter to avoid washing out the subject and to preserve color in the signs. With the right setup, a city street can feel like a studio, with neon as your lighting kit.
Shoot wide open for more light
Wide apertures gather more neon glow and yield smoother skin tones with a shallow depth of field. Be mindful of lens flare from bright signs; use a hood or shading to tame it. If your subject moves, a faster shutter preserves action while keeping the neon glow. Test at f/1.8, f/2.0, and f/2.8 to see how your camera balances light and detail. Focus carefully on the eyes with single-point autofocus or manual focus if contrast makes autofocus tricky.
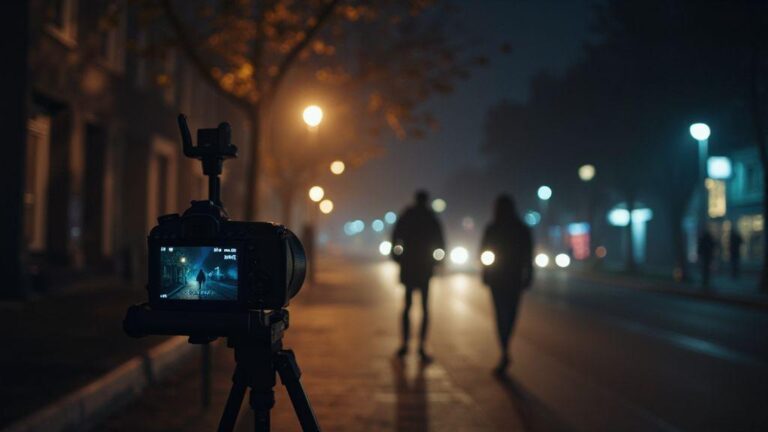
Stabilize with tripod or support
A tripod keeps your frame steady, letting you lower ISO for clean silhouettes while neon paints the rest of the frame. If you don’t have a tripod, use a stable surface to minimize camera shake. Stability enables longer pauses to let more neon into the frame and reduces motion artifacts. A compact tripod is a practical travel companion for night shoots.
Use fast primes
Fast primes excel in neon environments. Lenses like 50mm f/1.4 or 35mm f/1.8 provide natural perspective with minimal distortion while delivering punchy neon. Primes offer sharpness and precise focus at close distances and keep the background pleasantly blurred. When using fast primes, set WB to suit neon so skin tones stay warm.
Editing Neon Portraits in Post Processing
Editing should preserve the neon glow without washing out the subject. Start with exposure and color balance to keep neon legible and skin tones natural. Use a gentle workflow: correct WB, then adjust contrast to maintain depth in lights and shadows. If the image leans cool, add warmth to the skin without shifting neon hues too much. Subtle color grading around lights and midtones helps neon remain vibrant while the subject stays readable. Consider a light vignette to draw focus to the face and control edge noise.
Recover highlights and color
Protect the brightest parts of neon to retain texture and color. Use targeted masks to reduce exposure where needed and recover highlight detail. Balance color by neutralizing spill while preserving neon character. If a sign dominates, desaturate that channel slightly to keep skin warm. A cohesive edit keeps neon lively and subject-focused.
Reduce noise and sharpen
Neon night images can show noise in shadows. Apply light noise reduction on the subject while preserving skin sharpness, then selectively sharpen facial features and neon reflections. Avoid over-sharpening the glow to prevent halos. Subtle structure or clarity on the subject adds bite without compromising the neon’s softness.
Tweak hue and luminance
Fine-tune neon hues to match scene mood. Small hue shifts reduce color spill on the face, and luminance adjustments keep neon bright without overpowering the subject. Tackle one color at a time to maintain harmony between neon and skin tones. A tiny cyan shift on blue signs can warm the face while preserving legibility of the neon.
Neon Sign Portrait Photography Tips
Neon signs offer bold color and a strong mood that you can harness to shape portraits. Consider color temperature and how sign hues tint skin. A sign color that contrasts with your subject’s clothing can create punchy impact; cooler blues or greens yield a softer vibe. Keep the sign from blowing out; preserve detail in both the sign and the face. The neon is your teammate, not your enemy.
Your camera settings matter as much as the signs. Use a moderate aperture to keep the subject sharp while letting the neon blur into a lively background. A fast shutter helps with movement; add a reflector or gentle fill to balance bright clothing or lips. White balance matters with neon—set a creative tone rather than chasing perfect neutrality. Test a few frames to compare results.
Practice framing with the sign in the background and the subject in the foreground. Vary angles—slightly below for a heroic vibe or above for mood. If the sign flickers, longer exposures can produce unique effects, but a stable tripod helps with multiple frames. Watch for reflections on glasses, teeth, or jewelry, and adjust as needed.
Using neon signs for night portraits legally
Know your rights before you shoot. Check property rules and local filming laws for public spaces or private storefronts. If a sign is on private property, ask the business owner for permission. Commercial photography may require permits in busy urban areas. Carry your permit or authorization, and respect entrances, pedestrian flow, and signage that could create hazards. If a sign flickers or poses a hazard, pause and adjust.
Safety and power cable awareness
Be mindful of cables and plugs. Tidy cords and avoid touching exposed wires. Use weather-sealed bags for gear in rain, keep batteries warm, and bring spares. Position lights and stands so pedestrians aren’t endangered. After shoot, tidy the area to prevent hazards. A calm setup helps you focus on catching the neon glow on your subject’s face.
Ask permission and permits
Always ask for permission before shooting and bring a plan to show the owner. If required, obtain permits in advance and keep them visible during the session. Permission protects both you and the space and smooths the workflow.
This guide, Using Neon Signs as Natural Light for Night Portrait Photography: Complete Guide, provides practical steps to leverage neon for striking portraits. By balancing exposure, white balance, color, and composition, you can create night portraits that feel cinematic, natural, and uniquely yours.

Smartphone Night Photography Enthusiast & Founder of IncrivelX
Vinicius Sanches is a passionate smartphone photographer who has spent years proving that you don’t need an expensive camera to capture breathtaking images after dark. Born with a natural curiosity for technology and a deep love for visual storytelling, Vinicius discovered his passion for night photography almost by accident — one evening, standing on a city street, phone in hand, completely mesmerized by the way artificial lights danced across wet pavement.
That moment changed everything.
What started as a personal obsession quickly became a mission. Vinicius realized that millions of people were carrying powerful cameras in their pockets every single day, yet had no idea how to unlock their true potential after the sun went down. Blurry shots, grainy images, and washed-out colors were robbing everyday people of memories and moments that deserved to be captured beautifully.
So he decided to do something about it.
With years of hands-on experience shooting city streets, starry skies, neon-lit alleyways, and creative night portraits — all with nothing but a smartphone — Vinicius built IncrivelX as the resource he wished had existed when he was just starting out. A place with no confusing jargon, no assumptions, and no gatekeeping. Just honest, practical, beginner-friendly guidance that actually gets results.
Vinicius has tested dozens of smartphones from every major brand, explored dark sky locations across multiple states, and spent countless nights experimenting with settings, compositions, and editing techniques so that his readers don’t have to start from scratch. Every article on IncrivelX comes from real experience, real mistakes, and real lessons learned in the field.
When he’s not out shooting at midnight or writing in-depth guides for the IncrivelX community, Vinicius can be found exploring new cities with his phone always within reach, looking for the perfect shot hiding in the shadows.
His philosophy is simple: the best camera is the one you already have — you just need to learn how to use it in the dark.