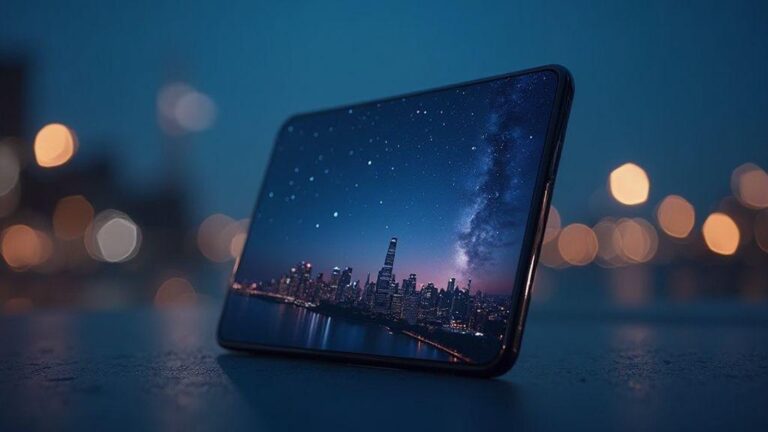
The Exposure Triangle for 2026: Mastering Night Photography on Your Smartphone
Master the Exposure Triangle on Your Phone
In night shots, three knobs work together: shutter speed, aperture, and ISO. You’re in control now, not the camera. When you understand how these three cooperate, you can light up the dark without blur or grain. Think of the exposure triangle as a balance scale you adjust until your photo looks right. You’ll often trade one factor for another to keep your image bright enough while preserving detail. The Exposure Triangle for 2026: Mastering Night Photography on Your Smartphone guides you to practical, real-world results.
Why shutter speed, aperture, ISO matter for your night shots
Shutter speed controls motion: fast speeds freeze, slow speeds gather more light but risk blur. Aperture opens wide for more light and changes depth of field—wide for background softness, narrow for more in-focus detail. ISO is the light amplifier: low ISO reduces noise; high ISO brightens but adds grain. You’ll balance these to keep your night photos clean and expressive.
In practice, adjust by looking at the screen and considering motion, sharpness, and noise. If the scene is dark, you can lower shutter speed, open the aperture, or raise ISO. If you see noise, dial ISO down and trade light with longer exposure or a steadier setup. The goal is a clean image with enough brightness to reveal what you saw, not what the camera thinks you saw. The fun comes from learning which knob to turn first in each scene.
The Exposure Triangle in Practice: 2026 Approach
You’ll apply the triangle in practical steps. Start with a baseline: moderate shutter speed, mid aperture, and cautious ISO. Then adjust for motion: if there’s movement, increase shutter or stabilize with a tripod; if the scene is dim but still, widen the aperture and lower ISO to minimize noise. Your smartphone’s exposure compensation helps tweak brightness after the basics are set.
Phones have small sensors, so compromises are common. The payoff is quick: you capture night scenes that resemble your memory, not a muddy test image. The final image should feel balanced—bright enough to show detail with textures and color popping. That’s the aim of The Exposure Triangle for 2026: Mastering Night Photography on Your Smartphone.
Open Pro mode to see shutter, ISO, and exposure compensation
In Pro mode, you’ll see shutter, ISO, and exposure compensation laid out clearly. Tweak each setting, watch brightness shift, and lock in a look you love. Use exposure compensation to push brightness without disturbing shutter or ISO too much. This helps recover highlights or bring out shadows after framing.
When you’re comfortable, use Pro mode as your default for night scenes. It gives precise control without auto decisions, helping your photos feel deliberate—clean, balanced, and ready to share.
Control ISO to Cut Noise in Your Night Shots
When you shoot at night, your sensor reads light differently than in daylight. Your goal is to keep ISO as low as possible to maintain image cleanliness and sharpness. Pushing ISO up invites grain, while lowering it yields smoother skies, crisper stars, and truer color.
Think of ISO as the volume control for light. Keep it at base level and raise only when brightness demands it, especially if you’re on a shaky ride or windy night where longer exposure isn’t feasible. A modest ISO paired with a longer shutter or a stable setup often yields the cleanest results.
Lower ISO to reduce grain, raise it only when necessary
Start with the lowest ISO practical for the scene (often ISO 100–200 on modern phones). If you’re unsure, take two shots at different ISOs and compare noise. Increase ISO stepwise only when you must, balancing brightness with acceptable noise.
Combine ISO with smartphone noise reduction night shots and RAW capture
A smart combo is moderate ISO with in-camera noise reduction and shooting RAW. RAW preserves more data for post-processing, allowing better noise management while keeping detail. Noise reduction helps, but don’t rely on it to fix everything. Shoot RAW and edit to recover texture in night skies without overdoing processing.
Prefer RAW and careful ISO dialing for cleaner images
Whenever possible, shoot RAW. RAW files retain more color information and dynamic range, making noise easier to tame in post. Dial ISO slowly and purposefully, testing a couple of frames to pick the cleanest with enough exposure. A little testing prevents ending up with a single grainy result you can’t fix.
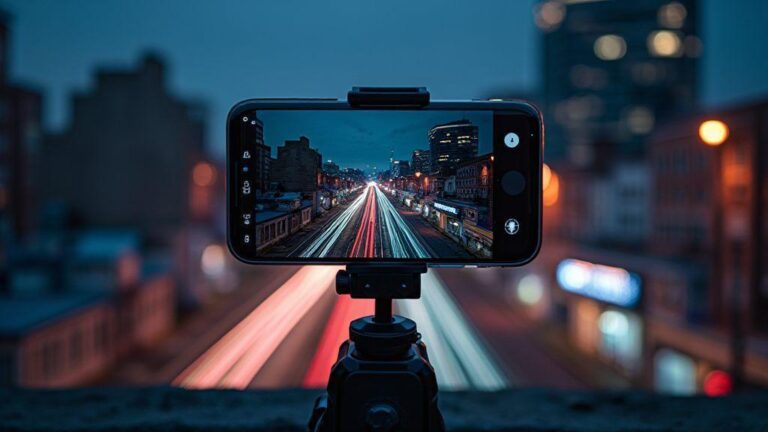
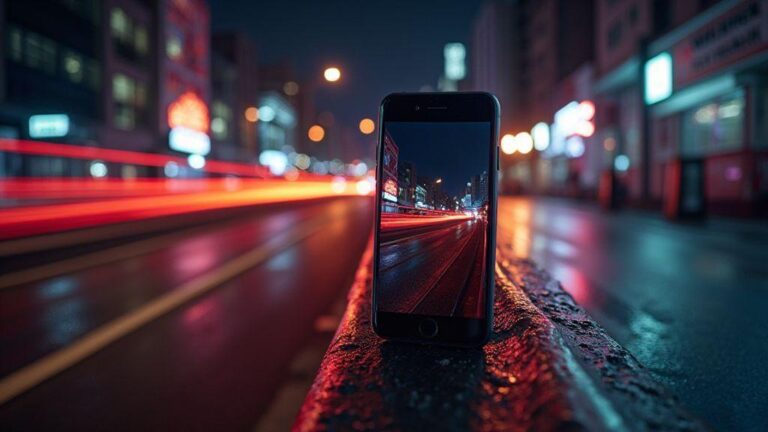
Use Shutter Speed and Long Exposure for Your Light Trails
Light trails come alive with the right shutter pace. Start around 1/60s to freeze small glowing lines; for longer, smoother trails, go toward 1/15s or 1/8s. Longer exposures require a steadier setup to keep static parts sharp. Balance motion with the scene’s brightness and your camera’s ISO limits. For bolder looks, stack several long exposures to intensify the trails without overwhelming the frame.
Long exposures demand patience. Shoot sequences of 10–20 seconds, review, and adjust. The aim is trails clearly defined while the surroundings stay recognizably dark. Practice to learn which speeds create the desired effect in different environments.
Choose shutter speeds for motion, from 1/30s to multi-second shots
Experiment with 1/30s for subtle trails, 1/60s for crisper motion, 1/15s or 1/8s for longer arcs, and multi-second exposures (2s, 5s, or more) for dramatic light graffiti. Always adapt to subject movement and safety. Start with a baseline, then adjust as you learn the scene’s rhythm.
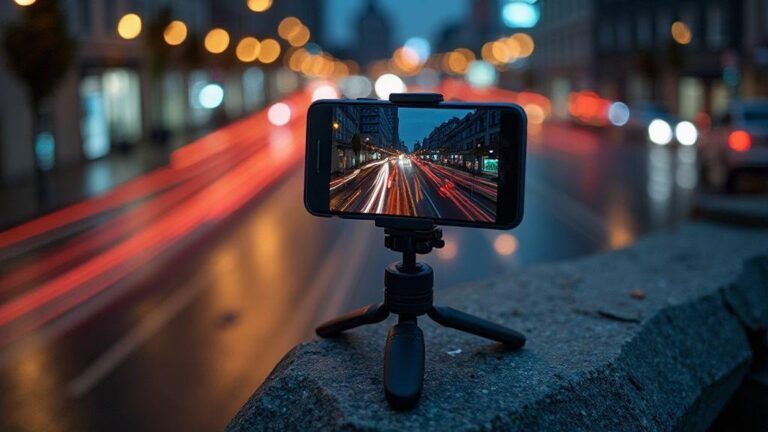
Try mobile long exposure night photography with a stable setup
Phone night photography excels when you minimize shake. Use a stable surface and a timer to avoid touching the phone at exposure start. A simple setup—phone on a ledge, clipped to a small tripod, or propped on books—can dramatically reduce shake and improve trail quality. A stable base makes longer exposures practical and professional-looking.
Use a tripod or tripod alternatives for smartphone night photography
A dedicated tripod is ideal, but not essential. A sturdy surface, a clamp, or a compact mini-tripod works too. Use a delayed shutter to eliminate shake after pressing the button. Enable grid or level to keep framing tidy, especially when long trails become the subject.
Work Around Fixed Aperture on Your Smartphone
Smartphones often use a fixed aperture, limiting depth of field. You can still shape your look by adjusting distance, filters, and software tools. The goal is to control light and mood while keeping exposure steady.
Most phones with fixed aperture rely on distance to control background blur and on software to simulate depth. When light is bright, shadows may need post adjustments; when dark, a stable setup and controlled ISO matter to avoid noise. Frame first, then fine-tune in editing to achieve a deliberate look.
Know most phones have a fixed aperture and what that means
A fixed aperture prevents you from opening the lens for more background blur. You influence depth of field with subject distance and post-processing, not a larger opening. Exposure decisions still matter, so plan framing and adjust exposure after capture for best results.
Use distance, ND filters, and software bokeh to change look
Move closer to exaggerate background blur or back up to keep more of the scene in focus. ND filters cut light so you can use longer shutter speeds in bright scenes, smoothing motion and preserving color. Software bokeh, available in many phones, simulates background blur when the hardware can’t deliver a wide aperture. Subtle distance changes paired with thoughtful editing yield natural results.
Improve depth with portrait modes and digital focus tricks
Portrait modes lift the subject from the background. If the background remains too sharp, tweak distance or use modes that emphasize edge detection and blur. Use digital focus tricks: tap to focus on the subject, then adjust exposure or shadows to keep facial detail without blowing highlights. Lighting the subject from one side can add depth even with a fixed aperture.
Use Manual Controls and Night Mode Like a Pro
Manual controls give you control over your shot, while night mode becomes a precise tool rather than a gimmick. Start with a steady baseline, then adapt to the scene. With practice, you’ll see better color, less noise, and more detail in the shadows when you stop letting the phone guess. Use manual exposure, shutter, ISO, and focus thoughtfully, and your night photos will feel intentional.
Night mode can be a powerful ally when tuned correctly. It blends longer exposures with smart processing. Adjust exposure and noise reduction manually to keep highlights clean and shadows rich. Treat night mode as a baseline, then push beyond it when needed.
Switch to smartphone manual exposure settings to own the shot
Manual exposure helps you decide exactly how bright or dark your photo should be. Start with a low ISO to minimize grain, then adjust shutter speed to balance motion and brightness. If the scene moves, a faster shutter may be necessary, accepting a touch of brightness loss for sharper results. Practice in familiar settings to learn how your phone behaves at night.
Learn night mode manual controls smartphone to balance light and detail
Lock exposure on your target area to keep the scene stable as data is captured. Balance shadows and highlights to retain texture without blown lights. For skylines, push exposure slightly higher to reveal city lights while preserving the sky’s depth. For indoor candle or fairy-light scenes, lower exposure helps preserve warm tones and avoid color halos. Practice to understand which scenes benefit from extended processing and which need quicker captures.
Save custom presets so you repeat great results quickly
Presets give you consistency. When you find a successful combo of ISO, shutter, white balance, and focus distance, save it. Name presets by location or mood for quick recall, so you can reproduce the look in familiar spots without re-dialing.
Shoot Stars with Your Phone: Astrophotography Tips
With careful setup and a few tricks, your phone can capture a striking night sky. Tiny movements become visible stars with long exposures and stacking. Keep the phone steady, set a long enough shutter, and minimize noise. Start with 10–20 seconds on a sturdy surface or tripod. A steady stance and hands-off exposure yield brighter trails and cleaner skies.
Manage light and sensor noise by starting with a low ISO and extending the exposure to reveal stars without washing out colors. If possible, lock focus to infinity and disable stabilization that might blur tiny tremors. Shooting RAW and stacking frames gives you flexibility in post. Frame, lock, expose, and stack for a cleaner, more dramatic night sky.
Use long exposures, stacking, and low noise workflows for stars
Long exposures gather faint stars but raise noise. Shoot multiple RAW frames and stack to reduce noise and enhance star detail. Use a tripod or stable surface, and choose shutter speeds you can handle without unwanted trails unless trails are your goal. RAW format helps preserve data for stacking. For many phones, an ISO around 400–800 with 15–30 seconds exposure works well. After stacking, align frames and apply flat/dark frames if available to reduce fixed-pattern noise.
Explore astrophotography with smartphone 2026 apps and stabilization tricks
New 2026 apps simplify night-sky capture with long exposure, stacking, and RAW workflows. Some apps guide shutter and ISO for your model; others offer manual white balance and focus. Use dark frames for calibration and stabilization features like tripod modes or motion suppression. If you don’t have a tripod, improvise with a solid surface and a timer to minimize shake. A steady shot, gentle long exposure, and RAW capture yield noticeably crisper skies.
Capture multiple RAW frames and stack in post for sharper skies
Collect several RAW frames at the same exposure settings and stack them to reduce noise and sharpen star details. Start with 20–40 frames and a 15–20 second exposure, then adjust as you gain confidence. In post, align and stack frames, then tweak levels to brighten stars without washing out the sky. The result is a clean, deep sky with visible star points.
If you want a focused takeaway, The Exposure Triangle for 2026: Mastering Night Photography on Your Smartphone is all about balancing shutter speed, aperture, and ISO, then using Pro mode, RAW capture, and stable setups to create night images that feel true to your memory and style.

Smartphone Night Photography Enthusiast & Founder of IncrivelX
Vinicius Sanches is a passionate smartphone photographer who has spent years proving that you don’t need an expensive camera to capture breathtaking images after dark. Born with a natural curiosity for technology and a deep love for visual storytelling, Vinicius discovered his passion for night photography almost by accident — one evening, standing on a city street, phone in hand, completely mesmerized by the way artificial lights danced across wet pavement.
That moment changed everything.
What started as a personal obsession quickly became a mission. Vinicius realized that millions of people were carrying powerful cameras in their pockets every single day, yet had no idea how to unlock their true potential after the sun went down. Blurry shots, grainy images, and washed-out colors were robbing everyday people of memories and moments that deserved to be captured beautifully.
So he decided to do something about it.
With years of hands-on experience shooting city streets, starry skies, neon-lit alleyways, and creative night portraits — all with nothing but a smartphone — Vinicius built IncrivelX as the resource he wished had existed when he was just starting out. A place with no confusing jargon, no assumptions, and no gatekeeping. Just honest, practical, beginner-friendly guidance that actually gets results.
Vinicius has tested dozens of smartphones from every major brand, explored dark sky locations across multiple states, and spent countless nights experimenting with settings, compositions, and editing techniques so that his readers don’t have to start from scratch. Every article on IncrivelX comes from real experience, real mistakes, and real lessons learned in the field.
When he’s not out shooting at midnight or writing in-depth guides for the IncrivelX community, Vinicius can be found exploring new cities with his phone always within reach, looking for the perfect shot hiding in the shadows.
His philosophy is simple: the best camera is the one you already have — you just need to learn how to use it in the dark.