Street Night Photography Safety Tips Every Beginner Should Follow
Safe Gear for Night Street Photos
You’re building a toolkit that helps you shoot confidently in low light. Start with gear you can trust and travel light, keeping your eyes on the streets rather than your camera bag. Think rugged, but simple. Planning now saves fumbling later when shadows deepen and streets get busier.
Your camera is your partner. Choose a body with good high-ISO performance and reliable autofocus in the dark, then pair it with a lens that stays sharp wide open. A versatile 24-70mm equivalent covers wide street scenes and tighter portraits without swapping lenses in sketchy corners. Have a fast memory card ready so you don’t miss moments. Consider a small, lightweight tripod or a sturdy monopod for long exposures when the lights glow just right.
When you’re out at night, your kit should feel like an extension of you, not a distraction. A compact water bottle or snack can sustain you during long shoots, and a microfiber cloth helps wipe lenses without smudges when rain hits. If you’re shooting in neighborhoods with uneven pavement, a small reflector or flash modifier can help shape light without adding bulk. Protect your eyes and hands: gloves that still let you use the camera and sunglasses for glare from shop windows or bright streetlights are useful. Your gear should support your eye for composition, not fight you at every corner.
As you plan for night sessions, test your setup in a familiar place first. Practice quick lens changes, check autofocus in low light, and rehearse battery access. Think through your process: could you shoot a quick street portrait, then switch to a cityscape without drawing attention or slowing down? Practice builds confidence, even with low light noise and grain, because you know your gear has your back. Now, let’s break down the essentials you’ll actually carry.
Street Night Photography Safety Tips Every Beginner Should Follow
Best Camera Gear for Night Street Safety
You want gear that keeps you grounded, not weighed down. Start with a body that handles noise well at high ISO so you can shoot in dim corners without sacrificing detail. A weather-sealed body helps you move through drizzle or misty nights. Pair it with a moderately fast zoom to cover most scenes—from alley portraits to wide street panoramas—so you stay nimble. Simpler setups reduce fumbling and help you stay aware of your surroundings.
Memory cards should be reliable and fast for quick bursts. Carry at least one spare, formatted and ready. A compact external battery bank can keep you powered through long nights, especially when testing new lenses or long exposures. Your safety is about staying alert, and reliable power helps you stay focused.
Your lens choice matters for safety as well. A fast, versatile lens reduces the need to linger in risky spots waiting for light. A standard zoom that covers wide to short-tele keeps you adaptable, safer than swapping lenses in dark or crowded areas. Don’t forget a small, bright flashlight with a red-light mode to preserve night vision when you need to peek at menus, batteries, or settings. A quiet, unobtrusive setup helps you blend in, so you’re less likely to draw attention.
Use Low-Profile Bags and Straps
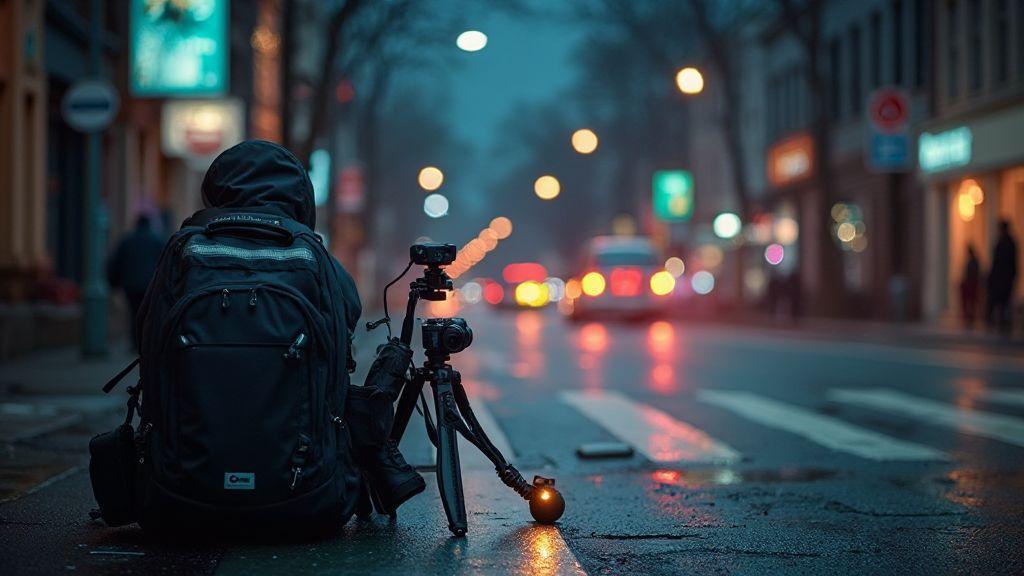
Your bag should blend with the scene. Choose low-profile bags that sit close to your body or slip under a jacket. A sling or compact backpack with a soft interior protects lenses while you move. If you’re navigating crowded streets, a bag that clips to your belt or a hidden chest strap keeps your hands free and gear secure. The goal is peace of mind: you should be able to swing your bag in front without wrestling with zippers or metal against bricks.
For comfort, use straps that distribute weight evenly. A wide, padded strap or a dual-strap system reduces shoulder fatigue after hours of shooting. Keep the bag in front or at your side so you can see what’s around you and react quickly if someone approaches. A low-profile bag helps you stay agile and ready for sudden moments on the street.
Organize gear to reach essentials fast without exposing the rest. Keep a spare battery and a tiny torch in a quick-access pocket. A clip-on tether or carabiner can secure a small tripod or monopod when you’re between scenes.
Choose Safer Night Street Locations
You’ll get the best results by picking places you feel confident moving with your gear. Start with streets with steady foot traffic and clear sightlines. The setup — tripod, camera, and bag — should be easy to maneuver, not a safety drill. When you choose locations with predictable patterns, you can focus on the shot instead of safety concerns.
Think about the vibe you want: bustling corners, quiet storefronts, or neon reflections in puddles. The right location helps your subject pop and your camera stay steady. Notice awkward shadows or corners that hide people and keep moving if needed. You want a street that invites shooting, not trouble.
Remember: safety first, but you don’t have to miss great shots. A few minutes of scouting can save hours of post-production frustration. If you feel unsure, switch to a busier route with crosswalks and visibility. Confidence grows as you learn which streets support steady, clean images.
Choosing Safe Night Locations
Pick locations with visible activity and predictable routines. Busy routes with regular pedestrians reduce surprises and help you blend your gear into the flow. Your body language should say you belong there—look confident. Look for streets with good lighting at multiple angles to bounce light onto your subject without harsh shadows.
If you’re new, start on familiar, safe edges to learn light behavior at night. You’ll learn where cars pause, where people gather, and where streetlights create highlights. As you gain experience, expand to neighborhoods that offer character without chaos. The goal is to shoot with confidence, not chase danger.
Pick Well-Lit, Busy Routes
Choose streets with illumination from multiple sources. Lights at different heights add depth and reduce sudden dark patches. A well-lit route helps you frame quickly and adjust exposure on the fly. Busy routes add context—people, cars, storefront reflections—giving energy to your night photos. Carry an extra small flashlight or test corners with your phone’s light before setup to see how your tripod will fit and how light interacts with the scene.
Personal Safety Habits While Shooting
Out at night, your main job is to stay safe while you capture great images. Think of it as a simple, repeatable checklist. Stay alert; reflections, moving people, and changing light can affect shots and safety. Keep your bag strapped snug, keep your lens cap on until you’re ready, and have your phone in an accessible pocket for quick help.
Know your environment. Scout a route, check lighting, and identify safe spots like busy streets or well-lit corners where you can retreat if needed. Your plan isn’t boring detail—it’s a shield to stay focused on the shot.
Personal Safety Tips for Night Street Photography
Be seen and see clearly. Wear bright or reflective clothing when possible, and use a flashlight or your phone’s light to check steps and tripod position. A visible presence lowers trouble risk and helps you stay aware.
Your gear should work for you. Use a sturdy strap or small backpack, keep the camera ready but not snag-prone, and choose a compact tripod for quick setup. Pack a spare battery and a small snack to stay energized.
Trust your instincts. If a scene feels off, move. Step back, switch streets, or pause behind a light post. You’ll shoot more confidently when you know you can leave immediately if needed.
How to Stay Safe Shooting Street at Night
Plan, not panic. Map a route, choose well-lit areas, and avoid empty alleys. If you must work in quieter zones, bring a friend or tell someone where you’ll be. Keep your camera on a strap you can feel and have your phone ready for help. A power bank helps you avoid chasing a charger in the dark, and a small first-aid kit is smart insurance.
Control your curiosity. You’ll see powerful scenes, but safety comes first. If a shot requires stepping into a risky area, skip it. Your best images come from choices that keep you out of danger and still capture the mood.
Tell Someone Your Plan and ETA
Before heading out, tell a trusted person your route and estimated return. Share exact location, streets you’ll shoot, and when you’ll check in. A quick update if you’re running late keeps everyone in the loop without disrupting your flow. Your plan helps you stay focused and gives your support system a safety net.
Prevent Theft and Protect Your Gear
Night shoots can attract thieves, and darkness can hide losses. Keep gear tight, stay aware, and bundle items to slow grab-and-go attempts. Your aim is to enjoy the shoot, not chase a thief.
Invest in sturdy bags with reinforced zippers, padded compartments, and hidden pockets. A bag that blends into the scene makes you less of a target. When you move between locations, keep your most valuable items in front, within arm’s reach, and use quick-release locks to shed weight if needed. Consider anti-theft bags and light security measures like a cable lock for rental gear.
Keep gear close and insured. Store valuable items within easy reach, and stay mindful of unattended time. Insure your gear and keep serials and receipts for quick claims. Carry a portable lock for quick security, and use hotel or rental-car safes when traveling between spots.
Night Lighting and Visibility Techniques
See clearly and be seen. Mix ambient light with purposeful lighting so subjects pop without washing out. Practice simple setups: a well-lit storefront first, then a small light to highlight a person. Balance contrast and detail to preserve the night mood.
Plan routes and timing. Neon signs may cause highlights to clip; adjust exposure accordingly. Understand light sources—headlights, lamps, reflections—and choreograph scenes where subjects emerge naturally. Shoot in RAW to keep latitude for adjustments, keep ISO modest to reduce grain, and use a wider aperture only when you want shallow depth of field. A steady hand or small tripod helps prevent blur on long exposures.
Small Continuous Lights and Reflective Clothing
Compact continuous lights stay on, helping you plan composition and timing. Place them low and to the side to sculpt features or behind objects to hint at shape. Reflective clothing catches light enough to separate you from the background without drawing excess attention. When working with pedestrians, reflections add texture and context.
Wearing reflective gear increases both your visibility and safety. Test by walking a few steps and observing how light affects nearby objects. Place yourself to avoid blinding drivers or creating glare, and use continuous lighting for clean visuals and safer streets.
Stay Visible to Traffic and Pedestrians
You’re part of the street, not a ghost. Direct lights toward your target, not into the void. Wear reflective accessories when crossing busy intersections. Position your light on your face or your subject’s face to reduce flare and improve readability of actions, helping you tell a clearer story.
Plan, Rules, and Group Safety Steps
Start with a simple plan that keeps you calm. Define your shoot goal, choose a location, and check the weather. List gear you’ll bring, like a small tripod, extra batteries, and a red headlamp to avoid waking others. Set a time window and a backup plan for rain or fog. Include a safety layer: tell a friend where you’re going and check in by phone or text when you’re done. A clear plan helps you stay focused and avoid risky detours.
Rules keep you steady in the dark. Bring minimal but essential gear, keep valuables tucked away, and stay aware of surroundings. Respect private property and street rules; don’t block sidewalks or doors. Use a small, steady tripod or a solid surface to keep shots sharp. If you feel unsure, step back and reassess instead of rushing. Your plan plus rules form the backbone for safe, enjoyable night photography.
Group safety steps are your first line of defense. If you shoot with others, pick a meeting point, rotate positions, and use a simple thumbs-up system to stay coordinated. Keep eye contact within the group, and have a buddy willing to stay in touch if someone splits off. Share your location with a trusted contact before you go and check in after the session. Group safety builds confidence and protects your night memories.
Nighttime Street Photography Safety Checklist
Keep your phone charged and emergency contacts ready. Wear reflective clothing or gear so drivers can see you. Carry a small flashlight or headlamp on red light mode to preserve night vision. Stay in well-lit, populated areas and avoid offbeat alleys. Use a discreet bag for your camera to avoid drawing attention. Always have a plan to leave quickly if needed. If something feels off, trust your gut and move to a safe place.
Night Photography Safety for Beginners
Begin in a lit area to build comfort with camera settings. Practice manual mode on a familiar street. Bring a friend to watch your back while you adjust settings. Keep gear close and secure, especially at busy intersections. Practice walking with your tripod and bag to avoid tripping. Take small, safe steps to build confidence and learn what to do if a situation looks risky.
Join a Group or Scout During Daylight Hours
Joining a group provides safety and a chance to learn from others. Observe how they move through crowded scenes and manage gear. If you prefer to scout alone, do it in daylight to map angles, check safe routes, and identify well-lit spots. This prep saves time at night and helps you stay calm when lights go down.

Smartphone Night Photography Enthusiast & Founder of IncrivelX
Vinicius Sanches is a passionate smartphone photographer who has spent years proving that you don’t need an expensive camera to capture breathtaking images after dark. Born with a natural curiosity for technology and a deep love for visual storytelling, Vinicius discovered his passion for night photography almost by accident — one evening, standing on a city street, phone in hand, completely mesmerized by the way artificial lights danced across wet pavement.
That moment changed everything.
What started as a personal obsession quickly became a mission. Vinicius realized that millions of people were carrying powerful cameras in their pockets every single day, yet had no idea how to unlock their true potential after the sun went down. Blurry shots, grainy images, and washed-out colors were robbing everyday people of memories and moments that deserved to be captured beautifully.
So he decided to do something about it.
With years of hands-on experience shooting city streets, starry skies, neon-lit alleyways, and creative night portraits — all with nothing but a smartphone — Vinicius built IncrivelX as the resource he wished had existed when he was just starting out. A place with no confusing jargon, no assumptions, and no gatekeeping. Just honest, practical, beginner-friendly guidance that actually gets results.
Vinicius has tested dozens of smartphones from every major brand, explored dark sky locations across multiple states, and spent countless nights experimenting with settings, compositions, and editing techniques so that his readers don’t have to start from scratch. Every article on IncrivelX comes from real experience, real mistakes, and real lessons learned in the field.
When he’s not out shooting at midnight or writing in-depth guides for the IncrivelX community, Vinicius can be found exploring new cities with his phone always within reach, looking for the perfect shot hiding in the shadows.
His philosophy is simple: the best camera is the one you already have — you just need to learn how to use it in the dark.