Star Trails Reimagined: Advanced Techniques for Capturing Celestial Arcs on Your 2026 Smartphone
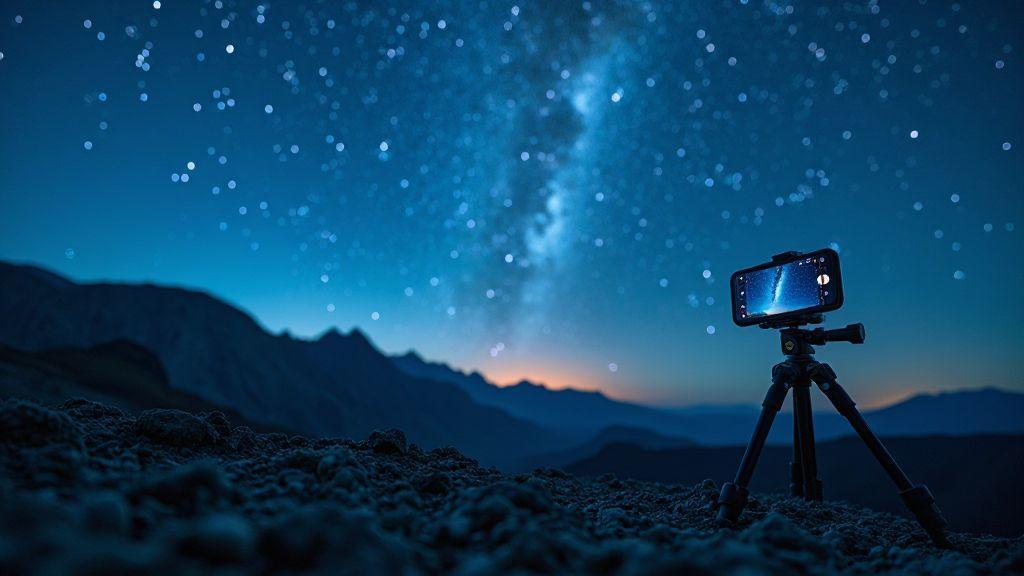
Tripod mounts for smartphone astrophotography
You need a solid base for crisp night shots. A sturdy mount keeps your phone steady through long exposures and tiny shakes from wind or passing traffic. Choose a model that balances with your phone’s weight and minimizes shake when you touch the screen. Reliability matters more than fancy features when aiming at faint stars or sweeping skies. Consider portability, needed height, and whether the legs spread wide enough for uneven ground. The right mount should inspire confidence as you frame your first star.
Your phone deserves an adapter that grips without scratching metal or glass. Look for soft pads and a firm bite to prevent slips during a long exposure. Ensure the adapter rotates and tilts without loosening mid-shot. If you shoot with a case, pick a clamp that accommodates a thicker profile or has removable padding. The goal is a secure, aligned connection that stays put as you adjust composition. A tiny misalignment can blur star edges, so test the setup before dark.
For star trails, quick-release options and modular parts help. A quick-release plate lets you switch from handheld to tripod in seconds, handy when chasing drifting clouds or auroras. A flexible mount lets you angle toward the horizon or zenith without juggling the phone. If you’re new, start with a simple, robust kit and add accessories as you gain confidence. Predictability is key: know exactly how your phone sits when locked down.
Mount tips for star trails smartphone 2026
Star trails demand careful alignment. Make sure the tripod is level; even a slight tilt can bend arcs into a slant. Use a bubble level or prop a spacer under a leg until the horizon reads flat on the screen. A level rig keeps trails uniform and eases post-processing.
Secure your phone and level the rig. Before long exposures, gently test the setup to confirm it won’t shift with a breeze or touch. If wind causes wobble, add a small weight to the tripod leg or use a sandbag. Level by eye, then verify with a test shot. Small tweaks are easy; big shifts waste time and stars.
Secure your phone and level the rig
Lock everything snugly, but don’t over-tighten. Over-tightening can strain clamps and cause misalignment as metal cools in the night air. After clamping, give the device a gentle shake to confirm stability. If you notice drift after minutes, pause, re-check, and adjust. Leveling matters for the shape of every arc you capture—consistent leveling yields clean, uninterrupted trails.
Smartphone RAW night sky settings
You want the night sky to shine, not the camera’s noise. Shoot in RAW with manual controls to guide every light your phone captures. RAW preserves color, detail, and dynamic range for stars, nebulae, and faint clouds. It’s a foundation you can rebuild in post.
Manual controls let you choose exposure, focus, and white balance. Open pro mode, extend exposure, and keep ISO as low as possible without dimming the scene. Longer exposures reveal more stars but risk trails if the camera moves. If the night sky looks noisy, ISO is likely too high. Start with a 10–30 second shutter to balance stars and noise.
Shoot in RAW and manual controls
Balance exposure, ISO, and focus by testing a few frames. Start with 15 seconds, ISO 800, infinity focus. If skies are dim, raise exposure slightly and lower ISO. If you see blur, adjust focus or shorten exposure. It’s a mix of math, art, and patience. You’ll find a rhythm: test, tweak, and lock in what works for your location and phone.
Smartphone RAW night sky settings (continued)
Balance exposure, ISO, and focus
A sweet spot captures light without burying stars in noise. If the sky looks dim, increase exposure and reduce ISO; if you see noise, lower ISO and lengthen exposure while watching for trails. Foreground matters too, so adjust white balance to avoid muddy colors.
Save uncropped RAW files for editing
Always keep full-resolution, uncropped RAWs. They maximize post-edit flexibility, letting you recover sky details and adjust color without losing sharpness. You can crop later if needed, but you’ll avoid compression and data loss during editing. Maintain a clean archive to revisit shots with different edits.
Smartphone stacking and intervalometer apps
Smartphone stacking apps fuse many short exposures into one clear image, reducing noise and keeping colors true without a heavy rig. Look for apps that handle alignment, stacking, and simple post-processing in one place, with features like exposure control, alignment guides, and batch export. With the right app, you’ll feel like a seasoned night photographer who found a powerful shortcut.
As you test stacking, minor drift or misalignment becomes nearly invisible when you accumulate frames. Your phone can shoot many short exposures, helping you dodge faint trails turning into blur. Start with 50–100 frames, then push to 500 as you gain confidence. Keep the phone steady on a tripod or stable surface and lock focus and exposure for consistency.
Use smartphone star trail stacking apps
Star trail stacking apps turn many short shots into sweeping arcs with simple controls. Set exposures to 15–30 seconds and let the app blend frames into a single arc. Plan a quiet, dark spot, choose a reasonable frame count, and start. You’ll see curved lines map the sky’s motion over time, with real-time previews and easy export.
Experiment with frame length and total duration to shape the arc. Short frames reduce wind or tremor streaks; longer frames yield broader arcs. If light pollution intrudes, choose apps with masking or cropping options to keep trails crisp. A straightforward workflow—shoot, stack, and lightly process—offers dramatic results with minimal gear.
Star Trails Reimagined: Advanced Techniques for Capturing Celestial Arcs on Your 2026 Smartphone
You’re not just shooting stars; you’re crafting motion in the night sky. Star Trails Reimagined pushes you beyond basics to create arcs that feel alive on a small device. Start with a stable tripod, but careful handheld tweaks are possible with a remote shutter or interval timer to avoid shake. The aim is to control the arc’s look by tweaking exposure, interval, and total duration so your trails have rhythm rather than a patchwork of dots.
Try bracketed stacks that merge two or three exposure lengths. This adds brighter foreground detail in some frames and cleaner stars in others, then blend for balance. If your app supports masking, isolate the sky from the foreground to prevent landscape smear while stars glide behind. A little post-processing can go a long way: slight contrast boosts, a touch of clarity, and careful noise reduction preserve the night’s mood.
Practice makes this feel natural. Begin with 60–120 minutes of interval shooting and 15–20 second exposures, then adjust based on how the arcs appear in your preview. Keep ISO modest to minimize noise, and consider subtle foreground lighting or light painting for a touch of drama. The result should look crafted, not just a long streak of lights.
Automate many short frames with interval apps
Automation keeps consistency without overnight babysitting. Interval apps can program hundreds of short frames with precise timing, exposure, and focus. Set a start time, interval, and total frames, then let it run while you stay warm. The payoff is a clean stack with even brightness and minimal drift.
If you’re new to interval shooting, start with a modest plan: 2 hours, 20-second frames, 2-second intervals. Lock exposure, white balance, and focus before you begin; disable screen dimming; and use an external power source if possible. A steady rhythm yields smoother stacks and more satisfying star trails.
Combine interval shooting with stacking to create a simple workflow: shoot, stack, and lightly process. With practice, you’ll discover which settings deliver the cleanest trails for your favorite night-sky scenes.
Mobile long exposure astrophotography methods
You want clear night skies without new gear, so rely on a quiet tripod or steady surface. Lock exposure to the darkest sky, raise ISO just enough to pull stars without excessive noise, and use a timer or remote shutter to avoid camera shake. Shoot in RAW if supported for later detail recovery. Stacking can enhance brightness and star pop, while keeping the foreground readable.
If wind or moving foreground elements are an issue, shield the lens with a small hood or your hand between shots. Tap to focus on a bright star or skyline first, then switch to manual exposure for consistency. Balance two scenes: a dark sky and a stable foreground. Shorter subframes reduce trailing and keep things crisp. Test settings side by side and adapt.
When to use single long exposures
Single long exposures are simple and effective in busy foregrounds or for beginners. They help you control glare and color balance in one shot. They’re easier to post-process and can still reveal Milky Way glow or bright planets under good conditions. Lock focus and exposure, use a stable surface, and shoot RAW when possible to tweak later. A single shot can make a dramatic foreground silhouette against a starry sky.
Advanced star trail techniques smartphone with stacking
Stacking remains the best route for long arcs with minimal noise. Shoot many short exposures and align on sky features, keeping the foreground stationary. Post-stack, you can blend frames to create continuous trails and adjust white balance to fix color shifts. Mask the foreground slightly so land stays sharp while the sky trails glow. Smartphones and desktop workflows both work—more frames yield longer, cleaner arcs.
Shield lens from wind and dew
Wind and dew ruin shots quickly. Use a small hood, microfiber cloth, and a light anti-fog spray if available. A wind shield or tiny tent helps keep frames stable, especially during lengthy stacks. Pause to wipe the lens if dew forms. Clean lenses yield sharper stars and crisper foreground.
Noise reduction and post-processing for phone star trails
Post-processing can make or break clean star trails. Plan your stacking workflow first, then apply denoise steps that preserve sky details. The goal is crisp arc lines with subtle brightness, without flattening the night.
Think of editing as a recipe: steady steps that maintain trail shape while boosting brightness. When unsure, test on cropped areas first to avoid over-editing. Color consistency matters; adjust white balance after denoising to keep natural hues.
Stack to lower noise before editing
Stacking aligns frames so you average out random noise while preserving trails. Ensure alignment on the sky, not the foreground, and use exposure bracketing or longer subs sparingly. A cleaner stack reduces the need for heavy noise reduction and keeps trails sharp. If using RAW, keep the stack intact for deeper edits later. Correct color noise with selective edits rather than sweeping changes.
Use phone denoise and RAW editors
Denoise tools vary in quality; test several to find one that preserves fine lines. Work on RAW files to maximize brightness, contrast, and color control. Apply denoise gently to avoid washing out the trails. Save a baseline before tweaking so you can compare edits, and keep color consistent after denoising to maintain natural-looking arcs.
Compose celestial arcs and fight light pollution
Plan for long exposures that reveal arcs while controlling light pollution. Start in a dark, open spot away from lamps. Use a wide-angle lens to capture sweeping arcs and target the Milky Way or star trails that fit your scene. Keep exposure steady and ISO modest to reduce grain. If glow appears near the horizon, adjust composition to push intrusions out of frame and let arcs breathe. Light pollution can hue skies pink or orange, so seek darker skies, a low horizon, and minimal nearby lighting. Stack multiple frames to darken the ground while keeping arcs bright for a dramatic nightscape.
Post-process to boost contrast so arcs pop without amplifying noise. Use a gentle sky boost and subtle color adjustments to keep stars natural. For longer trails, stack 200–400 frames with robust alignment so arcs stay sharp. Balance foreground detail with the sky to add depth. Label files and maintain a repeatable workflow for future shoots. The payoff is a smooth arc stream across the frame that feels alive.
Frame the celestial pole and foreground for scale
Frame Polaris as a reference point to convey scale. Place foreground elements in the lower third to anchor the scene. A tree line, rock, or a calm lake can frame the arcs and emphasize the sky’s vastness. Keep the tripod steady during framing; even small shifts ruin long-exposure alignment. If you want drama, place the celestial pole near a foreground feature so the arcs appear to bow toward it. Dim or sculpt foreground lighting in post to preserve sky integrity.
Light pollution mitigation mobile astrophotography tips
Use star-tracking apps to locate darkest skies and plan Milky Way appearances. Enable RAW or night modes to preserve color; apply a light pollution filter if available. Keep the lens clean and stabilize your setup with a small tripod or clamp. If near lights, shoot shorter exposures and stack later to build exposure without overstressing the sensor. Save settings as presets for quick reuse on future trips.
Scout dark sites and use local filters
Scout dark locations with clear horizons and minimal glow. Bring a light meter or use night mode to gauge sky brightness. Local filters can reduce sodium/LED glare while keeping stars intact. Consider joining a local astronomy club to find the best dark spots and optimal conditions. Plan for peak darkness times and remember a small foreground light can add depth. Bring extra batteries and protective gear for dew and cold, so you can stay out longer and capture richer celestial arcs.

Smartphone Night Photography Enthusiast & Founder of IncrivelX
Vinicius Sanches is a passionate smartphone photographer who has spent years proving that you don’t need an expensive camera to capture breathtaking images after dark. Born with a natural curiosity for technology and a deep love for visual storytelling, Vinicius discovered his passion for night photography almost by accident — one evening, standing on a city street, phone in hand, completely mesmerized by the way artificial lights danced across wet pavement.
That moment changed everything.
What started as a personal obsession quickly became a mission. Vinicius realized that millions of people were carrying powerful cameras in their pockets every single day, yet had no idea how to unlock their true potential after the sun went down. Blurry shots, grainy images, and washed-out colors were robbing everyday people of memories and moments that deserved to be captured beautifully.
So he decided to do something about it.
With years of hands-on experience shooting city streets, starry skies, neon-lit alleyways, and creative night portraits — all with nothing but a smartphone — Vinicius built IncrivelX as the resource he wished had existed when he was just starting out. A place with no confusing jargon, no assumptions, and no gatekeeping. Just honest, practical, beginner-friendly guidance that actually gets results.
Vinicius has tested dozens of smartphones from every major brand, explored dark sky locations across multiple states, and spent countless nights experimenting with settings, compositions, and editing techniques so that his readers don’t have to start from scratch. Every article on IncrivelX comes from real experience, real mistakes, and real lessons learned in the field.
When he’s not out shooting at midnight or writing in-depth guides for the IncrivelX community, Vinicius can be found exploring new cities with his phone always within reach, looking for the perfect shot hiding in the shadows.
His philosophy is simple: the best camera is the one you already have — you just need to learn how to use it in the dark.