Shooting Busy Intersections at Night: Settings and Composition Guide
Shooting Busy Intersections at Night: Settings and Composition Guide
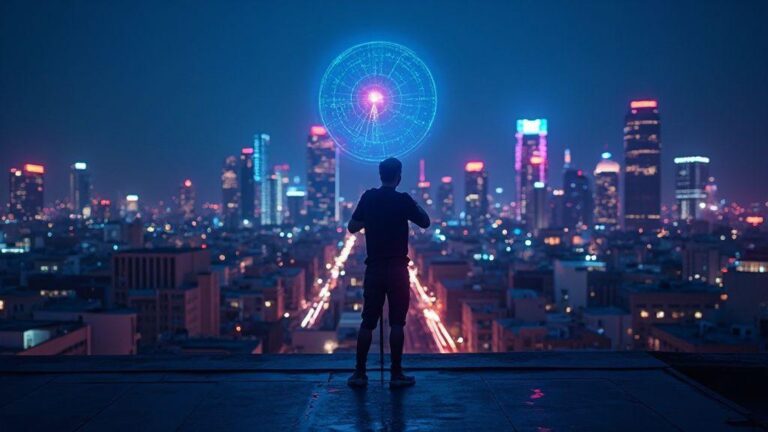
Welcome to a concise, practical guide for choosing aperture, shutter speed, and ISO when photographing busy intersections after dark. This guide covers core settings, how to compose light trails, and how to stabilize gear to capture crisp, dynamic city nightscapes. The Shooting Busy Intersections at Night: Settings and Composition Guide aims to balance light, motion, and depth so you can seize fleeting moments on crowded streets.
Aperture, Shutter Speed, ISO for Night Traffic
A balanced mix of light and motion hinges on aperture, shutter speed, and ISO. Aperture controls light entry and depth of field; for busy streets a mid-range f-stop keeps foreground and background legible. Shutter speed shapes motion: slow enough for light trails, fast enough to freeze most vehicles. ISO sets sensitivity; raise only as needed to avoid noise while preserving contrast. Bright street lamps, neon signs, and moving traffic require thoughtful exposure to prevent mud or blown highlights.
Start with a goal: crisp street details with some motion, or dramatic light trails carved through darkness. Trails benefit from a longer shutter with a stable base; details favor a shorter shutter and a touch higher ISO. A 24–70 mm zoom gives framing flexibility from a safe distance to close-in impact. Night air can soften focus, so shoot a few frames to confirm depth of field across the scene.
These settings aren’t fixed; adapt as the night evolves. If ambient fog glows, lower ISO and tighten aperture to preserve contrast. In glare-heavy spots, a higher shutter can reduce bloom while preserving trails where you want them. Test, review, and adjust quickly so you don’t miss fleeting moments on busy streets.
Use night street photography settings to start
Baseline you can rely on: aperture around f/8 to f/11 to keep mid-ground and background reasonably sharp, especially storefronts or signs. Shutter around 1/4 second to form trails without smear. ISO around 400–800 to keep the scene clean yet bright enough to see texture in shadows. If the scene is brighter than expected, drop ISO or raise aperture to protect highlights. For stronger trails, extend the shutter to 1 second or longer and compensate with ISO or a wider aperture.
Some streets yield smoother trails: wide streets with even traffic. Narrow streets or bright storefronts create dramatic contrast and can overwhelm the sensor; fine-tune by dialing down ISO and adjusting aperture to tame highlights while preserving trail glow. With practice, you’ll compare how different shutter speeds shape mood.
Keep your camera steady. If you’re hand-holding, you’ll lose sharpness, so use a tripod or a sturdy surface for longer times. Brace elbows and use a wrist strap if you must shoot handheld at slower speeds. Read the city’s pulse by observing how lights weave through traffic, then translate that into a frame that feels alive.
Set shutter speed to control trail length for your shot
Your shutter speed decides how long light is recorded in a frame, shaping motion. Longer shutters yield longer, brighter trails—great for conveying speed and energy. Shorter shutters freeze motion into crisp, bright points that map the traffic pattern without overwhelming the frame. Decide the story: a river of glowing lines or a still city pulse punctuated by moving cars.
New to trails? Start at 1/4 second and observe the lines. If trails are faint, move to 1/2 or 1 second, adjusting ISO to keep exposure balanced. If trails overwhelm the scene, shorten to 1/8 or 1/16 second. Check edges: cars entering or leaving the frame will shift light balance. A tripod helps here, as even small shakes become visible at slower speeds.
Bright signs or streetlamps may require a shorter shutter to prevent bloom. Dimmer scenes can benefit from longer exposures to reveal shadow texture. Expect your sweet spot to shift with the city’s lighting changes, and practice to predict light behavior as it moves through amber, green, and red phases.
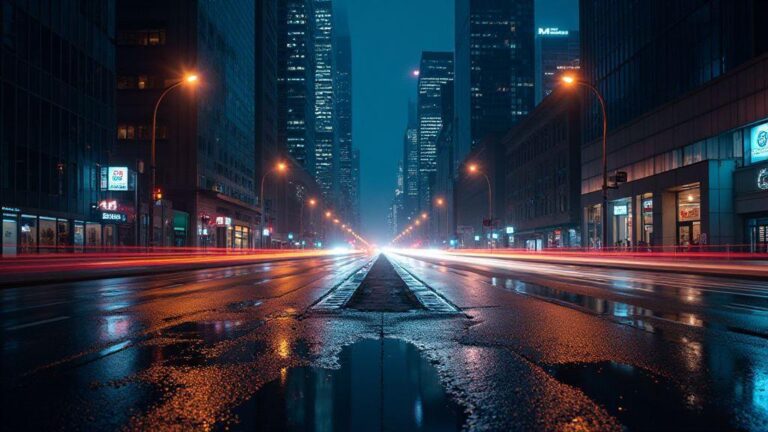
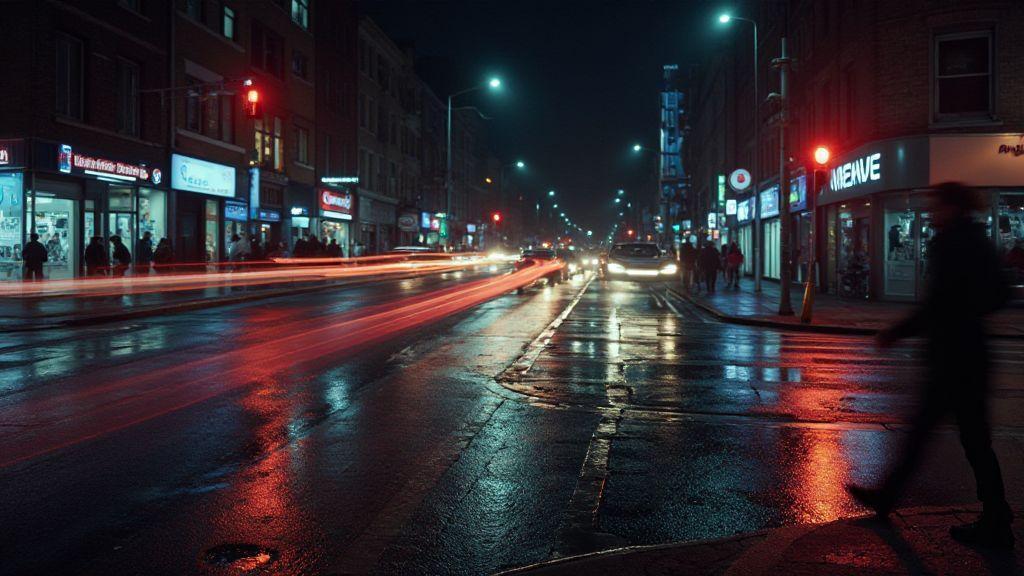
Long Exposure and Light Trails at Busy Intersections
Long exposure turns rushing lights into bright, continuous lines. Stand still, keep the camera steady, and let the city paint with light. Use a sturdy tripod and a timer or remote to avoid shake. Start with a low ISO and a small aperture to preserve detail, then adjust as needed. Moving cars become smooth trails while buildings stay crisp in the background, revealing the rhythm of traffic without losing essential details.
Think of every light as a thread in your story. Point down a straight road to create long lines that guide the eye toward your subject—aWaiting person, a café glow, or a distant statue. For drama, try a slightly shorter exposure to separate cars, maintaining motion with defined highlights. Consistency is key: stay steady, keep a consistent interval, and weave light into a living frame.
For beginners, shoot near a crosswalk where pedestrians briefly appear to add life without clutter. Check traffic patterns and choose a night with steady flow. Your goal is a balance between readable detail and motion blur, not a wall of white lines. With practice, you’ll know how long to expose to achieve clean, continuous strokes guiding the viewer through your shot.
Use long exposure to capture your light trails
Short exposures freeze action; long exposures let light paint the scene. Mount the camera on a tripod, switch to manual, and keep ISO low to reduce noise. Start with 15–30 seconds, then adjust. If trails are too faint, extend time; if too bright, shorten. Trails become lines that glow against the street, grounding your subject in still surroundings. Keep the camera level to maintain straight lines.
Sharpen trails with a small aperture (e.g., f/8) to keep more of the street in focus. If tall headlights or lamps create halos, slightly stop down or wait for lights to dim a touch. For color variety, dusk shoots can pair warm street lights with cooler neon, giving trails a two-tone glow that pops.
Compose trails to lead the viewer to your subject
Composition guides the eye. Use light trails to frame your subject and pull attention toward it. Position the subject a third from the edge or at a leading-line end so the viewer travels along the trail to your focal point. Let the brightest lines steer toward a cafe, statue, or storefront. A gentle road curve can direct the eye, while a straight line conveys urgency.
Consider foreground elements like a curb, bench, or puddle that reflect trails and multiply the energy. For a minimalist look, place the subject off-center with space in front; trails fill that space and lead the eye to your subject. Make trails act as arrows pointing to your subject, not random light bands.
Time shots for peak traffic flow
Timing matters as much as technique. Observe the intersection before shooting to find peak flow, usually when lights change or cars roll through together. Plan so fast, bright trails cross behind or beside your subject, conveying bustle without drowning the focal point. Arrive early to study how trails evolve and choose the moment that fits your composition.
Lock the moment, press the shutter, and stay still for clean trails that don’t blur your subject. If photographing pedestrians, shoot a few frames at different tempos to compare how movement interacts with your subject. This is where you find balance between energy and clarity.
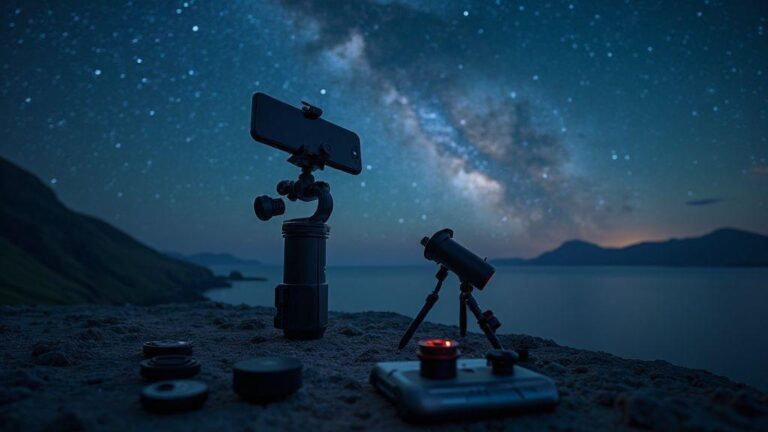
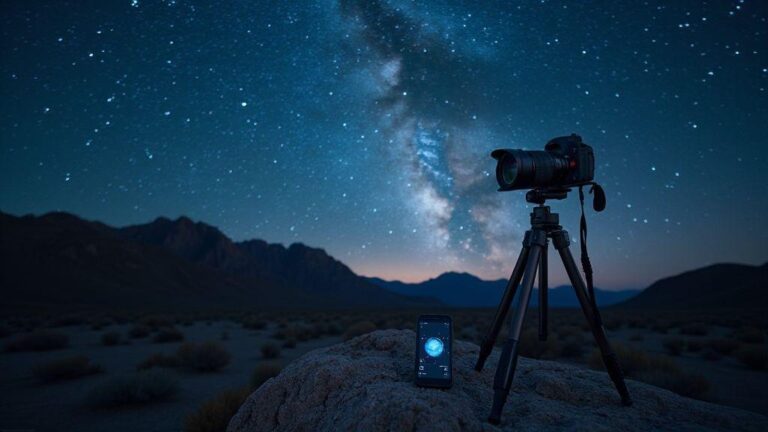
Tripod and Stability for Night Shots
Your tripod is your best friend at night. It yields crisper images, less blur, and the freedom to experiment with longer exposures. This is not the time to improvise on unstable surfaces; a solid setup lets you frame city lights and quiet corners with confidence.
First, keep gear steady against cold air and vibrations. A basic aluminum or carbon tripod with a stable head improves composition significantly. If you shoot longer exposures, a sturdy setup prevents micro-movements from ruining your frame. Check the ground surface; on concrete, widen the legs and secure them to avoid wandering as you adjust.
Pick a sturdy tripod you can trust
Choose a tripod that resists shake, with a solid center-column lock and reliable leg locks. It should handle wind and traffic vibrations, and not tip over easily in crowded places. Consider weight and height so you can shoot at eye level without bending, yet carry it comfortably on long shoots. Test stability by mounting your camera and nudging gently to gauge shake.
Use a remote or timer to avoid camera shake
A remote or timer lets you trigger without touching the camera, crucial for long exposures. If you lack a remote, a 2-second timer works well, especially for scenes with movement that deserves a steady frame. Lock your exposure first, then trigger. For moving subjects like buses, a remote helps minimize distortion. Consistency is the goal; a small delay is preferable to a blurry photo.
Stabilize your legs and avoid blocking sidewalks
Ensure tripod feet are stable on the ground. On slick surfaces, use rubber feet or a pad for traction. Widen the legs for stability on uneven ground. If you’re near a sidewalk, keep your setup clear so pedestrians can pass safely and you don’t block traffic or bike lanes.
Directly anchoring your stance helps maintain composition while you fine-tune focus and framing. Planning ahead saves you from constant resetting as people move by. With a rock-solid tripod, you’ll be more confident letting the shutter stay open longer.
Focusing Techniques in Low Light Traffic
Sharp images in low light require deliberate focus. Manual focus gives control when auto focuses hunt from reflections or moving cars. If automated focus struggles, use a focus assist or magnify in live view to nail distance, then lock and recompose. Lock focus when you’re ready, then wait for a passing bus or cyclist to create a clean silhouette without refocusing.
When framing busy lanes, lock onto bright lights or high-contrast points—storefront signs, streetlamps, or bright headlights. Once locked, avoid touching focus to prevent losing the lock as vehicles drift through. If the scene shifts, re-lock quickly on a new bright point while maintaining sharpness across the frame.
Verify sharpness on zoomed live view before pressing the shutter. Zoom 5x or 10x to check edges and details. If soft, re-focus and re-check. This quick check saves wasted frames and keeps night shots crisp even with fast-moving traffic.
Use manual focus or focus assist to lock your subject
In dim light, autofocus may hunt. Switch to manual focus and rotate the ring until the scene feels tack-sharp at your framing distance. If available, turn on focus peaking and watch for highlighted edges to confirm the plane. A quick trick is to focus on a bright point first, then recompose to maintain framing.
From a sidewalk or crosswalk, lock onto a bright edge (pedestrian, taillight, or neon) and keep the camera still as action unfolds. Control your breathing and stance to prevent micro-movements from softening focus. With practice, you’ll know which distances work best for your lens in your city.
Lock focus on bright lights or contrast points
Bright lights act as strong focus anchors. Lock on a single point—neon signs, reflected windows—to stabilize framing as cars move. If the bright point shifts with traffic, re-lock quickly on a new point and continue shooting. This keeps your framing steady even as the scene breathes with movement.
Depth matters: the distance to the bright point may differ from your main subject. If you want both in focus, you may need a smaller aperture, which reduces light. Balance ISO and shutter to preserve light while keeping the lock on the bright point. Practice on multiple streets and nights to map where bright anchors typically sit in your cityscape.
Verify sharpness on zoomed live view
Before pressing the shutter, zoom in on live view to inspect details. If lines look soft, adjust focus and re-check. This quick verification saves wasted frames and helps you stay sharp as you explore angles and lights.
Lens Selection and Framing for Urban Night Photography
Choose gear that minimizes blur and maximizes light. Lenses with wide angles capture more skyline; fast apertures help grab light when lamps flicker. In busy urban scenes, low light, moving cars, and crowds are common; a fast, wide lens gives you flexibility to freeze motion while keeping scenes sharp. Think of your lens as the doorway to the night—open wide for color and texture or tighten for storefront details or a moving subject. Balance light gathering with a frame that feels alive, not flat.
Framing matters as much as focus. Start with a foreground anchor—crisp curb lines, a streetcar rail, or a puddle reflecting neon—to add depth. Then weave in a readable background—tall buildings, a row of lights, or a bridge silhouette. A strong foreground plus a readable background creates an invite into the scene. If the frame feels empty, move closer to a subject waiting at a bus stop or include a silhouette against a bright window. Small, deliberate elements keep the shot balanced and engaging.
Changing focal length changes mood. Wide lenses exaggerate distance and activity; zooming in tight can create intimate drama with a single rider or a glowing storefront dominating the frame. A quick lens swap or zoom tweak can transform a busy intersection into a story you control.
Choose wide, fast lenses for your city frames
Opt for a wide field of view with a fast aperture. Around 24–35 mm on full-frame (16–24 mm on crop) catches sweeping cityscapes without stepping back too far. An aperture like f/1.8–f/2.8 helps pull light from signs and lamps, keeping color and texture in the shadows. This setup helps you keep people crisp while the background glows. If you can’t go ultra-wide, a 50 mm can work in tight urban spaces, but you’ll rely more on ISO and steady hands.
Use this setup to frame dynamic scenes: storefront glow meeting a passerby, a distant bus line, or a cyclist blur. Keep foreground strong and let the background illuminate your story. Practice with different focal lengths on the same street corner to feel how mood shifts. Wide angles amplify city personality; tighter frames invite intimacy with your subject.
Frame with a clear foreground and background
Depth brings night shots to life. Place a crisp foreground element—railings, a puddle, or a vending machine—so the eye travels into the scene. Pair it with a background that adds context—skylines, neon signs, or a row of parked cars under lights. This contrast creates a layered, inviting image. If your foreground feels noisy, adjust distance or angle to sit cleanly against midground and background. The payoff is a frame that invites exploration from front to back.
Directing the viewer through the shot, you can exaggerate lines: reflections guiding toward a bright sign, or a crosswalk light carving a path. Foreground isn’t filler; it’s a bridge that gives your audience a reason to linger in the night.
Safety, Legal Tips and Color Correction for Night Shoots
Shooting at night can be safe, legal, and sharp with planning and color management. This section offers practical steps you can apply to any night shoot. Color correction helps, but safety comes first. Thoughtful positioning and awareness simplify color work later, so you don’t fight shadows or blown highlights. Small post-processing tweaks can transform flat night scenes into vivid, true-to-life images.
Stay on public paths and follow local rules
Stay on public paths to avoid trouble. If a spot seems private, move along. Check signs or ask before you shoot; this saves time and prevents fines or being asked to leave. In busy areas, be mindful of pedestrians and traffic. A bright bag or tripod can draw attention, so keep gear organized and visible where it’s safe. When unsure about a rule, ask someone nearby or contact local authorities. Double-checking is better than disrupting a scene or risking a damaged memory card.
Shoot RAW so you can fix white balance later
Shooting RAW gives you maximum latitude for white balance. You’ll capture more color data, which is especially helpful when streetlights, neon, and moonlight mix. Later, you can adjust white balance without losing detail in shadows or highlights, recovering color in underexposed areas and avoiding JPEG compression limits. RAW provides a safety net for post-processing.
Keep visible gear and mind traffic while shooting
Keep gear in view to prevent trips or loss in the dark. Place bags and stands where they won’t snag feet or doors, and use reflective elements if you’re moving around people. A visible, orderly setup makes you look responsible and safer around others and vehicles.
Choose spots with clear paths and enough light to see cords and tripods. If near streets, keep a buffer so you aren’t in the flow of traffic. A small light or tripod indicator helps you and others spot gear in low light. Cleaner night shots come from minimizing hazards.

Smartphone Night Photography Enthusiast & Founder of IncrivelX
Vinicius Sanches is a passionate smartphone photographer who has spent years proving that you don’t need an expensive camera to capture breathtaking images after dark. Born with a natural curiosity for technology and a deep love for visual storytelling, Vinicius discovered his passion for night photography almost by accident — one evening, standing on a city street, phone in hand, completely mesmerized by the way artificial lights danced across wet pavement.
That moment changed everything.
What started as a personal obsession quickly became a mission. Vinicius realized that millions of people were carrying powerful cameras in their pockets every single day, yet had no idea how to unlock their true potential after the sun went down. Blurry shots, grainy images, and washed-out colors were robbing everyday people of memories and moments that deserved to be captured beautifully.
So he decided to do something about it.
With years of hands-on experience shooting city streets, starry skies, neon-lit alleyways, and creative night portraits — all with nothing but a smartphone — Vinicius built IncrivelX as the resource he wished had existed when he was just starting out. A place with no confusing jargon, no assumptions, and no gatekeeping. Just honest, practical, beginner-friendly guidance that actually gets results.
Vinicius has tested dozens of smartphones from every major brand, explored dark sky locations across multiple states, and spent countless nights experimenting with settings, compositions, and editing techniques so that his readers don’t have to start from scratch. Every article on IncrivelX comes from real experience, real mistakes, and real lessons learned in the field.
When he’s not out shooting at midnight or writing in-depth guides for the IncrivelX community, Vinicius can be found exploring new cities with his phone always within reach, looking for the perfect shot hiding in the shadows.
His philosophy is simple: the best camera is the one you already have — you just need to learn how to use it in the dark.