Screen Calibration & Color Profiles: Why Your Night Photos Look Different Everywhere Else
How monitor color calibration affects your night photos
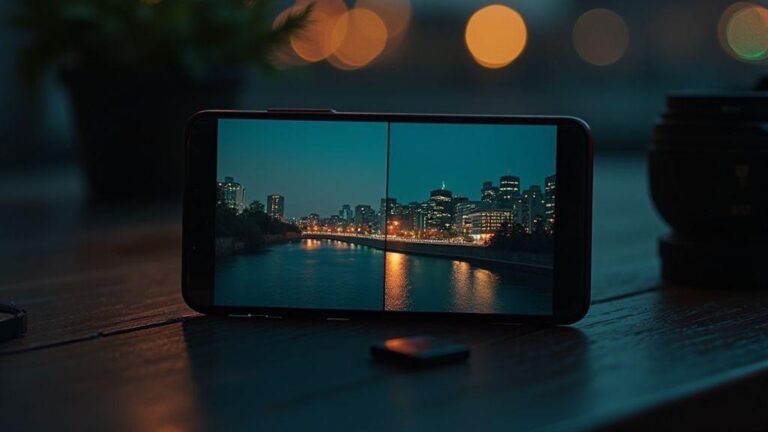
Your night photos can look amazing on your screen, but what you see isn’t the whole story. When your monitor isn’t calibrated, colors and brightness can drift, making blues look too purple or shadows too gray. Calibration aligns your display to a known standard, so you’ll see more accurate skin tones, better contrast, and true darks and lights. If you edit without calibration, your edits won’t translate well to other screens.
Calibrating your monitor changes how your edits feel. With correct colors, subtle shifts in hue and saturation become meaningful rather than misleading. A night sky glow or streetlight halo will look as it should, not overly bright or dull. Proper calibration keeps your edits consistent as you adjust exposure, shadows, and highlights, avoiding oversharpening or muddying details you meant to keep.
If you share photos, remember viewers’ screens vary. A calibrated view may still look different on a phone, laptop, or tablet because each device handles color, brightness, and contrast differently. Verify edits on multiple screens and keep a clean workflow. Your goal is a balanced look that travels well, not a perfect match to one monitor.
Check calibration tools
Use trusted calibration tools and follow their steps. Calibrate your monitor, then run a quick test with a known gray target and reference images to confirm predictable color, brightness, and contrast across edits. If you notice persistent shifts, revisit the calibration and color profiles. This habit keeps your night photos true to mood across screens.
How calibration changes tone and contrast
Calibration sets the baseline for tone. When the gray ramp and luminance are correct, midtones aren’t tilted warm or cold by accident. Your night tones retain depth, keeping stars, streetlights, and silhouettes distinct. This makes edits more honest to the scene.
Contrast is tied to calibration. Proper setup keeps dark areas rich without crushing detail, and bright areas from blowing out. You’ll notice natural separation between shadows and highlights, helping night portraits pop while preserving detail in eyes and hair. A calibrated screen provides a truer canvas for mood and drama.
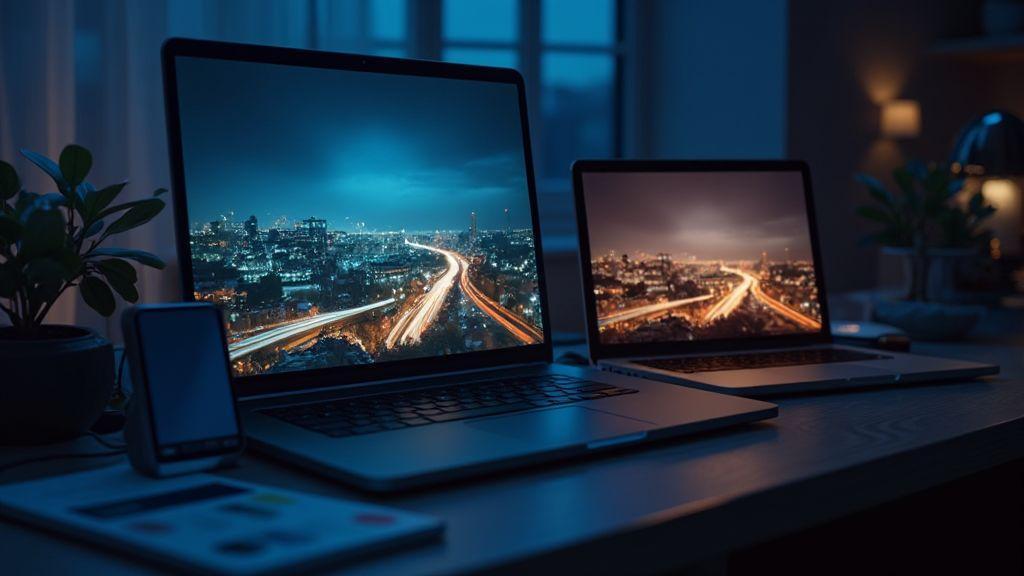
Why your edits look different on other screens
Different screens reproduce color and brightness differently. A calibrated monitor aims for a standard, but a phone’s smaller panel, a laptop’s color profile, or a tablet’s backlight can skew hues and contrast. Your edited night scene may appear cooler or warmer, brighter or darker, depending on the device. Trust a standard workflow and use color profiles so edits survive the switch.
If you want consistency, embed a color profile when exporting and test on a few devices. It’s not about perfection; it’s about predictability. Your audience should experience your night mood as you intended, not as their device forces it to look.
ICC color profiles and what you need to know
Color management starts with ICC profiles. You, your camera, and your monitor all have color rules, and ICC profiles tell devices how to translate colors consistently. For night scenes, this matters more than you might think. A profile acts like a translator so the final image looks like what you expected on your screen. Skipping this step can leave night shots looking washed out, too warm, or too blue on other devices.
Profiles are tiny files describing color spaces, gamma, and white points. They can be embedded in your photo or stored in a library on your computer. To keep results consistent, attach those details to the image. They help when you edit later and share widely, so others see colors closer to what you saw.
If you’re new, start by checking your camera’s color space and whether you want it to embed profiles automatically. Then align your editing software to honor those profiles. This keeps edits predictable and sharing easier.
What ICC color profiles do for color management
ICC profiles tell devices how to interpret color data, helping keep reds from oversaturating, blues from washing out, and skin tones from turning green or gray. In editing, those rules keep adjustments true across devices, so a white balance tweak remains consistent from laptop to tablet. Profiles also support consistent prints and displays; without them, prints can skew toward yellow or magenta.
Beware: switching software or devices can cause shifts if profiles aren’t honored. If your editor ignores embedded profiles, saved edits may look different on another screen. Color management isn’t optional—it’s essential for night photography where subtle tones matter.
When profiles change the look of night shots
Opening a night photo in a different program can cause color shifts if embedded profiles aren’t respected. Shoot RAW with an embedded ICC, and edit with software that honors the profile to keep night sky and street lights true. After export, if you don’t keep the same profile, the file can drift on new screens. Keep the profile in your workflow from capture through export.
If you’re sharing with others, mention color profiles briefly to help them understand why your photo may look different on their device.
Embed correct ICC profile
Embed the right ICC profile so editors and viewers see colors consistently. Embedding gives every device the same color language, reducing surprises when someone opens your night shot on a new screen. Your work travels with its color map intact.
Screen Calibration & Color Profiles: Why Your Night Photos Look Different Everywhere Else
A heading that emphasizes the core idea reinforces SEO and readability. This note helps readers connect calibration practices to cross-device color consistency.
Calibrate monitor for photo editing step-by-step
Editing night photos starts with a reliable view of your screen. Skipping calibration makes colors look off on some screens and perfect on others. This step-by-step guide helps lock in a true picture so edits transfer well to other devices.
Calibration isn’t a one-and-done task; it’s a routine that stays in your workflow. The more you calibrate, the fewer surprises you’ll face when exporting or viewing on another screen.
Use a hardware calibrator for best results
A hardware calibrator is a fast path to reliable color. Place the tool on your screen, run a test, and it generates a precise profile. It’s science you can trust, reducing color drift after long edits and easing cross-device comparisons.
Choose a calibrator with a trusted colorimeter and compatible software. The best ones guide you through a setup and store the profile with your OS. You can switch between profiles if you work with multiple devices, but for night photos, keep a solid primary profile as your anchor. Save the profile and keep the device steady during calibration.
Set brightness, gamma, and white point
Brightness determines how dark areas hold detail without washing out streetlight glow. Gamma maps midtones to brightness; 2.2 is a common middle ground for night scenes. White point defines color temperature; a warmer ~6500K is typical, but adjust to how you perceive the scene.
Test with familiar night photos to ensure gradients and colors stay natural as you tweak settings. Save a configuration that remains consistent across test images.
Save and apply calibration
Saving creates a profile your editing apps can use automatically. Set it as your default for editing and re-run calibration if colors drift. Keep the profile file in a known location and back it up. If you change monitors, re-calibrate and save a new profile. With a calibrated setup, you’ll edit with precision and keep night shots true to life.
Soft proofing for night photography explained
Soft proofing previews how your night photos will look on different screens before exporting. It reveals brightness, contrast, and color shifts as the image moves from camera to phone, monitor, or print. This is especially useful for night scenes where lights and color casts are tricky.
Pick a target display profile and simulate it on your computer to avoid post-export surprises. Look for hotspots where highlights blow out or shadows muddy, and tweak exposure, white balance, and color as needed. Soft proofing is a rehearsal for your night shots, helping you land a version that travels well.
How soft proofing simulates other displays
Soft proofing uses color profiles to mimic various devices. Choose a target device—phone, tablet, monitor, or printer—and let software adjust the image accordingly. You’ll see contrast and saturation shift, so you can decide where to push exposure or adjust white balance. It’s about balancing your look so it travels across screens, not achieving perfection on every device.
Soft proof in Lightroom or Photoshop before export
In Lightroom or Photoshop, soft proof before export. Choose a rendering intent and a target profile, and view clippings and color shifts. Use this to guide edits—pull back highlights that blow out in a phone preview, or deepen shadows that disappear on a bright monitor. When satisfied, export with the final profile embedded.
If you’re new to soft proofing, start with a common profile like sRGB or Adobe RGB as a baseline, then test a monitor or printer profile to see shifts. Build a workflow that keeps night photos consistent, not accidental.
Compare profiles before export
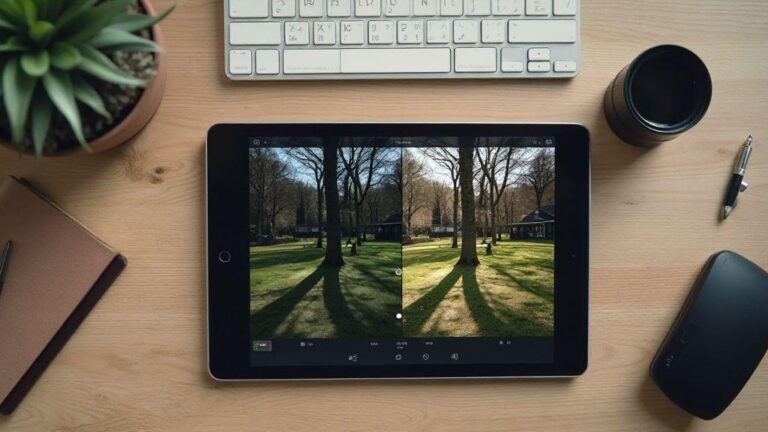
Before exporting, compare profiles side by side. Open two proofs on the same screen with different device profiles and toggle between them. This quick check helps identify where details are lost or colors shift, guiding you to bake the right profile into the final export.
Keep a simple rule: if a profile adds unwanted color casts or crushes shadows, choose a different one. The goal is natural skin tones, sky color, and reflections without fighting the display.
Viewing conditions affecting photo appearance
Your night photos look different depending on where you view them. Room lighting, the lamp, and even wall color tint what you see. Editing in a warm, yellow-lit room shifts colors toward orange; a cool room can dull reds and skin tones. Eye adaptation means you might overdo brightness or contrast if viewing conditions aren’t steady. Aim for a consistent setup: neutral room light, moderate screen brightness, and a direct viewing angle.
If you’re editing on the go, recreate a consistent setup: a neutral light with a color temperature around 5000–6500K and a straight-on screen position. This helps you judge colors closer to how others will see them.
How room lighting shifts perceived color
Room lighting can push tones toward orange or blue, affecting how the photo feels. Mixed lighting — several sources with different colors — makes colors harder to judge. When this happens, step back to a neutral setup (one soft light, no mixed tones) to decide whether to adjust white balance or calibration rather than chasing misleading colors.
Use neutral light and consistent viewing angles
Use a daylight-balanced bulb and look straight at the screen to avoid tilt-induced perception changes. Note your setup when sharing so others understand why your photo looks different on their device.
Why photos look different on other devices
Sharing night photos often means they look different on phones, tablets, and computers. It’s not your fault; screens render color and brightness differently. You can improve predictability with a few habits.
Device color profile mismatches cause shifts. Your device uses its own color profile, which can push colors warmer or cooler without you noticing. Gently test edits on a few key areas like skin tones, neon signs, and dark skies. If they look off on another screen, you’ve got a profile delta to fix.
Gamut, brightness, and processing differences also matter. Gamut is the range of colors a device can display. Broad gamuts may reveal details that narrower screens miss. Brightness and processing vary across devices, so subtle textures in night skies may vanish on some screens.
Test on common devices — phone, laptop, and tablet — to see where shifts occur. Edit for a neutral baseline on one device, then adjust to preserve a natural look on the others.
Color temperature and white balance shifts at night
Night scenes feature mixed light sources with varying color temperatures. Tungsten warmth (orange) and LED coolness (blue-green) shift WB. Shoot RAW to correct later, but use a consistent baseline WB to guide edits. Mixed lighting often creates cast that your eyes don’t notice in the moment. Use histogram and WB previews to see drift and start with a warmer or cooler baseline as needed.
Mixed light sources change color casts
Night photography often includes orange streetlamps, blue storefront glass, and yellow car headlights. Identify the strongest light source and balance the rest so they don’t overwhelm the subject. RAW brackets or a neutral gray card can guide later edits. Watch for color casts in shadows and highlights, and make small deliberate adjustments to lock in mood without losing realism.
Correct WB in RAW files for accuracy
RAW files preserve color information, giving you latitude to adjust WB without losing detail. Start with a neutral WB, then fine-tune across similar lighting frames. Shooting RAW helps you achieve a cohesive set, not perfection in every shot.
Use presets for night shots
Presets provide a reliable starting point for WB, noise reduction, and exposure in low light. After applying, tweak temperature and tint to fit the scene, then save batches of versions for future use. Presets streamline your workflow and keep your night look consistent across nights and locations.
Exporting and sharing to preserve color
Export correctly to protect the colors you adjusted. The goal is to keep deep blacks, true lights, and the mood intact across devices. Start by choosing the right color space and export options. For web and social, use sRGB to minimize surprises on different screens.
Choose sRGB for web and social display
Export to sRGB for web and social to translate more predictably across devices. If you shot in another space, convert to sRGB after editing to avoid muddy blues or blown reds on mobile.
Embed profiles and avoid lossy color changes
Embed the color profile in your files to ensure correct interpretation on viewers’ devices. Avoid exporting with unnecessary color changes or heavy compression that reduces gradients, especially in night scenes. Embedding profiles and preserving color helps maintain mood across platforms.
Use correct export settings
Choose high-quality JPEG or PNG and appropriate resolution for the platform. For social, 2048px on the long edge is common; for web, 1080–1440px works well. Balance sharpness and file size to retain detail without haloing.
Tools and services for display calibration
Calibrating your display requires reliable tools and services. Calibration devices measure color and light, while software builds a stable profile. A consistent workflow — quick calibration, profile application, and re-checks in consistent lighting — helps your night photos land the way you intended across devices.
Calibration isn’t just for pros; it’s essential for sharing city glow photos. Think of calibration as tuning a guitar: a small misalignment changes everything. Choose easy-to-use tools and maintain the same setup to minimize surprises when you post.
Popular calibrators: X-Rite and Datacolor
X-Rite and Datacolor are the leading names. They provide colorimeters or spectrophotometers and software to generate accurate screen profiles. They support multiple devices, making it easier to keep edits consistent when switching between laptops, desktops, or monitors.
If you’re deciding, consider budget and usage. X-Rite leans professional-grade; Datacolor often emphasizes value and ease of use. Either choice improves color reliability for night photography.
Professional profiling and calibration services
Professional profiling measures your entire imaging chain — screen, printer, and editing space lighting — to deliver a custom profile that matches your workflow. It saves time and improves repeatability, especially for portfolios or client work. A pro can also spot common mistakes and tailor recommendations to your setup.
Hire pro calibration help
Hiring pro calibration provides a tailored plan for your space and devices, delivering a repeatable setup and actionable guidance. This is especially valuable for photography businesses or color-obsessed personal galleries, offering confidence that edits read consistently across screens.

Smartphone Night Photography Enthusiast & Founder of IncrivelX
Vinicius Sanches is a passionate smartphone photographer who has spent years proving that you don’t need an expensive camera to capture breathtaking images after dark. Born with a natural curiosity for technology and a deep love for visual storytelling, Vinicius discovered his passion for night photography almost by accident — one evening, standing on a city street, phone in hand, completely mesmerized by the way artificial lights danced across wet pavement.
That moment changed everything.
What started as a personal obsession quickly became a mission. Vinicius realized that millions of people were carrying powerful cameras in their pockets every single day, yet had no idea how to unlock their true potential after the sun went down. Blurry shots, grainy images, and washed-out colors were robbing everyday people of memories and moments that deserved to be captured beautifully.
So he decided to do something about it.
With years of hands-on experience shooting city streets, starry skies, neon-lit alleyways, and creative night portraits — all with nothing but a smartphone — Vinicius built IncrivelX as the resource he wished had existed when he was just starting out. A place with no confusing jargon, no assumptions, and no gatekeeping. Just honest, practical, beginner-friendly guidance that actually gets results.
Vinicius has tested dozens of smartphones from every major brand, explored dark sky locations across multiple states, and spent countless nights experimenting with settings, compositions, and editing techniques so that his readers don’t have to start from scratch. Every article on IncrivelX comes from real experience, real mistakes, and real lessons learned in the field.
When he’s not out shooting at midnight or writing in-depth guides for the IncrivelX community, Vinicius can be found exploring new cities with his phone always within reach, looking for the perfect shot hiding in the shadows.
His philosophy is simple: the best camera is the one you already have — you just need to learn how to use it in the dark.