ProRAW and Night Mode: The Revolution of Smartphone Night Photography
How Night Mode photography boosts your low-light photos
Night Mode changes how your phone captures light, delivering brighter colors and clearer shapes even in darkness. It uses longer exposure and stacks several frames to reduce grain and add detail, making your photos feel like you upgraded your camera without a new device. Night Mode sharpens textures, from brick walls to leaves, and smooths skies for a cleaner look. It also subtly improves skin tones and preserves highlights, keeping colors vibrant without flattening the scene. If you shoot at dusk or in dim settings, Night Mode becomes a reliable go-to.
Night Mode works by stacking multiple quick frames. The camera blends them to reduce noise, producing sharper edges and better texture while preserving natural color transitions. It minimizes blur from hand shake and keeps detail in shadows, so you don’t have to guess what the lens can do in the dark—the camera does the heavy lifting.
In practice, you’ll notice more accurate skin tones and controlled highlights. The result feels truer to life, not flat or gray. For frequent low-light shooters, Night Mode often becomes your default when you’re out at night.
What Night Mode does with multi-frame noise reduction
Your phone captures several images in rapid bursts, then uses algorithms to merge the best parts of each frame. This reduces grain and smooths noise, especially in shadows. Multi-frame noise reduction also helps maintain smooth color transitions, preventing banding in skies and flat patches on dark surfaces. It preserves texture where it matters—fabric, wood, foliage—while keeping the overall image calm and coherent.
In very low light, you’ll still see some noise near the edges, but the center looks much cleaner. Night Mode trades a touch of shutter speed for brightness, giving you a brighter photo without sacrificing core detail.
When Night Mode helps you get usable shots
Night Mode shines in scenes with some light to work with—street lamps, a dim café, or sunset glow lingering on the horizon. In these situations, expect clearer detail and richer color that make memories pop. The multi-frame approach reduces blur from hand shake, yielding sharper results for spontaneous night photos.
If the scene is utterly dark, you may see a subtle glow around bright lights and need to adjust composition to keep key details in frame. For everyday night scenes, though, Night Mode generally delivers usable shots.
Night Mode limitations to keep in mind
Night Mode can oversaturate color and contrast in some scenes, making neon lights look punchier than reality. It may not deliver perfect skin tones in extreme darkness, since the camera prioritizes brightness over portrait accuracy.
Fast-moving subjects can cause motion blur in the composite image. For best results, use still subjects or be ready to shoot again if a person crosses the frame. In total darkness, a tripod or very steady hands help keep edges crisp.
Performance depends on hardware and processing power. On older devices, Night Mode may take longer to process and drain the battery more. If you’re chasing long-exposure-like results, patience becomes part of the process.
Why you should use ProRAW for night shots
ProRAW at night preserves more data per pixel, giving you richer shadows and color in the sky, whether bright or dim. It keeps sensor information intact, providing a flexible base for editing and a result that feels closer to real life.
Night shots benefit from ProRAW because you gain more data than a standard JPEG. The extra information lets you recover brighter highlights and recover detail in shadowy areas without sacrificing color. It’s a cleaner starting point for post-processing, letting you push edits further without crushing tone or texture.
If you want photos that pop, ProRAW is a smarter choice. You’ll notice improved texture on buildings, stars, and lights, with more nuance and depth than JPEG, and more room to fine-tune in post.
What ProRAW stores that JPEG removes
ProRAW saves multiple data layers from the sensor, preserving more color information, dynamic range, and latitude for adjustments. JPEG compresses data, making it harder to fix blown highlights or crushed shadows.
ProRAW also retains raw color channels and non-destructive editing data, so you can tweak exposure, white balance, and noise reduction after the shot without quality loss. It’s a flexible starting point, not a finished product.
With ProRAW, you aren’t tied to the camera’s decisions. You can correct white balance in tricky night scenes—neon signs or street lamps—without muddy results. That flexibility is the secret sauce for night photography.
How ProRAW gives you more control in editing
ProRAW puts editing power in your hands. You can adjust exposure in smaller steps, recover detail in bright lights, and pull detail from dark areas without introducing heavy grain. This means fewer compromises after the shot.
For color grading, ProRAW offers more latitude. You can tune highlights and shadows separately, or push white balance to achieve the mood you want. The result looks natural and intentional, not over-processed.
Think of it as painting with more brushes. JPEG gives you a finished piece; ProRAW gives you the canvas with all the colors to craft your own look.
ProRAW file size and storage facts
ProRAW files are larger than JPEGs, so storage management becomes important. They back up more slowly and can fill up devices faster, especially if you shoot many frames at night. The trade-off is worth it when you want top quality and flexible edits later.
If you shoot ProRAW often, consider selective backups and cloud storage to balance space and accessibility.
ProRAW and Night Mode: The Revolution of Smartphone Night Photography
You’re about to see how ProRAW and Night Mode work together to transform night shots. ProRAW saves more data, providing richer colors and more edit-ready detail. Night Mode stacks exposures to brighten scenes and reduce noise, keeping sky and shadows intact. Together, they let you capture what you actually see, not just what the camera thinks you want. ProRAW supplies a clean, editable file; Night Mode brightens the scene without washing out key elements. Your night photos can finally feel closer to real life.
Using both features is about workflow. ProRAW gives you control after the shot, while Night Mode optimizes capture at the moment. You’ll notice more detail in shadows and highlights, especially with harsh lights or scenes that blend bright lamps with deep shade. The result is flexibility: you can recover sunset colors or street light glow without losing tone or texture. If you’ve used Night Mode before, you’ll appreciate how ProRAW lets you push edits further without sacrificing mood.
In practice, preview the RAW file after capture to balance brightness and color. If a street scene looks off, ProRAW lets you adjust without re-shooting. Night Mode handles exposure; ProRAW refines the look afterward. This combination preserves the scene’s mood and texture, making your night photos more vivid and true to life.
How combining modes changes your capture workflow
Enabling Night Mode and shooting in ProRAW shifts your workflow. Plan a moment to capture light, then review the RAW file to adjust white balance and color. You’ll invest a bit more time in post-processing, but you’ll get images that closer mirror what you saw. It’s like upgrading from standard color to high-dynamic-range digital files.
With Night Mode on, the camera stacks multiple short exposures and blends them automatically. ProRAW retains all that information in a flexible format, giving you a brighter base image to refine later. A steady hand or a small tripod helps prevent movement from showing up in the RAW data. You’ll notice fewer artifacts and more natural color when leveraging both features.
If you’re unsure when to use this combo, think of scenes with strong lights and deep shadows—neon signs, a city street at night, or a dim café. Your capture workflow should be: set up, shoot with Night Mode, then export the RAW file for editing. The difference is immediate when you refine later.
When you should shoot ProRAW with Night Mode enabled
Use ProRAW with Night Mode whenever you want maximum post-shot flexibility. Scenes with bright elements and dark corners benefit from extra shadow and highlight detail. ProRAW lets you adjust color, texture, and exposure to match memory of the moment. For social sharing or prints, this pairing helps preserve mood and atmosphere.
If you’re capturing moving light and want to minimize noise, enable both. Night Mode reduces low-light noise, and ProRAW maintains the quality of light detail you capture. This pairing is especially useful for street scenes with flickering lights or sunsets fading into night. In short, use ProRAW with Night Mode when you want control after the shot and a cleaner base image.
Quick capture steps to follow
- Turn on Night Mode and switch to ProRAW.
- Stabilize your phone, frame your shot, and tap the shutter. Let Night Mode blend exposures.
- Review the RAW file and adjust white balance, color, and exposure in your editing app. Save a version you’re happy with.
Computational photography techniques in smartphone low-light imaging
Computational photography blends several shots, data, and math to produce brighter, clearer images. It’s not just snapping a photo; it’s guiding a tiny computer to edit after you press the shutter. You’ll notice more detail in shadows, less grain, and colors that feel true to life, thanks to software working with hardware.
In practice, phones often choose longer exposures and stack frames in milliseconds. The result is a recipe of capture, alignment, merge, and sharpen. The goal is to keep moving subjects sharp while stabilizing the scene. Faster processors and better sensors enhance the effect, but even mid-range phones can shine with smart software. Think of it as a chef assembling a dish from many tiny tastes, each essential to the final bite.
The bottom line: computational photography is why night shots feel less grainy and more real. It’s the stacking and polishing after you press the shutter, not a single perfect frame.
How multi-frame noise reduction builds a cleaner image
Multi-frame noise reduction stores several tiny captures and blends them to reduce grain. You’ll see smoother skin in portraits and crisper textures in walls or foliage. The camera aligns frames, then averages data to pull out random noise while preserving real detail. Movement is handled with motion vectors, but a steady hand or tripod yields the best results.
Texture preservation is a key benefit; brick, fabric, and leaves stay sharp while noise fades. The trade-off is processing time and minor delays between frames, which most devices handle invisibly. For maximum gains, keep the camera steady and avoid rapid movement during a long exposure sequence.
How AI denoising algorithms refine detail without blur
AI denoising uses trained models to separate real detail from noise, preserving fine lines and textures while smoothing specks. The goal is crisp images without the waxy, over-smoothed look some denoisers produce. Adjusting denoising strength lets you tailor results to your taste, preserving foliage and fabric textures.
AI denoising depends on model training and device power. Newer phones deliver faster, more nuanced results, enabling night photography with less risk of detail loss. The best outcome comes when AI denoising is balanced with good framing and exposure.
Processing speed and hardware limits to know
A phone’s speed and hardware determine what you can do at night. Fast processors and dedicated image signals enable quicker multi-frame processing and smoother previews. Strong hardware means faster post-processing and less waiting.
Material limits, like sensor size, pixel pitch, and color sampling, affect night shots. Bigger sensors capture more light but add bulk and power use. Software can help, but it cannot conjure data the sensor didn’t collect. Pair solid hardware with smart software for best results, especially in shadows and color accuracy.
When choosing a phone for night photography, look for fast processors, capable AI accelerators, and a camera app that communicates well with the hardware. A smooth, reliable experience comes from a balance of hardware and software.
Use exposure stacking and long-exposure simulation for night shots
Exposure stacking pulls more light from the dark by combining multiple short frames, keeping bright parts clear while revealing more detail in dark areas. It’s like layering sheets of paper to let more color show through. Long-exposure simulation blends several short frames to mimic a longer exposure, giving motion trails or silky skies without real long shutter times. It keeps the center sharp while letting moving elements flow around it.
If you’re new to this, start with familiar lights to learn the rhythm. Correctly stacked shots yield crisp centers and softly glowing edges. If something blinks or jumps in the sequence, adjust the interval or frame count. Practice helps you time the moment you want—like catching a friend mid-laugh in a crowded square. With patience, you’ll unlock powerful night shots that feel bright and natural.
How exposure stacking for night shots improves detail and SNR
Exposure stacking gathers light from many frames, boosting shadow detail and reducing noise. The combined image reveals textures you miss in a single shot and improves texture on brickwork, window patterns, and subtle sky gradients. It also improves the signal-to-noise ratio, producing smoother, more polished night photos ready for sharing.
When phones simulate long exposures instead of a single frame
Simulated long exposures help show motion with reduced blur by stacking short shots. It’s ideal for moving cars, waterfalls, and stars where you want smooth motion without streaks. If motion is heavy, the result can appear slightly soft, so choose between true long exposure or a shorter stack based on the desired effect.
Best scenes where stacking outperforms single shots
Stacking shines in scenes with mixed light—neon against dark streets, skylines at night, or reflective rivers. You get glow and texture with less noise, making architecture and street photography clearer. In dim interiors, stacking helps bring people into focus while preserving ambient light, producing a balanced, intentional look.
Boost dynamic range to save highlights and shadows
Dynamic range expands what your camera can see, keeping bright lights from blowing out and shadows from turning black. This results in more texture in a moonlit sky and better detail in dim alleys. If your phone supports RAW or ProRAW, you can preserve more information for post-processing, even in challenging lighting. HDR and night HDR modes also help balance exposure by stacking multiple exposures.
Avoid clipping by letting the camera capture a wider brightness range. When possible, compare shots with and without dynamic range enhancements to see the difference. The goal is a natural balance, not a sci-fi glow around every light source.
What dynamic range enhancement does to bright and dark areas
Dynamic range enhancement reduces blown highlights in bright areas and boosts shadow detail in dark areas. Skin tones stay natural, architecture reveals brick textures, and mixed-light scenes—neon signs, headlights, and shadows—remain readable. If color shifts occur, dial back a notch. The aim is a readable scene that stays true to life.
How Night Mode recovers shadow detail without overexposing
Night Mode stacks shorter exposures to pull shadow detail while controlling highlights. You’ll notice more texture in dark areas without glare from bright spots. The final image remains natural, not over-processed. If you want crisper results, adjust exposure slightly after capture or switch to a mode that emphasizes contrast.
Night Mode helps keep skin tones gentle and avoids washing out faces in city scenes, while neon signs stay vibrant without exploding into the sky. It’s smart stacking that respects both glow and grain.
Simple ways to avoid blown highlights at night
- Avoid direct, strong light sources in your frame when possible; angle the camera to illuminate indirectly. Use lower exposure or highlight-preserving modes.
- Shoot in RAW or ProRAW when you can for more post-processing flexibility.
- Use a tripod or stable surface to minimize shake; a steady setup helps your camera stack exposures cleanly.
- Practice framing to keep highlights from clipping while preserving shadow detail.
Simple shooting tips to get sharper smartphone night photos
- Keep your hands steady, frame carefully, and focus precisely. Use two hands, tuck elbows, brace on a railing, and use a quick shutter press to reduce blur.
- Lower exposure slightly on bright scenes to prevent glare. Frame with attention to key lines like streetlights and edges.
- Lift ISO cautiously to reduce noise, lock focus, and adjust exposure to protect highlights.
- When shooting people, have them stay still briefly while you shoot. For moving cars or crowds, shorter frames yield crisper edges.
- If you can, shoot in RAW for editing flexibility; use built-in night modes for everyday shooting and reserve ProRAW for moments you want maximum control.
How to steady your phone for multi-frame captures
Stability is crucial for clean stacks. Use both hands, keep elbows in, and rest the phone on a stable surface. A small tripod or adapter helps a lot for night work. Enable on-device stabilization and consider locking exposure after the first frame to prevent drift. Practice steadying gestures and breathing to minimize movement.
When to use a tripod, timer, or night mode burst
- Tripods are best for cityscapes, reflections, and starry skies where long exposures help.
- A timer (2–5 seconds) avoids camera shake when you press the shutter.
- Night mode bursts are great for changing lights or moving subjects; they blend frames for less noise and more detail.
- Use bursts for moving subjects only if you can keep alignment and choose the best frame afterward.
Fast composition rules that improve night shots
- Rule of thirds helps place lights and people off-center for dynamism.
- Use leading lines from sidewalks or building edges to guide the eye.
- Include a bright highlight to add depth, but avoid overpowering the main subject.
- Balance foreground, middle ground, and background to add depth.
- Look for reflections and silhouettes to add drama; simple, bold contrasts read best on small screens.
- Try diagonal lines and negative space to create a hero focal point.
Pick the right phone and settings for better low-light imaging
Choosing a phone with strong low-light performance and reliable Night Mode software is key. Look for a good sensor, fast lens, and strong processing. Test focus speed and processing smoothness in dim scenes. Set Night Mode or a dedicated low-light mode, keep shutter speed appropriate for light, use a tripod when possible, and use a lower ISO to minimize grain. Enable gridlines for better framing and lock exposure for consistency across shots.
Which hardware specs (sensor, aperture) matter most
Sensor size affects light capture and noise. A larger sensor generally yields cleaner shadows and more detail. A wider aperture (lower f-number) lets in more light, improving night shots. While you don’t need the fanciest gear, a solid sensor and fast lens make a noticeable difference. Compare reviews focusing on low-light performance to see which camera handles shadows and highlights best.
In practice, software smarts matter too. A capable processor and advanced denoising can salvage a dark frame, but the best results come from a strong hardware-software combination. If you’re choosing between two phones with similar hardware, favor the one that produces cleaner shadows and more natural colors.
How to enable ProRAW and Night Mode on your phone
ProRAW and Night Mode are powerful tools for maximum control. ProRAW provides a data-rich file for after-shoot adjustments, while Night Mode stacks frames to reduce noise and brighten the scene. To enable them, open your camera app settings and switch on ProRAW (RAW workflow) and Night Mode (automatic stabilization and multi-shot processing). Some devices let you adjust exposure or ISO after the shot, which is handy in tricky lighting.
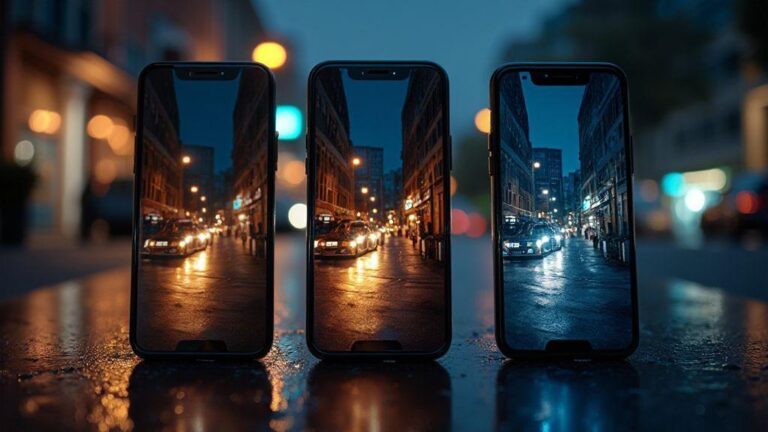
Try a quick comparison: a standard shot, a ProRAW shot, and a Night Mode shot of the same subject. ProRAW gives more editing headroom but larger files, while Night Mode offers a natural look right away. If you’re new to RAW, start with Night Mode for daily use and reserve ProRAW for moments you want precise control over shadows and highlights. ProRAW and Night Mode: The Revolution of Smartphone Night Photography.
Battery and storage trade-offs to expect with ProRAW
ProRAW consumes more storage and battery than standard JPEG/HEIC. RAW files are larger and back up more slowly, especially with many night shots. Battery use can rise during long night sessions, particularly when editing RAW. Plan ahead with extra storage or burst shooting to manage power and space.
Edit ProRAW Night Mode photos with clear RAW editing workflows
Shooting in ProRAW Night Mode yields data-rich files. Open your RAW in a preferred editor and start with non-destructive edits. Balance exposure to protect highlights while revealing shadows. Keep an eye on color accuracy; ProRAW preserves more color data, so small white balance adjustments can matter. Fine-tune texture and noise carefully; use light luminance reductions to preserve edges and avoid halos around bright points. If subjects move, selectively sharpen or mask to keep the rest soft. Make small color tweaks to set the mood, then export non-destructively.
Basic RAW editing workflows you should follow
- Start with balanced exposure; recover blown highlights, then gently lift shadows to reveal detail.
- Adjust white balance and color channels to prevent shifts in shadows and highlights.
- Enhance texture without over-sharpening; apply light noise reduction to flat areas while preserving edges.
- Fine-tune contrast to add depth, aiming for a natural finish that reflects the scene.
Tools that support ProRAW processing and export
Look for apps that preserve RAW layers and avoid flattening early. Use selective editing masks to protect skies or bright points while editing foregrounds. ProRAW is data-rich; the right tool unlocks its potential without forcing automatic fixes.
Export settings for web and print best results
- Web: aim for a layout that matches your platform, typically 1080–1440 px on the long edge; 70–90% quality; sRGB color space; retain color management data if possible.
- Print: export at high resolution (300 dpi for large prints) in TIFF or high-bit-depth JPEG, with proper printer profiles. If color shifts occur, adjust white balance and color channels before printing.
Battery and storage trade-offs to expect with ProRAW
ProRAW files are larger and can tax storage and battery. Plan backups and consider cloud storage to keep pace with night shoots. When editing, expect longer processing times but greater post-processing flexibility and higher-quality final results.
Edit ProRAW Night Mode photos with clear RAW editing workflows (continued)
- Maintain a non-destructive export plan: save a master version with all layers, then create web-optimized and print-ready versions.
- For web, keep a natural look with careful saturation; for print, preview proofs before finalizing.
- Preserve ProRAW data across devices for future edits.
Edit ProRAW Night Mode photos with clear RAW editing workflows (summary)
- Use ProRAW for flexible editing; Night Mode for clean base exposure.
- Balance highlights and shadows to preserve scene mood.
- Apply gentle denoising and texture preservation; avoid over-sharpening.
- Export in formats suitable for web or print with color fidelity.
This revised version preserves the original article’s intent and structure while removing redundancies and tightening explanations, all while preserving the SEO emphasis on ProRAW and Night Mode: The Revolution of Smartphone Night Photography.

Smartphone Night Photography Enthusiast & Founder of IncrivelX
Vinicius Sanches is a passionate smartphone photographer who has spent years proving that you don’t need an expensive camera to capture breathtaking images after dark. Born with a natural curiosity for technology and a deep love for visual storytelling, Vinicius discovered his passion for night photography almost by accident — one evening, standing on a city street, phone in hand, completely mesmerized by the way artificial lights danced across wet pavement.
That moment changed everything.
What started as a personal obsession quickly became a mission. Vinicius realized that millions of people were carrying powerful cameras in their pockets every single day, yet had no idea how to unlock their true potential after the sun went down. Blurry shots, grainy images, and washed-out colors were robbing everyday people of memories and moments that deserved to be captured beautifully.
So he decided to do something about it.
With years of hands-on experience shooting city streets, starry skies, neon-lit alleyways, and creative night portraits — all with nothing but a smartphone — Vinicius built IncrivelX as the resource he wished had existed when he was just starting out. A place with no confusing jargon, no assumptions, and no gatekeeping. Just honest, practical, beginner-friendly guidance that actually gets results.
Vinicius has tested dozens of smartphones from every major brand, explored dark sky locations across multiple states, and spent countless nights experimenting with settings, compositions, and editing techniques so that his readers don’t have to start from scratch. Every article on IncrivelX comes from real experience, real mistakes, and real lessons learned in the field.
When he’s not out shooting at midnight or writing in-depth guides for the IncrivelX community, Vinicius can be found exploring new cities with his phone always within reach, looking for the perfect shot hiding in the shadows.
His philosophy is simple: the best camera is the one you already have — you just need to learn how to use it in the dark.