Pro Mode for Night Photography: Step-by-Step Guide for Galaxy S25 & OnePlus 13
Pro Mode Basics for Night Shots
You’ll unlock clean night images once you understand the basics of Pro Mode. This isn’t about blasting ISO or blindly blasting through shutter speeds; it’s about balancing light and motion so your photos don’t turn into grainy messes. In Pro Mode, you control three main dials: ISO, shutter speed, and aperture (where available). You’ll learn to set these so your night shots aren’t just bright blobs but clear, detailed scenes. Think of Pro Mode as a steady hand you bring to the dark, not a quick flashlight you flash and move on. This approach is central to Pro Mode for Night Photography: Step-by-Step Guide for Galaxy S25 & OnePlus 13.
Your goal is to keep noise low, motion smooth, and detail sharp. Start by choosing a low ISO and a longer shutter time for stable subjects, then adjust exposure with shutter speed and ISO as needed. If you’re shooting street lights or car trails, a longer shutter will give you light trails and a calm sky. If your subject is people walking, you’ll want a faster shutter to freeze motion. It’s a balance, not a sum of random settings. Practice with a static object first, then try moving subjects.
When you nail the basics, you’ll notice Pro Mode makes night photography less guesswork and more control. You’ll stop defaulting to auto modes that bump ISO too high or blur your subjects. With practice, your night shots will feel deliberate and polished, not accidental.
How pro mode changes exposure
Pro Mode lets you dial exposure manually, so you’re not at the mercy of automatic brightness. You’ll set the shutter speed to control how long light hits the sensor. A longer shutter lets in more light, but it can blur moving subjects. A faster shutter freezes action but can underexpose in dark scenes. Use this like a balancing act: if your frame looks too dark, nudge the shutter slower or raise ISO a bit—careful not to add grain you’ll regret later.
ISO is your brightness lever without the blur. In dark scenes, you’ll often start with a low ISO to keep noise down and then raise it only as needed. The trick is to raise it just enough to get a clean exposure without turning your photo into a speckled sheet. If your exposure still isn’t right after adjusting shutter, adjust ISO before you adjust the shutter again. You’ll find your sweet spot quicker after a few tries.
Aperture, where available, controls how much light enters the lens. A wider aperture (lower f-number) floods more light in, which helps in dim scenes but can soften background details. Narrower apertures keep more of the scene in focus but need more light or a longer shutter to balance. In practice, you’ll often pair a wider aperture with a shorter shutter to keep movement sharp while still getting enough light. It’s about keeping your subject clear while the world around it holds its shape.
Galaxy S25 vs OnePlus 13 pro mode controls
On the Galaxy S25, Pro Mode gives you precise shutter, ISO, and exposure compensation. You’ll notice a smooth histogram and live previews that show how changes affect brightness. The UI tends to be forgiving: you can lock focus and exposure to dial in on a specific spot, then shoot with confidence. It’s great when you’re photographing a skyline where the lights are constant and you want to keep everything sharp.
On the OnePlus 13, pro mode often leans more into direct control with tactile sliders. You’ll feel like you’re turning actual knobs, which makes it satisfying to dial in the exact light you want. The focus peaking and manual focus options help you nail sharp subjects in tricky lighting. If you shoot moving subjects, you’ll appreciate the quick adjustments you can make without hunting through menus.
Both phones reward practice, but your preference might come down to whether you like a guided, visual approach (Galaxy S25) or a hands-on, tactile feel (OnePlus 13). Either way, you’ll gain steady control over exposure that your auto settings just won’t give you.
Quick settings to check before shooting
Before you shoot at night, skim these quick checks: turn off auto HDR so you don’t surprise your exposure later, set your RAW capture to keep full data for editing, and lock exposure for a consistent night sequence. Switch on a tiny amount of exposure compensation if your scene looks overly bright or dark, but don’t overdo it. Finally, enable focus peaking if available so you can see what will be sharp in the final image.
Pro Mode in Night Shots — Quick Guide
In this section you’ll apply the basics fast. You’ll set a low ISO to keep grain down, then pick a shutter that matches the action you’re capturing. If you’re shooting a quiet street at night, go for a longer shutter to catch light trails while keeping your camera steady on a tripod or solid surface. If your subject is people, choose a faster shutter to freeze motion, then adjust ISO to keep exposure clean. The balance is what separates casual night photos from pro-level night shots.
Your workflow becomes smoother once you know how to adjust exposure on the fly. You’ll compare your results to a pre-shot frame and tweak shutter or ISO to push the exposure toward your vision. With practice, you’ll feel confident switching between modes and keeping your shots consistent.
Pro Mode for Night Photography: Step-by-Step Guide for Galaxy S25 & OnePlus 13
- Enable RAW capture and disable auto HDR to preserve full data and avoid surprises in post.
- Start with a low ISO (400–800) and choose a shutter speed that suits the scene (longer for trails, shorter for people movement).
- Set focus first (manual focus if needed) and lock exposure to keep a stable base.
- Use a tripod for long exposures; if handheld, use stabilization and gentle breathing to minimize shake.
- Frame, shoot, and review the histogram; adjust ISO or shutter to balance highlights and shadows, then shoot again.
- Review in RAW, edit non-destructively, and keep a master RAW file for future tweaks. This approach is central to Pro Mode for Night Photography: Step-by-Step Guide for Galaxy S25 & OnePlus 13.
Shutter Speed and Long Exposure Techniques
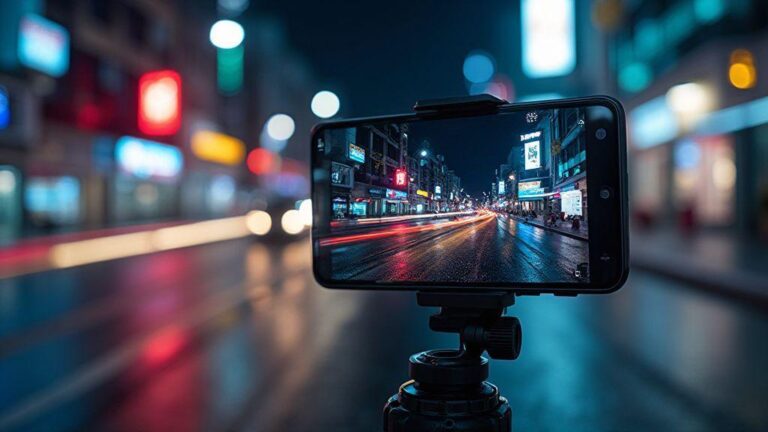
Long exposure lets you turn motion into smooth light trails or silky water. You’ll want to pick a shutter speed that matches the scene: fast enough to freeze action, slow enough to reveal motion. When you’re shooting at night, a longer shutter can reveal stars, traffic light trails, or moving clouds. Your goal is to balance light and motion so your image doesn’t turn into noise or blur. Start with 1/60s to 1s for general night scenes, then push to 2s or more if the light is really dim. If you’re capturing moving cars, think about 1/4s or 1/2s to get light trails without overdoing the blur. With longer exposures, your camera needs a stable base. Any shake will ruin your shot, so a tripod is your best friend here, even on a calm night.
To get clean results, you’ll want to plan your shot around a fixed point. Set your ISO as low as you can tolerate for the light you have. A lower ISO keeps noise away and makes your colors pop more. If you’re using a manual mode, lock in your exposure settings before you press the shutter. Use a remote trigger or the timer to avoid jostling the camera when you press. Remember, long exposures are about patience: you’ll take several frames, check what’s not working, then adjust your shutter or ISO. If you’re handholding, keep your stance steady and your breathing even, but know that long exposures usually demand a tripod and calm hands.
When you review your shots, look for softness caused by small movements. If you see blur, increase the shutter speed slightly or tighten the tripod, then recompose. You can also try light painting with a small light source during a long exposure to add interest. The trick is to keep the overall exposure balanced so the highlights don’t blow out. Pro tip: shoot in RAW if you can, so you’ve got more flexibility later to recover detail in shadows and highlights.
OnePlus 13 long exposure pro mode tips
Your OnePlus 13 can unlock dramatic night shots in Pro Mode. Start by choosing a longer shutter to capture motion, but keep ISO modest to reduce noise. You’ll want to experiment with 2–8 seconds for subtle movement like star trails or flowing water, then adjust as needed. If you’re new to this, begin with a target exposure around -1 to -2 stops in the EV meter to keep highlights safe while you learn how the scene behaves. Use the histogram to check that you’re not clipping the brightest areas, and rely on RAW if possible to keep control later.
What you’ll do next is lock focus manually. Auto focus can hunt in the dark and ruin your clean frame. Switch to manual focus, set a bright edge in the scene as your focus point, then fine-tune until it snaps. A tripod is non-negotiable here; any tremor shows up in the long shutter. If your scene has moving lights, consider a slightly shorter shutter to avoid overexposed trails. Finally, review your results and adjust ISO downward or upward based on noise and exposure balance. You’ll notice your Pro Mode for Night Photography: Step-by-Step Guide for Galaxy S25 & OnePlus 13 will feel similar in approach—steady, deliberate, and creative.
Shooting handheld night photos Galaxy S25 tips
You’ll still want to think about shutter speed even if you’re not using a tripod. Start with a shutter around 1/15s or 1/30s for handheld night shots; you’ll need a steady hand or rest on a solid surface. The goal is to let enough light in without turning the noise into a distraction. If you have light sources in frame, try a slightly faster shutter (1/60s) to keep those lights crisp. Your ISO should stay as low as possible, but don’t stall your shot if you need a bit of extra brightness—this is a trade-off you’ll learn with practice.
In Pro Mode for Night Photography on the Galaxy S25, you’ll often use longer shutter speeds with stabilization on. If your scene has motion, think about what you want to show: traffic trails, people walking, or stars. The longer the exposure, the more motion you’ll capture; the shorter, the less blur. You’ll want to lock your focus and set a stable white balance so colors look natural. When you do it right, your handheld night photos will look sharp and true to life, with the brightness you expect from a good long exposure. Pro Mode for Night Photography: Step-by-Step Guide for Galaxy S25 & OnePlus 13 becomes your practical playbook.
Set shutter, use tripod for light trails
For light trails, you’ll set a longer shutter to let the trails grow. Place your tripod firmly, frame your composition, and start with a shutter around 4–10 seconds. If your trails aren’t long enough, extend the shutter. Keep ISO low to control noise, and use manual focus to lock your subject. You’ll want to avoid overexposure on bright signs or headlights, so monitor your histogram and tweak as needed. With the tripod steady and your shutter long, you’ll see clean, elegant light trails weaving through your scene.
ISO, Noise, and Image Quality
You care about clean photos, and that starts with how ISO influences your image. ISO is your camera’s light sensitivity dial. When you raise ISO, the sensor sees more light, but you also invite more digital grain, or noise. In bright scenes, you want a low ISO so colors stay true and shadows stay smooth. In dim moments, you’ll lean on a higher ISO to keep your shutter speed fast enough to freeze action, but you’ll watch for noise creeping in. The trick is balancing ISO with light and motion, so your photos stay sharp without looking grainy. Your goal is to keep noise out of the shadows while preserving detail in highlights, especially in city lights or indoor scenes.
As you experiment, you’ll notice noise isn’t just about ISO number. Sensor quality, lens sharpness, and processing all play a part. When you push ISO, you also push the engine to work harder, which can soften edges. That’s why you’ll often pair a higher ISO with a faster shutter to keep motion blur down, and with noise reduction in post if you need it. Think of ISO like seasoning: too little and your photo feels dull; too much and you ruin the flavor with grain. Your aim is a balanced plate—clear, natural-looking images that still capture the moment.
In practice, you’ll judge ISO by what you’re able to see on your screen. If you can’t hold still, a higher ISO helps you avoid blurry frames. If there’s enough light, drop ISO to preserve color accuracy. Your camera’s noise becomes less noticeable in well-lit areas, but shadows reveal grain. That’s when you use exposure and lighting tricks to keep ISO low while still getting the shot. With practice, you’ll know your camera’s sweet spot for different scenes, and your photos will stay clean from edge to edge.
Best pro mode ISO settings for night shots
When night falls, you’ll want a starting point for ISO that keeps noise in check but still lets you shoot with a reasonable shutter speed. A good baseline is ISO 800 to 1600 for many night scenes, especially if you’re hand-holding. If your subject is stationary, you can push to ISO 400 to 800 and use a longer exposure, but you’ll need a tripod. For busy city nights with bright signs, you can drop to ISO 200 or 400 and rely on a longer shutter to capture glow without blowing highlights. As you lock in a scene, adjust ISO to keep the histogram balanced—avoid clipping highlights in the brightest areas while preserving shadow detail.
Your real win comes from how you react to noise. If you see speckles in the dark areas, drop ISO a notch and boost shutter speed only if you can. If you’re shooting moving subjects, you’ll raise ISO to retain a fast shutter. Pro tip: enable RAW capture so you have maximum latitude to reduce noise in post. You’ll thank yourself later for that extra data. Remember, there’s no single perfect ISO—context, light, motion, and your willingness to accept slight grain decide the best choice.
Manual camera settings low light Galaxy S25
In low light, you’ll take control with manual settings to keep your photo just right. Start with a wider aperture (lowest f-number) to gather more light, then set your ISO to a balance point—enough brightness without adding huge grain. A typical setup might be f/1.8, ISO 800, shutter around 1/30s for a handheld shot of a dim room. If people are moving, nudge to ISO 1600 or bump the shutter to 1/60s while keeping noise in check with post-processing. If you have a tripod, you can drop shutter to 1/15s or slower and keep ISO low to preserve image quality.
You’ll also want to consider white balance and focus. In low light, autofocus can hunt, so switch to manual focus or use a touch to focus on a bright edge, then fine-tune exposure. Shoot in RAW to capture more detail and give yourself latitude when you edit. With practice, you’ll dial in a tiny set of presets for different rooms and nights—coffee shop warm, street-night cool, or apartment glow—so you’re ready when the moment hits.
Balance ISO with shutter to reduce noise
Your goal is to keep the noise low by pairing ISO with a shutter that suits the scene. If you push ISO up to brighten a dim scene, you should lengthen the time the sensor collects light with a slower shutter only if you can hold still. If you can’t, keep ISO lower and accept a faster shutter to avoid blur, then brighten in post rather than push the ISO into heavy noise. In practice, light scenes with motion get a mid-range ISO and a brisk shutter; static scenes get you a lower ISO and a longer exposure. This balance is your best friend for clean, true-to-life images.
Conclusion
Focus, Aperture, and Depth Control
In this section, you’ll learn how focus, aperture, and depth work together to make your photos pop. You’re aiming for sharp subjects and just enough background blur to separate them. When you adjust focus, you tell the camera where to lock detail. Aperture changes depth of field: a wider opening (lower f-number) blurs the background more, while a smaller opening (higher f-number) keeps more of the scene in focus. Depth control is the balance between what you want sharp from front to back and how much you want to isolate the subject. Think of it like sculpting light: focus locks the statue, aperture shapes the surrounding air.
In practice, you’ll want to practice with simple scenes first. Tap to focus on your subject, then pinch to adjust the aperture if you’re in a mode that allows it. If your goal is a clean portrait, you’ll use a larger aperture to blur the background just enough to make your subject stand out. If you’re shooting a landscape, choose a smaller aperture so more of the scene stays sharp from near to far. The trick is to know when you want depth to tell the story: a shallow depth signals intimacy; a deep depth signals context.
When you’re learning, test both ends of the range. Try f/1.8 for a personal, dreamy look, then switch to f/11 to capture mountains and a sky full of details. Your phone’s computational tricks can help, but don’t rely on them to fix bad focus. If you want reliability, lock focus first and then adjust exposure. That way, you control what you’re sharpening and how much detail you keep.
How to use pro mode for night sky smartphone focus
In night sky shoots, you want to grab stars without them turning into mush. Start by switching to Pro Mode. You’ll control focus manually, often with a focus ring or slider. Set focus to infinity if your stars are distant, but check every star in your frame; some phones need a tiny nudge off infinity to prevent stars from looking like little lines. Use Live Focus or magnification if available to confirm the sharpest points.
Next, lock your focus once the stars are sharp, then adjust exposure separately. You’ll usually lower ISO to reduce grain and lengthen shutter time to let more light in without blowing highlights. If you see trails instead of pinpoint stars, your shutter might be too slow or your tripod isn’t stable. A steady hand doesn’t cut it here; a tripod or solid surface is your best friend. Experiment with a few seconds of exposure, but watch for noise and star trails you didn’t intend.
Pro mode ISO shutter speed aperture guide for phone
In Pro Mode, you control ISO, shutter speed, and aperture to balance light and noise. Start with a low ISO to keep noise down, then push the shutter speed slower to gather more light. If you aren’t sure, try ISO 100–400 and shutter speeds from 1/60 to several seconds, depending on the scene. Use a wider aperture only if your phone allows manual control; otherwise, let software handle it and keep ISO low. A practical rule: shorter shutter speeds freeze motion, longer ones reveal motion; pick based on whether your subject moves.
Keep the aperture as wide as your camera lets you for a shallower depth if you want the subject to stand out. If you need more detail in the background, move to a smaller aperture to increase depth. Remember, if you push the shutter too long, any tiny hand tremor becomes blur. A tripod saves you here, turning long exposures into clean, starry nights or smooth city lights.
Lock focus and use manual exposure for sharpness
Lock focus first, then set manual exposure. This keeps your light level steady while you nudge brightness up or down. Once focus is locked, you can adjust exposure without moving your camera or changing what’s sharp. If you’re shooting in tricky scenes, use exposure compensation to prevent blown highlights or crushed shadows. The result is consistently sharp subjects with the brightness you intended.
Stabilization, Tripod, and Handheld Workflow
You’re chasing sharp night shots, and the key is how you stabilize your phone. When the lights are low, tiny shakes become big blur. You’ll feel the difference the moment you set up the right support and a simple workflow. Your goal is to minimize movement before you even press the shutter, so your phone can soak in every available photon without you fighting blur. Think of stabilization as the foundation: if your base is solid, your camera can do the rest with cleaner, crisper results.
First, choose a setup that fits your style. A sturdy tripod gives you the best stability and time to frame your shot, but quick handheld moves still matter for dynamic scenes. Your workflow should mix both: use a tripod when you can, switch to handheld with careful technique when you can’t. Your camera’s stabilization features matter too, but they aren’t magic. Pair them with solid support, and you’ll notice fewer tremors and better detail in low light. You’ll get consistent results if you keep your grip steady, and you’ll save time by planning your shot sequence so you’re not constantly readjusting.
In practice, build a simple routine: set up your scene, stabilize with a tripod or rock-solid surface, frame your composition, then lock exposure and focus. If you must shoot handheld, keep your elbows tucked, breathe out slowly, and press the shutter gently to avoid a micro-shake. The better your stabilization mindset, the more you’ll trust your gear to capture the scene the way you see it, even when the light is sneaky.
Best mounts and tripods for phone night photos
Your night photos shine most when your phone isn’t wobbling. A good mount or tripod is your first line of defense against blur. Look for a versatile, sturdy build that can grip tight and extend a bit for different angles. A flexible tripod with a stable base is great for odd surfaces, while a traditional tripod with a solid head gives you precise framing. If you shoot from low angles, a mount with a tilting head helps you aim without losing balance.
For night shots, weight matters. A lighter option travels easier, but you don’t want it to topple when the wind sneaks in. Pick something with non-slip feet and a center weight if possible. A phone mount that grips the device securely without scratching is worth the extra few dollars. If you shoot in crowds or on uneven ground, a small tripod with a wide stance can be your best friend. Your best bet is to test a couple of setups before you rely on them in a big moment.
Your setup should invite flexibility. Look for quick-release plates or magnetic mounts so you can swap gear fast while you’re out. A compact tripod that folds small but feels sturdy in your hands helps you stay ready for spontaneous city lights or starry skies. With the right mount, you’ll set up once, and your night shots will unlock a new level of sharpness and control.
Shooting handheld night photos tips and support
Handheld night photos aren’t about brute force; they’re about control. Start by choosing a scene with stable foreground or a solid surface you can touch for extra support. If you have to handhold, keep your body low and still, like you’re braced against something invisible. A tiny shift at the wrong moment can ruin your long exposure, so stay calm and steady.
Slide your camera into a comfortable stance: elbows tucked, hands close to your body, and a light grip. Press the shutter gently or use a timer to avoid finger-induced shake. If your phone offers a built-in image stabilization mode, enable it, but don’t rely on it completely—combine it with careful breathing and a steady hold. You’ll see sharper results when you shoot in bursts at different exposures and pick the cleanest frame later.
When you’re in a pinch, use natural obstacles to steady yourself. A wall, a railing, or a parked bike can become your improvised tripod. You’re not cheating the shot; you’re giving your camera a real chance to collect light without wobble. Practice makes your hands feel what to do, so you’ll get more confident with each night you shoot.
Use timer, remote, or vibration reduction
To cut blur, set the timer on your phone or use a remote if you’ve got one. A short delay means your finger isn’t the last thing to touch the screen, so the camera has time to settle. If you don’t have a remote, a 2-second timer usually does the trick; you’ll notice fewer shakes in the final image. Vibration reduction helps, but don’t lean on it alone—combine it with a solid hold and a steadied stance.
Use a tripod whenever you can, and the timer or remote becomes your best friend for long exposures. If you’re shooting without a tripod, timing your shutter release to minimize motion is essential. Your goal is to keep the moment still enough for light to paint a clear picture on your sensor. Every little delay you add gives your phone a moment to breathe before the exposure starts.
RAW Capture and Post-Processing Workflow
You’ll start by locking in the basics: shoot in RAW to keep all the light data intact. RAW files give you the most flexibility when you’re editing later, especially for night scenes where contrast and color vary a lot. Set your camera to RAW and keep exposure compensation in the neutral range. This gives you a clean slate to push shadows or pull highlights without piling on noise. You’ll notice your images look flat at first, but that’s the point—RAW preserves every detail so you can bring them to life in post-processing. When you dive into editing, you’ll find you have more latitude to adjust white balance, exposure, and color without getting muddy results.
Next, organize and back up your shots. Create a simple folder structure: RAW, Edited, and Exports. Keep a separate folder for star trails or timelapses if you’re doing those. You’ll save yourself a headache later when you’re trying to find that one frame you loved from a long night. In your editor, start with core adjustments: tweak exposure, contrast, and white balance to match what you saw in the sky. Use subtle sharpening and noise reduction—night photos tend to get grainy, so you want it controlled, not overdone. Remember, you’re aiming for a natural look that retains the glow of the stars without looking artificial.
Finally, finalize your workflow with a non-destructive approach. Use adjustment layers or RAW-specific sliders first, then apply any global tweaks. Save a master edit file, then export versions for social or print. If you’re sharing on the web, export in sRGB with a modest file size so your image loads quickly but still looks sharp. The key is to keep your master RAW file untouched; you’ll thank yourself when you revisit the shot months later.
Raw night photography smartphone pro mode workflow
You’ll love how Pro Mode lets you control shutter speed, ISO, and focus. Start with a low ISO to cut noise, then use a longer shutter to collect more light without washing out stars. Set your focus to infinity and lock it so nothing shifts during the shot. If you’re using a tripod, you can push the shutter duration further, which makes star trails more dramatic. In post, you’ll recover highlights from bright stars while keeping the darker sky intact. It’s like painting with light, and Pro Mode gives you the brushes you need.
When you’re composing, include a foreground element to ground your image. A silhouette of trees or a nearby building adds depth and scale to the night sky. If your phone supports RAW capture in Pro Mode, you’ll have more flexibility to adjust shadows and midtones later. Don’t fear a little iso noise; you can tame it in post, and the richer luminance you capture now makes a bigger difference. Your result will feel more deliberate and less rushed than auto mode night shots.
Capture stars and light trails OnePlus 13 pro mode
Your OnePlus 13 in pro mode can push both stars and light trails into sharp, vibrant frames. Start with a longer exposure, like 15–30 seconds for storms of shooting stars or car light trails. Use a sturdy tripod and a remote shutter or timer to avoid any shake. You’ll want the ISO balanced to keep stars bright without washing the sky, often in the range of 400–800 depending on your scene. For trails, try interval shooting and stack later in post to reduce noise and avoid gaps. In your edit, you’ll align frames if you stacked them and fine-tune white balance to keep the sky cool and the trails warm.
As you practice, you’ll notice the sky changes quickly. A subtle change in exposure or white balance can shift colors dramatically. Don’t be afraid to shoot several frames with small variations; you’ll thank yourself when you’re picking the best one. You’ll also want to ensure your focus remains fixed during the sequence; a small shift can ruin the uniformity of trails. With time, you’ll find your rhythm: quicker captures for bustling trails, longer exposures for calmer skies.
Export, denoise, and adjust exposure in RAW
When you export, keep the RAW file’s integrity by exporting a high-quality TIFF or a 16-bit TIFF if possible. Denoise after you’ve adjusted exposure so you don’t blur fine star details. Use a gentle denoise with a light touch; you’re preserving texture in the sky, not smoothing it away. In your final step, re-check exposure: you want the stars bright enough to pop, but the sky should stay dark and rich. Your export should be ready for sharing or print, with the colors true to what you captured and the highlights well preserved. Pro Tip: keep a copy of the edited RAW so you can tweak it later without starting over.

Smartphone Night Photography Enthusiast & Founder of IncrivelX
Vinicius Sanches is a passionate smartphone photographer who has spent years proving that you don’t need an expensive camera to capture breathtaking images after dark. Born with a natural curiosity for technology and a deep love for visual storytelling, Vinicius discovered his passion for night photography almost by accident — one evening, standing on a city street, phone in hand, completely mesmerized by the way artificial lights danced across wet pavement.
That moment changed everything.
What started as a personal obsession quickly became a mission. Vinicius realized that millions of people were carrying powerful cameras in their pockets every single day, yet had no idea how to unlock their true potential after the sun went down. Blurry shots, grainy images, and washed-out colors were robbing everyday people of memories and moments that deserved to be captured beautifully.
So he decided to do something about it.
With years of hands-on experience shooting city streets, starry skies, neon-lit alleyways, and creative night portraits — all with nothing but a smartphone — Vinicius built IncrivelX as the resource he wished had existed when he was just starting out. A place with no confusing jargon, no assumptions, and no gatekeeping. Just honest, practical, beginner-friendly guidance that actually gets results.
Vinicius has tested dozens of smartphones from every major brand, explored dark sky locations across multiple states, and spent countless nights experimenting with settings, compositions, and editing techniques so that his readers don’t have to start from scratch. Every article on IncrivelX comes from real experience, real mistakes, and real lessons learned in the field.
When he’s not out shooting at midnight or writing in-depth guides for the IncrivelX community, Vinicius can be found exploring new cities with his phone always within reach, looking for the perfect shot hiding in the shadows.
His philosophy is simple: the best camera is the one you already have — you just need to learn how to use it in the dark.