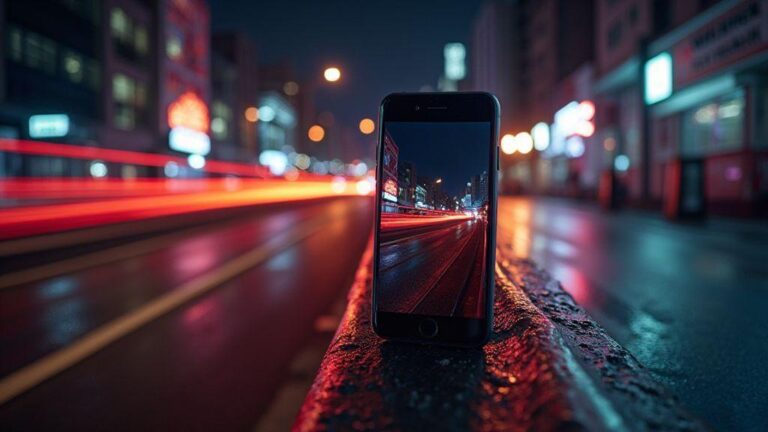
Optimal ISO Settings for Night Photos: iPhone 17, Pixel 10, and Android Flagships
Learn ISO basics for night shots
When you’re shooting at night, your camera needs to gather enough light to create a clear image. ISO is the sensitivity setting that controls how bright your photo will be. Turning ISO up makes the sensor more responsive to light, but it also makes noise more visible. You want enough light without trading away too much detail. Think of ISO as your camera’s light booster—set it just high enough to capture what you see, then adjust other settings.
Understanding ISO helps you predict results. In a dim cafe or under street lamps, a higher ISO can save a shot that would otherwise be too dark. But push it too far, and you’ll see grainy patches and fuzzy edges. The trick is to balance ISO with shutter speed and aperture so you don’t end up with blurred images or an overly noisy photo. With practice, you’ll know which scenes need a little more brightness and which scenes can stay calm and clean.
As you practice, keep notes on what works. Try taking the same scene at ISO 100, 400, and 1600 to see how noise appears. You’ll start spotting patterns: smooth textures stay cleaner at moderate ISO, while detailed textures reveal grain earlier. Your goal is to capture accurate brightness without sacrificing too much clarity. Remember: ISO is powerful, but not the first move—learn how it interacts with your other settings.
How ISO affects noise and exposure
Your ISO setting changes how much signal your sensor collects. A higher ISO boosts brightness quickly, but it also amplifies the signal that becomes noise. Noise is the grainy speckle you notice in shadows and dark areas. When you push ISO, you’ll see those speckles multiply, especially in low-light scenes or when you zoom in. To keep skin tones and textures clean, keep ISO lower where possible.
Exposure is the total amount of light that lands on the sensor. ISO is one piece of that puzzle. If you raise ISO, you can lower the shutter speed or open the aperture to balance exposure. Busy night scenes with moving subjects mean you should avoid very slow shutter speeds, or motion blur will creep in. Understanding this dance helps you choose an ISO that provides exposure without inviting noise. The goal is clean midtones and realistic shadows, not a washed-out glow or harsh grain.
In practice, test your device. Some phones handle noise better than others, and software processing can hide or exaggerate grain. If you shoot in RAW, you’ll have more flexibility to reduce noise later, but it won’t remove it entirely. Pick an ISO that feels safe for the moment, then adjust other knobs to finish the shot.
Optimal ISO levels for smartphone night photos
For most smartphone night shots, start with a low ISO, like ISO 100–400, if the scene allows. A tripod or steady hand and a longer exposure can capture more light without inviting noise. In darker streets or indoors, you can push to ISO 800 or 1600, but expect some grain. Some phones handle higher ISO better, especially newer flagship sensors, so you might get clean results at ISO 800 on devices like iPhone 17 or Android flagships, but you’ll still want to avoid going too high if you can.
Digital noise reduction varies by device. In well-lit but still night scenes, you’ll often see cleaner results at ISO 200–400. If you must shoot handheld and can’t slow the shutter, go up to ISO 800 and brace for mild grain. In brighter ambient nights, you might keep ISO around 100–200 to preserve detail in highlights like neon signs while using a longer shutter.
If you’re unsure, test a few frames. Compare a shot at ISO 100 with one at ISO 400; you’ll notice a difference in brightness and texture. With practice, you’ll learn your favorite zone for different scenes and subjects, whether you’re shooting a quiet park path or a bustling city crosswalk.
Set ISO on your iPhone 17 at night
You’ll love how your photos look when you get the ISO just right. At night, your iPhone 17 can stretch light without washing out details. High ISO can grain the image, so keep it lower whenever possible and let the camera’s processing lift shadows. If you’re in a dim street, you’ll notice the phone auto-adjusts, but you can still guide it. Try holding steady and letting Night mode do the heavy lifting. Your eyes may tell you one thing, but your camera’s math will surprise you with cleaner results when you balance exposure and ISO.
When you shoot in low light, think about the scene’s brightness first. If a sign is bright, you don’t want the whole frame to blow out. A good rule is to start with a lower ISO and rely on Night mode to brighten without adding noise. If your subjects are moving, a tiny bump in ISO is okay, but you risk more grain. You’re aiming for a clean, detailed look rather than a bright blur. Your goal is to keep ISO low enough to minimize noise but high enough to reveal color and texture.
The more you learn your iPhone’s quirks, the easier it gets. Practice by taking photos of a city street from a window or balcony. Notice how the lights become crisp lines instead of blobs as you keep ISO modest. When you review, you’ll see how Night mode helps without blasting ISO up. You’ll start recognizing the balance that makes every night shot feel more real and less HDR-y.
Night mode ISO recommendations iPhone 17
Night mode is your friend in dark scenes and handles ISO behind the scenes. Start with a low ISO to keep noise down, then let Night mode push brightness as needed. If your subject is static, you can hold your shot longer, letting the software smooth out the image without raising ISO. If you’re photographing a lit window or street lights, your ISO can stay modest while Night mode adds just enough glow. Lower ISO keeps details sharper and colors truer, especially in shadows.
If you’re shooting people or moving objects, a slightly higher ISO helps capture motion without too much blur. But don’t go wild—every bump in ISO adds grain. Keep ISO in the 100–400 range when possible and rely on Night mode’s processing. Practice with a storefront scene to see how Night mode compensates for dark corners while you keep noise minimal. You’ll get cleaner skin tones and crisper shadows when you respect the ISO ceiling.
Reduce noise on iPhone 17 night photography
Reducing noise starts with choosing proper ISO. The lower, the better, but you still need enough light for your subject. If you see specks in the dark areas, back off on ISO and let Night mode work. A steadier hand or a tripod helps you keep ISO low and get crisp detail. Your goal is texture over brightness, so you won’t chase brightness at the cost of grain.
When you’re in a loud city night scene, your camera may bump ISO anyway. Don’t panic—use post-processing lightly, and you’ll keep noise from overtaking details. You can also shoot multiple frames and combine them with Night mode processing to preserve color and reduce grain. In the end, you’ll notice smoother skies and clearer edges on buildings, not speckled shadows.
Use Night mode and lower ISO
Use Night mode and keep ISO low to preserve detail. Night mode uses longer exposure and smart processing to brighten without piling on noise. You’ll find your colors stay faithful, and your highlights won’t burn out. If you’re shooting a quiet alley or a storefront with lights, this combo keeps the scene natural and sharp. Your photos feel more like what you remember seeing, not a washed-out, over-processed version.
If you’re shooting people or moving objects, you’ll want a slightly higher ISO to capture motion without too much blur. But don’t go wild—every bump in ISO will add grain. Your best bet is to keep ISO in the 100–400 range when possible and rely on Night mode’s processing. Practice with a storefront scene: you’ll see how Night mode compensates for dark corners while you keep noise minimal. You’ll get cleaner skin tones and less mushy shadows when you respect the ISO ceiling.
Tune ISO on your Pixel 10 for low light
You want clear shots when the lights go down, and choosing the right ISO is your first shield. On the Pixel 10, cranking ISO up makes brighter images, but it also brings more grain. Your goal is to find a balance: enough sensitivity to see details without turning your photo into a speckled mess. Start by testing in a dim room. Set ISO to a low value, take a shot, and watch how the noise appears as you raise it. When you’re near the limit of what you can see with your eye, that’s a good sign you’ve found your ceiling for that scene. If you’re chasing brighter scenes without bumping noise too much, you’ll need a tripod or steady hand and a longer exposure.
In practice, keep ISO as low as possible and compensate with other tools. If you’re steady, you can stay around ISO 100–400 for most dim interiors, using auto exposure to nudge brightness without piling on grain. If you’re moving or the light is flickering, you’ll drift toward ISO 800 or higher, but watch the noise creep in. Remember, your Pixel 10 does its best when you mix gentle ISO adjustments with a stable shot—think resting elbows on a table or using a wall as support. Avoid jumping to ultra-high ISO just to chase brightness; that choice almost always costs you detail.
When you’re out in a cafe, at dusk, or inside a softly lit room, push ISO by small steps and review. If you still can’t get a clear subject, switch to Pro or Manual mode if available and lock exposure. You’ll notice that a slight ISO increase paired with a touch of exposure compensation can bring out faces and textures without turning everything into mush. The real trick is to practice your eye: know when the grain becomes distracting and when it’s acceptable for the scene you’re capturing.
Pixel 10 ISO settings for low light
Your Pixel 10 gives you several ways to manage ISO without losing control of the shot. Start with a base in the 100–200 range for clean night textures, then bump to 400 if you need more light without cranking shutter speed. High ISO is your last resort—only use it when you have to, and be ready for more grain and less detail. If you’re aiming for natural-looking skin tones in mixed lighting, keep ISO modest and rely on exposure tweaks and white balance to keep colors right.
In practice, you’ll often lock ISO in Manual mode and adjust shutter speed to preserve motion. When you’re stationary, you can lower the shutter and keep ISO modest; when people are moving, you’ll need a higher ISO to avoid blur. The Pixel 10 will warn you when noise is creeping in; that’s your cue to either slow down, steady your shot, or switch to a longer exposure stack if your scene allows it. Either way, you’re learning to play the long game with light, not just chasing brightness.
If you want a quick rule of thumb: start at ISO 100–200, test a frame, then add 100 increments only if the scene demands it. Always review your shot at 100% magnification to judge noise and detail. Your goal isn’t the brightest photo, it’s the clearest photo under those lights. Keep practicing and you’ll feel the difference between a grainy mess and a crisp capture.
Pixel 10 night photography exposure and ISO
Night photography on your Pixel 10 isn’t just about cranking ISO; it’s about how exposure, ISO, and shutter speed work as a team. With a steady hand or tripod, you can push exposure slightly longer while keeping ISO lower, which preserves detail and reduces noise. If you’re handholding, you’ll trade a bit of sharpness for brightness and bump ISO—just don’t overdo it. You’ll know you found balance when faces stay recognizable, textures appear, and grain stays controlled.
As you experiment, you’ll notice that longer exposures reveal motion trails, while higher ISO speeds up grain. The best path is to shoot in RAW if you can, so you can recover shadows and highlights later without tossing color balance. If you’re quick with edits, you can bring out midnight scenes without exploding brightness. The Pixel 10 rewards patience: small ISO steps, stable framing, and a willingness to adjust exposure after you review.
When you’re ready to push further, consider combining exposure stacking in night modes or computational options offered by the Pixel 10. Stacking helps reduce noise by layering multiple frames, letting you keep ISO lower while still brightening the scene. You’ll get cleaner skies, crisper edges, and a more usable color range, especially under city lights or starry skies.
Let Pixel stack exposures for less noise
Let Pixel stack exposures for less noise. This technique uses multiple frames to average out grain, so your night shots stay clearer even when light is scarce. You’ll notice smoother skies, better texture in fabrics, and less speckle on faces. When you enable this, you’ll want a steady setup—tripod or a stable surface helps the stacked result shine. If you’re moving, you can still stack, but you’ll want to lock your subject and reduce motion between frames. The payoff is worth it: cleaner, more detailed images without cranking ISO.
Use manual ISO on Android flagships
You’re in control when you switch to manual ISO on Android flagships. This isn’t just about dimming or brightening a scene; it’s about preserving detail where it matters. When you lock a lower ISO, you gain cleaner shadows and less grain, especially in low light. Push the ISO too high, and you’ll invite noise that masks textures. On flagship cameras, the balance is delicate but achievable: you get clean darks and defined highlights if you listen to the scene and adjust thoughtfully. Think of ISO as the volume knob for light—set it to a comfortable level and you’ll hear the whole scene clearly.
With night scenes, you’ll notice clear differences between auto and manual ISO. Auto tends to chase brightness, which can blow out lights or smear stars. Manual ISO helps you keep the brightness just right while your subject stays sharp. You’ll want to start lower, then raise just enough to reveal details in the shadows. Your goal is to avoid muddy blacks and blown whites. Flat, overexposed night shots disappear when you take charge of ISO. It’s about consistency you can trust, not luck with every snap.
If you’re new to this, practice with simple subjects at dusk. See how a building’s brick texture appears at ISO 100 versus ISO 800. You’ll feel the difference in color, contrast, and noise. Android flagships respond quickly to ISO tweaks, so you can test and compare in a single outing. The more you experiment, the faster you’ll learn which ISO feels right for your style and lighting.
manual ISO settings Android flagship night mode
When you’re in night mode on Android flagships, manual ISO becomes your anchor. You’ll want a lower ISO to keep noise at bay while relying on your tripod or stable hand to maintain exposure. Start at ISO 400 or 800 and adjust based on how dark the scene looks on the LCD. If the image looks flat, raise the ISO just enough to bring out texture in the shadows without blasting highlights. Your night shots become more consistent when you set ISO consciously rather than letting the camera guess.
In night mode, dynamic range helps you capture both bright windows and dark corners. If you find that highlights are clipping, lower the ISO and/or slow your shutter a touch while stabilizing the shot. Your aim is a balanced exposure where details in both shadows and lights survive. With patience, you’ll notice your Android flagships deliver crisp night photos that feel natural, not processed.
Android flagship camera ISO tips for night shots
Your best approach is to treat ISO as one piece of a trio: ISO, shutter, and aperture. Don’t tune ISO alone and expect miracles. You’ll get better results by pairing a moderate ISO with a shorter or longer shutter, depending on whether you want motion to blur or freeze. If your subject is still, you can push for lower ISO and longer shutter time (with a tripod). For moving subjects, raise ISO slightly to keep motion from turning into blur, but still watch noise.
Remember to check your histogram. A clean histogram means you’re not clipping too many highlights or shadows. If you see a wall of pixels to the right, you’ve blown out bright areas; back off ISO. If the left side is crushed, you’re losing detail in the shadows; you’ll want to raise ISO a tad or adjust the exposure. Your goal is to keep an even spread across the tonal range so textures don’t vanish.
Set ISO for detail, not just brightness
Set ISO to protect detail in textures, not just to brighten the image. A lower ISO keeps fabric threads, leaves, and brick lines sharp, while a higher ISO adds noise that softens edges. You want to preserve subtle lines in wood, stone, and skin, which means resisting the urge to crank ISO for mere brightness. By prioritizing detail, your night photos look closer to real life, not like a poster wash.
When you focus on detail, you’ll notice that some scenes reward slightly higher ISO for faster shutter and crisper results, especially with moving subjects or windy scenes. In those cases, a neck-and-neck balance works best: bump ISO enough to keep the shutter speed usable, then verify that noise doesn’t erase texture. Your eye will tell you when detail is winning over brightness, and you’ll feel confident adjusting on the fly.
Balance ISO with shutter speed and support
You’ve got two levers to tame light: ISO and shutter speed. When you adjust one, the other shifts to keep exposure in the right ballpark. Your main goal is to keep noise low while still freezing or capturing motion as you intend. A good rule: if you can raise the shutter speed a notch without losing the image you want, do it. If you can’t, nudge the ISO—but only enough to keep the exposure honest. Think of ISO as your brightness dial and shutter speed as your motion dial; use them together so your photos stay clean and sharp.
When you’re shooting handheld, you’ll notice every little hand shake becomes blur at slow speeds. That’s where you balance. If your scene is bright, you can keep a fast shutter and a low ISO, and your image will stay crisp. If the scene is dim, you’ll reach for a slightly higher ISO to keep the shutter fast enough to stop motion. The sweet spot varies by camera and lens, but the core idea is simple: don’t push ISO higher than you need. Faster shutters reduce blur, and lower ISO keeps noise down.
Your camera’s metering helps guide you, but your eyes keep the pace. If you’re shooting a moving subject in dim light, you’ll often need a faster shutter and a modest rise in ISO. If your subject stands still, you can use a slower shutter and a lower ISO for detail and color. The goal is a balanced exposure where the subject isn’t smeared or grainy, and the background isn’t blown out or muddy. Practice with small tweaks so you hear your camera talking back in clear terms.
When to raise ISO vs slow shutter
If your subject moves, prioritize a faster shutter. Raising ISO as a quick fix is fine, but only enough to keep the motion sharp. If the scene is bright and your subject is still, you can slow the shutter for more light without raising ISO, preserving color and noise performance. If you’re indoors with people talking and blinking, a modest ISO bump lets you keep a comfortable shutter speed so faces stay natural. The balance changes with lenses and sensors, so test in your typical settings and watch the noise creep as you push ISO higher.
If you’re in a crowded scene with lights, a higher ISO can help you avoid a blurry procession in the background. But if you can, push the shutter speed first to keep motion under control; only then lift ISO to compensate exposure. Think of it like riding a bike: you lean into speed first, then adjust power as needed. Your goal is a clean frame where motion is deliberate and grain is minimal.
Use a tripod to keep ISO low
A tripod is your best friend when light drops. With a solid base, you can drop ISO and stretch the shutter long enough to let the scene reveal itself. The result is sharper details, truer colors, and less noise. If you can’t use a tripod, brace your elbows, lean on a steady surface, and use the camera’s stabilization to bridge the gap. But a tripod buys you freedom: slower shutter, lower ISO, and a calmer image.
If you’re shooting landscapes or architecture at dusk, a tripod lets you capture long exposures without sacrificing color. Your hands aren’t the limit anymore; the light is. You’ll often find yourself holding a stable position longer, locking in the moment with less guesswork. A simple commitment to a tripod changes the game for night scenes and low light.
Dim scenes need support, not high ISO
In dim scenes, your first move is support—stability and light control—before you reach for ISO. A stable setup lets you use longer shutter speeds with lower ISO, preserving detail and color. If you must raise ISO, do so gradually and watch the noise creep. Your goal is crisp edges and natural tones, not a grainy mess.
Fix and sharpen night shots after capture
Night photos can look flat right away, but you can fix and sharpen them without losing texture. Tackle shadows first, then pull in detail from highlights, and finish with a crisp edge on key subjects. If you shoot in RAW, you have more room to adjust without introducing noise. Think of it like polishing a gemstone: remove dull spots, then lightly sharpen the cut to make texture pop. In practice, crop for composition if needed, adjust exposure, and use selective sharpening only where you need it. Your goal is a natural look, not a plastic shine.
When you apply sharpening, you’re essentially making edges stand out. Too much and you’ll see halos or grain; too little and the scene stays soft. Start with a small amount, then zoom in to 100% to inspect edges. You’ll likely need less on smooth skies and more on the subject’s outline. Use a soft brush to apply sharpening just to the main subject, avoiding the background. This keeps the image believable and avoids the overprocessed look.
If you want a quick win, try a light sharpen on the entire frame followed by an ultra-narrow pass on edges inside the subject mask. This two-step approach keeps texture without exaggerating noise. Save versions with different sharpening levels so you can compare before-and-after. The right balance makes your night shots look clean, not slapped on with filters.
Use RAW to recover shadows and reduce noise
When you shoot in RAW, you hold more information than in JPEG. That means you can recover shadow detail without baking in noise. If a wall behind your subject is underexposed, you can lift those tones and reveal texture without turning grainy. The trick is to avoid pushing brightness too far in one go; gradually pull shadows up and check how the noise behaves. RAW gives you latitude for noise control too. In darker areas, you’ll likely see blue-ish grain when you brighten. Use a targeted noise reduction pass on those shadow regions rather than a blanket effect. Apply NR lightly on darker zones and keep brighter areas clean. Your goal is to hold onto the natural grain that looks like film, not a flat nightscape.
If you’re unsure which shadows to lift, start with a neutral midtone baseline. Then compare the lifted image to the original and decide whether the change enhances mood or dulls it. Your eyes matter more than any scorecard; you want a balanced look that feels true to the scene.
Noise reduction apps for cleaner images
Noise reduction apps can be your best friend when you’re chasing cleaner night photos. Pick one that lets you target luminance noise and color noise separately. Start with a mild setting and zoom in to inspect detail around edges and textures. You’ll often notice that a small reduction on color noise preserves skin tones and textures better than heavy, one-size-fits-all NR.
Some apps offer presets tailored to night photography, which can be a quick starting point. After applying a preset, fine-tune with manual sliders for luminance, color, and sharpness. The key is restraint: NR should suppress noise enough to be clean, but not so much that you flatten fine detail.
If your device struggles with noise at high ISO, combine NR with selective sharpening. Apply NR across the frame, then mask in sharpening on the subject. You’ll keep the scene alive while minimizing grain.
Apply gentle NR to keep detail
When you apply NR, keep it gentle. A light touch preserves textures in fabric, brick, and foliage that heavy NR can erase. Use a conservative amount, then compare the result to the original. If you see a plastic look, back off a notch. Your aim is to smooth grain without removing character.
If you’re unsure, start with a small reduction and gradually increase until you notice a cleaner look without losing fine lines. Check edges and fine textures after NR to ensure they still read as real. Gentle NR makes your night shots feel calm and credible, not soft and soulless.
Optimal ISO Settings for Night Photos: iPhone 17, Pixel 10, and Android Flagships
To tie it all together, this guide covers optimal ISO settings across your favorite devices. Practice with your iPhone 17, Pixel 10, and Android flagships to dial in the right balance of ISO, shutter, and exposure. The key is consistency: lower ISO for detail and color, higher ISO only when you need brightness and your sensor can manage the noise. Use Tripods, Night mode, RAW, and exposure stacking where available to achieve cleaner night photos that look natural and true to life.
For more on the Optimal ISO Settings for Night Photos: iPhone 17, Pixel 10, and Android Flagships, keep experimenting across scenes—city lights, dim interiors, and moving subjects—and you’ll fine-tune your eye for the right ISO at every turn.

Smartphone Night Photography Enthusiast & Founder of IncrivelX
Vinicius Sanches is a passionate smartphone photographer who has spent years proving that you don’t need an expensive camera to capture breathtaking images after dark. Born with a natural curiosity for technology and a deep love for visual storytelling, Vinicius discovered his passion for night photography almost by accident — one evening, standing on a city street, phone in hand, completely mesmerized by the way artificial lights danced across wet pavement.
That moment changed everything.
What started as a personal obsession quickly became a mission. Vinicius realized that millions of people were carrying powerful cameras in their pockets every single day, yet had no idea how to unlock their true potential after the sun went down. Blurry shots, grainy images, and washed-out colors were robbing everyday people of memories and moments that deserved to be captured beautifully.
So he decided to do something about it.
With years of hands-on experience shooting city streets, starry skies, neon-lit alleyways, and creative night portraits — all with nothing but a smartphone — Vinicius built IncrivelX as the resource he wished had existed when he was just starting out. A place with no confusing jargon, no assumptions, and no gatekeeping. Just honest, practical, beginner-friendly guidance that actually gets results.
Vinicius has tested dozens of smartphones from every major brand, explored dark sky locations across multiple states, and spent countless nights experimenting with settings, compositions, and editing techniques so that his readers don’t have to start from scratch. Every article on IncrivelX comes from real experience, real mistakes, and real lessons learned in the field.
When he’s not out shooting at midnight or writing in-depth guides for the IncrivelX community, Vinicius can be found exploring new cities with his phone always within reach, looking for the perfect shot hiding in the shadows.
His philosophy is simple: the best camera is the one you already have — you just need to learn how to use it in the dark.