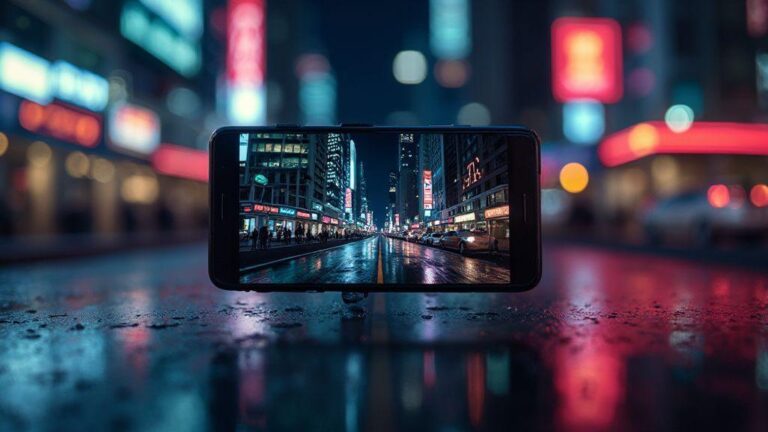
Night Mode vs Regular Mode: A Side-by-Side Comparison Across 2026 Devices for Optimal Low-Light Shots
What Night Mode Does on 2026 Phones
You’ll notice your phone’s night mode kicks in when you point the camera at a dark scene. It brightens the image using smart software tricks and extra sensor data, preserving natural colors and textures without looking fake. The goal is to reveal colors, shapes, and details you’d miss in low light, while smoothing rough edges to avoid a washed-out or photo edit look. With 2026 phones, processing is smarter, keeping skin tones natural and avoiding harsh contrasts.
In practice, night mode adds light from shadows without blasting exposure. It relies on RAW data and clever multi-frame stacking to pull light from dark areas, so you get more detail in the shadows and less risk of blown highlights. The result is a balanced shot that looks believable, as if you dimly lit the scene a touch more.
When you compare side by side, night mode tends to resemble what you saw with your own eyes: cleaner, with fewer speckles and color noise. It makes candlelit dinners, dim streets, and softly lit rooms usable without forcing a flash that kills the mood.
How Multi-Frame Stacking Cuts Noise
Multi-frame stacking blends several quick frames to form one cleaner image. This averages out random noise in dark areas, producing smoother colors and better texture. Each frame captures a little more light, and when combined, dark regions gain definition while bright areas stay bright. Stacking can take longer, but it’s the engine behind crisper night shots that hold texture in fabrics, wood, and brick.
If you’ve used a tripod, stacking mirrors that stability. Most phones achieve alignment digitally, so you don’t always need a tripod. The result is less blur and more natural texture.
Why Longer Exposure Times Capture More Light
Longer exposure lets the sensor collect light over a longer moment, improving brightness and color fidelity. The downside is potential motion blur, which phones counter with stabilization and selective stacking. The balance lets you capture quiet streets or still rooms with visible lamp glow and texture, while busy scenes may shorten exposure or stack more frames to keep motion sharp.
Night Mode Basics for Your Shots
Night mode runs in the background, analyzing brightness, color, and motion to decide how many frames to capture and how long each should be. For best results, steady your hand and let the processing finish. A stable grip or resting your phone on a surface helps you get clearer outlines and truer colors, from neon signs to candlelight.
How Sensor Size and Optics Affect Low Light
Your night photos glow when you understand the hardware behind the software. Bigger sensors grab more light, yielding brighter, cleaner images in the dark. When comparing phones, models with larger sensors typically deliver smoother skies and more detail in shadows. Look for sensor size in millimeters and effective pixel count, not just megapixels.
Optics matter as much as the sensor. A fast, wide lens lets light reach the sensor quickly, producing brighter images with less noise and better edge definition. A well-designed lens reduces distortion and keeps colors accurate, helping you capture more natural night scenes.
Your night photos improve when both sensor size and lens quality work together. If you’re choosing a new phone, prioritize a larger sensor and a fast, well-made lens for clearer foregrounds and calmer skies.
Why Larger Sensors Gather More Light
A larger sensor has bigger light-catching areas, so it collects more photons in the same moment. This reduces noise and preserves color in shadows, making details in dark scenes more defined. Larger sensors also expand dynamic range, keeping detail in bright windows and dark corners.
How Wider Apertures Change Image Brightness
A wider aperture (lower f-number) lets more light onto the sensor per shot, boosting overall exposure without increasing ISO or slowing the shutter. Expect cleaner images with better shadow detail and less noise. A wide aperture also gives a shallower depth of field, helping subjects stand out against a softer background—but beware of losing texture that adds scene context.
Choose Hardware That Helps Your Night Photos
Choose a phone with a bright, fast lens and a sizable sensor if you want better low-light shots. Stabilization—optical or strong electronic—matters a lot when shooting in the dark. A well-tuned night mode pairs longer shutter times with smart noise reduction and color correction for natural results. Pick hardware that matches your preferred lighting scenarios and shooting style.
Night Mode vs Regular Mode: A Side-by-Side Comparison Across 2026 Devices for Optimal Low-Light Shots
Night Mode typically stacks more light on the sensor, uses longer exposure, and applies smarter noise reduction. Regular Mode keeps shots fast and simple, which helps when you’re moving but hurts in darkness. Night Mode usually delivers brighter, cleaner images with better color in mixed lighting, acting like a gentle floodlight for your camera.
When you’re not on a tripod and the scene has mixed light, Night Mode shines, delivering detail in shadows and more natural highlights. Regular Mode remains viable for bright scenes or quick snaps, but you’ll often see more grain and less color nuance in the dark. For low-light storytelling, Night Mode is generally the better default.
In device comparisons, look at how quickly each phone switches modes, how well color is preserved between lamps and skies, and how clean the shadows stay. A strong Night Mode across devices provides consistently better low-light shots, guiding your choice based on how often you shoot at night and how much detail you want in the shadows.
Image Processing and AI in 2026 Night Photos
AI helps make night photos sharper and more natural by handling noise reduction, color balance, and frame selection in real time. Modern processors run multiple tasks in parallel, extracting more detail from small sensors. The result is images that feel more like real life—brighter where it matters, with fewer artifacts.
AI also enables smarter scene recognition, stabilizing frames, and consistent color science across changing light. This makes Night Mode feel less phone-y and more true to life, with less manual tweaking required.
How Algorithms Merge Frames for Clarity
Low-light capture often uses several frames. The software picks the sharpest parts of each frame and blends them, reducing noise and preserving edge clarity. Alignment ensures objects don’t blur if you move slightly. More frames can yield smoother results, especially with small, bright lights.
Why Motion Alignment Matters for Moving Subjects
Tracking moving subjects keeps them recognizable rather than ghosted. Stabilization and frame alignment ensure lights stay bright and edges stay defined, even with longer exposures.
Let Software Refine Your Low Light Images
Post-capture refinements remove noise while preserving mood and texture. The best software preserves skin tones, signage, and textures like brick or fabric without washing them out.
HDR and Night Mode Differences in 2026
HDR blends multiple exposures to balance highlights and shadows, preserving contrast across the frame. Night Mode gathers light over time and stacks frames to brighten shadows while keeping noise low. HDR tends to preserve contrast and edge definition, while Night Mode brightens darker areas more evenly and reduces grain.
How HDR Blends Exposures for Contrast
HDR captures several exposures at different brightness levels and merges them to retain detail in bright and dark regions. Aligning frames correctly prevents ghosting in moving subjects.
Why Night Mode Focuses on Brightness and Noise
Night Mode concentrates on gathering light over time, increasing brightness where needed while applying targeted noise reduction. The result is a clearer, softer rendition of shadows with natural color balance.
Pick HDR or Night Mode Based on Scene Light
- When the scene has both bright and dark areas, HDR preserves contrast and texture across the frame.
- When the scene is overall dark, Night Mode boosts brightness and reduces noise for visible detail.
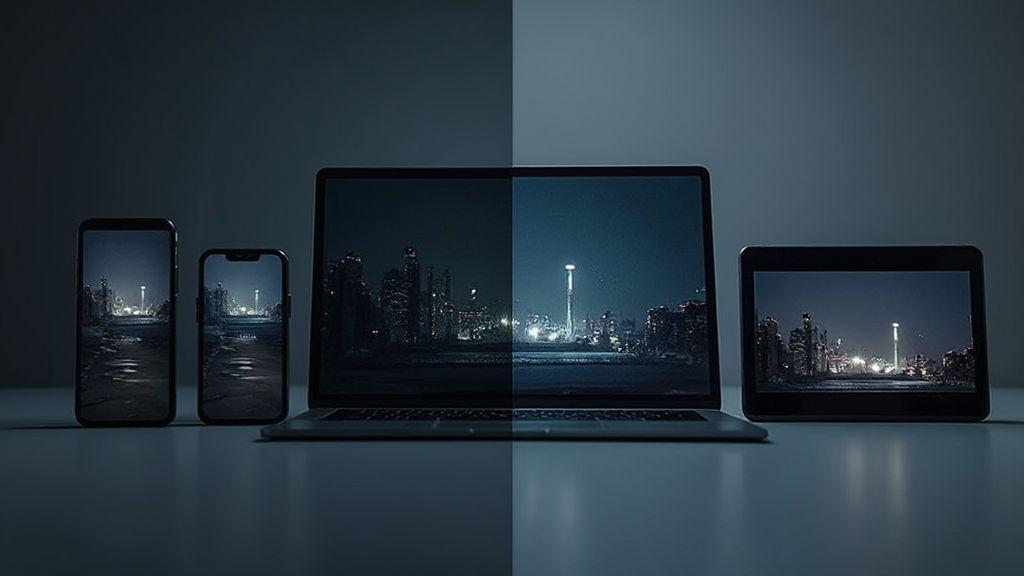
Side-by-Side Camera Mode Comparison 2026
Across devices, you’ll see variations in noise, color fidelity, and detail depending on mode and hardware. Some phones keep images very bright with pronounced processing, others stay truer to the scene with a quieter look. The key is to choose the setup that matches your eye: natural and true, or bright and bold.
Practical Low Light Settings and Tips for You
Start with a steady base: tripod or stable surface. Tap to focus on a bright area and lock focus if possible. Keep ISO low; raise it only when necessary. Shoot a few frames with slight exposure changes and pick the best.
Best ISO, Exposure, and Focus Steps to Try
- ISO: 100–400 for steady scenes; up to 800 in very dim light; avoid going beyond 1600 unless you’re prepared to clean up noise.
- Exposure: balance enough light to reveal detail without blowing highlights. For still scenes, 1/30 to 1/60 second; for moving subjects, faster.
- Focus: lock onto a bright feature and use manual focus if available. Use focus peaking or magnification to ensure sharp edges.
How to Use Night Mode vs Regular Mode in Practice
- Use Night Mode for near-total darkness or still subjects; it brightens shadows and preserves detail without heavy noise.
- Use Regular Mode for well-lit but dim scenes, or when motion is involved and you need faster captures.
- If motion is significant, Regular Mode is often preferable to avoid blur; in static scenes, Night Mode shines.
Simple Steps to Improve Your Night Shots
- Steady the shot with a base or tripod.
- Tap to focus on a bright spot and lock focus.
- Keep ISO low; increase only as needed.
- Take multiple frames with slight exposure changes and choose the best one.
When Regular Mode Beats Night Mode
Regular Mode can deliver crisper motion and more natural colors in many nighttime shots. It avoids the smoothing and potential ghosting from heavy Night Mode processing, making it ideal for fast action or scenes requiring quick captures. For color accuracy and a more straightforward look, Regular Mode often stays closer to what you saw through the viewfinder.
Fast Action and Dynamic Scenes Where Regular Wins
In moving scenes, Regular Mode preserves edge sharpness and reduces processing lag. It’s ideal for candid street moments, sports under lights, or any situation demanding speed and immediacy.
How You Can Avoid Ghosting with Regular Mode
Hold the phone steady, use a faster shutter, and brace yourself to minimize shake. If you see ghosting, switch to Regular Mode and adjust position or timing; small timing tweaks can remove smear.
Choose Regular Mode for Speed and Motion Control
For quick, in-the-moment shots, Regular Mode offers instant results and reliable motion control, making it the practical choice when you need speed over heavy night-time processing.

Smartphone Night Photography Enthusiast & Founder of IncrivelX
Vinicius Sanches is a passionate smartphone photographer who has spent years proving that you don’t need an expensive camera to capture breathtaking images after dark. Born with a natural curiosity for technology and a deep love for visual storytelling, Vinicius discovered his passion for night photography almost by accident — one evening, standing on a city street, phone in hand, completely mesmerized by the way artificial lights danced across wet pavement.
That moment changed everything.
What started as a personal obsession quickly became a mission. Vinicius realized that millions of people were carrying powerful cameras in their pockets every single day, yet had no idea how to unlock their true potential after the sun went down. Blurry shots, grainy images, and washed-out colors were robbing everyday people of memories and moments that deserved to be captured beautifully.
So he decided to do something about it.
With years of hands-on experience shooting city streets, starry skies, neon-lit alleyways, and creative night portraits — all with nothing but a smartphone — Vinicius built IncrivelX as the resource he wished had existed when he was just starting out. A place with no confusing jargon, no assumptions, and no gatekeeping. Just honest, practical, beginner-friendly guidance that actually gets results.
Vinicius has tested dozens of smartphones from every major brand, explored dark sky locations across multiple states, and spent countless nights experimenting with settings, compositions, and editing techniques so that his readers don’t have to start from scratch. Every article on IncrivelX comes from real experience, real mistakes, and real lessons learned in the field.
When he’s not out shooting at midnight or writing in-depth guides for the IncrivelX community, Vinicius can be found exploring new cities with his phone always within reach, looking for the perfect shot hiding in the shadows.
His philosophy is simple: the best camera is the one you already have — you just need to learn how to use it in the dark.