Night Mode vs Long Exposure: The Real Difference on 2026 Smartphones
How Night Mode processes low light
When you point your phone at a dark scene, Night Mode acts as a smart helper. It analyzes each pixel to decide where more light is needed while keeping the scene from looking muddy. Brighter areas stay clear, shadows gain detail, and colors stay vibrant. It’s not magic—it’s smart math that makes night shots feel closer to day without straining your eyes.
You’ll notice the difference when you move or lock focus. Night Mode tweaks light handling to avoid a flat or fake look, like turning up a lamp in a dim room without blowing out highlights. The goal is to preserve what you saw and add just enough light to set the mood.
In practice, you get more balanced brightness across the frame. Highlights from streetlights won’t glare, and dark areas won’t erase textures like brick or foliage. The result is natural-looking, ready-to-share images—the core promise of Night Mode on 2026 smartphones.
Image stacking and exposure blending
Image stacking is the backbone of Night Mode. The camera captures several quick frames and stacks them into one final image. Each frame adds light and detail, especially in shadows, reducing grain and making textures pop. You’ll enjoy cleaner skin tones, crisper edges, and less noise in dark corners.
Exposure blending compares parts of each frame and blends what works best. Brighter spots stay controlled, darker parts breathe a little, preventing blown-out highlights while keeping midtones pleasant. The result is a photo that’s bright yet faithful to the scene.
Practical tip: if you’re shooting people, stay steady for the stack. A small shake can blur the final blend. Use a hand brace or a tripod, especially with moving subjects—the more stable you are, the smarter the stacking and blending.
Computational noise reduction
Computational noise reduction removes rough grain from night photos. It analyzes patterns across stacked frames and quietly removes speckles that don’t belong. You get smoother skies, steadier textures, and fewer noisy spots in dark areas, with details preserved.
This isn’t blanket smoothing—the processor weighs what to keep and discard. You’ll see more detail in bricks, fabrics, and foliage because the algorithm knows what belongs and what is noise. Zoomed-in grain should look nicer, not just smeared.
Tip: in scenes with lots of uniform dark color, the camera may slightly sharpen transitions to preserve contrast and readability.
Smartphone night mode processing 2026 basics
In 2026, Night Mode blends rapid frame capture, smart stacking, and careful blending. The phone shoots several frames, keeps the best exposures, and uses the rest to fill gaps. The result is a bright, natural-looking photo with faithful color.
On-device AI adapts to the scene: cityscapes emphasize edges and neon hues; shaded areas protect shadow detail and greens. Post-processing is minimal because the camera handles the heavy lifting. Night Mode feels seamless because it works with little user effort.
Bottom line: Night Mode on 2026 smartphones turns dark moments into shareable images that respect texture, color, and motion. Keep an eye on how different phones handle motion—some optimize stills, others keep moving subjects sharper.
How Long Exposure works on phones
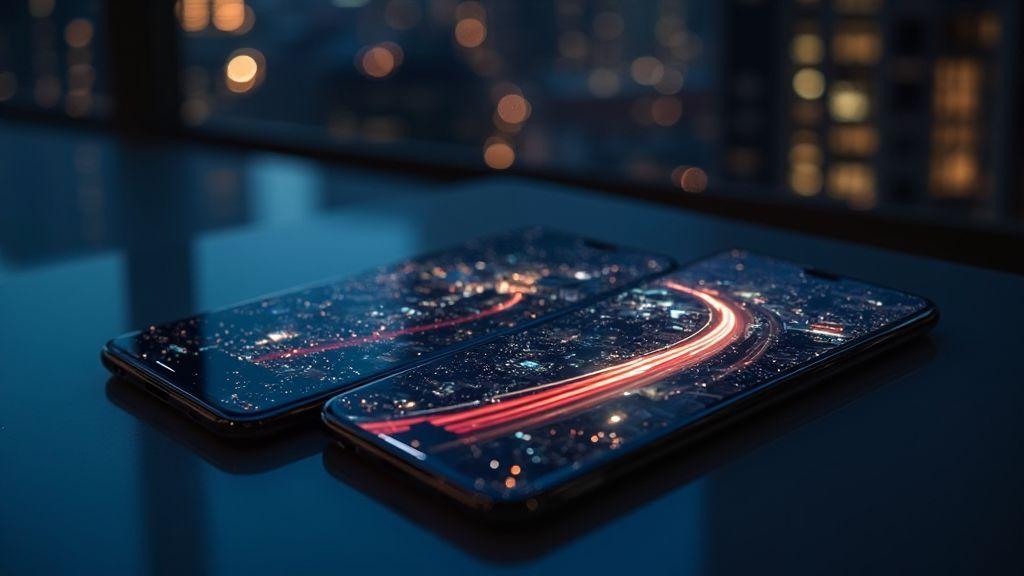
Long exposure on phones lets you capture scenes as if time slows down. You’ll see light trails from cars, silky water, and star-like trails. The camera blends many frames to produce a single image with more light than a standard shot.
A constant shutter time or a learned exposure period collects light. If you stay still, moving lights become bright ribbons; if you move, everything blurs. Stabilization matters, because the balance between a steady frame and motion defines the look.
Some phones let you set exposure time manually; others auto-adjust. Manual control lets you tailor motion blur and light trails. Automatic modes guess the best look, but you’ll usually get cleaner results with a chosen exposure length.
Sensor exposure time vs frame blending
Your phone must decide how long the sensor collects light in one shot. Longer exposure catches more light but risks more motion blur. Shorter exposure reduces blur but darkens the image. The trick is combining many tiny captures into a final photo (frame blending), which smooths and brightens while preserving detail.
Frame blending also improves color and reduces noise. By mixing frames, you cut grain in dark areas and maintain true colors. Movement, however, can smear in blending. A steady hand or tripod helps a lot. For crisp stars or flowing water, fine-tune exposure time and blending strength.
Knowing the difference helps you choose: longer exposure and stable framing for light trails; shorter exposure with gentle blending for a clean night portrait. Practice teaches what works best in your go-to spots.
Night Mode vs Long Exposure image quality comparison
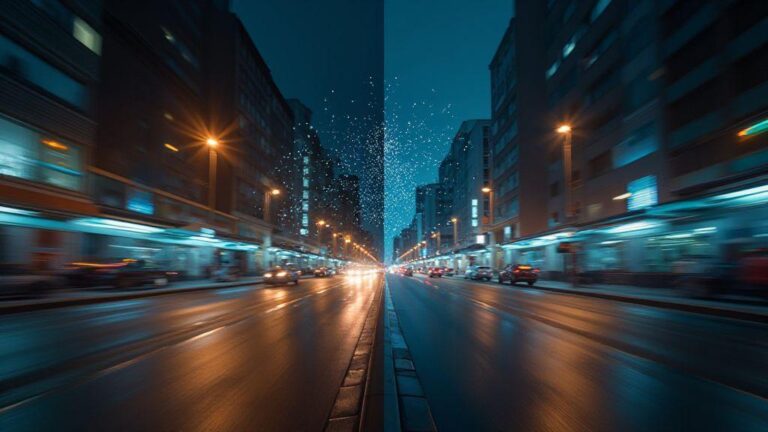
Night Mode and Long Exposure offer different looks at night. Night Mode brightens scenes with software tricks and multiple frames, usually prioritizing overall brightness and calmer colors. Long Exposure emphasizes motion and texture, especially in moving subjects, but can blur if you’re not steady. The choice depends on whether you want crisp shadows or a bright, forgiving scene.
Side-by-side, Night Mode tends to reduce noise and keep colors balanced, sometimes at the cost of very subtle textures in deep shadows. Long Exposure can reveal more micro-details in still subjects, yet motion or wind can introduce blur. For dynamic city scenes, Night Mode often provides quick, clean results; for waterfall or sky trails, Long Exposure can deliver drama with a tripod.
In crowded streets or cafes, Night Mode usually delivers a quick, reliable clean result. By a quiet lake at night, Long Exposure often shows motion more gracefully. Experiment with both, compare in your gallery, and learn which mode fits your mood and environment.
Detail and sharpness in low light
Night Mode often sharpens key edges while reducing shadow noise, helping buildings, text, and silhouettes stay readable. Long Exposure can preserve micro-texture in still objects, but motion increases blur. A steady hand or tripod helps Long Exposure keep textures crisp.
Noise and dynamic range differences
Night Mode reduces noise with stacked frames, giving balanced highlights and preserved midtones. Long Exposure relies on a single longer frame, which can offer greater dynamic range if you stay still but risks motion blur and higher noise at high ISO. Night Mode generally delivers consistent, natural results; Long Exposure adds drama with space for movement.
Night Mode vs Long Exposure image quality comparison (repeat)
Night Mode vs Long Exposure: The Real Difference on 2026 Smartphones is evident when you compare real shots. Night Mode typically yields cleaner, ready-to-share images with balanced colors and less grain. Long Exposure can create moodier images with longer lines and motion, ideal for water, clouds, or scenes with movement.
Your best approach is to carry both tools and practice. In urban night photography, Night Mode often gives honest, versatile results. In nature-night scenes, Long Exposure can unlock drama that Night Mode may smooth over. The key is control: Night Mode for quick, reliable results; Long Exposure for creative motion and texture. With practice, you’ll know which to pick in various situations.
Motion and ghosting in night shots
Night photography battles motion and light. Moving subjects blur when the shutter stays open long. Camera motion also causes ghosting, a faint double image, if the device shifts during capture. Stabilize with a solid grip or a tripod, and choose shorter exposure times for moving subjects.
Ghosting can also come from moving lights or changing lights during a sequence. Lock in longer exposure on a tripod for static scenes or avoid fast-moving lights. If your camera offers long exposure or night mode options, first test them in static scenes to understand motion behavior. Learn where ghosting hides and how to minimize it by keeping subjects still and lights steady.
Moving people and subject blur
Moving subjects blur around edges, reducing detail. If possible, frame so the person isn’t moving much during exposure, or use a faster shutter. In low light, balance light with speed for storytelling; a slight blur can hint at motion without concealing faces. For groups, choose moments when most subjects are still, or use shorter exposure with selective focus. Some phones offer motion detection or subject tracking to keep a main subject sharp while the background softens.
Ghosting artifacts from multi-frame stacking
Multi-frame stacking aims to merge several shots, but moving subjects can create ghost outlines. This happens when the phone blends mismatched frames. Reduce movement during capture or shoot single frames and let post-processing handle noise.
Motion blur and ghosting long exposure phones
Long exposure can produce dramatic light trails, but it also increases motion blur if anything moves. Use a tripod or solid surface for sharp faces and edges, and accept some blur for light trails if you’re after a city glow or star trails. Long exposure magnifies ghosting from stacking and minor shifts; minimize motion or use shorter exposures with quick captures.
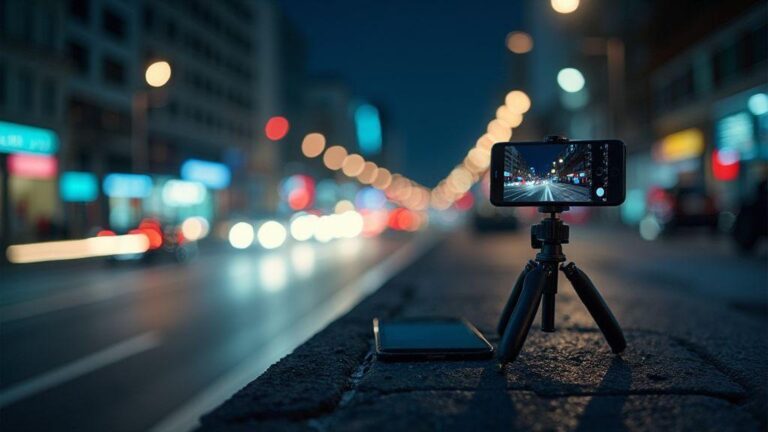
Handheld tips for long exposures
Long exposures at night glow when the camera stays steady. Use two-handed grips, brace against a solid surface, and press the shutter gently. Half-press to focus on a bright area, then fully press to lock exposure. Keep screen brightness low to reduce tremor, and breathe steadily during capture.
If possible, shoot in RAW or Pro mode for latitude in editing. Target exposure times between 1 and 3 seconds on many devices, adjusting for the scene. Shorter times for motion-heavy areas; longer times for dark scenes with fewer moving elements. Plan your composition before the shutter—anchor the frame with a foreground element and let light trails guide the eye.
Practice makes confidence. With time, night-time long exposures become cleaner and more dramatic.
Stabilization and steady holding methods
Stabilization starts with how you hold the device. Use both hands, keep elbows tucked, and stand with feet shoulder-width apart. If possible, rest against a solid surface. A small tripod or a gorilla pod helps, but a steady posture alone can make a big difference. Breathe steadily and press the shutter gently. Turn on stabilization modes if available, and keep the lens clean to avoid magnifying tiny shakes.
Using built-in gyro and software correction
Modern phones use the gyro to correct tiny movements after capture, improving stability. Enable gyro-based stabilization and the camera’s motion correction in the app if available. Software correction helps if you’re not perfectly still, smoothing jitter and improving light trails. Compare stabilized vs. non-stabilized results to learn when to rely on hardware versus software.
Handheld long exposure smartphone techniques
Maximize handheld long exposure with shimmy-free timing: set a comfortable shutter duration, hold your breath, and press gently. Half-press to focus, then full press to lock exposure. Vary angles to capture moving lights from interesting perspectives. Reflections on water or rain can add sparkle to trails. Stay still, but adjust your angle for a fresh look each shot.
Sensor and low-light hardware in 2026 phones
Your night photos start with hardware. In 2026, sensors are smarter and more capable of grabbing light without blowing out shadows. Better architecture, faster readouts, and smarter on-sensor processing reduce grain and preserve true color even in near-dark conditions.
Autofocus and noise handling are built into the sensor stack. The camera engine can detect details you’d miss on older phones. Coupled with dedicated low-light circuits, you don’t always need to dim the world to capture a decent shot. It’s like upgrading from a standard lamp to a studio light without rearranging the room.
In short, night shots depend on sensor size, readout speed, and smart noise control. The goal in 2026 phones is to balance power and battery life while delivering crisper night images.
Pixel size and ISO sensitivity matters
Larger pixels catch more light, reducing grain and keeping colors truer in dim scenes. Bigger pixels help maintain readable textures on skin, fabric, and skies and allow faster shutter speeds to prevent blur.
Higher ISO lets in more light but can introduce noise. Smart ISO juggling in 2026 phones boosts brightness in shadows while protecting highlights, so you don’t look washed out in low light.
When comparing phones, look for a balance: brighter sensors (bewer pixels) and software that manages ISO cleanly. It’s a combination that makes night photos look natural rather than gritty.
Multi-frame capture versus larger sensors
Multi-frame capture stitches several quick frames to brighten images without cranking ISO. It reduces noise and smooths texture, especially in shadows.
Larger sensors pull more light per frame, enabling brighter results at lower ISO, improving detail and color. But bigger sensors can slow bursts or add weight. Modern phones blend both ideas: smart multi-frame processing with sensors that breathe well in low light. You gain cleaner night results whether you’re shooting a street scene or a cozy dinner table.
Low light sensor performance smartphones 2026
Low-light sensors in 2026 deliver more detail, truer colors, and less noise at similar settings. They brighten intelligently, not by maxing ISO, by smartly combining data from neighboring pixels and frames. You can shoot in a dim room and still keep faces readable without extra lights.
The practical upshot is simple: you don’t need perfect lighting or a tripod. Your phone helps you hold steady, grab light, and preserve detail—so your photos resemble what you saw, not a washed-out memory.
When to choose Night Mode or Long Exposure
Choosing the right tool for night photos isn’t tricky once you know what each does. Night Mode gently slows down and brightens, delivering a clear, balanced shot with less noise. Long Exposure keeps the shutter open longer to capture motion and light trails, ideal for drama on a tripod.
For quick, consistent results, Night Mode is usually best. For creative effects like light streaks or silky water, Long Exposure on a stable setup is your go-to.
Beginners will find Night Mode forgiving: point and shoot and still get a nice image. Long Exposure asks for steadiness and setup. The more you shoot at night, the better you’ll understand which option fits your mood.
Static scenes vs moving lights guide
Static scenes: Night Mode clarifies the scene with minimal effort. The subject stays sharp and colors stay true. Long Exposure can still work, but hand tremor increases blur. Night Mode is safer for quiet streets and still landscapes.
Moving lights: Long Exposure shines with smooth light trails and dramatic lines. Night Mode may freeze motion, dulling the effect. For moving lights, plan a Long Exposure on a tripod or stable surface.
Experiment: start with Night Mode on a static scene, then switch to Long Exposure if you want movement storytelling. Your goal is to match the feeling you want to share.
Quick handheld shots vs planned captures
Quick handheld shots under dim lights usually favor Night Mode. It’s fast and forgiving, with stabilization helping prevent blur.
Planned captures lean toward Long Exposure. Set up on a tripod, pick a subject with motion or a dark background, and choose a longer shutter time for intentional results.
If you’re new, start with Night Mode. When you’re curious about a specific effect, schedule a session for Long Exposure to explore what your phone can do.
Night Mode vs Long Exposure 2026 smartphones choice
In 2026 smartphones, both Night Mode and Long Exposure are strong, but their best uses stay consistent. Night Mode remains a simple, reliable option for most quick shots. Long Exposure excels at capturing motion and light in a deliberate way. For a balanced, polished result, Night Mode often wins. For dramatic lights and smooth motion, Long Exposure is worth trying on a stable setup.
When comparing phones, look for a bright sensor, solid stabilization, and smart Night Mode processing. For Long Exposure, check live preview accuracy, tripod support, and exposure/focus lock. A good phone pairs Night Mode for everyday lighting with Long Exposure for controlled creativity.
Manual settings you can use
Manual controls give you brighter, clearer pictures by dialing in how much light hits the sensor. Start by locating the manual options and begin experimenting. Eyes know what looks right; the camera follows your lead.
ISO, shutter speed, and exposure lock
Balancing ISO, shutter speed, and exposure is key. Low ISO reduces grain but needs more light or a longer shutter. High ISO brightens quickly but adds noise. Find a middle ground that fits your scene.
Shutter speed controls how long the sensor gathers light. Longer shutters reveal more detail in dark areas but can smear motion. A steady hand or tripod helps push slower shutter speeds without blur. Exposure lock helps when lighting is uneven: lock the exposure on the brightest part, then recompose to protect shadows and highlights.
Practice with simple targets first; you can reset settings if something looks off.
RAW capture versus processed output
RAW keeps your photo in a raw state with more data for later editing. If you want flexibility, shoot RAW and edit on a strong editor. The result can look more natural and closer to what you saw.
Processed output is what most phones deliver by default—quick and pretty, with automatic optimizations. For serious night shots, RAW offers more room to shape contrast, highlights, and color without guessing.
If you’re new, try a few RAW shots and compare to processed versions. You’ll quickly see where extra data helps you recover detail and color.
Manual exposure settings smartphone cameras
With manual exposure, set a steady base (tripod or stable surface), adjust exposure compensation to balance brightness, and lock exposure when needed to prevent white highlights or crushed shadows. If light changes, shoot a quick burst and pick the best frame. Compare RAW and processed versions to learn what works best in real time.
Processing cost, speed, and battery
Night Mode increases processing cost because the camera stitches and aligns multiple frames and reduces noise. This behind-the-scenes work can cause a brief lag before the shot saves. If you’re in a hurry, a standard capture may be faster, with a trade-off in shadows, grain, and texture.
The speed of capture matters: Night Modes pause to gather light, then blend frames for a cleaner result. Expect a short delay between press and final image, especially in busy scenes.
Battery impact comes from longer exposure and HDR processing. More frames and processing drain juice. If you shoot for hours, consider power-saving modes or shorter bursts with stitching later.
CPU load during multi-frame Night Mode
Night Mode runs heavy processing: blending frames, aligning pixels, and reducing noise. If you multitask, you might see a brief slowdown. More frames equals more CPU cycles. Let the camera finish processing for the best result, or switch to a simpler mode for speed.
Battery drain with long exposure and HDR
Long exposure and HDR brighten nights by stacking data, which costs battery. Your device may warm up and the battery indicator may drop quicker. For long shoots, plan extra time for processing and consider shorter bursts if you need to conserve power. Lower screen brightness and power-saving modes help a bit.
Computational photography night mode advantages
Night Mode vs Long Exposure: The Real Difference on 2026 Smartphones is real. Night Mode uses early frame alignment and noise reduction to create a clean image without requiring perfect hand steadiness. It’s like a tiny studio built into your phone that brightens shadows and smooths grain automatically, giving clearer detail in dark corners, better color balance, and less flicker in moving scenes.
With night-mode processing, you’ll notice less blur when there’s slight movement. The algorithms compensate for camera shake, making street scenes, concerts, or late-night selfies look sharper. The trade-off can be a slightly cooler color tone or less dramatic contrast until stabilization finishes, but the overall result is more consistent and natural in low light.
Night Mode gives reliable, share-ready results, while Long Exposure offers moodier lines and motion that tell a different story. Practice with both to understand when to use each tool, and you’ll master the art of night photography on 2026 smartphones.

Smartphone Night Photography Enthusiast & Founder of IncrivelX
Vinicius Sanches is a passionate smartphone photographer who has spent years proving that you don’t need an expensive camera to capture breathtaking images after dark. Born with a natural curiosity for technology and a deep love for visual storytelling, Vinicius discovered his passion for night photography almost by accident — one evening, standing on a city street, phone in hand, completely mesmerized by the way artificial lights danced across wet pavement.
That moment changed everything.
What started as a personal obsession quickly became a mission. Vinicius realized that millions of people were carrying powerful cameras in their pockets every single day, yet had no idea how to unlock their true potential after the sun went down. Blurry shots, grainy images, and washed-out colors were robbing everyday people of memories and moments that deserved to be captured beautifully.
So he decided to do something about it.
With years of hands-on experience shooting city streets, starry skies, neon-lit alleyways, and creative night portraits — all with nothing but a smartphone — Vinicius built IncrivelX as the resource he wished had existed when he was just starting out. A place with no confusing jargon, no assumptions, and no gatekeeping. Just honest, practical, beginner-friendly guidance that actually gets results.
Vinicius has tested dozens of smartphones from every major brand, explored dark sky locations across multiple states, and spent countless nights experimenting with settings, compositions, and editing techniques so that his readers don’t have to start from scratch. Every article on IncrivelX comes from real experience, real mistakes, and real lessons learned in the field.
When he’s not out shooting at midnight or writing in-depth guides for the IncrivelX community, Vinicius can be found exploring new cities with his phone always within reach, looking for the perfect shot hiding in the shadows.
His philosophy is simple: the best camera is the one you already have — you just need to learn how to use it in the dark.