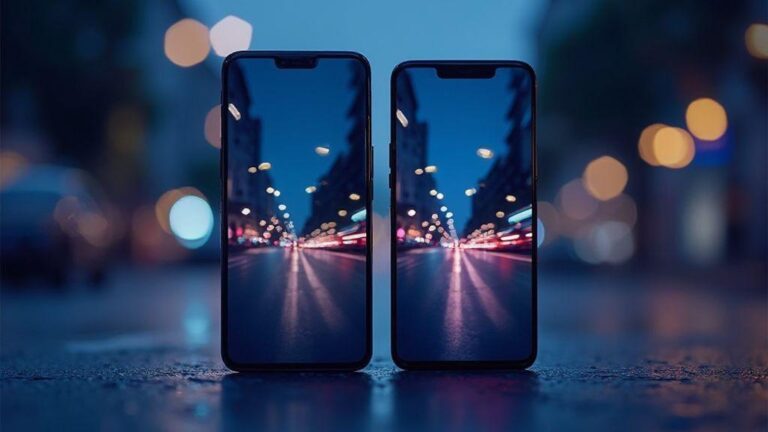
Night Mode vs Long Exposure: The Real Difference in Flagship Smartphone Photography for Creative Shots
Night Mode vs Long Exposure: How They Really Work for You
When you want better photos at night, you have two main tools: Night Mode and Long Exposure. They feel different in your hand and in your photos. Night Mode uses the phone’s processing to brighten scenes and reduce noise with little effort from you, while Long Exposure demands steadiness—usually a tripod—and a slower shutter. Your choice sets the mood: bright and clean or smooth and dreamy.
In practice, Night Mode is an everyday hero. It stacks light and color from multiple frames to brighten without blowing out highlights. You press the shutter once, and the phone handles the rest, keeping the camera steady in the background. It shines in busy streets or dim cafes, and helps you keep fast-moving moments readable without blur.
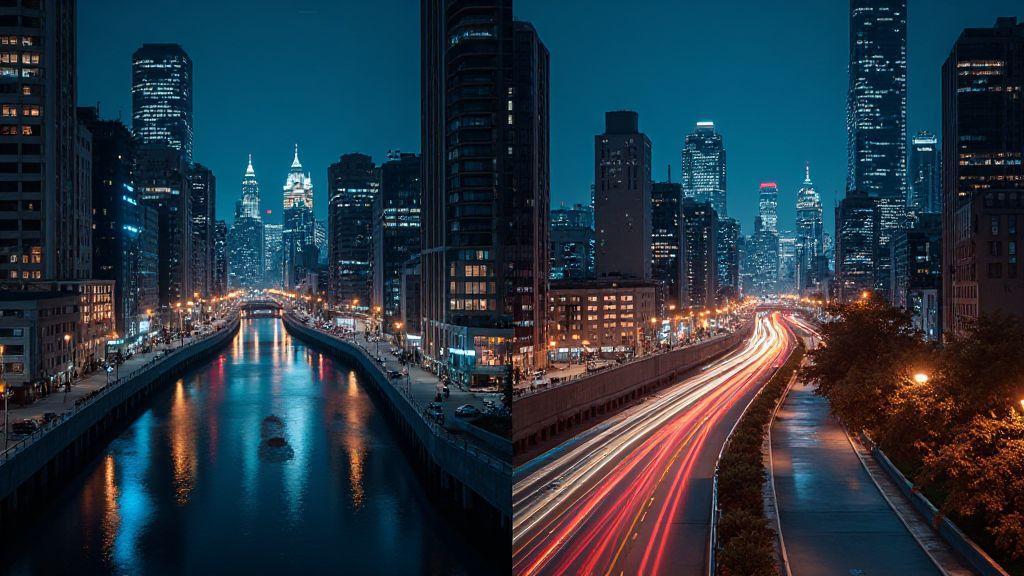
Long Exposure lets you paint with light. Keeping the shutter open longer lets moving elements leave trails—cars as light streaks, water as silk. A tripod is essential; without it, camera shake spoils the effect. If you want a moody, cinematic feel, Long Exposure provides that polish. It’s slower, but the results can be worth it.
How Computational Night Mode Stacks Frames for Less Noise
Night Mode captures several frames in quick succession, then blends them to reduce grain. The brightness comes from many small, clean shots, giving clearer low-light images. The blend also recovers color detail that a single shot can lose. Just hold steady and press the shutter—the phone does the heavy lifting, smoothing noise to look natural.
The magic happens in frame blending. Each frame adds brightness and detail, but also a touch of noise. The phone weights the clean parts higher and cancels rough bits, yielding a photo that feels sharp and natural. In dim restaurants or lit street corners, skin tones stay warm and colors stay true, instead of flat. Night Mode is your invisible editor, making the scene calmer and more real.
How True Long Exposure Uses Slow Shutter and a Tripod
True Long Exposure means the shutter stays open on purpose. You need a solid tripod to prevent movement while light paints the scene. You’ll capture smooth water, light trails, and lower noise as the sensor collects more light over time. The look is dreamy and cinematic—stars tracing across the sky, fountains flowing, neon glows. Without a stable base, results turn to blur.
Long Exposure is less forgiving for handheld use. A timer or remote shutter helps avoid jostling, and a low ISO keeps noise down since light is gathered over a long period. The payoff is a glossy, uninterrupted look with rich detail that quick snaps can’t match. It’s patient work with tangible rewards.
Quick Tip: Pick the Right Mode for Your Shot
If you’re in a bright-ish scene and want speed with less effort, choose Night Mode. For a calm, artistic effect like light trails or silky water, grab a tripod and go with Long Exposure. Night Mode is your automatic helper; Long Exposure is your deliberate craft. Know your goal before you press the shutter.
Capture Light Trails with Long Exposure for Drama
Long Exposure lets you paint the night with light. Car headlights become glowing rivers; city lamps turn into silky lines. You’ll notice more detail in the darker areas, not just blobs of brightness. The technique creates a cinematic feel, capturing motion you can’t see with the naked eye. Start with a longer delay and a moderate shutter, then adjust to avoid blurring edges.
Think of it as drawing with a soft brush in the dark. The stroke must be paced: too long and it smears; too short and it’s choppy. With a smartphone, control the stroke through exposure time and stability. Foreground anchors—bridges, storefronts—help trails feel connected to a scene. Review and tweak exposure, ISO, and distance to refine the arc of light.
When to Use a Tripod for Clean Light Trails
A tripod is your best bet for ultra-clean light trails. It locks in your frame so even longer exposures stay sharp. If you shoot from a fixed spot, a tripod ensures a consistent composition and lets you experiment with longer exposures for thicker trails. If you don’t have a tripod, a sturdy surface can work, but results won’t be as stable.
A compact tripod or mini Gorillapod fits in your bag and helps you stabilize. In crowded scenes, a monopod can help, but it won’t eliminate all shake. Busy night markets and concerts benefit most from a tripod to maintain consistency and reveal the light trails clearly.
How Shutter Speed Controls Streak Length and Blur
Shutter speed is how long the camera’s eye stays open. Longer times gather more light and create longer trails; shorter times produce shorter, crisper lines. For long, dramatic trails, go for several seconds. For a cleaner look with moving objects, start around 1–3 seconds and adjust. In busy traffic, longer speeds yield continuous ribbons, but too long can wash out detail. Keep ISO low to minimize noise and let exposure do the heavy lifting.
Experiment on the same scene to see how one second versus four seconds changes the mood. Use a timer or remote shutter to avoid shaking at the moment you press the button. Small tweaks can make big differences.
Simple Setup to Get Crisp Light Trails
- Set your phone on a stable surface or tripod.
- Frame with a clear foreground anchor.
- Turn off aggressive in-camera night modes and use manual or pro mode if available.
- Use a longer shutter (start around 2–3 seconds) and lower ISO. If brightness is too high, shorten exposure by a step.
- Prop your device on a railing or rock; cover bright reflections that can flare. Keep the lens clean to avoid halos around lights. After shooting, review trails and adjust exposure or position as needed.
Use Night Mode When You Shoot Handheld at Night
Night Mode makes a noticeable difference when shooting handheld at night. It stacks frames to reduce noise and brighten scenes without making colors look fake. It helps you capture natural skin tones and balanced lighting in dim environments, even without a tripod. If a scene is dim or busy, Night Mode can smooth the lights into a gentle glow while keeping faces and details in focus.
Leaning into the phone’s guidance helps too—some models warn when Night Mode isn’t ideal, prompting a shorter exposure or more bracing. For casual night shots, Night Mode provides brighter, less noisy results that look closer to what you see.
How Image Averaging Stabilizes Handheld Night Shots
When shooting handheld at night, the camera blends several frames to stabilize the image. This image averaging reduces random noise, smooths tremors, and preserves highlights without washing them out. It helps maintain color nuance in skies, neon signs, and reflective surfaces. Steady hands and brief pauses between frames improve the blend.
After capture, check exposure to ensure the image isn’t overbright, and note the reduced grain as evidence of the averaging process.
Why Flagship Smartphone Low-Light Photography Favors Multi-Frame Processing
Flagship phones use multi-frame processing to blend several captures. This yields richer color, better contrast, and less noise, making night shots look more like the real scene. The camera aligns frames and selects the best details, producing depth and accurate lighting.
Multi-frame processing keeps results cohesive across indoor cafes and outdoor lamp posts, improving color reproduction and texture in low light. If you’ve compared older shots to high-end devices, you’ve seen how multi-frame methods elevate detail without overdoing it.
Fast Handheld Settings to Try on Your Phone
- Start with Night Mode and hold steady for a moment after tapping the shutter.
- If you need more brightness, lightly adjust the exposure slider if available.
- For quick portraits, use a shorter burst to reduce motion blur.
- In scenes with strong lights, let the camera decide and avoid over-pushing exposure.
- Practice with simple scenes before tackling complex cityscapes.
Shoot Stars and the Limits of Smartphone Astrophotography
Your phone isn’t a telescope, but it can capture surprising night skies with patience. Tiny sensors and limited light require careful balance of exposure, ISO, and focus. A modest tripod and patience can unlock more detail than expected. Raw editing and stacking help reveal faint stars, but manage expectations—Milky Way slices may require more specialized gear.
Star photography rewards practice. Small adjustments in exposure can change how a faint star appears. Stacking or merging shots, and pairing long exposures with shorter ones, helps balance brightness and keep stars from blowing out.
When Long Exposure Helps Capture Faint Stars
Long Exposure can pull faint stars from the darkness, but it isn’t magic. A stable setup is essential. Use a timer or remote shutter to reduce shakes, and avoid overdoing exposure to prevent heat buildup. Expect some color noise and plan to shoot multiple frames or apply post-processing noise reduction.
Combining long exposures with careful white balance and RAW workflows yields a sky with more visible stars and truer colors. Start with Night Mode as a baseline if available, then experiment with longer shutter settings for more star detail.
Why RAW and Manual Focus Matter for Star Detail
RAW offers more data than JPEGs, enabling better recovery of highlights and shadows. It helps preserve star textures and Milky Way glow. Manual focus is crucial here; autofocus can hunt and miss stars. Use infinity focus or lock onto a bright star to fine-tune.
RAW also gives latitude for exposure adjustments after the shot. You can brighten faint stars while preventing clipping on bright ones. Pair RAW with manual focus for crisper star details and more natural colors.
Your eyes will notice the difference when comparing RAW and JPEG shots. RAW files feel like a true canvas; JPEGs can look flat. For serious night-sky work, embracing RAW and manual focus is the clearest path to star detail and cleaner color.
Basic Gear Checklist for Night Sky Shots
- Tripod or stable surface
- Remote shutter or timer
- Night Mode or manual exposure capability
- Phone with RAW support
- Optional: lens attachment or clip-on wide lens
Improve Night Photos with Stacking and RAW Editing
Stacking combines multiple frames to reduce noise and boost detail, while RAW editing offers control over color and brightness without data loss. Paired together, you’ll see crisper skies, sharper stars, and better texture in walls and fabrics. Think of it as layering viewpoints: stacking reduces noise, RAW refines the look.
Keep the tripod steady, shoot in RAW if possible, and choose exposures that avoid clipping bright lights. A few well-placed frames can outperform a single perfect shot, especially for night portraits and cityscapes.
How Exposure Stacking and Image Averaging Boost Detail
Exposure stacking blends frames captured at different brightness levels, preserving highlights and pulling shadow detail. It’s ideal for neon signs, starry skies, or scenes with bright lamps and dark corners. When you combine exposures, you create a result you can’t get from a single frame.
Image averaging further reduces random noise by smoothing out grain. It improves texture in bricks and metal, while keeping colors true. Keep movements minimal between frames and use a stable stand to avoid blurring details.
If you’re new to this, try 6–10 frames and edit in RAW to fine-tune contrast and brightness. The payoff is a night shot that feels clean and grounded.
Why RAW Processing for Night Shots Reduces Color Noise
RAW files provide more color and brightness information, letting you reduce color noise in post. Editing RAW helps you recover shadows and manage highlights, giving you natural tones rather than oversaturation. It also allows you to correct white balance for accurate skin tones and streetlight hues.
To get the most from RAW, shoot with a steady setup and avoid heavy compression. Adjust color temperature and vibrance to keep colors true. Night Mode vs Long Exposure: The Real Difference in Flagship Smartphone Photography for Creative Shots is a key idea to keep in mind as you compare results.
Easy Editing Steps to Sharpen Your Night Images
- Open RAW and adjust exposure to recover details.
- Tweak white balance to keep streetlights realistic.
- Use a light sharpening pass to recover edges without adding noise.
- Apply careful noise reduction, focusing on color noise to preserve texture.
- Finish with a gentle contrast boost and a touch of clarity to define details.
If you’re unsure where to start, follow these steps in order and compare before/after views to learn how each adjustment affects your night shot.
Pick the Right Gear and Settings on Flagship Phones
Choosing gear and settings starts with what you want to capture. Night shots benefit from a stable shot, clean ISO, and a steady grip or tripod. Flagship phones offer Night Mode and Pro/Manual controls, but you still guide the basics: shutter speed, ISO, and white balance. For sharp stars, use a low ISO and longer exposure with a tripod; for people scenes, use a faster shutter and let the phone handle the rest. Test presets and see how small exposure changes shift the mood. Use main and ultra-wide lenses to compare how each light-handles night.
Your flagship device’s toolkit should include: a stable grip, a tripod for long pulls, a remote or timer to avoid shakes, and an understanding of when to push which mode. Practice with different scenes to build confidence, then apply these lessons to landscapes and cityscapes.
Choose Between Night Mode vs Long Exposure Based on Motion and Light
- Night Mode is ideal when motion is minimal and light is scarce. It delivers detail without blur and is quick to use, making scenes look natural and balanced.
- Long Exposure is for motion and dramatic light trails. It requires a steady setup and yields smooth trails, but will blur moving subjects.
In short: use Night Mode for still, low-light scenes; use Long Exposure for motion and mood.
When to Use Tripod Long Exposure Smartphone vs Handheld Stabilization Night Shots
- Tripod long exposure delivers the cleanest night shots with no shake, especially for static scenes or subtle textures.
- Handheld stabilization is great for on-the-fly photography. Modern flagships offer strong stabilization, letting you shoot handheld in low light. Use stabilization in Night Mode for sharper handheld shots, or brace yourself with a railing or wall to reduce shake.
One Quick Setting to Elevate Your Night Photos
Turn on stabilization in Night Mode if your phone offers it. Keeping stabilization on for handheld night shots reduces blur with minimal effort, boosting clarity and making your night photos pop.
Understanding Night Mode vs Long Exposure: The Real Difference in Flagship Smartphone Photography for Creative Shots
Night Mode and Long Exposure each unlock different storytelling tools. Night Mode leans on multi-frame processing and RAW-friendly stacks to brighten scenes, preserve color, and minimize noise without extra gear. Long Exposure relies on deliberate timing, tripod stability, and controlled motion to reveal trails and fluid textures. On flagship smartphones, combining both approaches with RAW editing and exposure stacking lets you craft creative shots that balance realism and mood. Whether you’re chasing crisp street portraits, ethereal water, or starry skies, understanding when to use Night Mode versus Long Exposure—and how to mix their strengths—gives you the real difference in flagship smartphone photography for creative shots.

Smartphone Night Photography Enthusiast & Founder of IncrivelX
Vinicius Sanches is a passionate smartphone photographer who has spent years proving that you don’t need an expensive camera to capture breathtaking images after dark. Born with a natural curiosity for technology and a deep love for visual storytelling, Vinicius discovered his passion for night photography almost by accident — one evening, standing on a city street, phone in hand, completely mesmerized by the way artificial lights danced across wet pavement.
That moment changed everything.
What started as a personal obsession quickly became a mission. Vinicius realized that millions of people were carrying powerful cameras in their pockets every single day, yet had no idea how to unlock their true potential after the sun went down. Blurry shots, grainy images, and washed-out colors were robbing everyday people of memories and moments that deserved to be captured beautifully.
So he decided to do something about it.
With years of hands-on experience shooting city streets, starry skies, neon-lit alleyways, and creative night portraits — all with nothing but a smartphone — Vinicius built IncrivelX as the resource he wished had existed when he was just starting out. A place with no confusing jargon, no assumptions, and no gatekeeping. Just honest, practical, beginner-friendly guidance that actually gets results.
Vinicius has tested dozens of smartphones from every major brand, explored dark sky locations across multiple states, and spent countless nights experimenting with settings, compositions, and editing techniques so that his readers don’t have to start from scratch. Every article on IncrivelX comes from real experience, real mistakes, and real lessons learned in the field.
When he’s not out shooting at midnight or writing in-depth guides for the IncrivelX community, Vinicius can be found exploring new cities with his phone always within reach, looking for the perfect shot hiding in the shadows.
His philosophy is simple: the best camera is the one you already have — you just need to learn how to use it in the dark.