Multi-Frame Stacking: Comparing the Advanced Techniques of Top Smartphones for Unrivaled Night Detail
Multi-Frame Stacking: Comparing the Advanced Techniques of Top Smartphones for Unrivaled Night Detail
Explore how multi-frame stacking and related AI-driven methods shape night photography. This guide compares top smartphones and explains how to maximize clarity, color accuracy, and detail in low light.
How multi-frame stacking helps your night shots
You want clearer night photos, and multi-frame stacking is your best friend. When you capture several shots in quick succession, your phone gathers more light data than a single frame could. Each frame adds information, and blending them yields a brighter, sharper result with less grain. Think of stacking as teamwork: every frame shares the load, producing a cleaner final image.
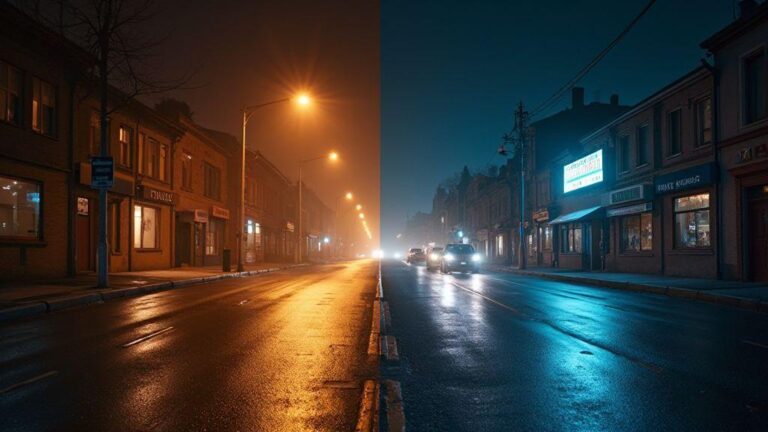
Stacking also reduces random noise in dark areas. Noise shows up as tiny color specks in shadows; averaging multiple frames cancels many of those specks, leaving smoother skies and crisper details. This is especially noticeable in street scenes where lights glow softly and the sky stays deep black instead of grid-like specks.
This approach works with your phone’s processing. The camera app guides you to hold steady, captures a short burst, and then handles the math backstage. You don’t need fancy gear—just a steady hand or a tiny tripod and a bit of patience. The result is night shots that feel truer to what you saw, not just what the sensor noise allowed.
Temporal denoising and frame alignment algorithms
Temporal denoising helps preserve detail while wiping away grain. Your phone compares pixels across frames to decide what data to trust, preserving edges like building lines and tree silhouettes so the photo stays sharp. The key is telling the algorithm what should stay fixed (static parts) and what can move (cars, people).
Frame alignment is the glue of stacking. If frames aren’t lined up, you’ll see ghosting or blur. The phone uses reference points—edges and corners—to align each shot precisely. Small shifts are expected, but solid alignment keeps the sky smooth and the skyline sharp, making the final image look like a single moment rather than a stitched collage.
You’ll notice the difference in varying light. If a car passes or a sign blinks, denoise and alignment work together to decide what to keep, resulting in a night photo that controls motion blur while revealing textures on walls and bricks.
Exposure fusion basics for low light
Exposure fusion blends different brightness levels to preserve detail in both shadows and highlights. Instead of choosing one best exposure, your phone cherry-picks the best parts from several frames. This prevents crushed shadows and blown-out highlights, giving you shadows with texture and neon signs that glow.
In low light, longer shutter or higher ISO is common. Exposure fusion avoids the muddy, brown look by mixing exposures dynamically. The result feels more real: brick textures stay visible, and neon signs remain legible.
As you practice, exposure fusion lets you push a little more light without wrecking color or contrast. Night photos gain depth, with brighter windows and richer skies, while remaining recognizable.
Why noise drops with stacking
Stacking averages the random noise from multiple frames. Each frame brings its own tiny noise, but blending them cancels much of it, yielding a cleaner image with smoother shadows and more tonal detail. Stacking also expands dynamic range: highlights don’t clip as harshly, and dark corners retain texture. The final shot feels more natural, with less static in the night.
How you compare night modes on top phones
When evaluating night shots, compare how each device handles noise, color, and detail in low light. Some phones boost contrast to reveal texture; others preserve a softer, more natural look. Your goal is a mode that preserves true scene color without turning everything into a poster. Compare specs side by side, but test with real scenes: a street, a dim restaurant, or a park at dusk. Differences show up in paint texture, skin tones, and the sharpness of small lights.
Pay attention to exposure timing and capture speed. Some phones snap quickly with a bright result but miss subtle shadows; others take longer, stacking frames to reduce noise but risk motion blur if you move. The best picks feel steady and faithful, revealing stars in the sky or brick grain without looking fake. Note how each phone handles bright light sources like street lamps, which can bloom if processing is too aggressive.
Finally, compare the final look after export. Some night modes feel dramatic and cinematic; others look like a clean documentary. Choose a style that matches your taste and subjects. You aren’t chasing a single photo—you want a reliable night mode you can use daily without second-guessing every shot.
Night mode multi-frame stacking comparison
Multi-frame stacking can change your night photos significantly. Some phones stack many frames to reduce noise, producing a crisper sky and smoother shadows, but with potential motion blur on moving subjects. Others stack fewer frames, preserving motion but leaving more noise. Your choice depends on whether you shoot static landscapes or busy streets.
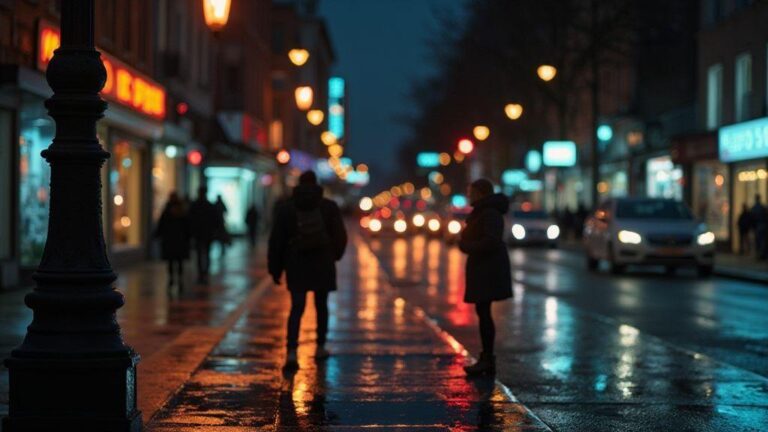
When comparing, check frame alignment. Drift can soften faces or create double images. A good system locks onto the scene and stitches frames with precision, preserving edges like window frames and rope lights. If selective processing is offered, you’ll see better highlight detail while keeping midtones natural. Try a storefront lights scene with a moving person to see how motion is handled.
Practical tip: test a tripod shot of a quiet street and one with moving cars. The best multi-frame stacking gives you clean, detailed results for static parts and minimizes motion artifacts for moving elements. Look for a balance where noise disappears but the night’s character stays.
What phone processing changes your photo look
Processing is the secret sauce that makes a night photo feel finished. Phones apply brightness, contrast, and color in unique ways. Some boost greens and blues for a cool, slick feel; others warm scenes for a cozy, candlelit vibe. Notice changes in skin tones, brick textures, and neon signs—the differences turn a simple shot into something you’d post with confidence.
Edges may be sharpened to create crispness, which can add halos around bright zones. Others keep edges softer for a natural look. Test the same night scene on several phones to compare faces, fabric textures, and road details. You want a look that stays faithful to reality but still polished for sharing.
Color saturation in the dark also matters. Too much makes lights cartoonish; too little can flatten the image. Use a scene with mixed lighting to judge which phone preserves color balance without exaggeration. The right processing should feel seamless, like you just remember the scene.
Real-world comparison tips
- Use a steady stance or a small tripod for night scenes; stability helps stacking do its job.
- Shoot in RAW if possible for more exposure and color adjustments later without losing detail.
- Compare shots side by side on your device; assess texture in shadows, color accuracy, and light glow. If one phone makes the sky look smeary or lights bloom, it may not be ideal for night work.
- End with a quick recap: which phone gave you the most usable night shots, the most natural look, and the most vibrant vibe.
Real-world comparison tips
- Bring two tricks: a steady stance or small tripod, and RAW shooting if available.
- Compare shots side by side for texture, color accuracy, and light glow.
- Note how well the tone holds after export; aim for consistency across lighting and subjects.
How AI helps your stacked frames
AI enhances night photos by handling many frames at once. It analyzes details across frames, deciding what to keep or discard. It reduces motion blur and fills gaps in dark areas, acting like a careful editor to assemble a cleaner final shot.
This approach lowers grain and boosts brightness without making colors look fake. AI becomes more effective as it learns your camera’s patterns, delivering steadier results frame after frame.
When lighting is tricky, AI can keep the subject sharp while protecting the background. The more the AI understands your camera’s behavior, the steadier your results become.
AI-based multi-frame stacking smartphones
Some smartphones use dedicated algorithms to stack frames and extract details others miss. Expect less color noise and sharper edges in textures like brick or bark. The AI scans across frames to determine the best pixels and blends them into one image. It also helps manage motion by selecting frames with minimal movement, avoiding smear in low-light or slow shutter modes. The result is a night photo that closely matches what you perceived.
If the AI dominates, you may see brighter skies, darker shadows, and more natural skin tones. Your device may warn when lighting is too tricky, suggesting longer exposure or a steadier hand.
When AI boosts detail or adds artifacts
Sometimes AI pushes detail too far, creating tiny halos around edges or an artificial look. If you notice this, try a slower shutter speed or steadier handling to give the camera more reliable data.
Other times AI enhances detail without artifacts: sharper brick lines, crisper stars, and clearer signs while keeping colors believable. If you’re unsure, compare two shots—AI on versus AI off—to judge whether it helps or hurts. Trust your eyes.
How you get sharper images with super-resolution
Super-resolution combines several frames into one sharper picture. Each frame captures a different detail and motion, so the final image is steadier and more defined. You’ll notice crisper edges, more pronounced textures, and less blur in low light.
You enable it by capturing multiple frames quickly or using a stabilization mode that aligns shots before saving. The final image carries more data behind it. It’s not magic; it’s math—tiny shifts merged to reveal details unseen in a single shot.
Compared to a standard shot, super-resolution offers more subtle but real improvements: better clarity in fine lines and brick texture. It’s not about daylighting a dark room, but about extracting more information from the pixels you captured. Practice helps you know when to use it—for night sports, cityscapes, or quiet streets with interesting textures.
Super-resolution through frame stacking
Frame stacking builds a sharper image by aligning and blending several frames. Tiny camera shakes vanish through averaging, and color consistency improves with more data. This method excels when there is movement or slight hand motion, capturing the right texture while smoothing rough bits. You’ll get stronger edges and reduced noise, especially in still subjects or scenes with slight motion.
When stacking beats single-shot detail
Stacking beats single-shot detail in low light or with motion. A single shot often suffers from noise and blur; stacking uses multiple moments to preserve edges and texture. The result is smoother textures and crisper contrasts in tricky parts like hair, fur, or fine fabric threads, ideal for night portraits and dim streets.
If you’re unsure when to stack, consider: low light, motion, and the desire for detail. Stacking is usually beneficial, with the trade-off of a slight delay for processing. The payoff is sharper, more reliable detail.
How small moves add big detail
Small, intentional micromovements can add detail by providing more angles of the same scene. Each micro-shift captures a slightly different texture and edge, and blending these shifts preserves lines and smooths gradients. This is the core of Multi-Frame Stacking: Comparing the Advanced Techniques of Top Smartphones for Unrivaled Night Detail. The goal isn’t to shake the phone but to introduce tiny shifts that enrich stacked data, yielding crisper corners and smoother night gradients.
In practice, a tiny shift can turn a dim doorway into a clearly defined entry with visible bricks. It feels like taking several small, careful steps and letting the camera merge them into one standout shot.
When you should use exposure fusion or long exposure
Two main moves in low light: exposure fusion (multi-frame stacking) or a single long exposure. Your choice depends on motion and how steady you can hold your device. If people or cars move, exposure fusion captures different moments and blends them to avoid trails. If the scene is mostly static, a long exposure can gather more light in one shot and deliver a soft glow. The goal is to balance brightness, noise, and motion blur for a clean night photo that still feels real.
- Exposure fusion stacks several frames to keep highlights from blowing out and shadows from crushing. It’s forgiving if you’re handheld and subjects move a bit.
- Long exposure yields smoother water, more uniform skies, and richer color in static scenes, but it’s vulnerable to motion blur and shadow noise if not locked down.
In practice, switch between the two depending on the subject. For busy streets with moving cars, use exposure fusion to prevent trails. For a calm river, a long exposure can turn ripples into silk. Start with exposure fusion to minimize shake, then try long exposure when you can keep the device steady.
Exposure fusion multi-frame low light
Exposure fusion stacks several frames for balanced brightness across dark and light areas. You shoot a quick burst and let the algorithm pick the sharpest parts of each frame. This reduces noise and preserves detail even if the subject moves, since not every frame needs to be perfect.
The result is often more natural in low light, with preserved texture in shadows and readable highlights on lights. You’ll notice fewer harsh halos and less color clipping in the sky. It’s ideal when handheld or when scenes contain both bright lights and deep shadows. Remember: exposure fusion relies on bracketing several shots, so a brief window of stability is essential. If there’s wind or a lot of motion, some ghosting may occur unless the motion-correction is smart.
Pros and cons versus one long exposure
- Exposure fusion offers a safety net in changing light. It masks sensor noise and reduces motion blur from small shakes, and it’s friendlier if you’re not perfectly still. The trade-off is a slightly less ultra-smooth look than a single, clean long exposure.
- Long exposure delivers silkier water, smoother skies, and brighter street lamps with a single click. It’s the cleanest way to maximize light in static scenes, often with richer color depth in blue-hour tones. The risk is motion blur if anything moves and potential shadow noise if exposure isn’t locked. If handheld, fusion is safer; if on a tripod and static, long exposure can win for mood and brightness.
When fusion yields cleaner results
Fusion tends to win when there’s motion or when you’re not perfectly still. It blends the sharpest parts from several frames, avoiding ghosting and blown highlights in busy city scenes with many light sources.
Pick pixel binning or multi-frame stacking for low light
Two main tools for night photography: Pixel Binning and Multi-Frame Stacking. Pixel binning merges nearby pixels to create a brighter single pixel, delivering quick, bright results. Multi-Frame Stacking blends several frames for maximum detail and minimal noise, at the cost of speed. Binning is faster; stacking is more detail-rich and slower.
- Pixel binning shines when you’re moving fast or need instant results; it’s like lighting up a room with a single brighter lamp.
- Multi-Frame Stacking excels when you can hold still and want maximum detail, texture, and dynamic range.
If unsure, start with binning for quick, bright shots and switch to stacking for scenes you can hold steady. Some devices offer both modes or auto-switch based on light. Try both in the same night to see which fits which moment—a street lamp versus a quiet park.
Pixel binning versus multi-frame stacking
Pixel binning merges neighboring pixels to boost brightness and reduce grain, producing quicker results but potentially softer detail.
Multi-Frame Stacking takes several frames and blends them to keep detail sharp while lowering noise, preserving texture and color. It’s slower and requires steady hands or a tripod, but the result is a crisper, more color-accurate image with better dynamic range.
In practice, binning is best for fast, night-on-the-town shots; stacking is best for night landscapes or cityscapes where you can stay still.
When each method wins on detail and noise
- Binning wins on speed and exposure. You’ll get brighter images with less motion blur when moving or when you can’t stay still. Noise reduction is decent, but some fine texture is traded for smoothness.
- Multi-Frame Stacking wins on detail and low noise. It shines in still scenes with a steady setup, showing more defined edges, better texture in dark areas, and more accurate color. The trade-off is processing time and the need for a stable setup.
Choosing depends on how steady you can stay and how much texture you want. If texture is king, stacking; if speed and brightness matter more, binning.
How you shoot handheld with multi-frame stacking
When you shoot at night, your phone’s sensor works hard. Multi-Frame Stacking lets you combine several quick captures to pull more light and detail from darkness. With a steady hand, you’ll see more color and less noise as frames align. This isn’t magic—it’s math: each frame contributes a tiny piece, and stacking aligns those pieces into one brighter, cleaner image. For true night detail, this is your best handheld toolkit.
Keep the shutter as short as possible while letting in enough light. Stacking lets you push ISO down, trading tiny motion for better quality. You’ll notice crisper trees, stars, and building edges, with textures (brickwork, leaves, reflective surfaces) appearing more realistic after stacking. Practice a few frames in a quiet moment, then compare with a single shot to see the difference.
Use night or pro modes if available. Enable features that support stacking, such as exposure bracketing or longer sequences, but stay steady. If possible, prop your elbows in or lean on a stable surface. The camera’s motion cues will help decide what to discard, so give it a moment between frames.
Handheld night photography multi-frame techniques
- Begin with a plan: choose a scene you don’t want to miss—street glow, storefronts, or a skyline.
- Use a longer exposure sequence and let the stack fuse multiple moments for depth without blown highlights.
- Enable auto-alignment and noise reduction if available to help frames line up when you’re not perfectly still.
- Shoot in bursts and rely on the stacking algorithm to merge the best frames. Don’t chase every micro-movement; small camera shake becomes noise otherwise.
- For moving lights, stacking can still help by prioritizing static elements across frames.
- Lock white balance on a neutral setting or maintain a consistent auto WB across frames to avoid odd color shifts in the stack.
Motion estimation and frame rejection for you
Your phone uses motion estimation to decide which parts of each frame to keep. If a frame is too blurry, it’s rejected to keep the stack clean. A steady hand reduces bad frames and ghosting. For moving subjects, pre-aim and pause briefly to let the camera capture the right moment. If nearby moving subjects appear, the camera prioritizes still elements, brightening them while allowing minor blur on moving parts.
Simple steps to steady better stacks
- Grip your phone with two hands, elbows tucked in, and brace against your torso.
- Use a stable surface or a small tripod when possible.
- Enable stabilization and let the software do the heavy lifting.
- Shoot during calm moments with minimal wind.
- Keep frames short but frequent; more frames equal cleaner stacking.
How stacking affects phone speed and battery
Stacking a night-shot sequence makes the phone work harder. Each frame adds data to process, so capture and save times can be longer, and the device may heat up. If you’re in a dim doorway or a bright-lit sidewalk, you’ll see more computations per second during stacking.
The processing time isn’t just for capturing; saving the final image also takes longer as frames are merged and denoised. On older devices, expect a noticeable wait. If impatient, reduce the number of frames or shorten exposure sequences. You still get good night detail, just with less processing pressure.
Battery life also takes a hit because stacking uses more CPU and AI cores. If you’re out late, consider charging beforehand or shooting in shorter bursts with breaks. Ultra-power saving mode can help when you don’t need long exposure stacks.
Computational photography low-light enhancement costs
Low-light enhancement relies on heavy algorithms to clean noise and brighten shadows. Each stacked frame adds processing time and energy cost. Expect sharper edges and less grain, but more heat and slower performance. More frames mean larger RAW or HDR files, consuming more storage. For frequent night shooters, you may delete older stacks to reclaim space. You can balance this by using shorter sequences or lower resolution for casual shots, reserving full stacks for special moments.
Think of it like cleaning a dusty window with a power washer: improved clarity comes with higher energy use. If you prioritize speed, dial back the intensity of enhancements while still enjoying improved detail.
How temperature and processing limit stacking
Temperature affects stacking: when the device warms up, the processor may throttle, reducing the number of frames you can stack or increasing processing time. After long sessions, you might notice less clean night shots as the chip cools.
Processors also cap how many frames you can stack at once to manage memory and AI tasks. Some night modes limit to around a dozen frames to prevent overheating. If you want to avoid overheating, shoot in cooler times or in short bursts with rests between sequences.
Save power while keeping night detail
To conserve power without losing too much night detail, balance the number of frames and exposure length. Slightly lower resolution in very dark scenes can still yield strong results with less processing. Use scene selection or smarter auto modes to reduce frame counts when the sensor is warm. Reserve high-precision modes for key moments and keep casual snaps light.
How you choose the best phone for night stacking
When selecting a phone for night stacking, you’re choosing how clean your pictures stay in low light. Look for a strong night mode with multi-frame stacking to minimize noise and preserve color. A bright sensor, smart processing, and enough RAM help you handle many frames without slowing down. Consider your shooting style—bold, dramatic night shots or true-to-life street scenes—and ensure the device fits your nightly routine.
Movement handling matters too. Night stacking shines when the camera can lock onto a scene and stitch frames smoothly. A solid ISP and efficient image pipeline convert stacked frames into one sharp photo rather than a fuzzy collage. Choose a model that feels quick in real life, not just in a spec sheet.
Finally, consider practical bits: battery life during long shoots, ease of access to RAW or Pro modes, and whether the user interface fits your night photography workflow. Night stacking isn’t only about camera tech; it’s about how you actually use it. If you want to post quick nighttime updates or share precise, low-noise images, pick a phone that slots easily into your nightly routine.
Best smartphones for low-light multi-frame stacking
Some phones handle night stacking with more confidence. Top picks balance sensor size, processing power, and software tricks that weave several shots into a clean final image. When you try them, you’ll notice less noise and better detail in shadows. These phones often have multi-frame stacking baked into the core camera apps, so you don’t have to wrestle with settings to get great night photos. The best devices feel natural; you don’t have to overthink the setup—just point and shoot.
Another benefit is how well these devices manage color and glare from streetlights. A strong ISP prevents washed-out highlights and keeps night tones accurate. These devices typically have enough RAM to buffer many frames, so stacking doesn’t lag for moving subjects. It’s not just about specs; it’s about how smoothly the phone keeps up with your eye for detail. When a device hits that balance, night photos feel effortless, like you snapped them while you were blinking.
Key specs to scan: sensor, ISP, and RAM
Your first focus should be the sensor—the larger, the better for night light. A bigger sensor gathers more photons, yielding more detail and less grain when you stack frames. Pair it with a capable ISP that can blend frames quickly while preserving color and texture, and ensure ample RAM to manage multiple frames without slowing down. Look for phones that advertise generous RAM or smart memory management.
Software features matter too. Some phones offer dedicated night modes that lock exposure and use multi-frame stacks in the background, while others give manual or semi-manual control to tweak ISO and shutter time. You want a setup where hardware and software cooperate to produce natural, crisp results. A model with a strong sensor, smart ISP, and ample RAM to handle several frames is a solid choice for night photography.
Quick buying checklist for night photos
- Look for a large sensor with high dynamic range.
- Check that the ISP supports fast multi-frame stacking.
- Ensure ample RAM and good memory management.
- Prefer models with a stable gimbal for low-light video if you shoot moving scenes.
- Test auto night mode versus manual mode to see what suits your style.

Smartphone Night Photography Enthusiast & Founder of IncrivelX
Vinicius Sanches is a passionate smartphone photographer who has spent years proving that you don’t need an expensive camera to capture breathtaking images after dark. Born with a natural curiosity for technology and a deep love for visual storytelling, Vinicius discovered his passion for night photography almost by accident — one evening, standing on a city street, phone in hand, completely mesmerized by the way artificial lights danced across wet pavement.
That moment changed everything.
What started as a personal obsession quickly became a mission. Vinicius realized that millions of people were carrying powerful cameras in their pockets every single day, yet had no idea how to unlock their true potential after the sun went down. Blurry shots, grainy images, and washed-out colors were robbing everyday people of memories and moments that deserved to be captured beautifully.
So he decided to do something about it.
With years of hands-on experience shooting city streets, starry skies, neon-lit alleyways, and creative night portraits — all with nothing but a smartphone — Vinicius built IncrivelX as the resource he wished had existed when he was just starting out. A place with no confusing jargon, no assumptions, and no gatekeeping. Just honest, practical, beginner-friendly guidance that actually gets results.
Vinicius has tested dozens of smartphones from every major brand, explored dark sky locations across multiple states, and spent countless nights experimenting with settings, compositions, and editing techniques so that his readers don’t have to start from scratch. Every article on IncrivelX comes from real experience, real mistakes, and real lessons learned in the field.
When he’s not out shooting at midnight or writing in-depth guides for the IncrivelX community, Vinicius can be found exploring new cities with his phone always within reach, looking for the perfect shot hiding in the shadows.
His philosophy is simple: the best camera is the one you already have — you just need to learn how to use it in the dark.