Milky Way Magic: How to Photograph Our Galaxy with iPhone 17 Pro Max and Galaxy S25 Ultra
Choose Your Dark Sky Spot
Finding the right dark sky spot is your first win. You’ll want a place far from city lights, with a clear horizon and minimal obstructions. Look for parks, hills, or coastal overlooks where light pollution is lowest. Note where the Milky Way rises and where the best foreground sits. Your goal is to maximize contrast between the stars and your foreground. If you’re in a popular area, scout a quiet edge where fewer people linger. The right spot makes your images pop with depth, not just a flat night sky.
When you pick your spot, think about access and safety. Check public hours, paths, and weather accessibility. You’ll shoot after sunset, so you need a safe route back to your car or shelter. For dramatic foregrounds, choose a lone tree, rock formation, or shoreline silhouette to give your Milky Way shots scale and drama. Your spot isn’t just about stars—it’s about telling a story with landscape.
For reliable results, write a quick timing plan: note when the sky darkens, when the Milky Way is visible, and the best window for sharp photos. Bring a small flashlight with a red filter to protect night vision. Pack extra batteries, a sturdy tripod, and a wide lens or a compact zoom. With this plan, you’ll capture a nightscape that blends stars and foreground into one frame.
Milky Way photography tips for iPhone 17 Pro Max
If you’re using an iPhone 17 Pro Max, you can still chase the Milky Way with great results. Start with a tripod and a remote shutter or timer to keep the camera steady. Use a wide or ultra-wide lens to capture more sky, and a long exposure to reveal faint stars. Avoid pushing exposure too far, or stars will smear. A 20–25 second exposure with a low ISO works well. Shoot in RAW (ProRAW if available) to adjust white balance and noise later.
For color and contrast, edit sparingly: keep the foreground natural, deepen the sky, and avoid washing out the Milky Way. Try test frames at different exposures to see what your camera can capture. The iPhone 17 Pro Max can surprise you, especially with a simple composition and minimal in-frame light sources.
Use light pollution maps
Light pollution maps are your secret weapon. They show where bright skies end and truly dark skies begin. Before you head out, compare several spots and choose areas marked dark or darkish where the Milky Way is visible on a clear night. Use these maps to plan your route and timing for the darkest skies. If you’re between cities, you’ll see a big glow drop, translating to more visible stars.
Study the maps and pick at least two backup spots. Weather or crowds can ruin your first choice, so options save your night. Note where local storms or early cloud cover might move in, and be mindful of directionality: the Milky Way isn’t always highest in the sky, so plan to align your foreground with the brightest arc.
Check weather and moon
Weather and moon phase determine whether your shot will shine. Clear skies are essential; even a thin veil of clouds can ruin sharpness. Look for a night with little wind to keep the tripod steady and low humidity to preserve star points. A new moon or slim crescent is ideal for a dark sky. If the moon is rising late, target the deepest hours. Pack a thermos, extra layers, and a rain cover in case conditions shift. The best nights feel quiet, dark, and magical.
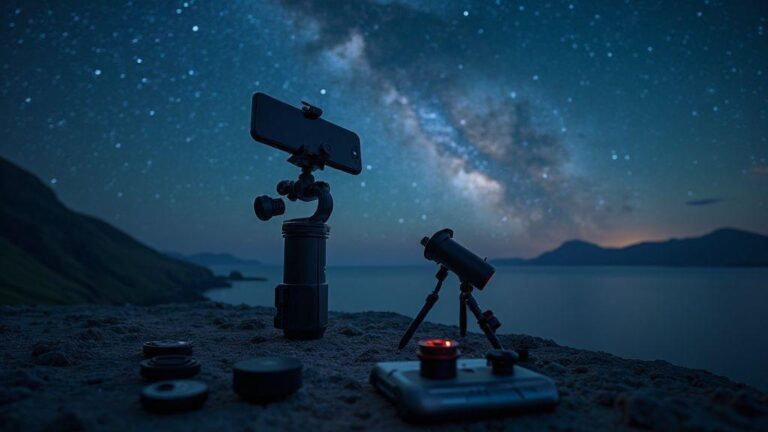
Pack Your Gear: Tripod and Lenses
Your night shots start with a rock-solid setup. A sturdy tripod keeps the frame steady, preventing star blur and wobbly foregrounds. Choose a weighty, stable unit with smooth panning, and consider a lighter option if you’ll hike in. A reliable head that locks tight saves you from constant readjustments. Pair your tripod with a lens that pulls in enough light: a wide-angle lens captures more sky and scenery in one frame, letting you see more stars without cranking up the ISO. For mirrorless or DSLR, a fast wide prime or wide zoom gives crisper stars and cleaner shadows.
Lenses matter: sharp edges and minimal distortion are key. A fast wide aperture (f/2.8 or faster) pulls in more light, keeping ISO reasonable and shutter speeds longer for star trails or a soft deep-sky glow. If you’re limited to a kit lens, stay calm—you can still capture stunning Milky Way shots with care. Use a go-to prime for night skies to minimize fiddling between shots.
A solid tripod needs a mount and remote to finish the job. A stable setup prevents creeping in cold, windy nights. Use a remote or timer to avoid touching the camera during capture. For long exposures, this small tool is invaluable, keeping the sky calm and the foreground crisp.
Bring extra batteries and power bank
Night shoots drain batteries fast. Bring several charged batteries and a power bank to top off between shots. Keep extras in a small, labeled pouch so they’re easy to grab. For long nights, plan a charging station you can access without moving your setup. More power means more frames and more chances to capture the perfect star field.
Best smartphone lenses for astrophotography
Your phone can join the night game with the right kit. A dedicated wide or ultra-wide lens helps you frame the Milky Way and a bright foreground in one shot. Look for lenses with low distortion and good edge-to-edge sharpness to avoid losing stars at the frame’s edge. A fast aperture helps, but the real trick is stacking multiple shots later to reduce noise and keep stars crisp. For devices like the iPhone 17 Pro Max or Galaxy S25 Ultra, choose an add-on lens that improves low-light performance without smearing stars. Practice with test shots to learn how long you can expose before stars begin to smear.
Stable tripod, mount, and remote
A stable tripod is the backbone of night photography. A solid mount prevents creeping and helps you shoot in cold, windy conditions. A wireless remote or timer avoids camera shake at capture. If you’re in a breeze, weigh your tripod or use a sandbag to anchor it. The calmer the setup, the clearer the Milky Way and foreground.
Use long exposure and stacking techniques
Long exposure and stacking are your best friends for sharp night shots with minimal noise. Start with a steady base: tripod or stable surface, and a remote shutter to avoid shake. For long exposures, push the shutter beyond 1–3 seconds, but manage light carefully. Use a low ISO and a small aperture to maintain depth. Stacking multiple frames blends faint stars while keeping the foreground detail crisp. With practice, you’ll get more stars and less grain, revealing a cinematic Milky Way arc.
In practice, balance exposure length with your scene. A cityscape with moving clouds might use 15–30 seconds for cloud trails while keeping cars from washing out the frame. For star fields, shoot many 15–20 second frames at a low ISO and stack them to reduce noise. You may need a shorter exposure for the land and blend it with the star stack for detail and atmosphere.
When stacking, let the software do the heavy lifting: align frames and use an averaging or median blend to keep stars sharp and noise low. Start with 10–20 frames and watch noise drop. You’ll be surprised at how stacking reveals the Milky Way’s arms.
Long exposure smartphone photography
You can push your phone’s limits with long exposure from a tripod or stable surface using a dedicated app. Enable manual mode, set a long shutter (4–15 seconds), a low ISO, and a wide aperture if possible. Lock focus on a distant point to reduce vibration, and consider a lens attachment or stabilization to minimize shake. A light pollution filter in the app can help keep city glow from washing out stars. For foregrounds, shoot a separate shorter exposure and blend it into your stack.
Milky Way Galaxy S25 Ultra techniques
When shooting the Milky Way with the Galaxy S25 Ultra, start RAW, use a tripod, and set a long shutter (10–20 seconds) with a low ISO. Focus manually at infinity and avoid overexposing the core. A wider focal length helps frame the arc, and a slight tilt adds dramatic perspective. Post-processing can unlock color and star color that a single shot might miss. Try a sequence: several long sky frames plus one or two shorter foreground frames, then stack the sky images and blend the best foreground shots for balance. Gentle noise reduction and a touch of color boost can reveal the Milky Way’s structure without washing out detail.
Try interval shooting and stacking apps
Interval shooting saves you from constant tapping in the dark. Set a timer to capture a series of frames at regular intervals and feed them into a stacking app. Look for apps that offer alignment, exposure fusion, and easy export. After stacking, check for misalignment and re-shoot if needed. With practice, interval shooting becomes a reliable part of your workflow for cleaner night skies.
Milky Way Magic: How to Photograph Our Galaxy with iPhone 17 Pro Max and Galaxy S25 Ultra
Milky Way nights are about planning, gear, and patient editing. For the iPhone 17 Pro Max, rely on RAW capture, manual focus, and exposure bracketing to preserve star clarity and color. For the Galaxy S25 Ultra, use Pro mode to control shutter and ISO, then bracket shots for a clean stack. Stack a dozen or more frames to reduce noise and reveal the Milky Way’s arms. During post, balance foreground lighting and push contrast to bring out the core without overdoing the sky.
Start with a dark site, proper alignment, and a wide lens to capture the galaxy panorama. Lock your exposure to protect the sky, and use a tripod for sharp stars. After capture, process RAW files to enhance the Milky Way’s core and color while preserving natural tones. Subtle noise reduction, light dehaze, and careful color balance help the Milky Way feel real and cinematic. With the right technique, iPhone 17 Pro Max and Galaxy S25 Ultra images can rival DSLR results while staying portable and personal.
Set Your Phone for Night Sky Shots
You’re chasing crisp, starry shots, so prepare your phone for action. Enable features that matter for night skies: lock exposure to keep the sky from brightening as the ground exposure shifts, and shoot in RAW if possible for editing flexibility. Use a sturdy tripod and limit in-frame light sources to avoid washing out the Milky Way. Start with a baseline exposure, then adjust as you go.
Remember to keep your battery happy: night shooting drains power, so bring a portable charger. Clean the lens to avoid smeared stars, and run a quick test frame before committing to a longer sequence.
Night sky camera settings: iPhone 17 Pro Max
Aim for a balance between sensitivity and detail. Start with a low ISO to reduce noise, then increase as needed to capture faint stars without washing out the scene. A shutter of several seconds helps keep stars pinpointed unless you want trails. If you have ProRAW, use it for post-work. Turn off auto night mode for full control and set focus to infinity. Keep white balance cooler to preserve the night’s blue-black character. Use a remote or timer to avoid shake, and adjust exposure to keep sky detail while recovering shadows in post.
Night sky camera settings: Galaxy S25 Ultra
With the Galaxy S25 Ultra, start with a low ISO and a longer shutter to reveal faint stars. Use a tripod, enable extended night mode if available, and shoot in RAW for flexible editing. Experiment with white balance to keep the sky natural and slightly cool. If there’s noise in the dark patches, lower ISO a notch and boost exposure slightly. Focus at infinity, then fine-tune in post. Stacking multiple shorter frames can yield cleaner stars than a single long shot.
Control Focus, ISO, and Shutter in Low Light
In the dark, balance focus, sensitivity, and timing to avoid blurry or grainy photos. Use manual mode if possible. Fix shutter first: slower speeds gather more light but risk motion blur. If hand-holding, aim for 1/60 to 1/125 second; use a tripod for slower shutter speeds. Incrementally raise ISO to capture detail without excessive noise. Set focus carefully; manual focus helps you lock sharp edges on distant stars. If your device supports focus peaking, enable it to see where the lens is sharp. You can also use exposure compensation to brighten shadows without washing highlights.
Consider exposure bracketing: take several shots at different exposures to merge later. This is handy for Milky Way scenes where you want star detail and color without blowing highlights.
Low light photography: iPhone 17 Pro Max
In dark scenes, a steady setup helps the iPhone shine. Lock focus, then use manual exposure if possible. Keep ISO as low as practical, and use longer shutter on a tripod if needed. The night mode is helpful, but don’t rely on it alone. Bracket a couple of shots and blend later for cleaner color and detail. A test frame helps you refine focus and exposure before committing to a longer sequence.
Low light photography: Galaxy S25 Ultra
The Galaxy S25 Ultra handles low light well with hardware and software. Start on a tripod, use Pro mode to control shutter and ISO, and focus manually to avoid hunting. Bracket shots to capture both bright and faint details, then stack for noise reduction. If color is off, adjust white balance in post and avoid overexposing the Milky Way core.
Use manual focus and exposure bracketing
Manual focus and exposure bracketing give you maximum control in low light. Lock sharp subjects and capture a range of brightness to blend later, keeping color accurate. Try a middle exposure with ±1 stop bracketing. For Milky Way stacks, extra detail in the shadows pays off.
Milky Way Magic: How to Photograph Our Galaxy with iPhone 17 Pro Max and Galaxy S25 Ultra
Milky Way nights demand steady setups, careful focus, and smart exposure. On the iPhone 17 Pro Max, use manual focus and exposure bracketing for star clarity. On the Galaxy S25 Ultra, use Pro mode, bracket shots, and stack for a clean result. When you blend, you’ll reveal a brighter core and more stars than any single frame could show.
You’re chasing a memory, not perfection. When the Milky Way arc appears, you’ll know the practice paid off. Share your results with someone who believes you can photograph the night sky with a handheld device—the right technique makes you feel like a pro, even on a weekend trip.
Edit and Share Your Milky Way Photos
Editing turns a good image into a wow moment. Balance exposure so the sky stays rich without washing out stars. Increase contrast just enough to pop dust lanes, and add a touch of clarity to reveal structure, while tweaking saturation so colors feel real. If you shot RAW, you have latitude to correct light pollution and preserve depth. Keep edits consistent across the set for a cohesive series.
Subtlety is key. A gentle vignette can guide the eye toward the Milky Way’s core, with highlights nudged to avoid bloom. If you used a light-polluted location, apply targeted dehaze and color balance to keep the sky blue or black, as you prefer. Noise reduction should be conservative to avoid smoothing stars. For a dramatic look, try a light split tone with cooler shadows and warmer highlights.
Save multiple versions to compare later: a flagship best version and a slightly different variant for various platforms. Export files with colors that render consistently across devices.
Milky Way Magic: How to Photograph Our Galaxy with iPhone 17 Pro Max and Galaxy S25 Ultra
Your best Milky Way shots come from planning, the right gear, and careful edits. Both devices offer strong sensors and night modes, but a steady setup, dark location, and patience are essential. Start with RAW, lock focus, and use a wide lens. For the iPhone 17 Pro Max, shoot 15–25 seconds per frame with a low ISO. For the Galaxy S25 Ultra, use Pro mode, 15–20 seconds shutter, and modest ISO. Stack a dozen frames to reduce noise and reveal the Milky Way’s arms. Balance foreground lighting in post to keep the landscape readable, then boost contrast enough to bring out the core.
With the right technique, Milky Way magic can be captured on a pocket device. The moment you see the arc emerge from darkness will be worth the effort. Share your results with others who think you can photograph the night sky with a handheld device, and celebrate the pro-level results you achieve on weekend trips.
Edit and share your Milky Way photos (quick recap)
- Shoot RAW when possible and stack multiple frames to reduce noise.
- Use a tripod, manual focus, and careful exposure to keep stars sharp.
- Edit with subtle contrast, color balance, and minimal noise reduction for a natural look.
- Export in formats suitable for social, print, and backups, keeping a cohesive look across platforms.

Smartphone Night Photography Enthusiast & Founder of IncrivelX
Vinicius Sanches is a passionate smartphone photographer who has spent years proving that you don’t need an expensive camera to capture breathtaking images after dark. Born with a natural curiosity for technology and a deep love for visual storytelling, Vinicius discovered his passion for night photography almost by accident — one evening, standing on a city street, phone in hand, completely mesmerized by the way artificial lights danced across wet pavement.
That moment changed everything.
What started as a personal obsession quickly became a mission. Vinicius realized that millions of people were carrying powerful cameras in their pockets every single day, yet had no idea how to unlock their true potential after the sun went down. Blurry shots, grainy images, and washed-out colors were robbing everyday people of memories and moments that deserved to be captured beautifully.
So he decided to do something about it.
With years of hands-on experience shooting city streets, starry skies, neon-lit alleyways, and creative night portraits — all with nothing but a smartphone — Vinicius built IncrivelX as the resource he wished had existed when he was just starting out. A place with no confusing jargon, no assumptions, and no gatekeeping. Just honest, practical, beginner-friendly guidance that actually gets results.
Vinicius has tested dozens of smartphones from every major brand, explored dark sky locations across multiple states, and spent countless nights experimenting with settings, compositions, and editing techniques so that his readers don’t have to start from scratch. Every article on IncrivelX comes from real experience, real mistakes, and real lessons learned in the field.
When he’s not out shooting at midnight or writing in-depth guides for the IncrivelX community, Vinicius can be found exploring new cities with his phone always within reach, looking for the perfect shot hiding in the shadows.
His philosophy is simple: the best camera is the one you already have — you just need to learn how to use it in the dark.