Mastering Instagram: Post Night Photos with Zero Quality Loss in 2026
Shooting: Instagram night photography 2026
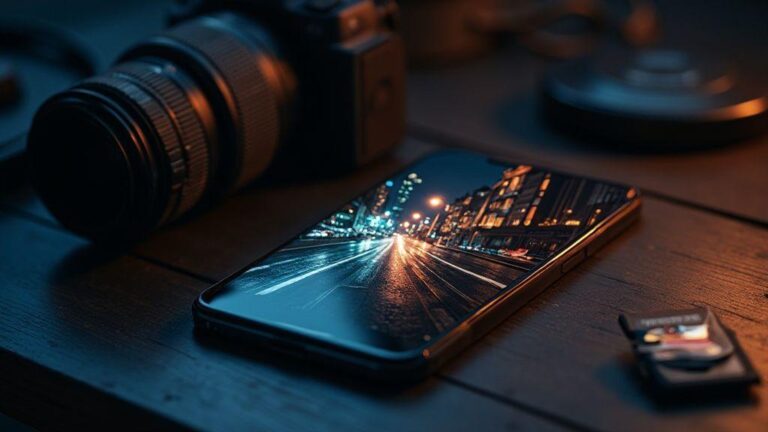
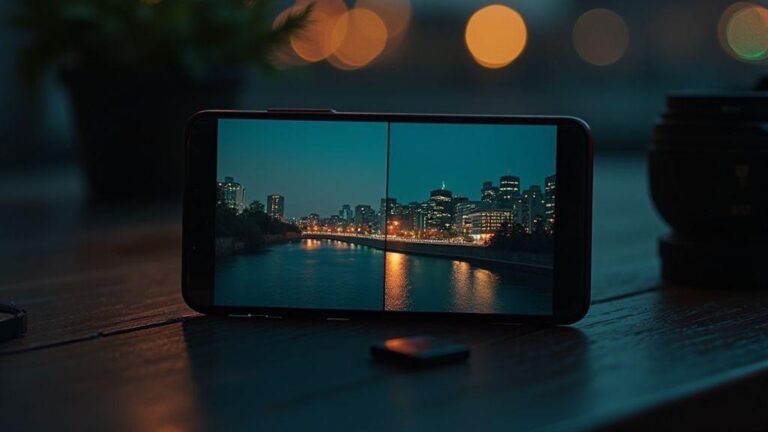
You’re chasing clean, vibrant night shots that don’t spill noise across your grid. In 2026, the goal is clarity you can feel. Learn to balance light, motion, and color so your feed shines when your followers scroll. With the right setup and quick checks, you’ll post night photos that look intentional, not accidental. Think of this as a recipe: you bring the scene, your gear does the heavy lifting, and your edits keep the glow. This approach is part of Mastering Instagram: Post Night Photos with Zero Quality Loss in 2026.
You’ll notice results improve when you stop rushing. Night photography rewards patience, not speed. Slow down and plan a bit, and your images become more than pretty lights—they tell a moment, a mood, a memory your audience can step into. The more you practice, the less you worry about the perfect shot and more about capturing the feeling.
Your attention to detail matters. A small tweak in ISO, a steady hand, or a tiny nudge with a tripod can calm chaos in your frame. Your audience will feel that control in your final post. Mastering Instagram: Post Night Photos with Zero Quality Loss in 2026 isn’t magic; it’s discipline, a bit of science, and street-smart intuition.
Use low ISO and steady shots
Shooting with a low ISO limits noise and keeps colors clean. Night photos stay crisp, whites stay clean, and you’ll see more texture in lights with less grain. It helps you hold shutter speeds longer without losing detail, so you keep subject and background in focus.
A steady shot is the backbone of sharp night images. If you’re handholding, you’ll get motion blur you don’t want. Use a sturdy stance, elbows in, and exhale slowly as you press the shutter. Resting your camera on a wall or chair adds stability. A tiny shake is loud in dark scenes, so steady wins every time.
With a low ISO, you’ll need to expose a touch more or allow more light. Don’t chase brightness; chase balance. Your goal is clean shadows and highlights that feel natural, not blown-out lights or muddy darks.
Frame with slow shutter or tripod
A slow shutter lets more light in, which helps in the dark. But slow means you must keep the camera still. If you’re not careful, you’ll blur what you want sharp. A tripod is your best tool here; it protects against shake and lets you keep a longer exposure without fear.
If you don’t have a tripod, lean on solid surfaces or improvise a stand from your bag. You’ll still capture long exposures, but with less wobble. A remote or timer helps a lot; you won’t touch the camera during exposure, so you keep the image clean.
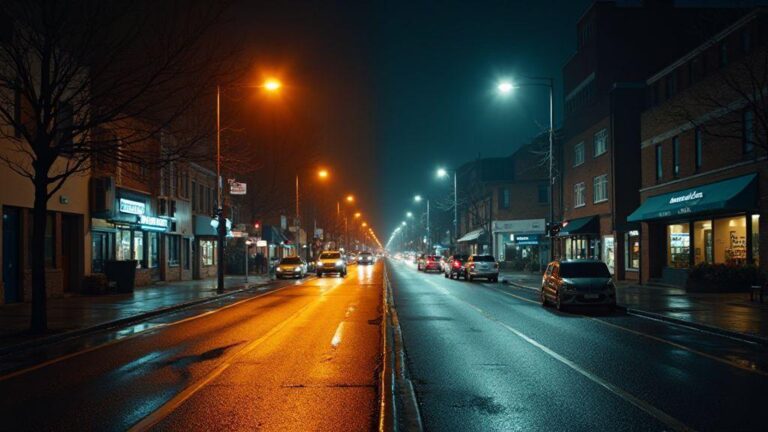
Frame your scene with intention. A slow shutter invites motion in lights, people, or water, giving your photo life. But you don’t want everything blurred. Decide what to freeze and what to let flow. Your composition should feel calm, even if the city behind you is buzzing.
Check exposure and RAW
Always check exposure as you shoot, not after. A quick glance at the histogram tells you if you’re clipping highlights or losing detail in shadows. If you see blown whites or crushed blacks, adjust ISO, shutter, or aperture right away. You want a balance that preserves texture in lights and detail in dark corners.
Shoot in RAW whenever you can. RAW gives you the most latitude to recover details during editing without color degradation. Later tweaks to brightness, contrast, and color feel natural rather than gritty. Shooting RAW is a small extra effort with a big payoff when refining night scenes.
Editing & Sharing Night Photos
Edit with the goal of preserving the night’s mood while making it pop on a feed. Start with a gentle baseline: lift shadows a touch, then level exposure so highlights don’t blow out. Keep color accurate where the scene matters—neon signs, street lights, and sky tones—so your photo remains believable.
Edits should feel cohesive with your overall style. If you lean toward bold colors, push them a bit without oversaturation. If you prefer natural tones, keep the palette true to life but crisp. Your aim is to share a moment you actually experienced, not a contrived version.
Share your post with intention. A caption that provides context, a location tag, and a couple of questions can boost engagement. When your audience sees clear, steady night shots, they’ll trust your technique and want more of your perspective.
Choose best file format for Instagram 2026
You want your night photos to look sharp and load fast on Instagram. The right file format is your first move. Start with a RAW capture for editing latitude, then export a JPEG for posting. If you’re tight on storage or want smaller files, HEIF can be worth considering. Always export in sRGB to maintain color consistency across devices.
Prefer RAW capture, export JPEG
RAW preserves light and color data for maximum post-edit flexibility, especially for night scenes. You’ll be able to recover shadows and balance highlights without obvious banding. However, RAW isn’t ideal for instant posting, so export to JPEG for Instagram. Apply final sharpening, noise reduction, and color tweaks you want to keep. If you skip RAW, you’ll miss flexibility and may see more compression artifacts.
Consider HEIF for quality and size
HEIF stores more information per file than JPEG, often delivering better detail at smaller sizes. It’s worth testing on your devices and with Instagram’s compression to ensure no quirks. HEIF can be a sweet spot between quality and file size for many night shots, but compatibility matters.
Export in sRGB color space
Export in sRGB to keep colors consistent across platforms. Wide color spaces can shift tones after Instagram converts, so sRGB minimizes surprises and preserves your night blues without oversaturation. This also helps with future edits, starting from a predictable baseline.
RAW to JPEG Instagram workflow 2026
Paragraph 1: Start with RAW to retain data for adjustments, then export to JPEG for posting. Treat RAW as your toolbox; JPEG is the published chapter.
Paragraph 2: Your workflow should be calm and repeatable. Set white balance to match the scene, not the screen, and avoid over-sharpening in this stage. If the image looks flat, adjust contrast and vibrance gently until the glow reads as real rather than flashy.
Paragraph 3: Save a final master copy with edits intact before switching to JPEG. Export a high-quality JPEG with consistent settings to maintain a steady rhythm across your feed. This approach helps you deliver consistent night imagery while preserving the shot’s soul, which aligns with Mastering Instagram: Post Night Photos with Zero Quality Loss in 2026.
Denoise before resizing
Denoising first is like cleaning a window before framing. You’ll see more detail when you remove grain from shadows, but use a light touch to preserve texture. After denoising, check color and luminance because noise can affect midtones when resizing. Keep a gentle denoise setting and preview at final size to ensure you retain the mood.
Sharpen for screen viewing
Sharpening for screen viewing is about balance. Start modestly and zoom into key areas to judge glow. If haloing appears around bright spots, back off slightly. Tailor sharpening to image detail: give fine textures a touch more sharpness, but keep skies and bokeh lights softer. Compare against the original to ensure natural detail reads well on small screens.
Downsize to Instagram sizes
Downsize to platform-friendly dimensions. Resize to the common dimensions (usually 1080px on the long side) to keep edges crisp and loading fast. After resizing, recheck for soft edges or color shifts and tweak contrast or vibrance if needed. Smaller files load faster, helping keep your audience engaged.
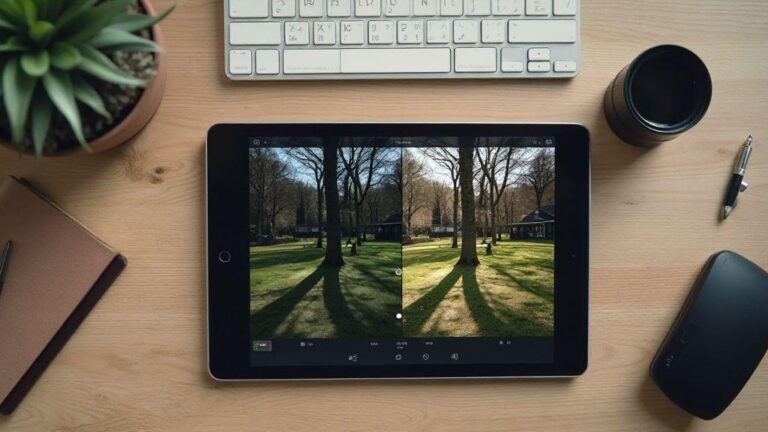
Night mode editing for Instagram
Editing night photos can feel tricky, but you’re closer to perfection than you think. Zoom into the darkest areas and lift shadows just enough to reveal detail without turning the scene gray. Maintain balanced contrast so highlights don’t blow out and stars or lamps still spark. A consistent process helps you move fast: adjust exposure, smooth midtones, then add warmth to keep the image inviting. Your edits should tell a story, not just fix a flaw.
Use local contrast to add depth without altering the whole image. Boost the brightest signs or windows slightly, then pull back surrounding areas for realism. Dodge and burn softly to emphasize lamps or reflections without halos. Reduce color noise gently, keeping skin tones and city colors natural.
Save edits as high quality JPEG
Save your edits as a high quality JPEG to preserve detail and keep file sizes practical for Instagram. Export at maximum quality and keep resolution aligned with your original capture. Name the file clearly for easy future edits. A well-saved JPEG lets you post quickly without losing the nuances you built into the edit.
Mastering Instagram: Post Night Photos with Zero Quality Loss in 2026
Saving and posting edited night shots should feel seamless. If you follow a disciplined process—adjust shadows, apply subtle local contrast and dodge, use gentle noise reduction, and save in high quality—you’ll deliver sharp, vibrant images that retain their soul on the feed. Aim for consistency across posts so your grid tells a real story, not a collection of snapshots. With practice, you’ll master the rhythm of posting night photos with confidence.
Post night photos without quality loss tips
Plan your shoot for the platform: shoot RAW when possible, brighten slightly to preserve data, and export at a size aligned with Instagram’s guidelines. If a post lands soft after upload, you may have skipped sharpening or used too much compression. Apply gentle, local sharpening after balancing contrast and color to emphasize edges that matter in the night scene.
Color management matters more than you might expect. Night skies read differently across devices, so keep white balance consistent and avoid over-saturation. Add a subtle vignette or light clarity to help midtones pop while keeping highlights natural.
Keep file type and size in check. Instagram favors optimized JPEGs, but test compression levels to find what yields the most reliable results. Consider stripping metadata to save space, and test post quality on multiple devices before publishing.
Instagram lossless upload 2026 reality
In 2026, true lossless uploads are not guaranteed, but you can minimize losses with a careful workflow. Use a consistent color space (like sRGB) and avoid aggressive edits that break under compression. Check your post on multiple devices before posting to catch any inconsistencies. A repeatable process helps you spot where losses occur and adjust before publishing.
Check final post on multiple devices
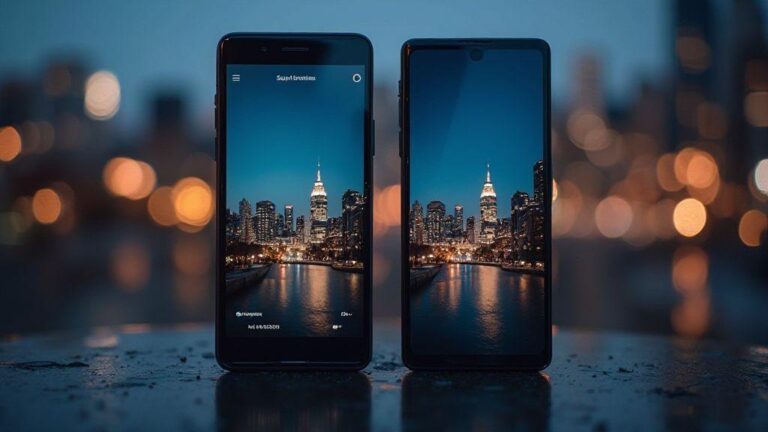
Before you publish, view your post on a phone, tablet, and computer. Ensure night details stay clear and colors stay true across screens. If one device dulls shadows or overblows highlights, tweak your edit or export settings and try again. The goal is a consistent look across devices, so your followers get the same night vibe wherever they view it.
Use captions that spark comments
Craft captions to invite conversation, not just describe the frame. Start with a bold question or a surprising fact about the night scene. Ask followers about neon colors, favorite spots, or memories the photo brings up. Keep the tone friendly and human, and end with a clear call to comment. Use emoji strategically to set mood without clutter. For carousels, reserve the last slide for a question to drive engagement.
Add niche hashtags and alt text
Use 3–5 precise niche hashtags describing location, mood, or technique, plus a few broader tags. Alt text should describe the scene in one or two sentences to aid accessibility and discovery. Rotating hashtags helps keep reach fresh. Example: Night street scene with neon signs reflecting off wet pavement; a lone cyclist under a blue streetlight. This improves accessibility and search visibility.
Post when your followers are active
Publish when your audience is online. Check insights for peak activity in your time zone, and aim to post just before that. If you have multiple time zones, stagger posts to cover each peak. A test-and-learn approach helps—try different times and compare results. Consistency builds trust with the algorithm and your followers.
Mastering Instagram: Post Night Photos with Zero Quality Loss in 2026
In 2026, posting night photos that stay sharp and true on Instagram comes from understanding how uploads are processed and applying a steady, repeatable workflow. Start with solid shooting fundamentals, then layer in editing choices that matter most for night photography. Small changes—like the right file type, careful brightness adjustments, and testing on multiple devices—make a big difference. The key is consistency: a reliable process that protects the integrity of your night scenes.
Post night photos with confidence by aligning your gear, editing, and export steps to Instagram’s current behavior. Build a recognizable look and test new features—like reels or short clips—related to your night scenes. Remember: quality beats quantity; fewer, better night photos will outperform a flood of mediocre shots. Stay curious, measure results, and keep refining your workflow. Mastering Instagram: Post Night Photos with Zero Quality Loss in 2026 is within reach when you treat each post as a mini-story designed for clarity and momentum.

Smartphone Night Photography Enthusiast & Founder of IncrivelX
Vinicius Sanches is a passionate smartphone photographer who has spent years proving that you don’t need an expensive camera to capture breathtaking images after dark. Born with a natural curiosity for technology and a deep love for visual storytelling, Vinicius discovered his passion for night photography almost by accident — one evening, standing on a city street, phone in hand, completely mesmerized by the way artificial lights danced across wet pavement.
That moment changed everything.
What started as a personal obsession quickly became a mission. Vinicius realized that millions of people were carrying powerful cameras in their pockets every single day, yet had no idea how to unlock their true potential after the sun went down. Blurry shots, grainy images, and washed-out colors were robbing everyday people of memories and moments that deserved to be captured beautifully.
So he decided to do something about it.
With years of hands-on experience shooting city streets, starry skies, neon-lit alleyways, and creative night portraits — all with nothing but a smartphone — Vinicius built IncrivelX as the resource he wished had existed when he was just starting out. A place with no confusing jargon, no assumptions, and no gatekeeping. Just honest, practical, beginner-friendly guidance that actually gets results.
Vinicius has tested dozens of smartphones from every major brand, explored dark sky locations across multiple states, and spent countless nights experimenting with settings, compositions, and editing techniques so that his readers don’t have to start from scratch. Every article on IncrivelX comes from real experience, real mistakes, and real lessons learned in the field.
When he’s not out shooting at midnight or writing in-depth guides for the IncrivelX community, Vinicius can be found exploring new cities with his phone always within reach, looking for the perfect shot hiding in the shadows.
His philosophy is simple: the best camera is the one you already have — you just need to learn how to use it in the dark.