Lightroom Mobile vs Snapseed vs Adobe Express for Night Photos: Honest Comparison
Raw file support on mobile
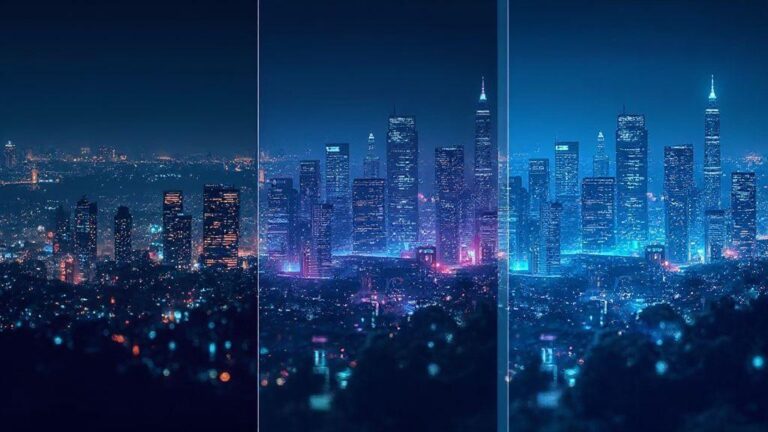
You want to keep every detail from your night shots, and that means working with RAW on your phone. RAW captures more light information and color data than a standard JPEG, giving you real flexibility in editing, especially in low light. On mobile, RAW support is essential if you’re serious about pulling detail from shadows and reducing color noise. If your phone camera app supports RAW (often labeled DNG), you’ll notice smoother edits later. This is your foundation for brighter, cleaner night photos.
With RAW, edits don’t degrade the image as quickly. You can adjust exposure, recover shadows, or lift midtones without everything turning muddy. Your workflow becomes more forgiving, and you’ll see the difference when comparing a RAW edit to a standard JPEG. The key is using the right editing app to access RAW layers and tweak white balance, contrast, and clarity without heavy artifacts. Skipping RAW trades flexibility for convenience—and you’ll notice it in your final night shots.
If you’re sharing quickly, RAW still helps because you can save multiple edits as different versions without destroying the original. Export a finished version as JPEG for social and keep the RAW for future tweaks. Your night collection benefits from better tonality and color consistency across devices. In short, RAW on mobile is your secret weapon for nights that look almost like you saw them.
Lightroom Mobile night photo editing with RAW
You’re ready to dive into Lightroom Mobile, and RAW support opens the door to serious night edits. Import your RAW into Lightroom and you’ll see a richer histogram with more latitude. Adjust exposure and shadows without blowing out highlights, perfect for street lamps and neon signs. The sliders feel intuitive, and warmth and tint controls help balance artificial lights with natural skin tones. The result: your night scene retains mood while preserving detail.
Lightroom also shines in color handling. The HSL/Color controls fine-tune blues in the sky, oranges from streetlights, and greens in foliage without skewing skin tones. For night portraits, you can recover skin detail while maintaining color accuracy. You can also create presets for future night edits, speeding your workflow and keeping a signature look. Lightroom’s RAW engine makes it easy to push and pull brightness while keeping noise manageable.
Snapseed DNG raw develop tools
Snapseed brings powerful RAW editing to your pocket. With its DNG raw develop tools, you can control white balance, exposure, and contrast at a fine grain. White balance adjustments affect neon glows and street lamps, letting you dial in a cooler night or warmer indoor scene without breaking the mood. Snapseed’s selective edits brighten only the darkest areas or deepen highlights on bright signage.
You can add texture and clarity to bring out brick textures or rain reflections, keeping the result natural. The DNG workflow means you’re not stuck with a flat result; you can recover shadow detail and still retain realism. When finished, export a high-quality JPEG for sharing, while the original RAW stays saved for future edits.
Tip: shoot RAW for best night edits
Shoot RAW to maximize data. You’ll gain freedom to recover tones, adjust color balance, and reduce noise without sacrificing detail. For night scenes, this data is invaluable when highlights blow out or shadows swallow the subject. Keep your phone steady, shoot RAW in a well-lit moment, and you’ll see edits stay true to the scene.
LightRoom Mobile vs Snapseed vs Adobe Express for Night Photos: Honest Comparison
You’re weighing tools for night edits. Lightroom Mobile gives you robust RAW support, precise color control, and a clean pipeline for multiple edits. Snapseed is fast, intuitive, and surprisingly powerful for on-the-go tweaks with RAW DNG support. Adobe Express focuses on quick, share-ready results with solid presets and easy exports. If your priority is depth and professional control, Lightroom shines. If speed and simplicity matter most, Snapseed keeps you productive. If you need rapid storytelling and polished social-ready posts, Adobe Express helps you publish fast.
In practice, your best approach might be a combo: shoot RAW, edit in Lightroom for the heavy lifting, do quick refinements in Snapseed if you want a different look, then push a final share-ready version with Adobe Express. Your night photos get the best of both worlds: detailed control and the speed you want for posting.
Why this Honest Comparison matters for your workflow
Choosing between Lightroom Mobile, Snapseed, and Adobe Express should hinge on how you edit, how fast you work, and how you share. For deep, repeatable edits and professional color management, Lightroom is a strong core. For fast fixes on the go, Snapseed is unbeatable. For quick, polished social-ready results, Adobe Express can save the day. This Lightroom Mobile vs Snapseed vs Adobe Express for Night Photos: Honest Comparison helps you map tools to your shooting style, not just to feature lists.
Noise reduction and low light cleanup
When editing night photos, clarity without losing mood is key. Noise can ruin deep shadows and starry skies, so aim for clean, natural results. Noise is a signal with recoverable information; your goal is to reduce grain while preserving detail in buildings, trees, and light glows. Use targeted adjustments and monitor color shifts to avoid gray skies or muddy skin tones. Preview at 100% to catch artifacts.
Keep edits non-destructive. Work with copies or use layers and masks when possible. If you’re sharing, maintain a version that holds up across devices. The cleaner your base, the less dramatic your later edits need to be. RAW offers more recoverable data than JPEG, giving you more room to breathe before things look smeared.
Noise reduction for night photos in Lightroom
In Lightroom, begin with the Basics and move to Detail for grain control. Apply a gentle luminance noise reduction and avoid overdoing it for a plasticky look. If color specks appear, reduce saturation on the offending hues with the Color slider. Protect textures with the Masking slider under Sharpening. A touch of sharpening after noise reduction can reclaim edge definition without reintroducing noise. For local issues, use radial or graduated filters to clean up zones like bright lamps, vehicle lights, or the sky. Compare before/after against a dark boundary to ensure no halos.
Snapseed vs Adobe Express noise handling
Snapseed offers quick, intuitive noise reduction and works well for uniform areas like skies, while preserving texture where it matters. It’s less precise for edge retention and color noise compared to Lightroom. Adobe Express provides more nuance in tone curves and selective edits, helping with mixed lighting; however, it can feel heavier on mobile when juggling multiple edits. If you want speed with reasonable detail, Snapseed; for nuanced color/light control, Adobe Express.
Quick fixes and color work
Quick fix: reduce noise then sharpen
Reduce noise moderately, then sharpen to restore edge clarity. Don’t overdo either step. A little noise reduction to remove grain in dark areas, followed by selective sharpening around the subject, keeps a natural look.
Color correction and white balance
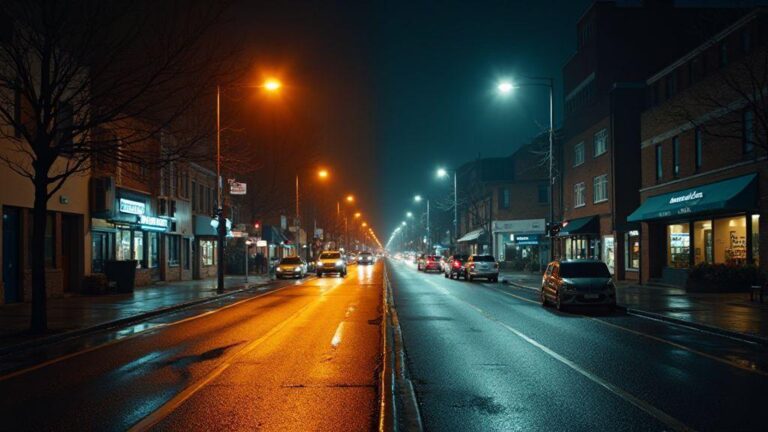
Color correction and white balance are your first moves. Fix color casts from streetlights, neon, or moonlight so the photo feels natural. Identify the dominant light source and set whites accordingly. If yellow from sodium lamps dominates, bias toward blue; if the scene reads too blue, warm up. Check skin tones and sky edges to stay believable. Your goal is truth, not drama for drama’s sake. Balance, then lock the baseline to prevent drift.
Color correction also shapes mood. Warmer balances feel cozy; cooler balances feel crisp. In night photos, neutral balances help preserve twilight blues while preventing neon pinks. Compare edits to the original to assess improvements. If contrast shifts your overall look, revisit white balance.
This isn’t a one-and-done step. It’s a loop of adjust-review-adjust. Avoid over-saturation; keep color fidelity intact. With experience, you’ll know which light sources push color in which directions and how much correction each needs. Final goal: balanced whites and faithful colors.
Color correction for night photos mobile apps
Choose a mobile app with intuitive color correction. Sliders for temperature and tint help, and keep multiple preset levels to compare quickly. Curves are your secret weapon on mobile; a gentle S-curve lifts shadows while preserving highlights. Set a solid white balance, then use curves to recover dark areas without skewing color. Practice with repeatable edits to save time and maintain consistency.
A quick workflow: fix white balance, adjust exposure for shadow detail, then apply a subtle curve tweak for contrast. Always compare with the original and trust what looks natural.
Use curves and white balance in Snapseed
Snapseed provides precise control without overwhelm. Use White Balance to neutralize dominant colors from street lamps, then Curves to shape contrast. Brighten shadows with the lower end of Curves, and pull down the upper end to prevent blown highlights. The aim is a balanced, readable image where light sources look realistic.
Curves preserve color integrity while adding depth. A gentle S-curve adds dimension to night scenes. If the sky looks flat, a subtle blue lift can help, but avoid overdoing it to prevent color shifts. Compare edits to the original to keep color accuracy.
Rule: fix white balance before contrast
Fix white balance before adjusting contrast. Global contrast changes will amplify existing color casts, making skin tones and lights look off. A solid white balance creates a clean baseline for contrast, resulting in crisper shadows and highlights and a cohesive edit.
Fixing white balance speeds up workflow. If color artifacts appear after boosting contrast, revisit white balance without starting over.
Presets, filters, and AI boosts
Presets, filters, and AI boosts speed up night edits while keeping a natural look. Start with a strong base preset to balance colors and exposure, then apply filters to shape mood or contrast. AI boosts can reduce noise, sharpen edges, and recover detail in dark areas without producing obvious artifacts. Presets help you stay consistent across a shoot or batch.
Lightroom presets for night scenes help preserve detail in highlights and smooth shadows. Save your tweaks as new presets for repeatable results. The right setup makes night photography feel deliberate rather than accidental.
Lightroom presets for night scenes
Lightroom presets should manage noise, shadows, and color in cool or neon-lit environments. Choose a base that keeps greens and skin tones natural while enhancing glow from lights. After applying a preset, minor tweaks to exposure or white balance are common. A good night preset preserves highlight detail and yields even shadows. Test presets on different photos from the same night to see what holds up.
Snapseed night photo enhancements and filters
Snapseed offers quick wins for night shots. Use Tools like Exposure, Shadows, Highlights, Tune Image, Details, and HDR Scape to bring out light trails or neon reflections. Filters add character without overpowering the natural light. Grain or Atmosphere filters can add depth, but use sparingly to maintain realism. If the sky or lights are noisy, use Noise Reduction selectively to retain star and light integrity.
Try presets, then tweak for night shots: adjust exposure and white balance to suit each scene. If storefronts glow too yellow, cool them; if shadows look muddy, lift them and add gentle clarity. Treat presets as a backbone and tweaks as finishing touches to keep a consistent yet unique look.
Speed, interface, and mobile workflow
You want fast, trustworthy edits on the go. A clean, simple interface helps you push edits without hunting through menus. Apps designed for quick tweaks keep toolbars on screen, letting you adjust exposure, contrast, color, and noise reduction in a straight path. Predictable layouts and fast previews save time when processing a night set.
Exporting should be quick and reliable: batch exports, clear file naming, and the option to export with or without metadata. The best mobile editors balance speed with control, enabling batch exports with a single tap.
Mobile apps low light photo editing workflow
A low-light mobile workflow should feel like a steady routine: auto-adjust for baseline, then refine exposure, shadows, and highlights. Keep a small set of go-to tweaks (exposure, contrast, shadows, highlights) to avoid hunting sliders. If shooting RAW, access white balance and noise reduction early in the edit.
Use selective tools to lock in color and detail. A gentle vibrance boost can enliven night tones without oversaturating the sky. Sharpening and texture help silhouette edges and reflections while keeping noise in check. Preview often to stay true to the scene. Finish with consistent export settings and a calm workflow to keep night photos natural and ready to publish.
Fast edits in Snapseed vs organized Lightroom library
Snapseed provides fast, tactile edits in real time. Tune Image, Details, and HDR Scape help highlight light trails or neon reflections. It’s fast with a short learning curve, ideal for quick results. But it can feel scattered if you juggle many tasks; a deliberate routine helps keep edits cohesive.
Lightroom on mobile shines for organization and batch consistency. If you’re editing many night photos, a well-structured library helps you categorize and copy edits across images. It’s not as instantaneous as Snapseed, but you gain reliability and a clean archive, which matters when revisiting a series later.
If you’re choosing, pick Snapseed for speed and Lightroom for scale and consistency.
Workflow tip: copy settings to save time
When you nail a look, copy those settings to others to save time. Apply exposure, contrast, white balance, and noise adjustments to a batch, then fine-tune only the images that need special treatment. Lock in a base edit, then use copy/paste or sync to spread it across selections. This reduces drift between frames and keeps the mood intact.
Exporting, sizes, and sharing options
When finishing night photos, choose sizes and formats that fit your use. For social feeds, balance file size and detail to preserve glow. For prints, export high-resolution files. Save to your device, cloud storage, or a dedicated folder for night photos to stay organized. Direct post links, camera-roll exports, or sharing via messaging apps each have quirks, but consistent originals and properly sized edited copies travel well.
Export quality and formats in Lightroom Mobile
Export high quality, especially for night scenes with subtle lights. JPEG works for social shares; TIFF is ideal for prints or further edits. For most social sharing, JPEG with high quality (80–100) works well, and sRGB is recommended for web. Use Lightroom Mobile presets for night shots that boost clarity and de-haze moderately. This ensures reproducible results across sessions.
Export tip: keep a high-res copy for prints
Always retain a high-resolution master for prints. Name it clearly (e.g., Master-Original) and store separately. When you decide to print, you’ll appreciate the extra resolution and data preserved.
Editing night sky and low-light scenes
Editing night skies is about revealing detail without creating an artificial glow. Start by evaluating exposure on bright stars and light sources. If the sky looks flat, subtly boost contrast and lift shadows to reveal nebulae. Balance color toward cooler tones to preserve blues, but avoid a blue cast that looks unnatural. Watch noise carefully; tackle it in measured steps to keep stars crisp and skies clean.
Refine the star field with careful layering. Global edits first, then targeted tweaks to keep stars sharp. Reduce glow around bright stars without erasing their sparkle. If banding appears in dark regions, apply light noise reduction after sharpening to keep skies clean. Save multiple copies with different tones to compare options.
Color harmony matters: celestial colors provide cues that pull the scene together. Enhance sky colors and any auroras with a gentle vibrance lift, stopping short of oversaturation. Save copies with different tones for comparison.
Night sky low light mobile editing workflow
Start with a quick crop for composition, then adjust exposure and contrast to restore depth in the sky. Use a cool white balance for realism, and selectively warm the foreground. Use shadows and highlights to balance detail without clipping. Keep edits non-destructive and save preferred presets to speed future nights. Then use selective adjustments to target the dark sky, nudging shadows up and clarity down to reduce haze. If color noise appears, apply a hint of purple or blue tactically. A little sharpening on stars helps, but avoid halos. Finish with light noise reduction in deep shadows to keep the sky clean.
Use selective masks for stars in Lightroom
Selective masking is invaluable for starry scenes. Select the sky, then invert to protect land. Increase clarity in the sky to lift star details without amplifying noise. A gentle dehaze reveals subtle textures like wispy clouds or the Milky Way, kept restrained. For stars, push sharpening slightly more than the rest of the scene, then mask the adjustment to avoid over-sharpening foreground rocks or water. Masks are reversible, so tweak radius or feather for seamless blending.
Tip: boost shadows but watch noise
Raising shadows can recover faint star detail but also lifts noise. Use a light touch, and zoom to 100% to monitor. If noise climbs, switch to targeted masking for the darkest areas and keep global shadows lower. Pair a slight shadow lift with sky-only noise reduction to keep stars crisp while foreground textures stay natural.
Auto mode vs manual edits for night photos
Auto mode can save time but often pushes contrast and brightness in ways that wash out stars or halos. Start with auto for a baseline, then switch to manual to tune what matters. Manual edits let you recover shadow detail without blowing highlights and control color temperature for a night feel. If you want a cinematic look, manual adjustments provide latitude. Auto is your draft; manual is your final polish. Consistency matters—auto can vary across shots, so tweak manually to create a cohesive look.
Lightroom vs Snapseed night mode: quick viewpoints
Lightroom offers depth and precision with a broad slider set, selective edits, and color grading. It handles RAW well, letting you rescue shadows and recover detail. The learning curve is steeper, but results scale with your routine.
Snapseed shines in simplicity and speed. Tune Image, Details, and other tools move quickly, great for a strong night shot with just a few taps. If you need more depth, Lightroom remains the better long-term choice; for quick fixes, Snapseed wins.
If you’re comparing for night photography, Lightroom provides depth; Snapseed offers speed. Use both as needed, especially when you’re on the move and want fast results.
Snapseed vs Adobe Express night editing tips
Snapseed gives direct control with straightforward sliders. Boost shadows and reduce noise for Night mode-like looks, then fine-tune with Details. Use subtle sharpening and avoid overdoing it on starry skies or long light trails.
Adobe Express focuses on quick, polished results with guided edits. Start with tone and color adjustments, then finish with subtle clarity and vignette. Perfect when you want a ready-to-share photo in minutes.
If you’re choosing between them, Snapseed is your quick, nimble tool for hands-on control; Adobe Express is your fast, polished editor for sharing on the fly. Keep both in your toolkit.
Choosing the best app for your night photos
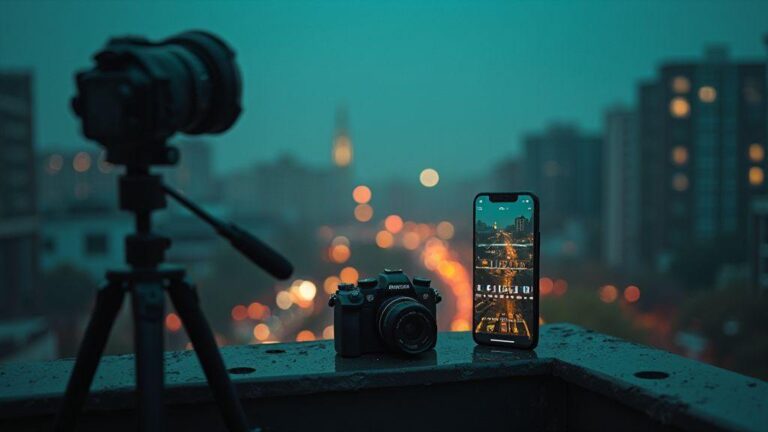
When you shoot at night, your phone’s camera can only do so much. You need an app that helps you bring out detail, color, and mood without looking fake. You want control over exposure, shadows, and noise, but a simple interface that avoids menu-hunting. The right app should feel like a natural camera extension: quick fixes that look polished and deeper edits when you want total control over the night vibe. Consider how you shoot—do you want more automatic corrections or do you love tweaking slides for perfection?
The best app depends on how you actually edit, how fast you work, and how the final image feels. If you want to preserve authentic light and color, favor apps that handle noise well and adjust color temperature without cartoonish effects. If speed is your thing, presets and quick fixes that look good with one tap are ideal. The right app makes you confident to shoot more at night and fix later.
Remember, the goal is to make your night photos pop without losing their charm. You’re chasing the moment you captured, not perfection. The right app helps you keep stars, street lights, and neon signs distinct so memories don’t blur into gray.
Best app for editing night photos comparison
You want an honest side-by-side view to pick what fits your workflow. One app may excel in color control, another in quick fixes. Look for easy exposure adjustments, solid shadow recovery, and clear noise reduction that preserves texture. A helpful comparison also shows how the app handles white balance in mixed lighting, since neon and street lamps can cast odd tints. A clean export process—direct sharing or save options that retain quality—matters too. If you’re comparing, test how each app preserves fine details like starbursts or reflections on water.
The best comparison comes from editing in real life. Does the app respond smoothly to touch? Are presets repetitive or adjustable to taste? Does it cue you to adjust color temperature before overdoing it? The right pick isn’t always the one with the most tools; it’s the one that makes your editing flow natural.
Pick Lightroom for precision or Snapseed for quick fixes
Lightroom gives precise control with granular exposure, highlights, shadows, whites, blacks, and color mixing. You can target specific colors to emphasize signs or warm tones from lamps without washing out the rest. It’s worth the learning curve for repeatable results and reliable presets.
Snapseed is your quick fixer. It shines for fast improvements with one-tap adjustments, selective edits, and precise brush control. It’s great for on-the-go editing, especially when you want a strong night shot in minutes. The trade-off is shallower depth of control than Lightroom, but it’s perfectly fine for casual night photography.
Final pick: test apps with your own night shots
Grab a few recent night photos and open them in both apps. Compare brightness, color, and noise handling. See how easy it is to apply a look you like and tweak it later. The best choice isn’t the most tools; it’s the one that makes your workflow feel natural and results true to life.
Quick recap for a strong night-edit workflow
- Shoot RAW when possible and edit with Lightroom Mobile for depth, but use Snapseed for fast on-the-go tweaks.
- Tackle noise with caution; start with luminance noise reduction, then address color noise as needed.
- Use white balance first, then contrast, to keep colors honest.
- Save and reuse presets to maintain consistency across a night shoot.
- Export with settings that match your final usage, and keep a high-res master for prints.

Smartphone Night Photography Enthusiast & Founder of IncrivelX
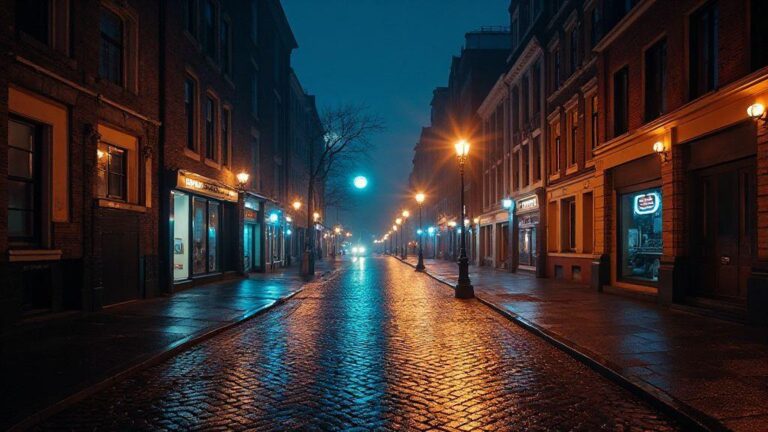
Vinicius Sanches is a passionate smartphone photographer who has spent years proving that you don’t need an expensive camera to capture breathtaking images after dark. Born with a natural curiosity for technology and a deep love for visual storytelling, Vinicius discovered his passion for night photography almost by accident — one evening, standing on a city street, phone in hand, completely mesmerized by the way artificial lights danced across wet pavement.
That moment changed everything.
What started as a personal obsession quickly became a mission. Vinicius realized that millions of people were carrying powerful cameras in their pockets every single day, yet had no idea how to unlock their true potential after the sun went down. Blurry shots, grainy images, and washed-out colors were robbing everyday people of memories and moments that deserved to be captured beautifully.
So he decided to do something about it.
With years of hands-on experience shooting city streets, starry skies, neon-lit alleyways, and creative night portraits — all with nothing but a smartphone — Vinicius built IncrivelX as the resource he wished had existed when he was just starting out. A place with no confusing jargon, no assumptions, and no gatekeeping. Just honest, practical, beginner-friendly guidance that actually gets results.
Vinicius has tested dozens of smartphones from every major brand, explored dark sky locations across multiple states, and spent countless nights experimenting with settings, compositions, and editing techniques so that his readers don’t have to start from scratch. Every article on IncrivelX comes from real experience, real mistakes, and real lessons learned in the field.
When he’s not out shooting at midnight or writing in-depth guides for the IncrivelX community, Vinicius can be found exploring new cities with his phone always within reach, looking for the perfect shot hiding in the shadows.
His philosophy is simple: the best camera is the one you already have — you just need to learn how to use it in the dark.