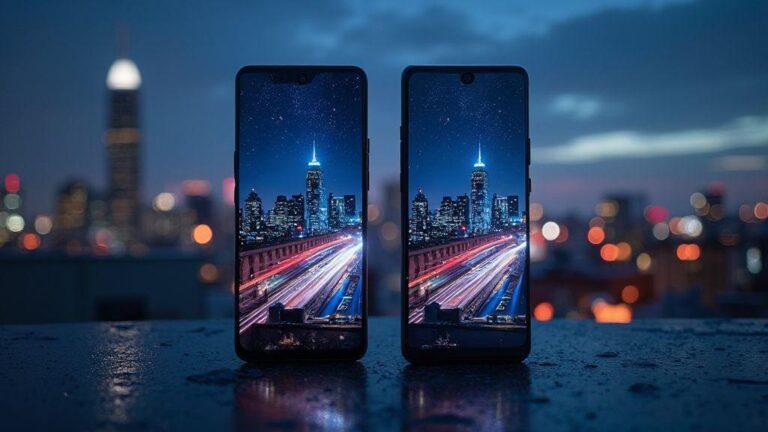
Light Trails with Shutter Speed: Mastering Night Street Photography on Your Phone (2026)
Best shutter speed for light trails
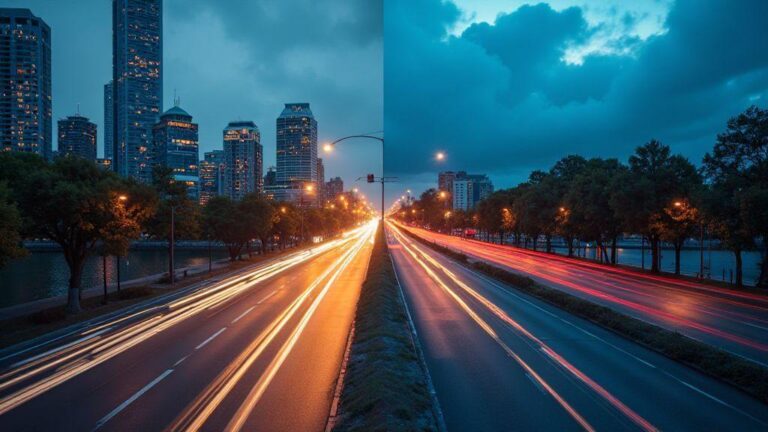
You’ll find the best shutter speed for light trails by thinking about how busy the scene is and how long you want the trails to appear. If you want short, crisp light lines, you’ll use a faster shutter. If you want long, flowing lines, you’ll push the shutter slower. Your goal is to balance motion with brightness so your trails aren’t washed out or too dim. In practice, you’ll test a few options: start around 1–2 seconds for moderate trails, then move toward 4–6 seconds for longer streaks. Remember, the street and car speeds matter, so you’ll adapt on the fly.
When you’re shooting at dusk or after dark, a longer exposure often works better. If you’re using your phone, you might tap and hold to lock exposure and focus, then keep the shutter open with a timer or tripod. If you don’t have a tripod, you can stabilize your phone against a steady surface and use shorter bursts to simulate longer trails. The key is to keep your ISO low enough to avoid grain while letting the lights pop as you want them to.
For night street scenes, you’ll likely shoot multiple frames and stack them or choose the best single frame. That gives you control over brightness and trail length without guessing. If you aim for bold, thick trails, you’ll lean into slower speeds. If you want delicate lines, you’ll choose faster speeds. Practice makes perfect, and soon you’ll know your camera or phone’s sweet spot for light trails.
Light Trails with Shutter Speed: Mastering Night Street Photography on Your Phone (2026)
Shutter range for car trails 1–6s
When you’re chasing car trails, you’ll often start around 1–2 seconds to get short, bright lines from moving headlights. If traffic is light or you want longer, glowier trails, push toward 4–6 seconds. The longer you leave the shutter open, the more the lights smear into longer ribbons across the frame. You’ll watch the brightness and adjust: if the trails look too pale, you may need a touch more exposure time or a tiny boost in ISO, but avoid grain. If you see overexposed white spots, you’ll shorten the shutter or lower ISO.
You’ll also consider the scene’s dynamic range. On busy streets, a 2–4 second range often gives you good brightness without washing out the sky or building lights. If the sky is bright, you might stay near 1–2 seconds. If you’re on a bridge or open street, 3–6 seconds can give dramatic, flowing lines that feel cinematic. Always check your first frame and tweak from there rather than guessing.
ISO balance for light trails phone photography 2026
Your ISO should stay as low as possible while you still see the trails clearly. On phones, high ISO creates noise, which muddles the light trails. Start with ISO 100–200 and bump only if the scene is too dark after you lock focus and exposure. If you need more brightness, try a longer shutter first before increasing ISO. You’ll notice that long exposures with low ISO keep lines clean and colors truer.
If you’re stuck in a super dark street, you can use your phone’s live photo or a long exposure mode to add a little brightness without pushing ISO too high. Some phones let you simulate longer exposures by stacking multiple short frames; that can keep noise down while giving you longer trails. Remember: the cleaner your base image, the sharper your light trails will look.
Quick settings checklist
- Shutter speed: start 1–2 seconds, adjust to 4–6 seconds for longer trails.
- ISO: keep at 100–200; raise only if needed after testing.
- Focus: lock exposure and focus on a bright point in the scene.
- Stability: use a tripod or stable surface; if not possible, brace your phone.
- White balance: set to Auto or a cooler temp to keep traffic lights from turning orange.
- RAW if possible: shoot RAW or a high-quality RAW-like format for post tweaks.
- Mirror/board reflections: watch for reflections that can fool your exposure.
- Test shot: take a quick test frame to gauge brightness before committing to a long exposure.
- Noise reduction: turn off extra processing that might blur trails in the editing phase.
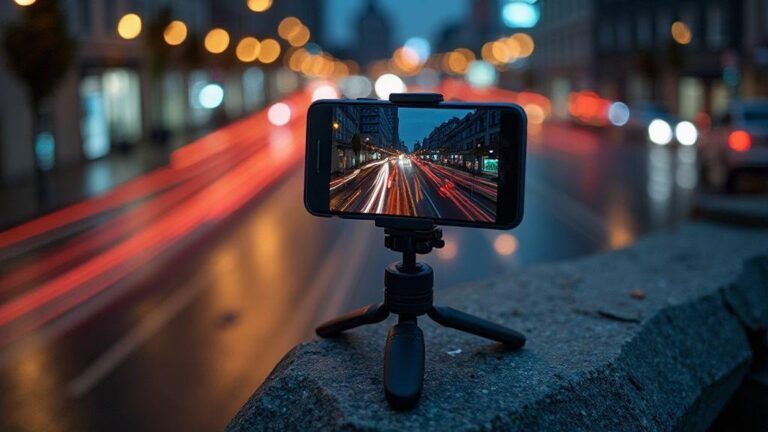
Stabilize with tripods and mounts
Stabilizing your shot is the first step to clean images, especially in low light. When you use a sturdy mount, you cut out camera shake and keep your framing exact. A good setup lets you slow down your shutter without worrying about blur, so you can focus on composition and timing. Think of your grip as the foundation of your entire shot—steady means crisp, and crisp means publish-ready.
Your phone is light, so even small movements can ruin a long exposure. By choosing a solid mount, you create a rock-steady base that lets you shoot at slower shutter speeds. With stability, you can experiment with different angles, like low-to-ground street scenes or elevated rooftops, without the risk of a wobbly frame. The payoff is immediate: sharper lines, clearer details, and fewer retakes.
If you want to level up, pair a tripod or mount with proper balance. A balanced setup reduces micro-movements and helps your phone stay in the same position as you tweak composition. Plus, a quick-release plate saves time when you want to switch between shots or go from landscape to portrait. Stability isn’t flashy, but it’s the secret sauce for professional-looking night photos.
Choose a phone tripod or clamp
A compact phone tripod gives you a stable base without bulk. Look for adjustable legs, a sturdy head, and rubber feet to grip slick surfaces. If you shoot on uneven ground, a flexible tripod can wrap around rails or poles, giving you angles you couldn’t reach with a traditional setup. The right clamp keeps your phone secure without blocking the camera, and a strong clamp reduces the risk of accidental drops.
When you pick a clamp, check for compatibility with your model and case. Some clamps grip around a slim phone with a simple one-handed twist, while others require removing a case. If you shoot with a case, choose a cradle-style clamp that accommodates thicker phones. A gasket or padding helps protect your device from scratches. A good clamp should feel solid in your hand and not slip when you adjust tilt or pan.
Think about portability. If you’re carrying gear for a night walk, a lightweight tripod and a clamp that folds flat will save space. A compact kit fits in your bag without weighing you down, so you’ll actually bring it along. Your goal is to be prepared, not bogged down by gear.
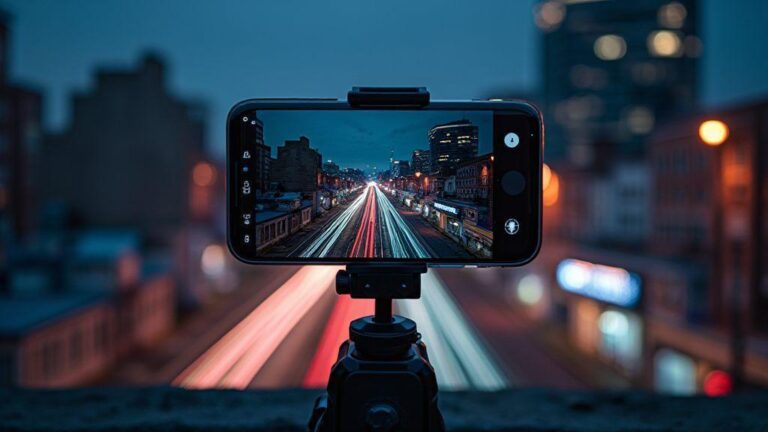
Use tripod apps long exposure smartphone
Long exposure apps unlock creative possibilities you can’t get with your standard camera app. They let you control exposure, ISO, and shutter timing with precision, so you can create light trails, silky water, or starry skies. Look for apps that offer manual controls, RAW support, and a clean interface. The right app makes tough settings feel intuitive, not intimidating.
As you experiment, you’ll appreciate apps that provide live previews and histograms. A histogram helps you avoid blown highlights or muddy shadows, especially in urban scenes with bright street lights. Some apps also offer stacking or composite modes, letting you blend multiple frames for smoother results. Start with a small ISO and a longer shutter to avoid grain, then adjust as your scene demands.
Remember to lock focus and exposure before you start. In long exposure, even a slight change in lighting can ruin a shot, so use manual focus and lock exposure value. And don’t forget to turn off AUTO settings that can shift mid-shot. With the right app, you can craft dramatic Light Trails with Shutter Speed: Mastering Night Street Photography on Your Phone (2026) by your side.
Avoid blur with remote or timer
A remote or timer is your best friend for clean long-exposure shots. It eliminates the tiny shake you get from tapping the shutter button. Set your timer to a two- or ten-second delay, depending on how you’re bracing yourself and the environment. This small delay is enough to stabilize your shot and let you settle after pressing the button.
If you don’t have a remote, use a Bluetooth trigger or your phone’s built-in timer. A simple 2-second delay often works well for street scenes with moving cars or pedestrians. For static scenes, a longer delay reduces any lingering shake from your breath or heartbeat. Either way, the goal is to capture a steady frame the moment the exposure begins.
Keep in mind that remotes can fail if the battery dies or the connection drops. Always have a backup plan: a temporary timer on the phone or a quick physical press with minimal movement. Small safeguards prevent wasted takes and keep your night photography workflow smooth.
Manual controls in camera apps
You’ll take control of your photos when you use manual controls in camera apps. This means you decide the shutter speed, ISO, and focus, not the app. You can tailor each shot to what you want to capture, instead of relying on automatic settings. When you adjust these settings, you’ll start seeing how light and motion change the final image. Think of it like cooking: you choose the ingredients and the heat, and you get the flavor you want.
In practice, you’ll set the shutter speed to freeze or reveal motion, choose an ISO that keeps noise low, and focus manually for sharpness where you need it most. If you’re shooting a moving scene, a faster shutter will freeze the action; for light trails, you’ll want a slower shutter. Your phone becomes a real camera, not just a point-and-shoot. Over time, you’ll notice small gains each time you tweak the numbers and compare results.
Set shutterspeed, ISO, and focus manually
You’ll decide the shutter speed first. If you want crisp motion, go fast. If you want trails or smooth water, go slow. Next, pick an ISO that keeps grain under control. Lower ISO for bright scenes, higher ISO for dim scenes, but be mindful of noise. Finally, switch to manual focus so you control what’s sharp, especially in low light or when your subject isn’t centered. This trio puts you in charge, and your results will reflect your eye.
Try this combo: in a busy street scene at night, set a slower shutter (like 1/4 or 1/8), keep ISO moderate, and manual focus on the edge where the action happens. You’ll capture light trails or silky motion rather than blurry messes. If the image looks washed out, nudge the shutter toward faster or drop ISO a bit. With each shot, you’ll learn how the numbers translate to what you see.
Bulb mode and camera app settings for light trails
Bulb mode lets you keep the shutter open longer. You’ll see long streaks of car lights and star-like trails in the sky. If you want that effect, start with a tripod or a stable surface. Open Bulb mode, press the shutter, and hold it for the duration you need. If you don’t have Bulb, look for a long exposure option in your app, or use a timer to start and stop the shot. In this setup, your phone is the paintbrush, and the road is the canvas.
When you’re chasing light trails, you’ll work with longer exposures and lower ISO to keep the image clean. A simple trick is to shoot at dusk or just after sunset when lights are vivid but the scene isn’t pitch dark. Use a steady stance or tripod, and keep focus fixed on a known point so the trails stay nicely aligned. You’ll end up with smooth, glowing lines that tell a story of motion.
Look for RAW and long exposure features
Look for RAW where possible because it saves more detail than JPEG. With RAW, you can recover highlights and shadows later without wrecking the image. Long exposure features help you dial in the exact shutter time you need for your scene. If your camera app has RAW plus long exposure, turn them both on. You’ll have more data to work with in editing, and your final photo will feel more precise.
When you’re aiming for patience and control, RAW is your friend. It gives you flexibility to adjust contrast, color temperature, and exposure without banding or color shifts. If your phone supports stacked exposure or anti-noise in long exposures, enable it. Your night photos will look cleaner and more professional, even on a phone.
Compose night street photography smartphone
You’re going to capture stunning night street scenes right from your phone. The key is using manual controls to keep light, color, and motion in balance. Start by setting your exposure carefully: a longer shutter lets you thread light trails into your frame, while careful ISO keeps noise low. When you hold your phone steady on a railing or a small tripod, you’ll notice cleaner photos with rich shadows and crisp outlines. Remember, practice makes progress. Tonight, you’ll tune your camera like a pianist tunes a piano—small adjustments, big results.
Your phone’s camera can feel shy in low light, but you can coax it into action. Use a low ISO to reduce grain, a modest aperture to keep everything in focus, and a shutter that lets the scene breathe. If you want brighter highlights on neon signs or street lamps, you’ll use a longer shutter with care. Stabilize with a steady grip or a tiny tripod, because the tiniest shake shows up as a wobble in night shots. As you shoot, think about how the street guides your eye—leading lines, reflections, and the rhythm of passing cars all play a role in your frame.
In the end, your night street photos will show more than just lights. You’ll see movement as it happens, captured with intent. If a streetlight creates a halo, don’t crop it out—let it tell the story. You’ll learn to balance color temperature by watching how different lights mingle, from warm sodium lamps to cool LEDs. Your phone can handle this if you stay deliberate with your settings and steady your hand. Before you know it, your gallery will feel like a street you’ve walked a hundred times, only brighter.
Use leading lines to guide light trails
Leading lines pull your viewer into the scene and steer the eye toward light trails you want to highlight. You’ll notice curb edges, rails, and the edges of parked cars forming lines that pull viewers into the distance. When you set a longer shutter, those lines become glowing rivers of motion—the cars’ tails painting bright streaks across the frame. Try placing the line so the light trails start near a foreground element you love, then march toward a strong background feature.
As you compose, think about where the brightest trails should end. A bright storefront or a tall streetlight can anchor the end of the line, giving your photo a sense of destination. If you want longer, smoother trails, keep the camera steady and time your shot with a light-traffic moment—when a bus or taxi passes, it can add drama without blurring your foreground. You’ll learn to balance the line’s strength with the surrounding shadows so nothing looks muddy.
Remember, your phone’s lens can exaggerate perspective, so keep the leading line within a comfortable angle—too steep will feel claustrophobic, too flat will lose energy. If you’re struggling, try a quick move to reframe: shift a step left or right to re-align the line with a key building edge. When you nail this, your image will feel guided, almost like you drew the path yourself with light.
Include light sources and reflections on streets
Light sources are your rhythm section. Neon signs, street lamps, and storefront windows create color and texture that give depth to night scenes. Reflections on wet pavement or glass add sparkle and double the storytelling, especially after a rain. Your goal is to let at least one bright source anchor your composition while other lights bounce around to fill shadows with color. Use a longer shutter to capture the glow, but keep ISO in check to avoid grainy spots.
Play with color balance by watching how warm and cool lights play together. A red lamp on one corner and a blue storefront sign on the opposite can produce a dynamic palette—your phone can show this subtly if you tweak white balance a touch. Reflections can complicate the scene in a good way: they create symmetry, doubling the lights and giving you a more interesting ground story. If you frame a puddle, you’ll often discover a secondary composition unfolding—your own tiny, inverted world.
Every light source becomes a character in your frame. You’ll notice how their shapes map onto the street and how reflections multiply the drama. If you see an overpowering glare, angle your shot to let the light trail breathe instead of clipping the brightest part. Your phone rewards you for patience; wait for a moment when the traffic stops or slows, and you’ll capture more controlled reflections and balanced highlights.
Simple composition checklist
- Include a leading line that guides toward a light source.
- Place a strong foreground element to add depth.
- Watch the balance between warm and cool lights.
- Aim for a clean reflection without distracting clutter.
- Keep your shutter steady to avoid motion blur.
Edit light trails on your phone
You can turn simple night photos into glowing stories with a few smart edits. First, start by pulling the shot into a RAW-friendly editor on your phone so you don’t lose detail in the dark areas. You’ll want to keep the highlights from washing out, then bring back the shadows so the light trails stay bright without looking blown out. When you adjust exposure, let your trails stay crisp by avoiding over-brightening the whole image. Think of it like drawing neon lines on a dark street—keep the lines sharp, not the whole scene washed in glare. If your phone supports selective editing, target the brightest parts of the trails to prevent color clipping and keep the color intact.
Next, balance contrast and warmth to make the trails pop without turning the scene yellow. Light trails look best when their color remains true to the light source—neon blues, reds, or white headlamps—so tweak white balance to avoid muddy tones. A subtle boost in clarity can sharpen the edges of each trail, but don’t overdo it, or you’ll introduce halo artifacts. If your image carries noise in dark areas, use a light denoise pass just where it matters, so the trails stay clean against a smooth sky or road. Finally, check your overall tone curve; a gentle S-curve often preserves detail in both bright trails and shaded streets, letting the motion feel more alive.
Finally, save a copy with your preferred settings and compare different looks. You’ll learn what works by testing different white balances and contrast boosts on your usual night routes. Keep the trail brightness consistent across frames if you’re posting a series, so your viewers see a cohesive story rather than a random assortment of glows. With practice, you’ll know exactly how bright to keep each color so your Light Trails with Shutter Speed: Mastering Night Street Photography on Your Phone (2026) reads clearly in every shot.
Capture RAW and reduce noise first
Start with RAW if your phone supports it; you’ll have the most latitude to bring out detail in dark cars and street lights. RAW files hold more information than JPEG, so you can pull down shadows without turning noise into a feature. If you can, shoot a quick, longer exposure to capture more trail without blowing out the lights. That extra data helps you keep color and texture intact when you edit.
Noise is your enemy in night shots. After you’ve captured RAW, apply a light noise reduction focused on the darker areas where the trails live. Don’t smear the trails—aim your denoise at the sky and asphalt, not the glowing lines themselves. If your phone offers multi-frame or night modes, use them as a base and then refine in post; the stacked data gives you cleaner trails to work with.
Finally, preview your edits on a few different screens if you can. Your phone screen isn’t the same as a computer monitor, so make sure the light trails stay visible and true across devices. The goal is clean capture with a flexible file you can tweak later, so you can push the colors and brightness without pulling the noise into center stage.
Post processing light trails mobile: highlights and color
In post, start with highlights: cool or dim the brightest points so the trails don’t glare. You want a crisp glow, not a blown-out ring around each light. If you see blown highlights during editing, grab the highlight slider and dial them down until the trails read clearly. Then move to color: boost the hue of the trails to match the light sources you captured—blue from LED signs, amber from streetlights, or white from car headlights. Subtle color shifts can make the scene feel more dynamic without looking fake.
Next, fine-tune saturation and vibrance. Trails benefit from a touch more color, but avoid oversaturation that makes colors clash with the rest of the scene. Use vibrance if you want to lift the more muted colors without pushing the bright ones too far. If your phone supports HSL adjustments, isolate specific colors in the trails so you don’t affect the whole picture. This keeps the street scene grounded while the trails glow with personality.
Finally, check the overall balance: ensure the road and sky still read as separate planes and that the trails lead the viewer through the frame. Save a version with the color balance that pleases you most, and keep an alternate with a cooler, more cinematic look for social shares. Your Light Trails with Shutter Speed: Mastering Night Street Photography on Your Phone (2026) will feel intentional, not accidental.
Best mobile editing steps
- Start by importing the RAW file. Lock the horizon, then crop to improve framing if needed. Increase sharpness a touch, but stop before you see halos.
- Adjust exposure and contrast to preserve detail in both lights and shadows. Bring down highlights and lift shadows to reveal trails without washing the image.
- Tweak white balance to keep trail colors true to their sources. Apply a gentle color correction to match what you saw on the street.
- Apply selective denoise on dark areas, especially around the trails, to keep edges clean.
- Fine-tune highlights and shadows in small increments, then compare against your original to ensure you didn’t lose mood or drama.
- Save at least two versions: one with cooler tones for a car-light feel, and one with warmer tones for a street-crowd vibe.
- Export final in a size suitable for your sharing platform, keeping the trails bright but realistic.
Handheld light trail techniques phone
You’ll chase glowing lines through the night using only your phone and steady hands. Keep your grip firm and your stance wide for balance. Find a quiet street with moving cars or bikes, then frame the scene so the brightest lights sit where you want the trails to start and end. Use your phone’s viewfinder to keep the horizon level and the lines clean. As you shoot, breathe steady and press the shutter gently to avoid shaking the image. If your phone lets you lock exposure, set it to a lower ISO and a longer shutter time to coax longer trails without grain. Practice a few seconds of patience between takes; the best trails rarely appear on the first try. With every shot, you’ll learn which streets and times give you the cleanest light ribbons.
When handheld, you’re working with variables. You’ll want a fast shutter to capture bright, short trails, or a slow shutter to stretch the lines into long curves. If your phone supports RAW, turn it on; RAW gives you more control when you edit later. Tap to focus on a light source, then lock exposure if possible. A simple trick: lean slightly against a railing or a tree so your body becomes a natural mount. Small movement hides in the noise, but a calm stance makes the trails smoother. If the wind nudges your phone, tuck your arms in, bring the phone closer to your chest, and watch your breath—steady, slow, and deliberate.
Experiment with distance and timing. Try shorter trails at one corner and longer ribbons near a busier lane. Your phone’s auto-focus can drift when scenes are busy, so switch to manual focus if you can. Light sources will glow differently in the frame; you’ll notice that street lamps become soft halos while moving cars create crisp lines. Don’t be afraid to redo a shot with a slight repositioning; a tiny move can turn a muddled pattern into a neat look. Keep your expectations realistic—you’re building skill with each take, not chasing a single perfect frame.
Brace, lean, and try burst stacking
Brace your elbows against your ribs to steady the shot. A tiny twist in your posture can blur the light trails, but a stable stance keeps them crisp. Lean into the scene so your phone isn’t fighting gravity. If you have a burst mode, use it to capture several frames in quick succession. The best trails often appear in a composite: stack the sharpest frames to smooth out flickers and jitter. You can combine them later with simple edits on your phone or a quick app. The result is a cleaner, brighter trail without extra noise.
Burst stacking works best when your street has constant light movement. You’ll catch different moments of motion and weave them into a longer, smoother path. Start with a bright source near the curb, then sweep your camera along the road. Save the sequence and pick the cleanest frames for stacking. If you see a frame that’s smeared with motion blur, skip it. The stacked result should look like a single, flowing thread. This technique takes a little practice, but it pays off with professional-looking light trails you can brag about on your feed.
Mobile long exposure tips when you have no tripod
You can get long exposure looks even without a tripod. Use a low ISO to keep noise down, and give yourself as much shutter time as your scene allows. If your phone offers a built-in long exposure or night mode, enable it, then hold very still. Rest your elbows on a fence or wall, or lean against a stable object to minimize shakes. A small tripod substitute, like a compact car window edge or a sturdy ledge, can make a big difference. If you’re shooting moving lights, keep the camera moving with the subject just enough to create a continuous glow without blurring the whole scene.
Another trick is to shoot in bursts and pick the clearest frame from the sequence. The idea is simple: your shutter stays open long enough to pull light in, but your hands still enough to keep the shot sharp. If you can, use a timer or the volume button to trigger the shutter without jostling the phone. And always review your images at 100% before you move on; it helps you learn exactly where your steadiness gave you success or failed you.
When handheld works best
Handheld shines when scenes are dynamic and you want quick, spontaneous trails. You’ll get a natural motion feel rather than a stiff, posed look. In busy streets with bright storefronts or moving traffic, a little shake can add character to the line, making it feel alive. If you’re chasing reflections on wet pavement or neon, your handheld shot can capture the shimmer with less setup. It’s the fastest way to get a good trail without carrying extra gear, so trust your instincts and your grip.

Smartphone Night Photography Enthusiast & Founder of IncrivelX
Vinicius Sanches is a passionate smartphone photographer who has spent years proving that you don’t need an expensive camera to capture breathtaking images after dark. Born with a natural curiosity for technology and a deep love for visual storytelling, Vinicius discovered his passion for night photography almost by accident — one evening, standing on a city street, phone in hand, completely mesmerized by the way artificial lights danced across wet pavement.
That moment changed everything.
What started as a personal obsession quickly became a mission. Vinicius realized that millions of people were carrying powerful cameras in their pockets every single day, yet had no idea how to unlock their true potential after the sun went down. Blurry shots, grainy images, and washed-out colors were robbing everyday people of memories and moments that deserved to be captured beautifully.
So he decided to do something about it.
With years of hands-on experience shooting city streets, starry skies, neon-lit alleyways, and creative night portraits — all with nothing but a smartphone — Vinicius built IncrivelX as the resource he wished had existed when he was just starting out. A place with no confusing jargon, no assumptions, and no gatekeeping. Just honest, practical, beginner-friendly guidance that actually gets results.
Vinicius has tested dozens of smartphones from every major brand, explored dark sky locations across multiple states, and spent countless nights experimenting with settings, compositions, and editing techniques so that his readers don’t have to start from scratch. Every article on IncrivelX comes from real experience, real mistakes, and real lessons learned in the field.
When he’s not out shooting at midnight or writing in-depth guides for the IncrivelX community, Vinicius can be found exploring new cities with his phone always within reach, looking for the perfect shot hiding in the shadows.
His philosophy is simple: the best camera is the one you already have — you just need to learn how to use it in the dark.