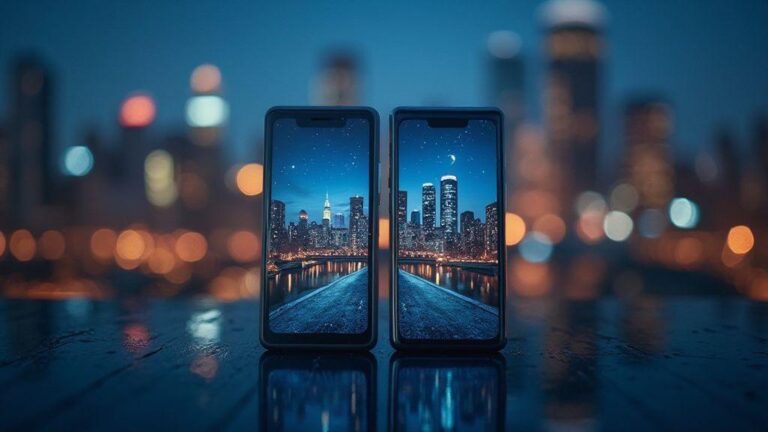
iPhone 17 vs Galaxy S25 Displays: Why Your Night Photos Look Different on Each Screen
How OLED vs AMOLED change your night shots
When you view night photos on different screens, you’ll notice real changes. OLED and AMOLED displays handle dark scenes differently, which can alter how your shots feel after you snap them. You may see deeper blacks, brighter highlights, and colors that shift from device to device. If you edit on one screen and view on another, you might tweak exposure or contrast to keep your night photos looking right. Knowing what to expect helps you avoid surprises when you share.
On a night scene, you’ll chase details in shadows while keeping stars and street lights from washing out. OLED displays tend to deliver more consistent blacks because each pixel turns off completely, aiding your contrast judgment. AMOLED shares that ability, but you may notice slight color warmth or coolness depending on the device. Your goal is edits that still feel natural across devices, so compare your edited shot on at least two screens before posting.
When you’re editing, brightness and color accuracy matter. If you edit on an OLED device, you might push brightness to bring out a sunset or neon sign and still keep the stars intact. If you edit on AMOLED, you may rely on the display’s dark tones to keep the night vibe. Motion, HDR, and noise reduction also differ slightly. Practicing by taking the same shot with the same settings on two devices helps you learn how each screen interprets your work.
iPhone 17 night photo display traits
Your iPhone 17 uses an OLED panel, so you’ll often see great contrast in night shots. The blacks stay deep, and highlights can pop without losing detail, which helps a city at night feel alive. You’ll notice skin tones stay natural even in shadows, which helps if you shoot people under streetlights. If you edit on the iPhone 17, watch how vibrant you want colors like neon signs to be; you might dial back saturation a touch so it doesn’t look fake on another screen.
Previewing on the iPhone 17 gives a smooth, crisp look thanks to its color science. If you share to another device, your photo might appear a touch different—but that’s normal with OLED. A quick trick: enable HDR or keep a mid-tone check to maintain balance across devices so your night scenes stay readable whether you’re scrolling or posting.
Galaxy S25 night photo display traits
The Galaxy S25 also uses an OLED-based panel, but its tuning can shift how you perceive night shots. Deep blacks are strong, but color warmth may skew slightly compared to other devices. You might see skies or lamps with a hint of amber that changes how a photo feels when viewed elsewhere. If you edit on the S25, you might lean toward more contrast to make stars pop while keeping street lights from exploding into halos on other screens.
When you view your night photo on the Galaxy S25, bright points stand out without losing texture in the dark areas. For cross-device sharing, keep highlights at a comfortable level so they don’t clip on brighter or less saturated screens. A simple approach is to use mild local adjustments for highlights and shadows, then test on a second screen before finalizing.
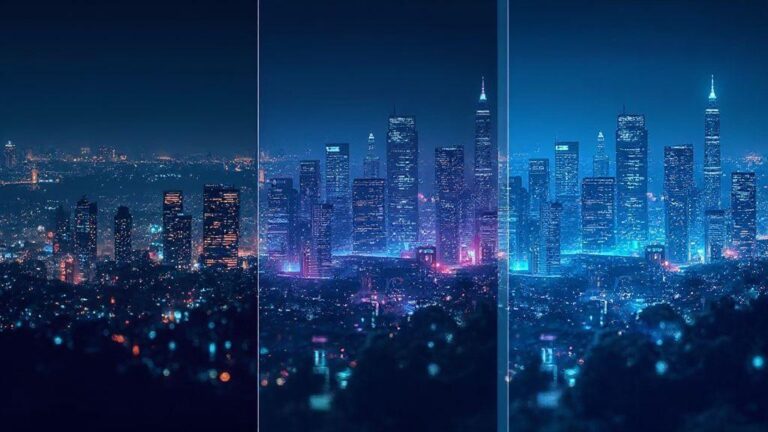
OLED vs AMOLED night rendering quick fact
OLED and AMOLED both deliver strong dark-scene performance, but the exact look varies with device calibration and color tuning. A simple rule: aim for natural shadows, controlled highlights, and balanced midtones so your night shots stay true whether you view them on OLED or AMOLED displays. This aligns with the iPhone 17 vs Galaxy S25 Displays: Why Your Night Photos Look Different on Each Screen.
Why tone mapping makes your nights look different
Tone mapping is the hidden chef behind night photos. It decides how dark shadows stay detailed and how bright highlights pop, so two photos of the same scene can look very different. Edit or view in different apps or devices, and tone mapping changes the mood of the night. A street lamp can glow warmly on one screen and appear cool on another. This isn’t a bug; it’s how tone mapping handles brightness and color for you.
Tone mapping controls contrast, color depth, and how much information remains in the shadows. If you shoot in RAW or use high-contrast scenes, tone mapping decides what survives the edit. The result can be punchy on one device and muted on another. Understanding this helps you plan shots and edits with your end screen in mind.
Thinking about tone mapping before you edit saves you from redoing a lot. If you know your phone or app renders mornings and nights differently, you can keep a consistent look with fewer post-share fixes. Some scenes demand careful balance to keep both stars and street lights visible. That balance is tone mapping in action, shaping your night with intention.
Night mode tone mapping differences explained
When you switch to night mode, your phone lifts shadows more and treats highlights with a gentler touch. Some devices push color warmth, others favor cooler tones. The same night photo can look inviting on one phone and stark on another. Screen brightness and color calibration also tilt tone mapping’s display. Consistency across devices means understanding how your favorite phone handles brightness curves and color.
Apps you use to edit or view can also change tone mapping. Some editors preserve raw data and apply local adjustments; others apply global tone curves that alter contrast across the frame. You might see more detail in a dim alley on one app and less on another because the tone curve compresses highlights differently. Test shots on a few trusted apps to find a workflow you can rely on.
Urban nights with neon signs demand careful tone mapping. Neon can blow out if the curve is too aggressive, while a soft curve might mute the glow. If you photograph a star-filled sky, tone mapping decides how many stars you keep and how much you lift the Milky Way without washing color. It’s a balancing act, and each device trades a bit of one detail for another.
How tone mapping alters detail and brightness
Tone mapping squeezes a wide brightness range into what a screen can show. That squeeze often hides fine textures in shadows or flattens bright highlights. You’ll see more detail in midtones, but some scenes lose texture in the very dark or very bright areas. Your phone makes these choices automatically, so two cameras can produce different results from the same scene.
If you push a photo too hard, you’ll notice banding and color shifts where the curve tries to fit extremes into the display’s range. Under a streetlamp, skin might look smooth, yet textures in curtains or brickwork can vanish. If you want a moody vibe, you might like higher contrast; for true-to-scene fidelity, a gentler curve is better. Tone mapping stays the gatekeeper of brightness and detail in your night shots.
Understanding this helps you edit smarter. You can exaggerate or pull back the tone curve depending on what you want the audience to see. Lift midtones to bring out faces, but keep some shadow detail so the image still feels real. Experiment with exposure and gamma to see how the same frame reveals different textures as you adjust the mapping.
Tip to match tone mapping across phones
To keep a consistent look across devices, start with a baseline edit and apply it identically on each device. Begin with a neutral tone map that preserves midtones, then test on your phone and a friend’s phone. If highlights look washed, dial back the curve a touch. If shadows feel crushed, lift them slightly. Save a preset you can reuse on future shots. This small step helps maintain a similar look whether you’re sharing now or later.
How color calibration and white balance affect your view
Color calibration and white balance ride side by side when you look at night photos. If your screen is off on color, your photo will look off too, even if you did everything right. Reds can tilt toward orange, blues can look too cold, and greens can feel muddy. Calibrating your display sets a baseline so colors you see match what was captured in the dark. This helps you judge exposure, contrast, and detail more accurately. Skipping calibration can lead you chasing colors instead of fixing real photo issues. Your goal is a balanced scene that mirrors what you shot, not a color shift from another device.
White balance is the brush that paints true colors in night shots. In low light, cameras lean toward warm or cool tones depending on settings and scene. Without proper white balance, whites won’t stay white and skin tones can look unnatural. Calibration helps the camera interpret colors consistently, so stars, streetlights, and neon signs stay believable. A well-calibrated display makes small light pops glow correctly, helping you decide if you need more blue for night mood or a touch of warmth for a cozy street scene. Think of it as setting the mood for the whole image, not just polishing one color.
Pairing good color calibration with proper white balance reduces back-and-forth edits and surprises after you share.
Display color calibration night photos
Calibrate your own screen first with a known gray or white reference, then test with a neutral night image. If your monitor or phone supports built-in calibration, run it and compare to a trusted reference, tweaking brightness, contrast, and color sliders to keep the scene balanced. Lock in a baseline to make your night photos pop with the right intensity, not washed-out or oversaturated.
Keep a color checker handy when you shoot. After you edit, compare against a reference shot you know is accurate. If colors drift, recalibrate. A quick mid-project check saves hours of guessing later. The goal is consistency across your gallery so you and others see the same scene.
Automatic white balance display differences
Automatic white balance can save time but often betrays you on night photos. On your display, you might see a cool blue tone one minute and a warm orange the next, even if the camera didn’t move. This happens because different screens interpret light differently. Relying on auto WB alone risks color shifts that make a cool street scene look too yellow or a neon sign too bright. Some devices lean blue in dim scenes, others push warmth. The result is a mismatch between edits and what you view on another device.
To reduce surprises, set a fixed white balance in your camera for night shots after calibrating your display. If you still use auto WB, test how edits look on at least one other screen before sharing.
Check and fix white balance before sharing
Before you post, confirm white balance on your calibrated display. Look at skin tones and bright light sources; if whites aren’t true white or highlights feel off, adjust WB slightly. After adjusting, re-check the overall color balance with a neutral reference photo. If the scene still reads strangely on another device, tweak again. The goal is one consistent look across screens, not a lucky guess.
HDR, brightness, and what you actually see at night
When you shoot at night, your camera and display perform a tricky dance with light. HDR and brightness aren’t just about making things lighter—they balance details in both dark and bright areas so your brain can read the scene clearly. To translate well from camera to phone or monitor, you need to understand how HDR works and how brightness affects your viewing.
HDR captures a wider range of light, then blends shots into one image. This helps keep bright areas from blowing out while preserving shadow detail. But not all displays render HDR the same way. Some screens push highlights more than others, so the same photo can look different across devices. You’ll notice this when a streetlight seems intense on one screen but merely bright on another. The most accurate look comes from understanding how your display handles HDR and brightness in real-world viewing.
Your eyes adapt to night differently than a camera. Perceived noise or banding can be higher on some screens, even if the file is clean. This means a photo may look smooth on one device but noisy on another at the same brightness. To compare, test how the image looks at different brightness levels and on a few devices.
HDR processing impact on displays
HDR processing aims to keep detail in shadows and highlights. On some displays, you’ll see richer contrast and more texture; on others, the same HDR image may look flat if the screen can’t boost highlights properly. Your experience depends on how your display maps HDR data to its brightness and color range. If a screen is limited, HDR can be toned down, and the image may lose intended drama. That’s why you might switch to a non-HDR view to compare side by side. HDR is a tool—your screen decides how loudly it speaks.
Timing matters too. If you preview HDR images on a phone with automatic brightness or local dimming, the look can shift as the screen re-calibrates. When editing, test the photo on several devices you expect your audience to use. This helps decide whether to push more contrast or keep a gentler balance so streetlights stay readable on all screens.
Perceived noise and brightness on displays
What you see as noise isn’t always the camera’s fault. On brighter displays, you’ll notice tiny specks and rough patches in dark areas. A photo may have quiet shadows, but screen brightness and latency can exaggerate texture. When sharing, check how your image reads at lower brightness, since many apps default to mid-range brightness.
Brightness also changes how you read colors. Too bright, and a night sky may wash out; too dim, and it can look flat. Edit to suit what you mostly view—phone, tablet, or computer—and test on several devices to preserve detail in both darks and highlights.
Use display HDR settings for clearer night images
Turn on HDR on your display and keep your viewing environment consistent. If your screen has a brightness limiter, set it to a comfortable level to avoid blowing out highlights while checking edits. Use tools that show you both the full image and a safety preview with shadows lifted just enough to reveal detail. Edit to balance highlight details (like streetlight glow) without introducing excessive shadow noise.
Why saturation and color gamut change your night colors
Editing night photos often shifts colors because screens don’t render greens, reds, and blues the same way. Saturation is color intensity, and color gamut is the range a screen can display. If your photo features bright neon lights or cool blues, a device with a wider gamut or higher saturation makes those tones bolder. Be mindful so edits don’t push colors too far on one screen and look wrong on another. The goal is mood without making the night look cartoonish.
Saturation changes aren’t only about pop; they can exaggerate noise and glow in dark areas. Overdoing saturation can make the sky oversaturated while shadows stay gray. Edit with intent and test on multiple displays to keep a natural look.
Color gamut differences come from how each screen is built. Some phones show punchier reds, others cooler blues. If you shoot in RAW or use HDR, you’ll have more control to adapt later. What you see on your phone may shift when you export or view on a monitor. Edit to bridge those gaps, not chase perfect colors on one device. A calm, deliberate adjustment keeps your night photos real even as screens disagree.
Display color gamut effect on night images
Your night images can look dramatically different on screens with varying color gamuts. A wide-gamut display reveals more color nuance in neon lights and skin tones, while a narrower gamut might clip details, making areas look flat. If you shoot vibrant signs, blues and teals can appear cooler or warmer depending on the device. To keep balance, check your image on at least two devices before finalizing brightness and color.
When adjusting saturation, balance gamut effects with intention. If a color looks oversaturated on one screen, back off just enough so it remains lively on another. This approach helps you produce a consistent look across devices, especially for neon-lit nights.
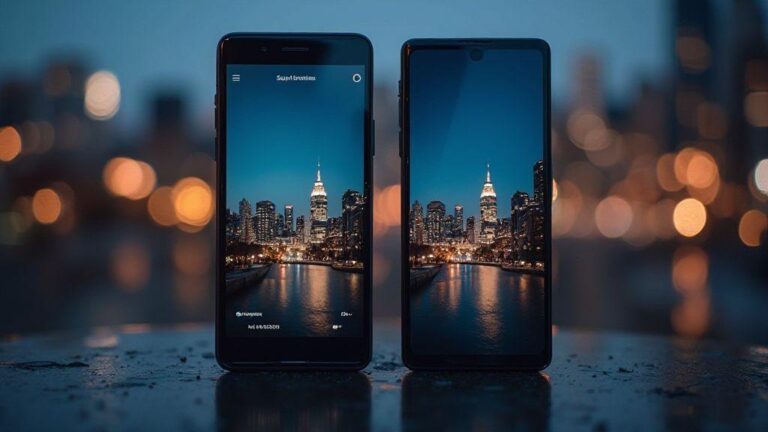
iPhone 17 vs Galaxy S25 display comparison for color
The iPhone 17 tends to push warmer skin tones and slightly punchier reds, which can give night scenes a cozy glow. The Galaxy S25 often emphasizes greens and blues more, making reflections in puddles and neon signs feel crisp and cool. These tendencies show up in sunsets, street lamps, and storefront glare. Editing with this in mind helps prevent one device from skewing the entire photo.
When comparing displays, you’re learning how each device renders color so you can edit with a plan. For example, if a shot has a lot of red signage, soften reds slightly to avoid blowout on the iPhone 17 while preserving warmth on the Galaxy S25. The goal is a balanced edit that looks good across both screens—consistent mood with honest color, not a one-device miracle.
Lower saturation to match both screens
If you want a simple fix, lower saturation a notch to keep night colors honest on both displays. This helps prevent overblown colors on the iPhone 17 while keeping blues and greens from looking harsh on the Galaxy S25. Test by comparing the edited image on both screens and adjust until the balance feels right. The final version should feel true to the scene, not a one-screen exaggeration.
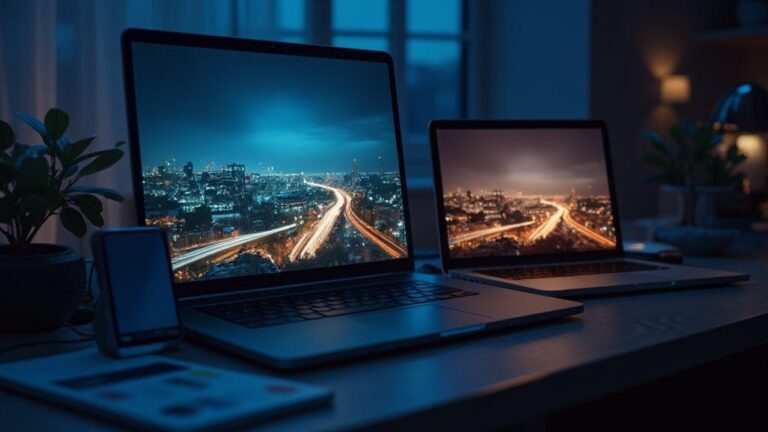
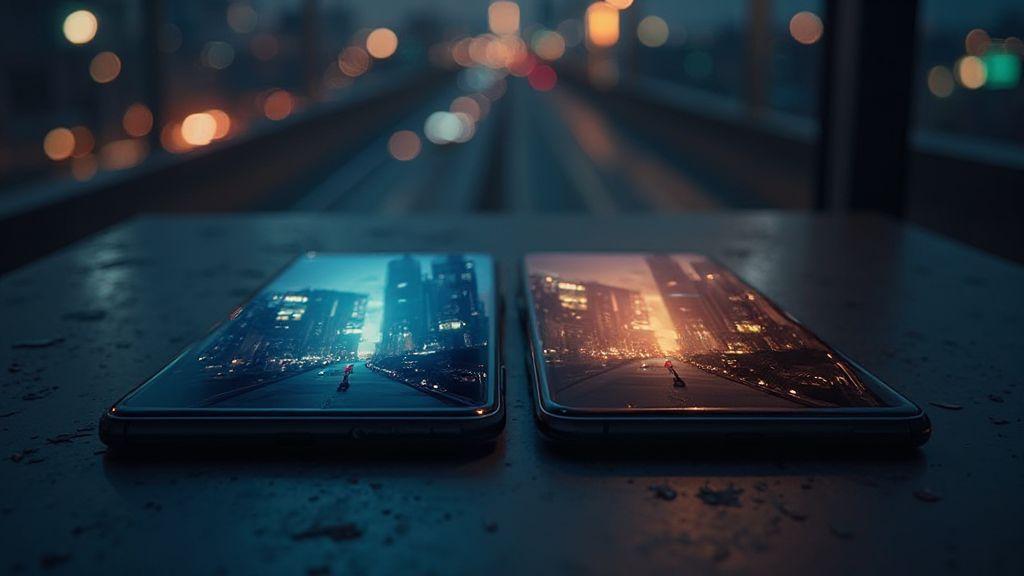
Edit and share so your night photos match on any screen
Your night photos can look wildly different across devices. A clear workflow helps keep colors, brightness, and contrast consistent so shots feel nearly identical on any screen. Start with a baseline, apply calibrated edits, and export with device-friendly settings. With practice, you’ll share photos that reflect your scene, whether from your phone or a desktop, with predictable results.
Begin by setting a consistent white balance and exposure across edits. Choose a neutral starting point, then tweak shadows and highlights to preserve detail. Use a simple color profile and avoid extreme saturation that shifts with different screens. When possible, compare a small crop on a second device to catch obvious mismatches early. This trains your eye to spot differences quickly and keeps you from guessing during export. When you share, you’ll thank your future self for a clean, readable edit that translates well beyond your one screen.
Finally, establish a quick export routine you actually use. A consistent file size, color space, and sharpening level go a long way toward reducing device mismatch. You’ll notice that exporting with the same settings keeps your night photos closer to what you saw in your editor, even on dim phone screens or bright computer monitors. Treat your workflow like a recipe: repeatable steps that minimize guesswork. With practice, your audience sees the same mood, not a different version on every device.
Edit for iPhone 17 night photo display and Galaxy S25 night photo display
Edit to look right on the two most common night-photo displays. For iPhone 17, aim for a cooler baseline with careful contrast and slightly reduced saturation. This preserves sky detail and street lights without flattening the scene. Use gentle adjustments to highlights to prevent blown neon signs, and keep shadows lifted enough to reveal detail in dark corners. A consistent white balance and modest curve help avoid the math problem look when colors are pushed too far.
On Galaxy S25, lean into warmer tones and a bit stronger contrast to counteract the phone’s tendency to brighten shadows. Deepen midtones to keep brickwork and pavement textures, and apply mild chroma reduction if you notice color fringing around bright lights. The goal is to maintain mood while ensuring lights pop on the Galaxy screen. When switching devices, these tweaks help your photo feel close to the same scene you captured.
Export and share settings that reduce device mismatch
Your export choices are the last line of defense against mismatches. Choose a color space that stays stable across screens—sRGB is a safe, widely compatible option. Keep bit depth and compression balanced to preserve detail without introducing banding. Avoid heavy sharpening for web use; a light pass tends to look better on both phone screens and desktops. If possible, embed a color profile so downstream apps render your image more consistently. These settings bridge your edit and how your audience actually sees it.
Quick export settings for consistent sharing
- Color space: sRGB
- Resolution: 1920×1080 (or your corresponding aspect ratio) for web sharing
- Quality: Medium to high (keep above 70%)
- Sharpening: Low to none for web; a tiny amount for thumbnails
- Metadata: Include basic EXIF; consider privacy if sharing publicly
- Color profile embedding: Enabled when available
If you’d like any further tweaks to tighten phrasing or adjust the keyword distribution, I can refine additional sections while keeping the article’s flow and style intact.

Smartphone Night Photography Enthusiast & Founder of IncrivelX
Vinicius Sanches is a passionate smartphone photographer who has spent years proving that you don’t need an expensive camera to capture breathtaking images after dark. Born with a natural curiosity for technology and a deep love for visual storytelling, Vinicius discovered his passion for night photography almost by accident — one evening, standing on a city street, phone in hand, completely mesmerized by the way artificial lights danced across wet pavement.
That moment changed everything.
What started as a personal obsession quickly became a mission. Vinicius realized that millions of people were carrying powerful cameras in their pockets every single day, yet had no idea how to unlock their true potential after the sun went down. Blurry shots, grainy images, and washed-out colors were robbing everyday people of memories and moments that deserved to be captured beautifully.
So he decided to do something about it.
With years of hands-on experience shooting city streets, starry skies, neon-lit alleyways, and creative night portraits — all with nothing but a smartphone — Vinicius built IncrivelX as the resource he wished had existed when he was just starting out. A place with no confusing jargon, no assumptions, and no gatekeeping. Just honest, practical, beginner-friendly guidance that actually gets results.
Vinicius has tested dozens of smartphones from every major brand, explored dark sky locations across multiple states, and spent countless nights experimenting with settings, compositions, and editing techniques so that his readers don’t have to start from scratch. Every article on IncrivelX comes from real experience, real mistakes, and real lessons learned in the field.
When he’s not out shooting at midnight or writing in-depth guides for the IncrivelX community, Vinicius can be found exploring new cities with his phone always within reach, looking for the perfect shot hiding in the shadows.
His philosophy is simple: the best camera is the one you already have — you just need to learn how to use it in the dark.