How to Use the Selective Tool in Snapseed to Fix Dark Areas and Shadows
How the Selective tool works for you
The Selective tool in Snapseed puts you in control of darks, lights, and color at specific spots in night photos. You don’t need to redo the whole image—target areas that need love and leave the rest intact. It’s a shortcut to fix shadows without washing out highlights, giving you precise edits you can trust. It’s approachable, so you can start right away.
Using the Selective tool is like painting with a tiny brush on your screen. Place a control point on a spot that needs adjustment, then switch between light and color tweaks to fit that spot. It keeps your photo balanced while giving night shots the clarity they deserve. Shadows soften, highlights stay intact, and color shifts feel natural because you’re editing in localized zones rather than the whole image.
The key benefit is control with minimal risk. One control point can brighten a shadow without blowing out the sky, or deepen a color without muddying the foreground. You can duplicate control points across different areas to tailor every part of the scene. As you grow more comfortable, you’ll stack adjustments—ups the brightness here, tweaks elsewhere, then fine-tune saturation—to craft a cohesive night photo that still looks real.
Snapseed selective tool tutorial basics
Getting started is quick. Open your night photo, tap Tools, then Selective. Tap the plus sign to place your first control point on a spot you want to adjust. A small menu appears with brightness, contrast, saturation, and structure. Brightness lightens shadows; contrast helps highlight details; saturation makes colors pop without looking fake. Structure sharpens edges in the selected area, bringing out textures lit by street lamps.
Each control point acts like a tiny, independent editor for exactly where you place it. Move the point to reassign it to another spot, or zoom to place it on a tricky corner. You can add more points by tapping the plus sign again. If you don’t like a point, drag it off the image to delete it. Start with brightness and contrast first, then sprinkle in saturation or structure as needed. The goal is to guide the viewer’s eye to the mood you’re aiming for, not overhaul the entire scene.
You’ll see a circle around each control point with a line showing the direction of your adjustment. The circle’s reach is a soft zone where the tweak spreads a little beyond the exact dot. This means you can nudge a sidewalk’s glow without turning the whole block into daylight. Practice placing points on tricky shadows, like under a doorway or in a park corner, and you’ll get smoother transitions over time. Smaller, precise tweaks beat giant edits every day.
What each control point changes
A control point changes four main things: brightness, contrast, saturation, and structure. Brightness affects how light or dark that spot appears. If a streetlight casts a harsh shadow, lift brightness to reveal details without touching the sky. Contrast makes differences between light and dark more pronounced, helping textures pop in night scenes. Saturation tweaks color intensity, keeping colors natural or giving them life. Structure sharpens edges and textures to bring out brick, foliage, and signage.
Pair controls for realistic results. For example, brighten a shadow with brightness, then raise structure a touch to recover brick texture. If a neon sign looks flat, push saturation up a notch and fine-tune brightness so the sign reads correctly without oversaturation. If you want the sky calm while the ground gains depth, apply less brightness to the sky and more to the ground around the lights. The balance should feel natural, not cartoonish.
Control points give you localized power without wide ripple effects. If a window glare ruins the view, place a point near it and reduce brightness there, then add another point elsewhere to lift the surrounding area slightly. You’ll waste less time guessing at global edits and preserve the mood of your night shots with practice.
Quick start tips for your first control point
- Start with brightness on the darkest area you want to fix, like a shadowed doorway. Lighten just enough to reveal texture without washing out the street outside.
- Add one more point for the adjacent area to ensure a smooth transition. Small tweaks keep edges soft.
- If color looks off, nudge saturation slightly. Don’t oversaturate; you want a natural glow.
- Use structure sparingly. A touch can restore detail in brick or foliage after brightening shadows.
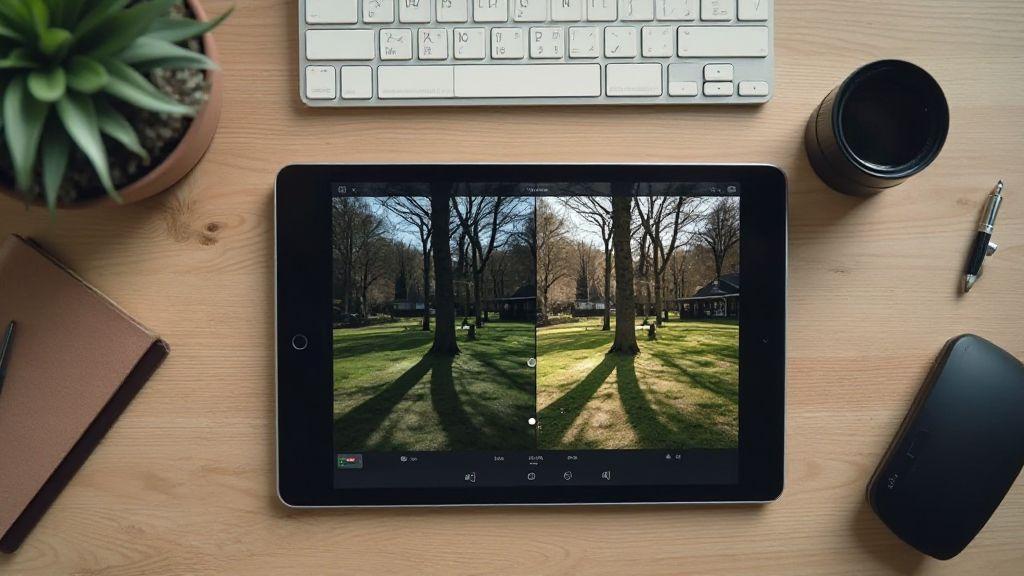
- Compare before and after often. If you wouldn’t recognize the image, back off a tweak and try a gentler adjustment.
Fix dark areas step-by-step
You’ll learn to bring back light in night photos without losing mood. Start by scanning the image for the darkest spots and where detail hides. Gently lift shadows to reveal detail without blowing out bright areas. Compare before and after to avoid overprocessing. Adjust midtones to reveal texture in buildings, streets, and trees. Use a light touch to keep faces and chrome natural. When happy with exposure, save a version to revisit later. Check the overall tone; if the image looks flat, add a touch of contrast to separate subjects from the background, and warm or cool color slightly to match the night atmosphere.
Fix dark areas in Snapseed with control points
Control points in Snapseed let you target shadowy spots without changing the entire image. Tap a control point, drag to brighten the area, and keep the effect local. Use multiple points for several dark zones; fine-tune with brightness, contrast, and saturation to keep colors honest. If a spot looks blown out, reduce brightness or add a little contrast to maintain depth. Compare with the original and tweak intensity or position as needed. Small, careful changes beat big, one-shot edits.
Increase brightness and check contrast
Brighten just enough to reveal detail in the darkest parts without washing out the glow of the night. A gentle brightness push uncovers textures in clothing, brickwork, and sidewalks. Check contrast to add depth and separate elements without jagged edges. If bright areas blow, back off brightness or selectively protect highlights. If color shifts after brightening, adjust white balance slightly. The aim is a natural look that still pops on screens.
A simple three-step routine you can follow
1) Identify the darkest zones and apply targeted brightness with control points.
2) Boost midtones to recover texture on faces, walls, and surfaces, then tweak contrast.
3) Fine-tune overall brightness and color balance to keep the night vibe intact.
Practice this routine a few times; your night photos will improve consistently and faster with practice.
Remove shadows in night photos
Night photos often hide details in shadows, making images look flat or uneasy. Learn to spot shadows and lift them without blowing out the rest. By adjusting selectively, you keep the night mood while revealing faces, textures, and colors. If the sky or bright streetlights dominate, you’ll overcorrect and create halos. The goal is to bring out hidden information in darker areas while preserving atmosphere. Subtlety is your friend—the right lift should feel seamless, like turning on a dim lamp in a cozy room.
Remove shadows Snapseed selective methods
Using Snapseed’s selective tools lets you target only shadow zones. Start with Selective, tap dark areas to brighten, then adjust contrast to preserve texture. Keep saturation near original to avoid color shifts. Fine-tune with brush or exposure in small increments. If shadow areas hold texture, protect them by increasing clarity slightly. Remember, you’re guiding the eye to what matters in the shadows without breaking the night mood.
Target only shadow zones, not highlights
Brighten shadows without touching highlights. Use a mask or brush to apply changes precisely where depth is lost. If highlights glow unnaturally, back off the adjustment and let shadows carry the visual weight. Test with before/after; if the night sky looks too bright, scale back the shadow lift. Edits should feel effortless, like a gentle glow at the edges rather than a spotlight in the middle.
Target only shadow zones, not highlights
You can still use selective tools without touching highlights. Choose the right tool—Brightness, Exposure, or Shadows—and apply only to areas that need it. Brightening too much can erase the night feel. Practice with one area at a time, start small, and expand if the result looks natural. If halos appear, reduce brush size and rework edges. Keep the scene’s contrast believable while revealing hidden details.
Night photo shadow checklist for your edits
- Identify shadow-dan zones you want to reveal and map them out.
- Use selective tools to target only those areas, not highlights.
- Lift shadows in small increments; avoid overdoing it.
- Preserve texture with clarity and slight contrast where needed.
- Keep color saturation close to original to avoid color shifts.
- Compare before and after to ensure a natural look.
- Check on different screens to confirm consistency.
Brighten shadows without adding noise
Brighten shadows without introducing noise by targeting the dark areas first. Start with a light touch: lift exposure or shadows just enough to reveal details, then compare before and after. If you push too hard, banding or grain appears. A subtle nudge keeps mood, color, and texture intact. Think of turning on a lamp in a dim room—localized adjustments preserve the night mood while making important details pop.
If you’re unsure, apply a gentle baseline tweak and view both with and without the change. Your night photo should feel like the scene, not a glossy postcard. Small, deliberate edits beat big, loud changes every time.
Brighten shadows Snapseed gently
When you open Snapseed, use Shadows to lift dark pockets without harming the rest. Set the amount small, then zoom in on areas that look crushed or muddy. If you see color shift or new noise, back off and use targeted approaches like Brush or Selective for stubborn spots. Use Highlight sparingly to keep bright lights from blooming. Compare with the original and save a copy to compare edits.
Pair with denoise or Structure sparingly
Denoise cleans grain that appears when lifting shadows. Use it after the initial brighten, but keep strength low. Structure adds clarity but a light touch is key to avoid an artificial look. If noise returns, dial back Structure and recheck with denoise. Edit for atmosphere, not perfection—the vibe matters as much as the pixels.
Noise control tips to protect your night shots
- Start with small boosts to shadows, then apply denoise only where needed.
- Check zoomed-in detail areas to see noise changes across skin, brick, and sky.
- Compare to the original to avoid chasing false clarity.
- Keep color noise in mind; lifting shadows can introduce shifts.
- Save a version before major changes so you can revert.
Use the Selective tool for portraits
The Selective tool helps portraits pop without looking fake. Target specific spots—skin, eyes, or shadows—and adjust them without changing the whole photo. Open portrait, tap Selective, pick a bright dot, resize the circle, and tweak brightness, contrast, saturation, or structure. Lift eyes or lips without washing out skin, keeping a natural look.
Work in small steps. Micro-adjust, then check the overall portrait. If you go too far, undo and retry with a gentler touch. The goal is balance: highlights soft, shadows genuine, and skin tone believable. With practice, the Selective tool becomes a quick part of your editing flow for portraits at night.
Snapseed selective tool for portraits best practices
Consistency is key. Start with one area—usually skin or eyes—and keep adjustments subtle. Small brightness or clarity around the eyes can bring life to a dark night shot. Don’t jump around; multiple tiny tweaks create a smoother finish and avoid halos. Use multiple tiny selections, but keep circles small. Brighten too large an area and you’ll lose texture. Target darkest spots first and work outward. Adjust Structure and Sharpness sparingly to keep skin texture natural. Reset often and compare with the original. For batches, set a consistent baseline across photos.
Lighten skin while keeping natural tones
Lighten skin with a gentle glow, not a flat overlay. Apply small brightness boosts to the areas you want, keeping the rest steady. Eyes and lips stay vivid while cheeks gain light without washing out texture. Avoid heavy contrast here to keep tones intact. If shadows linger, lift midtones and highlights where skin sits to preserve freckles and pores. Compare multiple shots to keep a consistent brightness and warmth. After editing, scan for color shifts and rebalance with temperature and tint if needed.
Portrait safety steps to avoid over-editing
- Start with the smallest adjustments and build up slowly.
- Check edits on a neutral screen and in daylight if possible.
- Keep skin texture; avoid over-smoothing.
- Save a copy before heavy edits.
- Use before/after view to judge edits.
Combine Selective with other Snapseed tools
Selective edits work best when paired with other Snapseed tools. Start by targeting problem tones, then use global tools to balance the whole image. This keeps edits intentional and natural, avoiding clangy looks. When combined thoughtfully, your night photos gain depth and keep the glow of lights and shadows intact.
Adjust highlights and shadows Snapseed using Tune Image
Tune Image helps breathe life into dark areas and blown-out spots. After selective tweaks, use Highlights to recover bright areas without stealing color. Push Shadows to reveal texture in darker regions, then add a touch of Contrast for depth. If color shifts, tweak Warmth to keep skin tones and lights consistent. Save steps as a habit to maintain balance across edits.
Use Brush for fine local corrections after Selective
Brush lets you touch up tiny areas that Selective might miss. Use it to nudge a single dark corner or a bright window. Keep brush size small and use A or B for lightening or darkening. Brush helps blend edges where Selective left hard lines, smoothing transitions without overdoing the edit. Zoom in to check edges and avoid halos. Use Brush for final polish on artifacts or patches.
Best tool order for cleaner edits you’ll use
1) Start with Selective to target problem tones in small areas.
2) Use Tune Image for global brightness, contrast, and color balance.
3) Bring in Brush for local refinements that other tools can’t handle.
If a highlight is harsh or a patch is underexposed after the first pass, return to Tune Image, then go back to Selective or Brush. The rhythm is: local fixes first, then global balance, then final local polish. Keep a mental checklist: identify darkest areas, balance globally, refine edges, recheck highlights and shadows.
How to Use the Selective Tool in Snapseed to Fix Dark Areas and Shadows
- Identify the darkest zones you want to lift and place control points only there.
- Use brightness to reveal hidden detail, then adjust contrast to restore texture.
- Tweak saturation and structure to keep colors natural and edges crisp.
- Add more control points for multiple dark areas and refine gradually.
- Compare before/after and keep edits subtle to preserve the night mood.
How to Use the Selective Tool in Snapseed to Fix Dark Areas and Shadows ensures you can sculpt light where it matters most—without flattening the scene. This is the core approach behind clean, natural-looking night edits.
How to Use the Selective Tool in Snapseed to Fix Dark Areas and Shadows (recap)
- Plan your edits around preserving texture and mood.
- Apply localized brightness, then fine-tune with contrast, saturation, and structure.
- Use Brush and Tone adjustments to polish small areas after Selective edits.
If you’re looking for the quickest path to better night photos, remember: start with local tweaks using the Selective tool, then balance with Tune Image and fine-tune with Brush. How to Use the Selective Tool in Snapseed to Fix Dark Areas and Shadows is all about targeted corrections that keep the scene believable and immersive.
How the Selective tool helps portraits in night scenes
You’ll want your portraits to pop without looking fake. The Selective tool helps by targeting skin, eyes, or shadows and adjusting them without altering the whole photo. Start with one area, keep adjustments subtle, and build up with multiple small selections to avoid halos. Reset often and compare to the original to maintain a cohesive look across your night portrait set.
Save and revert edits while keeping quality
Always save incremental versions so you can revert without losing your best work. Keep one clean base edit and layer selective adjustments as needed. If a change goes wrong, roll back just that layer or reset it, keeping the parts you love intact. This keeps night photos flexible, so you can experiment confidently.
Build a fast workflow for night photos
Night photos can be magical but tricky to edit quickly. Aim for a repeatable path: capture well, adjust only what matters, and export at shareable sizes. You want consistent results that feel natural, not overworked. Start with local adjustments using Selective, then use Tune Image for global balance, and finish with Brush for local polish. This loop keeps edits cohesive and efficient, letting you post more often with confidence.

Smartphone Night Photography Enthusiast & Founder of IncrivelX
Vinicius Sanches is a passionate smartphone photographer who has spent years proving that you don’t need an expensive camera to capture breathtaking images after dark. Born with a natural curiosity for technology and a deep love for visual storytelling, Vinicius discovered his passion for night photography almost by accident — one evening, standing on a city street, phone in hand, completely mesmerized by the way artificial lights danced across wet pavement.
That moment changed everything.
What started as a personal obsession quickly became a mission. Vinicius realized that millions of people were carrying powerful cameras in their pockets every single day, yet had no idea how to unlock their true potential after the sun went down. Blurry shots, grainy images, and washed-out colors were robbing everyday people of memories and moments that deserved to be captured beautifully.
So he decided to do something about it.
With years of hands-on experience shooting city streets, starry skies, neon-lit alleyways, and creative night portraits — all with nothing but a smartphone — Vinicius built IncrivelX as the resource he wished had existed when he was just starting out. A place with no confusing jargon, no assumptions, and no gatekeeping. Just honest, practical, beginner-friendly guidance that actually gets results.
Vinicius has tested dozens of smartphones from every major brand, explored dark sky locations across multiple states, and spent countless nights experimenting with settings, compositions, and editing techniques so that his readers don’t have to start from scratch. Every article on IncrivelX comes from real experience, real mistakes, and real lessons learned in the field.
When he’s not out shooting at midnight or writing in-depth guides for the IncrivelX community, Vinicius can be found exploring new cities with his phone always within reach, looking for the perfect shot hiding in the shadows.
His philosophy is simple: the best camera is the one you already have — you just need to learn how to use it in the dark.