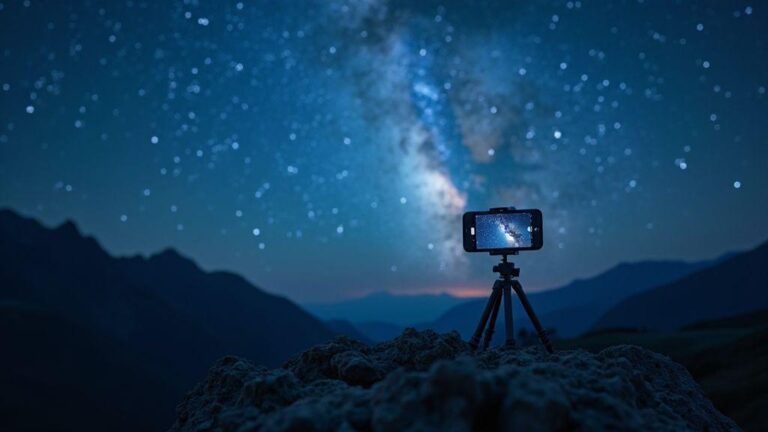
How to Use Puddles and Reflections for Creative Night Street Shots
Frame puddle reflections with simple composition
When you frame puddle reflections, keep the composition clean and honest. Look for a single line or a strong silhouette mirrored in the water. Place a foreground object off-center to create a quiet diagonal, then let the puddle do the rest. Position the horizon to guide the eye toward the reflection rather than the lights on land. The result should be a calm, readable image where every element serves a purpose, with the puddle acting as a natural window into the street’s nighttime mood.
You’ll notice simple shapes—cylinders, signs, or trees—translate well into reflections. If the puddle is large, include just a slice of the street so the reflection dominates. If the puddle is small, crop tightly around the mirrored shapes and let negative space frame them. In both cases, avoid busy backgrounds that steal attention. Quick tip: scan the scene, pick one feature, and let the puddle be a stage for that feature’s mirror image to keep the shot readable and striking.
As you practice, you’ll see how a minimal foreground can dramatically improve depth. A lone umbrella, a bench, or a lamp post reflected in still water can become the hero. Be mindful of wind or ripples; a perfectly still puddle yields the sharpest reflection. If you must shoot with wind, find a sheltered spot to keep the water calm. Your eye should balance what’s above and below, so the image feels intentional rather than accidental.
Use symmetry to guide your eye
Symmetry is your best friend for night street reflections. Stand so the puddle mirrors a strong vertical line or a row of lights, and let symmetry draw the viewer’s gaze straight to the center. Aligning a lamppost with its reflection creates a tidy, graphic composition. This approach doesn’t require busyness; it rewards patience and precise framing. The most impact often comes when the reflection sits on a clean axis with a clear horizon just above or below.
Beyond perfect verticals, you can use reflective symmetry along the water’s edge. Place a bold shape on one side and mirror it on the other so the eye travels naturally. Think of it as a visual handshake between reality and its mirror. If your street has repeating arches, windows, or signs, let them appear twice in the frame. The audience will feel pulled into the scene, not overwhelmed by random elements.
When testing, shoot both with and without a visible horizon. Sometimes the reflection and the real object create flawless vertical symmetry, especially in a still night. Other times, a partial reflection with an off-kilter horizon adds tension. Symmetry can be subtle too; a single light and its reflection may guide the eye along a clean, balanced line.
Place horizons to balance sky and reflection
Horizon placement matters. If the sky is dramatic, raise the horizon so the reflection dominates the frame. If the puddle shows a quiet street with the sky above, drop the horizon to keep more sky in view. The goal is balance: neither sky nor reflection should overwhelm the other, creating the calm, cinematic mood night scenes often demand.
Align the horizon with the water’s edge for a neat split where sky and reflection mirror each other. If the water is choppy, you may blur the water slightly in post or shoot with a very slow shutter to smooth the surface. A crisp horizon line often anchors the image and gives a sense of place.
Move your tripod a few inches to see how the composition shifts. A small shift can place the brightest reflections along the rule of thirds or bring a leading line from a curb to a streetlight. Test and observe how horizon position changes the feel of the shot to learn where your eye travels most comfortably and how to keep the scene balanced.
Try close low angles for stronger reflections
Shooting from a low angle makes puddle reflections feel immersive. Get closer to the water surface and point your camera almost parallel to it. This exaggerates the reflection and pushes the real scene into the background. A low angle also makes bright lights bloom softly in the water, which can look magical at night.
Small height changes create big mood shifts. A knee-height angle often sharpens edges and highlights, while a slightly lower angle turns the puddle into a glassy stage. If you’re working with a long street, crouching near the ground can reveal a long, continuous reflection along the frame. Keep your footing steady and watch for wind that might disturb the water’s surface.
Puddle reflections don’t need to be perfect to be effective. A tiny ripple can add character, suggesting movement or rain. If you want ultra-clean reflections, shoot after it stops raining or during a wind lull. Either way, a close, low angle invites viewers to look closer and feel part of the night scene.
Set camera and exposure for low light reflections
You’re chasing mirror-like streets after dark, so your setup should match the mood. Start with a sturdy tripod to keep your camera rock solid during long exposures. Lock focus on distant lights or bright reflections, then switch to manual focus to avoid hunting in the dark. Set white balance to neutral or a slight tungsten balance near street lamps to keep colors true when neon glows. For exposure, treat reflections as the star: hold the glow without washing it out. Use the histogram to gauge the scene and shoot a touch darker than you think to protect bright puddles or glass.
Think in terms of a baseline exposure and adjust from there. If reflections are strong, start with a lower ISO and a longer shutter to accumulate detail. Balance motion (cars, steam) by adjusting shutter to freeze or blur as the mood demands. Use a remote or timer to avoid camera shake, and protect highlights by checking the brightest spots first. On a busy night street, shoot multiple frames to compare how reflections hold up under different settings.
Lower ISO and use slow shutter for clean shots
Lower ISO (100–200) reduces grain; let the shutter do the heavy lifting. A slow shutter preserves neon glow and streetlight bloom as soft lines rather than noisy specks. Typical ranges are around 5–15 seconds, adjusted for scene activity. If vehicles move, you may need longer exposures to keep light trails while keeping puddles crisp. Use live view to preview exposure and anticipate blown highlights before pressing the shutter.
Longer exposures also shape mood: crowds blur into a gentle fog, and reflections become color ribbons. If camera shake is a concern, use a remote or timer. Manual mode with exposure compensation helps you nudge balance without auto adjustments. The aim is a clean, balanced look where reflections carry the scene without crowding it.
Pick a narrow aperture for depth and sharpness
A narrow aperture (f/8 to f/11) helps keep more of the scene in focus—from the puddle to distant storefronts. This depth matters when reflections span multiple planes—the curb, the street, and glass storefronts all compete for attention. A smaller aperture also sharpens point lights into star-like glints, giving edges to reflections. If edge performance is soft, let the center do the heavy lifting and keep the focal point slightly behind the most important reflection.
Stopping down reduces light, so you’ll rely on longer shutters or brighter ambient light. If motion is present, you may open up slightly to preserve exposure, accepting a touch less depth. Do a quick test at your chosen aperture, then adjust ISO or shutter to maintain edge-to-edge sharpness. The goal is a solid, detailed scene from foreground puddle to distant lights.
Use exposure bracketing to protect highlights
Exposure bracketing is your safety net for night reflections. Shoot three frames: baseline, a touch darker, and a touch brighter. This gives you data to protect highlights in puddles and glass while preserving mood. Start with ±1 stop and adjust outward if needed. Bracketing simplifies post-processing and prevents clipping while preserving color and texture. When you blend frames, you’ll often find a sweet spot where highlights stay crisp without flattening the rest.
Bracketing also helps you adapt to changing light as you move along a street. Reflections on wet pavement shift with headlights or neon signs, so multiple exposures give you options. If you’re new to blending, keep differences modest and merge with a simple editing toolkit. The goal is a balanced look where reflections carry the scene without overpowering it.
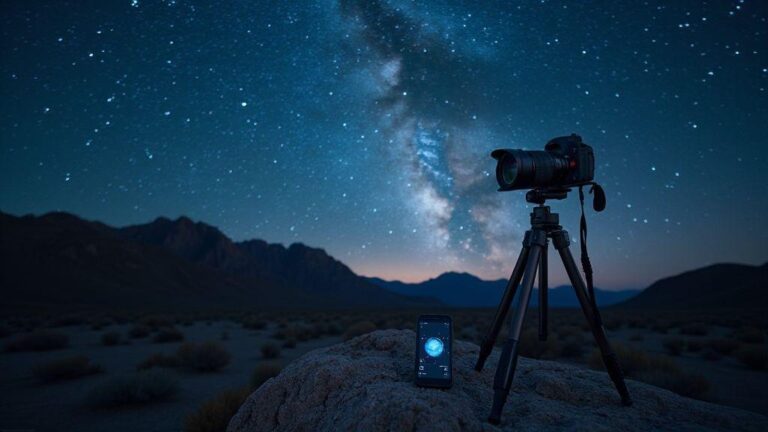
Use a tripod and steady techniques for sharp shots
A solid tripod is your best ally for night photography. It keeps long exposures from ghosting or blur. Frame low for dramatic perspective, and ensure the ground is solid and level. Use the weight of the camera to stabilize the setup, and keep your breathing steady as you compose.
A steady setup lets you push ISO a touch higher without sacrificing quality, capturing more detail in shadows. Use a weight bag or backpack on the legs if the ground is slick. If you’re near traffic, shield vibrations by keeping the setup still and avoid touching the tripod while the shutter is open. The goal is sharp lines and clean edges, making the scene feel exactly as captured in the moment.
Check that the legs are fully extended and locked, the center column snug, and the camera steady. A stable base helps you work with longer shutter speeds to reveal city lights, stars, or rain reflections without blur.
Lock your camera and use a remote or timer
Locking your camera eliminates one more shake source. Use a remote or the timer to press the shutter. A 2-second or 10-second delay lets you settle into the frame without camera shake. Remote operation allows you to click without any hand movement.
Enable exposure bracketing or choose a well-balanced exposure. Night scenes balance bright lights and deep shadows, so a moment of patience pays off. You can run a quick sequence: standard exposure, one stop darker, one stop brighter for blending later. This helps avoid motion blur from your hands, especially with crowds or moving traffic.
Stabilize on uneven pavement and curb edges
Urban nights are full of uneven surfaces. Find a smooth patch or place a small shim under a leg. If you must set on a curb edge, anchor the tripod with a wide stance and keep the camera over the center for balance. A bit of creativity here saves a lot of blur later.
On uneven ground, shorter exposure times can help, but you still want sharp lines. Use your legs and core to steady yourself while adjusting. A flexible weight bag can add stability on windy nights or busy sidewalks. Tiny ground shifts can shake the frame, so solid contact matters.
If you’re shooting reflections on wet pavement, stabilize the entire setup first. Water makes the ground slippery, so keep the tripod locked while waiting for reflections. A stable base keeps reflections crisp as the city lights dance.
Use mirror lockup or electronic shutter for steadiness
Use mirror lockup to minimize camera movements that happen when the mirror flips up in DSLRs. If you have mirror lockup, enable it and shoot with a remote or timer. For mirrorless bodies, electronic shutter helps avoid vibrations. Turn on electronic first-curtain shutter if available to minimize shake further.
Cleaner lines appear in architectural shots and calmer skies in city nights. Fewer moving parts during exposure preserve edge glow and distant lamps. If you don’t have mirror lockup, use a short delay after pressing the shutter to let vibrations settle.
How to Use Puddles and Reflections for Creative Night Street Shots
Using puddles and reflections can turn a simple street into a painter’s palette. Keep your camera steady and compose so reflections mirror your subject or story. Look for a clean puddle that reflects a neon sign, a street lamp, or a storefront. Frame the shot so the reflected image aligns with what you see in real life, doubling the scene’s depth.
Shoot with a longer exposure to capture both the water glow and surrounding sharp details. If the water surface moves, wait for a moment when it’s still to maximize clarity. Keep your camera low and level so reflections stay true to shape. This technique adds mood, depth, and a touch of magic to your night street shots.
Capture color and bokeh in night street reflections
Mood lives in the tiny details caught in reflection. When chasing color, pair bright signs with the dark, slick street surface. Use a mid to wide lens with a wide aperture to blur the water just enough for color to wash through. Try a shutter speed that preserves traffic motion but keeps lights crisp, then adjust ISO to avoid grain. Let the street mirror multiply color without turning the scene into noise. Let the reflections feel like a secret you’re discovering, not a billboard you’re reading.
Frame the puddle and the streetlight in the same shot. Aim for highlights without blown whites. If a sign casts a long neon tail, you’ve hit gold. Tilt your camera slightly to stretch the reflection or keep it level for a clean rectangle of color. Balance is key: keep enough sharpness in the reflected lights so color reads saturated, while allowing the water to blur just enough for dreamlike shapes. You’re painting with light, and reflections are your brightest brush.
Let your eyes guide contrast: a bright storefront against a dark curb makes the reflection pop. If a streetlamp dominates, reduce ISO or switch to a smaller aperture to tame it. Neon should glow, not burn. Let the reflected color ripple just enough to imply movement, while the puddle remains glassy and calm. When you nail this balance, the scene feels electric yet tranquil, as if the street itself is sighing with color.
Use neon and streetlights to add vivid tones
Neon signs are your color factory. Set white balance cooler to keep blues and magentas from washing out, then let those tones ride through the water. Position yourself so the sign’s reflection lines up with the subject or use it as a color splash across the puddle. If the neon flickers, you’ll get subtle variation that feels alive.
If a sign is too busy, back up or crop in post to keep color and remove clutter. A crisp puddle edge keeps the scene focused while neon breathes in the background. You’ll know you’ve got it when the reflected light reads as a separate color layer you can almost touch. Neon becomes your foreground glow, framing the subject rather than drowning it.
Create soft bokeh spots in puddles with wide apertures
A wide aperture yields creamy bokeh in night reflections. Open up to f/2.8 or wider if your lens allows, and stay back so the water becomes a velvet mirror with bright spots turning to gentle orbs. Soft spots add atmosphere without sacrificing detail. Move slowly and let the water become a canvas where light softens into circles.
Close to the puddle, bokeh is stronger; step back for subtler dots. Avoid over-saturation; preserve crisp reflections of major lights with a dreamy speckle around them. Practice with different angles to see how circles change with distance.
Position bright lights behind you for rich color
Placing bright lights behind you gives a warm edge and creates a color halo that bounces into the puddle, exaggerating reflections. This setup makes the foreground subject stand out while the street stays lush in the water. If you want a punchy foreground, keep your subject a little closer and let background lights spill over the water.
Aim for a balance where back-lit subjects aren’t washed out. A touch of fill from a side street helps keep facial detail while the puddle preserves neon glow. Use this technique to turn a simple street scene into a color-rich reflection portrait of the night.
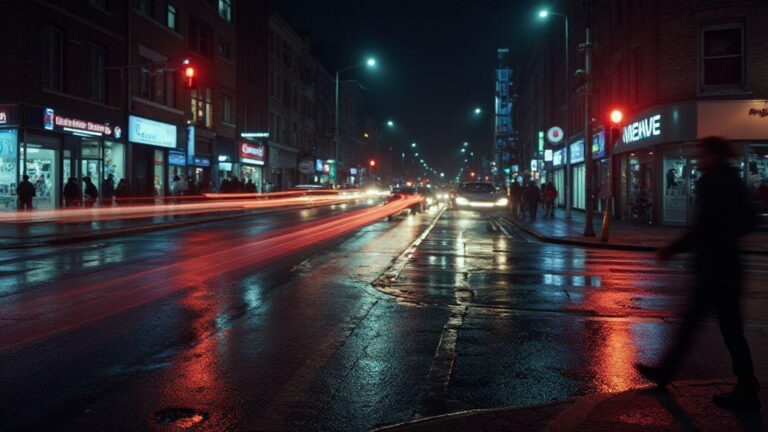
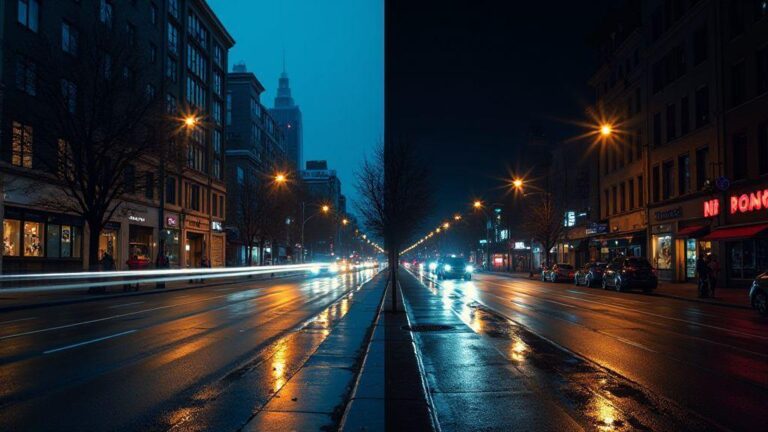
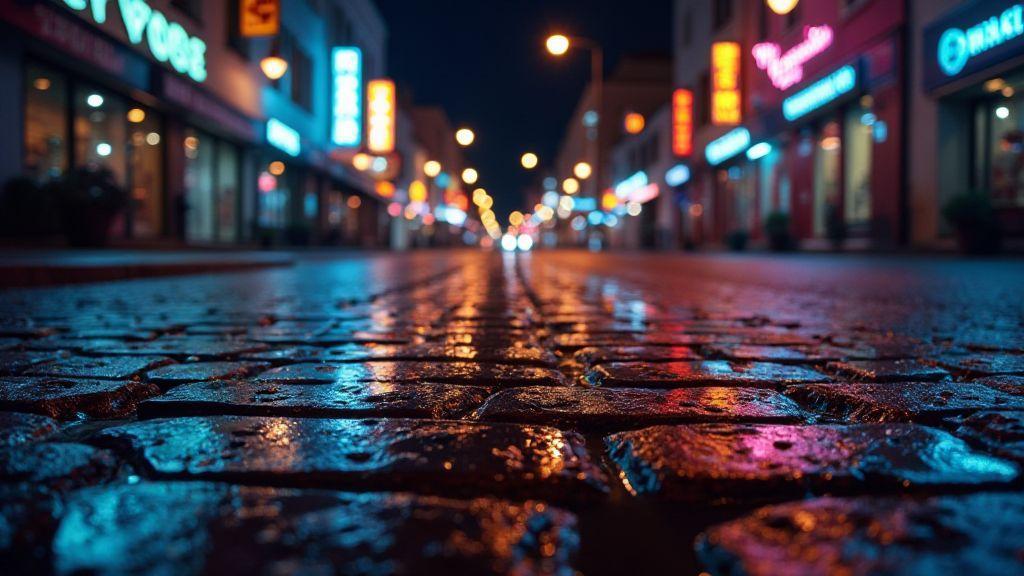
Work rainy scenes and puddle reflection photography
A wet street is a night photography goldmine. Plan around the rain: look for streets with a clean water layer after showers and moments when the sky adds color from neon signs. Crouch low to capture reflections like a natural mirror, and frame the puddles as stages for color and motion you don’t see on dry pavement.
Keep gear simple but ready: a sturdy tripod, a wide-angle lens to frame more reflections, or zoom in for abstract details. White balance matters: cooler for neon, warmer to soften rain’s bite. Use a higher ISO only for mood and keep it as low as possible for clean lines. If cars arrive, capture taillight trails reflecting in the puddles for dramatic lines.
When composing, consider horizon and puddle edges. Place light sources so their reflections fill the frame while avoiding distractions. Shoot with the puddle in the foreground and the city blur behind, or vice versa. Mix reflections with real objects—like a crossing person whose umbrella becomes a bright stroke in the mirror—for added depth.
Find fresh rain puddles for clear mirror images
Seek new puddles after a shower, avoiding debris or wind ripples. A clean surface yields a crisp mirror of light. The best puddles are in quiet spots where traffic and wind don’t disturb the water. Bend to eye level with the puddle to immerse yourself in the reflection.
Scan for puddles that line up with strong light sources—neon signs, street lamps, storefronts—so the water reflects back the color. If your location has puddles near sidewalks or crosswalks, you can catch moving people as blurred silhouettes reflected in water. Check for a clean bottom; a muddy mirror ruins clarity.
Watch for wind and ripples that change patterns
Even a light breeze can turn a mirror into a ripple map. If you detect wind, choose a faster shutter to freeze patterns or a longer exposure to turn ripples into painterly streaks. Decide your mood: sharp reflections for graphic images, or blurred water for dreamy light portraits. Bracket shots to cover wind variations.
Patience pays: ripples may align with a passing car or drifting leaf, creating repeating patterns. Move to a calm pocket of water where ripples won’t ruin the mirror. Sometimes the simplest puddle becomes a star with a tiny breeze dancing across it and a perfect line of light.
Stay safe and protect gear from wet conditions
Rain means gear protection. Bring waterproof covers and a dry bag. Wipe lenses often to prevent water droplets from turning reflections into blurry circles. Dry paths reduce slips with heavy gear, so choose sturdy boots and plan routes.
Keep the camera away from streams of water. When shooting near puddles, avoid spots where water can splash onto the lens. Use a microfiber cloth to dab moisture and don’t leave gear in the open where rain can collect inside.
Edit reflection shots for impact and clarity
Edit reflections so the audience feels the scene, not just sees it. Check the water surface and sky exposure. If the water looks flat, lift shadows a touch to recover detail, but avoid blowing highlights on the water. Night edits often benefit from a careful contrast push to separate the real world from its mirror. Keep edits simple at first, then fine-tune with a light touch for a natural feel. The goal is clarity without overworking the image.
Balance color as reflections can skew blue or green under urban lighting. Cold or warm tones can emphasize mood, but stay true to what you saw. If reflections look muddy, boost vibrance sparingly and let tones breathe. A touch of sharpening on the reflection helps it pop without halos around bright lights. The final image should feel like stepping back into the moment, not a stitched composite.
Compare the reflection to the real scene. If the reflection dominates, you lose the street story. Aim for harmony where both real world and mirror tell the tale. Slightly brighten the darkest areas near the reflection so pedestrians or cars don’t vanish, and reduce clarity a touch if halos appear around highlights. The result should be a coherent, readable reflection that guides the eye with intention.
Crop to strengthen reflection composition techniques
Cropping matters as much as exposure. Target the key reflections—neon, rain-slick streets, or glowing storefronts. Try vertical crops to emphasize the waterline or diagonals to add tension. Experiment with 4:5 or 3:2 frames to keep the reflection in the foreground while preserving context. The goal is a clean frame that showcases the reflection.
Watch for symmetry and leading lines. Let the reflection ride along strong lines—lampposts, power lines, or the edge of a puddle guiding the eye. Trim awkward gaps or unnecessary negative space. Keep the waterline near one third or two thirds of the frame to anchor the reflection and strengthen composition. A precise crop can rescue a shot that felt almost there.
Try multiple crops and compare. Tight crops can make the reflection intimate; wider crops provide context and atmosphere. Don’t hesitate to re-crop as you test versions. The best crop communicates the story fastest, with the reflection leading.
Remove distractions and boost contrast in post
Distractions steal mood. Remove stray light flares and bright spots with targeted masking, preserving surrounding glow. Boost contrast where the reflection meets pavement enough to make shapes pop, but avoid crushing the darks. A subtle S-curve or local contrast adjustment can sharpen the reflection while keeping the rest soft. Aim for a cohesive mood where the reflection and street share the same tone, not a patchwork.
Apply selective sharpening and noise reduction
Sharpen the reflective surface lightly, focusing on edges where water shows texture and reflections gleam. Be gentle—over-sharpening water looks artificial. If noise appears in dark areas around puddles, apply subtle noise reduction there while preserving bright highlights. The goal is a crisp reflection with a gentle city glow.

Smartphone Night Photography Enthusiast & Founder of IncrivelX
Vinicius Sanches is a passionate smartphone photographer who has spent years proving that you don’t need an expensive camera to capture breathtaking images after dark. Born with a natural curiosity for technology and a deep love for visual storytelling, Vinicius discovered his passion for night photography almost by accident — one evening, standing on a city street, phone in hand, completely mesmerized by the way artificial lights danced across wet pavement.
That moment changed everything.
What started as a personal obsession quickly became a mission. Vinicius realized that millions of people were carrying powerful cameras in their pockets every single day, yet had no idea how to unlock their true potential after the sun went down. Blurry shots, grainy images, and washed-out colors were robbing everyday people of memories and moments that deserved to be captured beautifully.
So he decided to do something about it.
With years of hands-on experience shooting city streets, starry skies, neon-lit alleyways, and creative night portraits — all with nothing but a smartphone — Vinicius built IncrivelX as the resource he wished had existed when he was just starting out. A place with no confusing jargon, no assumptions, and no gatekeeping. Just honest, practical, beginner-friendly guidance that actually gets results.
Vinicius has tested dozens of smartphones from every major brand, explored dark sky locations across multiple states, and spent countless nights experimenting with settings, compositions, and editing techniques so that his readers don’t have to start from scratch. Every article on IncrivelX comes from real experience, real mistakes, and real lessons learned in the field.
When he’s not out shooting at midnight or writing in-depth guides for the IncrivelX community, Vinicius can be found exploring new cities with his phone always within reach, looking for the perfect shot hiding in the shadows.
His philosophy is simple: the best camera is the one you already have — you just need to learn how to use it in the dark.