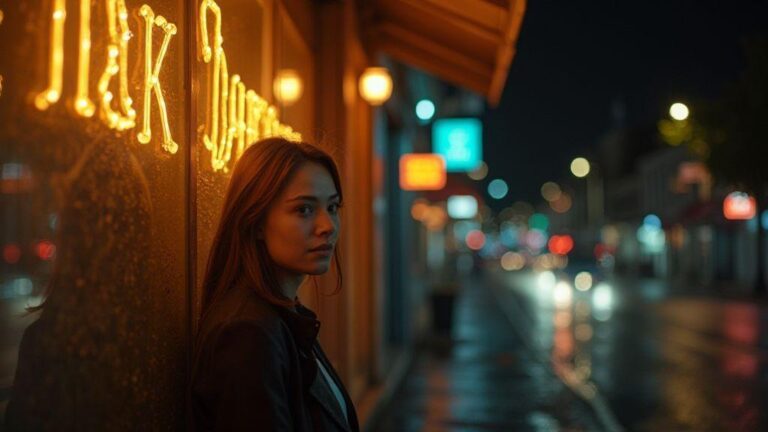
How to Use Fairy Lights as Background for Night Portrait Photography
How to Use Fairy Lights as Background for Night Portrait Photography
This guide shows how to plan, light, and shoot with fairy lights as a background to create dreamy night portraits. From backdrop planning and light choices to camera settings and composition, learn practical steps to keep the subject front and glow in the background.
Plan your DIY fairy light backdrop
You want a backdrop that adds glow without stealing the show. Start by picturing your portrait space and how the lights will sit behind your subject. Think about color temperature and brightness so the background enhances the face, not competes with it. You’ll build a soft halo, not a glare, so choose lights that give even coverage and gentle bokeh when you shoot. Plan where you’ll place the power source, too, so cords stay out of frame and your model feels relaxed.
Decide the vibe you want: warm amber for romance, or cool tones for drama. Use a longer strand to add depth behind your subject, but keep the brightest spots off to the side so the face remains the focus. Sketch a quick layout to visualize where the lights land and how they wrap around your model’s shoulders. A solid plan helps avoid harsh shadows in low light. Finally, consider safety and setup time: run a quick test to catch tangled cords or dimming lights, keep a spare strand, and clamp or tape indoors to prevent movement. Your plan should let you adjust quickly so you can shift mood between shots without redoing the wall.
Choose lights for DIY fairy light backdrop for portrait shoots
Use tiny LEDs that stay cool to the touch and won’t wash out skin. Look for lights with flexible copper wire so you can shape them around a frame or fabric panel. A warmer color temperature (2700K–3200K) flatters skin tones, with a few cool accents (around 4000K) to add depth. Test how the lights render in your camera’s dynamic range; you want a glow without blowing out highlights.
Consider bulb spacing: tightly packed bulbs provide dense glow, while spaced bulbs yield more visible background bokeh. If you’re new, start with a 6–10 foot strand and add another for layering. A dimmer or DIY diffusion can soften the glow. The goal is a soft, twinkly backdrop that complements the face, not a bright display behind you.
Think about placement options: drape behind a sheer curtain for a shimmering veil, wrap around a frame for a circular halo, or string in a loose grid on a wall for even coverage. Outdoors at night, battery-powered strands offer layout flexibility. Choose lights with good battery life or reliable plug options so you don’t fizzle mid-shoot.
Hang lights for depth and safety using string lights as background for portraits
Create depth by layering lights at different distances from the subject: place some close for a gentle edge glow and others farther back so the background recedes into soft bokeh. Secure everything with clamps, hooks, or removable adhesive to protect walls, and consider a lightweight frame to keep the setup steady.
Prioritize safety: inspect cables, avoid overloading outlets, and tuck cords away from feet. Use gaffer tape to secure loose wires and prevent trips. Outdoors, carry a small power bank and weatherproof connectors. A quick safety check keeps both you and the subject comfortable, not on edge.
Aim for an irregular map of light rather than a strict grid. A natural tangle of strings reads more organic and cinematic. Leave edge space so the face isn’t surrounded by a hard ring of light; this helps the face pop while the background still gleams.
Set your camera for fairy lights portraits
You’ll want your camera ready for magic, so start with a sturdy tripod and a calm plan. Set white balance to a neutral value so the lights don’t skew colors, and switch to manual focus to lock onto the subject and the twinkling backdrop. Think of the lights as a glow around your subject, not the whole picture; you want the subject to pop.
Choose a wide aperture to let in more light, but balance it so the subject stays sharp. If your lens is f/1.8 to f/2.8, you’ll get dreamy background bokeh behind the lights while keeping the subject clear. Turn on live view to zoom in and confirm eye focus, not just the sparkles. With the camera set, you’re ready to start crafting the mood.
Pack light and consider distance: too close, the lights blur into a halo; too far, the glow fades. Use a remote or timer to avoid camera shake. The goal is a clean portrait with a warm fairy-light backdrop that feels intimate.
Use camera settings for fairy lights portraits with wide aperture
Set a wide aperture (f/1.8–f/2) to create creamy backgrounds where lights become soft orbs. This helps the subject stand out while preserving the night vibe. Keep shutter speed around 1/125 s or faster to keep the subject sharp while the lights shimmer.
Use a modest ISO (ISO 400–800) to minimize grain while maintaining brightness. If noise appears, lower ISO and adjust exposure instead. Turn off auto ISO for consistent results. If you want more texture in the lights, nudge exposure a touch to boost glow without washing skin.
If you have image stabilization, you can push shutter to around 1/60 s when hand-holding, but a tripod is best in dim settings. The aim is a balanced look: the subject warmly lit with a soft halo from the fairy lights.
Manage ISO and shutter for low light portrait photography with fairy lights
Keep ISO as low as possible without compromising skin tones. Start at ISO 400 and step up slowly if needed. Higher ISO adds grain that can distract from the subject; bracket shots if unsure.
Shutter speed should protect motion: 1/125 to 1/200 s is a solid range for moving or spontaneous shots. If you’re on a tripod in a very dim area, 1/60 s can work for a gentler ambient capture. Balance the glow of the lights with the clarity of the face. Bracket exposures to find a sweet spot where skin tones stay natural and lights keep their sparkle.
Test exposure and adjust
Check your histogram and use an LCD preview. If the skin looks washed out, reduce exposure; if lights look blown, dial it back. Take a few test frames, zoom in to confirm focus on the eyes and the lights’ sparkle. If eyes are sharp but lights are bright, fine-tune exposure darker; if lights look dull, push exposure slightly while keeping skin tones natural. The result should be a portrait where fairy lights act as a gentle background and the subject remains front and center.
Create strong bokeh with fairy lights
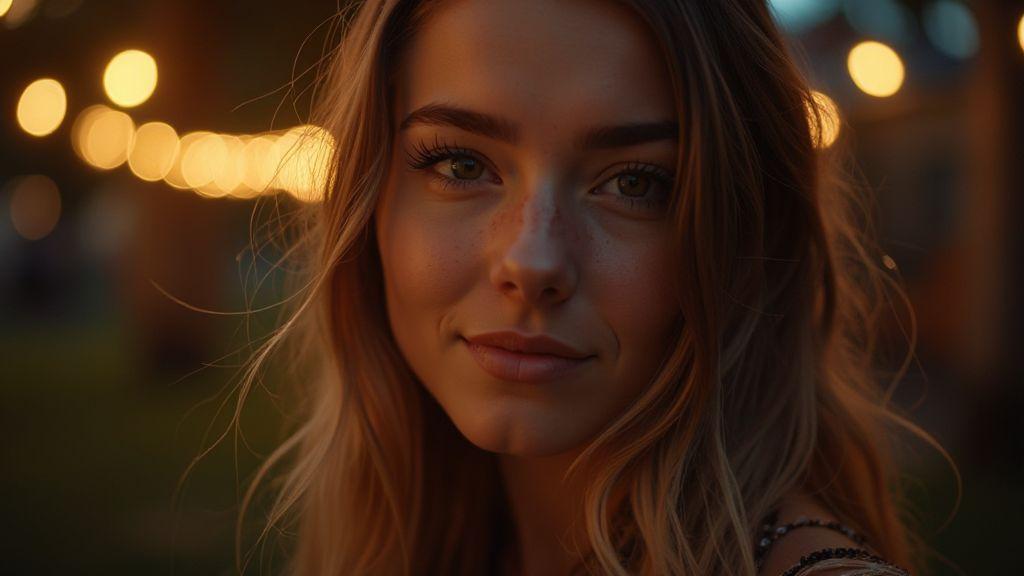
Fairy lights behind your subject create a magical night portrait. Start with warm-colored lights in the background, not within the frame. If the lights are too bright, they flatten the subject; dim or spread them out so the subject remains readable while the background glows. A shallow depth of field helps the lights blur into creamy orbs that tell a story without overpowering the face.
Lens choice matters: a wider lens exaggerates bokeh when you leave distance between you and the lights; a longer lens makes tighter, more defined orbs. Indoors, mount lights along a wall; outdoors, pick a location with light glows through natural gaps. Keep the background dreamy and uncluttered, and use a narrow focus on the subject.
Start with a single string behind or to the side of the subject for depth. If needed, layer two or three strands at different distances. Focus on the subject’s eyes, and let the bokeh do the storytelling. Balance exposure to keep the skin tones natural while the lights glow.
Apply fairy lights bokeh portrait tips for soft round highlights
Aim for soft, round highlights, not harsh blobs. A wide aperture helps keep background blur smooth; too sharp lights mean you’re too close or using a small aperture. Increase distance and open the lens a bit more to get smooth circles. Use manual focus to lock onto the subject’s eyes; autofocus can grab stray lights and ruin roundness.
Position lights behind and slightly to the side so bokeh circles fall near the edges rather than center the frame. For more drama, layer lights at different distances but keep foreground clear so circles don’t collide. The glow should complement the face, not dominate it. Use warm lights and avoid flicker. If you have other light sources, adjust shutter or ISO to maintain skin tones while keeping the background dreamy. Practice at dusk or in a dim room to see how lights behave in real conditions.
Place lights far behind subject for bokeh background fairy lights portraits
Placing lights far behind creates more distance blur and richer bokeh. Start with the subject several meters from the lights, then adjust. The farther the lights, the more circular and soft the bokeh; too close, and the shapes become chunky. This setup enhances subject separation and adds a cinematic feel.
Indoors, line lights along a wall or doorframe; outdoors, string them in trees or behind a fence so they glow through softly. Experiment with depths: one bright distant strand and a closer strand for texture. Keep the subject still while you adjust to judge the bokeh. If the background becomes too busy, back up or reduce strands. The goal is a gentle, starry veil rather than distraction.
Check bokeh quality
Look for round, uniform discs without hotspots or odd shapes. If you see lines or shapes, adjust distance or aperture until you have clean circles. The bokeh circle size should feel proportional to the frame—too small and they disappear; too large and they overwhelm. Try shots at different distances and apertures to find the sweet spot for your subject and setting.
Light your subject at night with fairy lights
When you shoot at night, fairy lights around the subject become a natural glow you can bend to your will. Place a string in the frame so it wraps softly around the person or floats behind them. Tiny bulbs create a gentle halo and warm the look. Indoors, drape lights along a wall or behind a chair for depth without stealing focus. Keep lights close enough to glow on the skin without washing it out, using warm white or amber for natural tones.
Dark backgrounds can drain light, so adjust exposure accordingly: start with a low ISO and a wider aperture to avoid grain. If the face looks too dark, nudge the lights closer or bounce them off a nearby surface toward the subject. A soft, dreamy result comes from balancing the glow with the available light. Practice street or indoor setups to see how lights behave in real conditions.
As you practice, balance the glow with other light sources. If there’s a street lamp behind your subject, let fairy lights fill in the face without creating a harsh silhouette. Take test shots and adjust distance, angle, or brightness. If needed, hide a portion of the lights behind a prop to soften the glow naturally. Over time, you’ll craft scenes where fairy lights become a key character guiding the viewer toward the subject.
Balance night portrait lighting with fairy lights and fill light
Keep the subject well-lit without washing out the mood. Start with a subtle fill light to lift shadows without overpowering the fairy lights. A small LED panel or a compact reflector can bounce just enough light for balance. If the lights are very close, you may not need much fill; test with and without to see what looks best. Aim for a natural balance where the face reads clearly and the magical glow stays dominant.
Adjust fill brightness in small steps. Too much fill flattens the portrait; too little leaves it eerie. Place fill slightly higher than the camera to mimic the light angle and create realistic falloff. A compact panel that can be lowered to a whisper often works well. Indoors, use a wall or ceiling bounce to soften the fill and blend with the ambient fairy light. Compare frames with fill on and off to choose the most natural look. The combination of fairy lights and fill should feel intimate and cinematic.
Use reflectors or small LEDs to avoid underexposure
Night shots risk underexposure, so use a reflector or a small LED to lift the face without stealing the glow from the fairy lights. A white or silver reflector angled toward the subject can bounce gentle light up from the scene, keeping details visible. If using LEDs, choose a slim panel and set it to a low level so it fills shadows softly without hotspots. Place the reflector beneath the face to lift under the eyes and along the jawline, preventing flat shadows. If using LEDs, angle them to reduce glare on eyes.
Experiment with angles and distances to balance the eyes’ sparkle and the fairy lights’ glow. A good reflector or LED creates a cohesive look that blends the subject with the magical background.
Avoid harsh shadows
Harsh shadows break the mood. Soften direct light and space your lights thoughtfully. If a shadow edge is sharp, adjust the light slightly to give the subject more breathing room. A gentle feathering of light along the cheeks and jawline can preserve warmth. I often bounce lights off a nearby surface to create a soft glow on the skin rather than a hard line. If you see a strong line on the forehead or nose, tweak the angle or distance. The aim is shadows that feel natural, not cutthroat. Let the lights feel part of the environment.
Pose your subjects with fairy light background
Position your subject so the fairy lights create a soft curtain behind them. Place them a bit away from the lights to prevent flare, but close enough for their face to catch some glow. Frame with the camera low or at eye level to merge lights into a gentle bokeh. Let some lights peek into the frame edges to suggest depth without chaos. This yields a clean subject with a dreamy, starry halo.
Distance and angle matter: for wide portraits, back up and angle the subject slightly so lights fall behind and off to the side. For intimate shots, bring the subject closer and tilt the camera so lights frame the head without overpowering the face. The balance should keep the glow while preserving the subject’s presence. Light should feel like a whisper around the person.
Lock in camera settings for a smooth night portrait: a wide aperture to blur the background and keep the face sharp, a moderate ISO to avoid noise, and a steady shutter to preserve details in the eyes. If the lights are bright, reduce exposure slightly to keep skin tones natural. Review a few test shots and tweak distance and angle until the background glows without stealing the spotlight. This is your stage; you control the glow and the gaze.
Use posing subjects with fairy light background to show bokeh
Position your subject so some lights sit just behind the head or shoulders, creating a soft rim glow that separates them from the background. Keep the face well-lit by your main light or a reflector, so the eyes stay bright and engaging. You’re not trying to fill every light; you’re shaping a few and letting the rest blur into creamy circles. Let the bokeh be the mood, not the message.
Experiment with lighting arrangements: a vertical string or loosely draped lights create longer, smoother bokeh, while a clustered bulb setup yields more sparkle. For a dreamy vibe, go denser; for a lively feel, spread the lights. Guide the eye toward the subject while letting the background whisper magic. Try compositions like side-lit faces with lights behind for a halo, or mid-frame subjects with a halo of bokeh.
Watch the distance: too close, the circles become chunky and the face may wash out. Too far, the bokeh vanishes. A sweet spot is where the lights become soft dots just behind the subject’s head. The goal is skin tones that read true and a magical background.
Guide hands and eye lines for clear faces against lights
Let the hands tell a subtle story without stealing focus. Relaxed hands near the face or at the side work well. For taller subjects, have a shoulder angled toward the camera with a hand on the hip to create shape without blocking the face. Tiny pose adjustments help.
Eye lines matter: have the subject glance slightly off-camera toward a light or a distant spot, then return gaze to the lens. A direct look can work too, but keep the chin slightly lowered to reduce reflections in glasses and prevent the lights from overpowering the face. A small head tilt can soften the jawline and add warmth.
Keep hands and eyes aligned with the lights. Let the eyes catch a glint from the glow for life in the portrait. If hands cast odd shadows, adjust placement so light lands where you want—across the cheekbone or along the jaw, never under the chin where it can look harsh. You want faces that read clearly against the twinkling backdrop.
Keep poses simple
You don’t need dramatic moves for night portraits. Simple, honest poses work best: shoulders relaxed, chin slightly down, and a gentle tilt toward the light. A natural smile or thoughtful look can be enough. Let the fairy light background do the mood work; keep the subject centered and clear. Too many angles at once can split attention and break the connection.
Compose creative fairy light portraits
You’ll start with a plan: think about how the fairy lights frame your subject and the mood you want to convey. Keep the camera steady, use a tripod if possible, and set exposure to prevent lights from blooming into white circles. Place a single bright string behind or to the side of your subject to glow softly around their silhouette. Weave the lights into the portrait without overpowering the face.
Choose a lens and distance that fit your vibe. A longer focal length compresses the scene and smooths the background sparkle. Indoors, use a window or doorway as a frame; outdoors, string lights high in trees or along a fence to create a canopy. Make sure your subject is comfortable; guide them to relax and notice the twinkle rather than force a stare at the camera.
Color and contrast matter: warm white lights deliver cozy skin tones, while cool blues offer a dreamy, night-time look. Balance white balance and watch for mixed lighting that could cast odd colors on the face. Review shots as you go and adjust distance, angle, and light strength.
Try creative compositions fairy lights portraits with foregrounds and reflections
Experiment with foreground elements to add depth: a sheer curtain, a branch, or a veil of lights between you and the subject can blur in the foreground and draw attention to the eyes. Reflective surfaces like glass or water can double the glow by capturing a subtle reflection of the lights behind your subject. Move foreground lights closer to the camera for bokeh or star-like highlights around the subject. Shoot through a textured surface to soften the lights into gentle orbs.
Treat lights as part of the composition, guiding the viewer’s eye toward the subject. Create rhythm by repeating light patterns—alternate brighter and dimmer strands or loop lights around the frame to form a subtle frame. The aim is harmony: foreground, reflections, and subject working together.
Use fairy light background photography techniques like motion blur or filters
Motion blur can lend a dreamy feel: slow shutter speed while the subject remains relatively still, letting lights streak around them. If the subject moves slightly, the glow can halo the face while the eyes stay sharp. Diffusion filters soften edges and skin, while gradient filters push the lights forward by darkening the sky. Color filters can tilt the mood toward magenta, teal, or gold for a specific vibe. Layered exposures—one crisp frame for the subject, another for the lights—can be merged in post or with in-camera stacking if supported. The result is a portrait where light feels alive.
Experiment and refine
Try different distances, angles, and light positions to see what makes your subject shine. Note what works and what doesn’t, then repeat with small tweaks. Keep a simple checklist: distance, angle, light color, and background clutter. Use it every time you shoot.

Smartphone Night Photography Enthusiast & Founder of IncrivelX
Vinicius Sanches is a passionate smartphone photographer who has spent years proving that you don’t need an expensive camera to capture breathtaking images after dark. Born with a natural curiosity for technology and a deep love for visual storytelling, Vinicius discovered his passion for night photography almost by accident — one evening, standing on a city street, phone in hand, completely mesmerized by the way artificial lights danced across wet pavement.
That moment changed everything.
What started as a personal obsession quickly became a mission. Vinicius realized that millions of people were carrying powerful cameras in their pockets every single day, yet had no idea how to unlock their true potential after the sun went down. Blurry shots, grainy images, and washed-out colors were robbing everyday people of memories and moments that deserved to be captured beautifully.
So he decided to do something about it.
With years of hands-on experience shooting city streets, starry skies, neon-lit alleyways, and creative night portraits — all with nothing but a smartphone — Vinicius built IncrivelX as the resource he wished had existed when he was just starting out. A place with no confusing jargon, no assumptions, and no gatekeeping. Just honest, practical, beginner-friendly guidance that actually gets results.
Vinicius has tested dozens of smartphones from every major brand, explored dark sky locations across multiple states, and spent countless nights experimenting with settings, compositions, and editing techniques so that his readers don’t have to start from scratch. Every article on IncrivelX comes from real experience, real mistakes, and real lessons learned in the field.
When he’s not out shooting at midnight or writing in-depth guides for the IncrivelX community, Vinicius can be found exploring new cities with his phone always within reach, looking for the perfect shot hiding in the shadows.
His philosophy is simple: the best camera is the one you already have — you just need to learn how to use it in the dark.