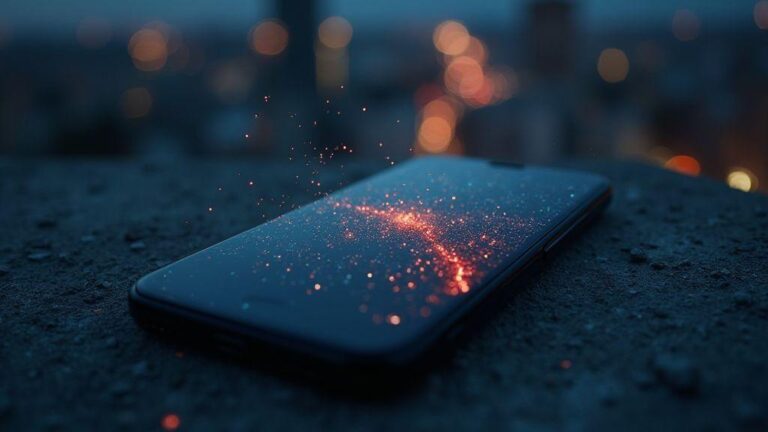
How to Remove Grain from Night Photos on iPhone 17 and Galaxy S25
Use Night Mode on your iPhone 17 and Galaxy S25
When you’re shooting at night, you want images that look clear and not grainy. Night mode on both devices helps you capture more light with less reliance on high ISO. You’ll notice brighter skies and faces that look natural rather than chalky. A steady hold lets the camera stack frames for you, turning casual snapshots into share-worthy photos.
On your iPhone 17, Night Mode activates automatically in low light, with adjustable duration and light intake. On the Galaxy S25, Night Photo offers different exposure levels to control brightness. In dim restaurants or streets, these tools keep colors accurate and avoid washed-out looks. Your goal is to represent what you saw, not what a machine thinks looked best.
Practice helps you get clean night shots: stabilize your phone, avoid hand movement, and shoot under similar lighting to compare results later. You’ll learn when to let Night Mode run longer or shorter based on ambient light, and which scenes benefit most from the feature.
iPhone 17 night mode noise reduction basics
iPhone 17 Night Mode reduces grain by stacking multiple frames automatically. Keep your phone steady on a stable surface whenever possible. More light means less grain, but Night Mode still helps in darker spots.
Noise reduction on the iPhone 17 happens in two parts: reducing random specks and keeping edges sharp. Smooth areas like skies will show fewer specks, while fine details like hair stay sharper. You can adjust exposure slightly to avoid over-brightening, which can make grain more visible in shadows.
A practical tip: hold your device steady, tap a bright area to focus, and let Night Mode merge the frames. If needed, try a longer exposure in very dark spots or use brighter nearby lighting to guide the camera. Expect less grain in the final image with a steady hand.
Galaxy S25 night photo denoise settings to know
Galaxy S25 offers denoise options to control how clean your night photos look. You can target noise reduction in dark areas to preserve texture, while dialing back slightly preserves detail in faces or objects. The goal is a balance between noise reduction and real texture; aim for a natural result rather than a plastic look.
Start with the default denoise level and compare to slight adjustments. Observe textures like brick walls or tree bark as you tweak sliders. In neon-lit streets, lighter denoise helps maintain color detail without flattening the image. The objective is to keep texture while reducing noise.
Hold steady for multi-frame Night shots
Hold your phone as steady as possible. Night shots rely on stacking frames, and any shake creates motion blur. Use a firm grip, rest your elbows, or lean on a stable surface. A timer or small tripod helps. The steadier you are, the closer your final image is to what you saw.
Stay calm and deliberate: breathe, settle your hands, and press the shutter—don’t rush. Outdoors, watch for wind or passing traffic that might jostle the camera. Small efforts in stability yield big reductions in blur and grain.
How to Remove Grain from Night Photos on iPhone 17 and Galaxy S25
Grain can be toned down after shooting. Use the denoise or noise reduction tools on both devices to smooth grain while preserving texture. Maintain some texture in fabrics or foliage, then apply gentle noise reduction elsewhere. When editing on a computer, avoid overdoing denoise to keep edges sharp. Carefully adjust brightness and contrast so the image stays natural. For best results, refer to How to Remove Grain from Night Photos on iPhone 17 and Galaxy S25 as your practical guide during editing.
When sharing, tag the scene or people to add context. A well-edited image with natural color and minimal grain tends to engage more viewers. It helps your photos feel true to what you remember rather than a processed look. For a quick reminder: How to Remove Grain from Night Photos on iPhone 17 and Galaxy S25 starts with stabilization, then aims for balanced denoise and careful post-processing.
Shoot in ProRAW or Expert RAW for cleaner files
You’ll notice cleaner files when you shoot in ProRAW or Expert RAW. This approach provides more data to work with later, helping night photos look less grainy and closer to what you saw. ProRAW/Expert RAW captures more color and detail in the raw data, enabling refined adjustments to exposure, contrast, and noise without flattening the image. It’s like having a larger canvas for edits, rather than trying to fix noise after the fact.
The key is consistency: start a shoot in RAW and keep shooting RAW for predictable edits. Night scenes blend shadows with bright light, and the extra data helps separate noise from real details, allowing you to brighten shadows without muddy results and still keep a natural look. This aligns with the goal of How to Remove Grain from Night Photos on iPhone 17 and Galaxy S25—RAW gives you a cleaner baseline for grain-free edits.
Why ProRAW helps you remove grain night photos iPhone 17
ProRAW stores a richer data set, letting you reduce grain by adjusting exposure and color without sacrificing texture. In night scenes, where contrast can reveal noise, the extra data helps you apply noise reduction selectively—protecting details like headlights and highlights. The workflow becomes smoother, enabling light adjustments to maintain natural skin tones and textures. ProRAW reduces the risk of the plastic look from aggressive noise reduction, keeping night photos authentic to what you saw.
Compared with non-RAW captures, ProRAW offers cleaner files for comparing shots and refining color without amplifying grain. It’s the practical choice for iPhone 17 users who want crisper night scenes. For How to Remove Grain from Night Photos on iPhone 17 and Galaxy S25, ProRAW often provides the most reliable starting point.
Expert RAW gives more data to reduce noise night photos Galaxy S25
Expert RAW captures more detail in shadows and highlights, enabling better noise management. This extra data allows you to restore texture in dark areas without reintroducing grain. Fine-tune noise reduction at a granular level to target noisy regions while preserving sharp edges. It also helps maintain color fidelity during edits, allowing you to recover the scene’s mood without dulling clarity.
Expert RAW excels with busy cityscapes or moving lights, as you can blend frames or stack shots for HDR-like results while keeping noise to a minimum. It’s the practical edge for Galaxy S25 night photography and aligns with How to Remove Grain from Night Photos on iPhone 17 and Galaxy S25 by giving you more reliable raw data for clean edits.
Enable RAW before low light shoots
Enable RAW before you start shooting in low light. This simple step makes edits smoother and more predictable. If you wait, you risk losing detail you could have saved. Turn on RAW in your camera app, then choose ProRAW or Expert RAW depending on the device.
Do a quick test shot in a dim scene to confirm the file looks right. You’ll gain more latitude to adjust exposure without immediate grain spikes, and final edits will feel less rushed. This setup pays off across all night shoots.
Manual ISO and shutter tips to reduce grain
Narrating your night photography: grain shows up when you push the shadows. Controlling light and motion on the front end helps. Lower ISO reduces grain but may require longer exposure. If you speed the shutter, you risk motion blur that looks like noise. Balance light, motion, and detail to keep shots smooth and natural.
Think of it as dialing in the right amount of light: lower ISO means less grain, and a steadier setup lets you keep the shutter open longer for proper exposure. Avoid extreme adjustments; aim for clarity and realism in your night shots.
Set lower ISO to avoid grain on your phone
Lower ISO helps prevent grain in dark areas. Keep ISO around 100–400 when possible, using a stable base like a tripod or solid surface. In bright urban scenes, you can keep it lower and let the shutter gather more light. Test with bursts to compare results and choose exposure rather than pushing ISO higher. Your night images will have crisper edges and fewer specks.
Use longer shutter with a tripod for less noise
A longer shutter collects more light with less noise, but you need a steady base. A tripod or solid surface keeps the image sharp as the shutter stays open. If you don’t have a tripod, stabilize your elbows on a railing or car roof. A small portable tripod is worth it for night photography, delivering cleaner textures and smoother tones.
Lower ISO, increase exposure time
Dropping ISO calls for longer exposure to gather light. This balance reduces noise and enhances color. In safe environments with a sturdy surface, test longer exposures for calmer, more natural-looking night scenes.
Use a tripod, timer, or stabilizer for night shots
Steadiness is essential for clear night photos. A tripod, timer, or stabilizer minimizes camera shake when you press the shutter. If a tripod isn’t available, a steady surface like a wall or bench works, but a stabilizer or small tripod is best. A timer prevents touch blur, and a stabilizer helps when shooting moving subjects. Solid stability yields less blur and sharper lights, with colors that don’t smear into grain.
Editing afterward will be easier with a solid base. The steadier you start, the less you fight blur and noise in post. Your goal: keep the camera perfectly still so every light, reflection, and silhouette stays crisp. Your night photos will look more professional with minimal effort.
How steady gear cuts noise in low light
Stable shots reduce the need to push ISO or slow shutter speed further. With a tripod or stabilizer, you can use a longer shutter without blur, gathering more light and reducing grain. Even a modest setup lowers noise by keeping ISO sensible while still allowing proper exposure. Steady gear is the quiet backbone of night photography, quietly saving your exposure from turning noisy.
Compact tripods or magnetic stabilizers are easy to carry and noticeably improve night shots, delivering more reliable results with less guesswork.
Quick tripod techniques for iPhone 17 and Galaxy S25
Set up on a stable surface or mount, then use the timer to avoid touch blur. A 2–3 second delay works well for static scenes. If shooting tall buildings or busy streets, tilt slightly to reduce reflections. Use grid lines to level your shot and keep verticals straight. A small tripod or phone clamp helps you angle the camera without wobble, making night photos steadier and more intentional.
Experiment with slight height changes; moving a few inches can alter how streetlights fall and where shadows land. Steady gear plus a calm setup yields better results and crisper final images.
Use noise slider first, then sharpen lightly
Begin with a gentle noise reduction to smooth grain, then apply a light sharpen to recover edge detail without reintroducing noise. This two-step approach preserves a natural look while keeping key textures intact.
AI denoise night photos Galaxy S25 options
Galaxy S25 offers on-device AI denoise and app-based AI denoise for different control levels. On-device AI reduces grain quickly while preserving edges, ideal for quick edits. App-based AI gives finer control over strength and selective denoising for tricky scenes. Both paths aim to maintain texture and a natural look while removing noise.
On-device AI tends to be fast and batch-friendly, analyzing brightness, color, and texture to quietly reduce grain without overdoing it. App-based AI provides more nuanced control, useful for challenging photos like moving cars or neon-lit streets.
On-device AI reduction vs app-based AI denoise
On-device AI reduction runs in the background, delivering natural results with fewer artifacts. It’s ideal for quick edits and group processing. App-based AI denoise offers greater control, allowing selective denoising and stronger reductions when needed. Both support How to Remove Grain from Night Photos on iPhone 17 and Galaxy S25 by improving texture while minimizing grain.
How AI denoise night photos Galaxy S25 improves texture
AI denoise preserves texture while removing grain, keeping fine lines in walls, fabrics, and reflections identifiable. It helps maintain natural shadows and highlights, avoiding a flat look. You’ll retain the scene’s mood, from cool urban blues to warm streetlamp tones, with clearer night details.
Compare before/after with a small crop
Before: grain dominates the sky, foreground textures feel muddy. After: grain reduced, edges clearer, textures pop. A tiny crop highlights the improvements and shows how the photo reads more like a real scene.
Post processing noise reduction workflow
Map out a simple workflow to tame grain without losing detail. Start by assessing the shot, noting areas that feel mushy or grainy and textures that still shine. The aim is to keep stars crisp and foreground legible while avoiding a smooth, unrealistic look. Reduce noise, then adjust contrast and exposure to restore the scene’s mood. Compare before/after frames to avoid overcorrecting.
Apply a light noise reduction first, then refine edges with selective masking if needed. Avoid halos around bright edges by dialing back the strength. Zoom into tricky textures (foliage, fabric) and fine-tune with masks. Maintain balanced brightness so shadows don’t become muddy after denoise.
Finish with a polish pass that enhances local contrast or clarity in highlights and shadows. If sharpening reintroduces noise, back off slightly and recheck overall balance. The goal is a clean, natural night look.
Post processing noise reduction Galaxy S25 step order
Import the shot, apply light noise reduction to even texture, then use edge-preserving sharpening around lights and stars. Use a luminance mask to target darker regions and push the mask softly. Apply color noise reduction selectively if needed, then compare with the original. For the sky, adjust blue-channel noise slightly to keep stars sharp while preserving foreground texture. End with a gentle global sharpen and save a share-ready version.
iPhone 17 post process: reduce grain then sharpen
Begin with a mild grain reduction to avoid washing out textures. Follow with restrained sharpening on edges around lights and foreground textures, using a mask to keep the sky smooth. If halos appear, back off sharpening and tweak the noise reduction in that area. Reassess color and exposure, then save a clean version for sharing and a version with a bit more grit for a dramatic style.
Always work on a copy of your photo
Always work on a copy to protect the original. This lets you experiment with noise reductions or sharpening without losing the source file. Keep two edits: one with gentler denoise and one with brighter contrast to preserve mood. This approach supports How to Remove Grain from Night Photos on iPhone 17 and Galaxy S25 across tests and edits.
Export and share without reintroducing grain
Export quality matters as much as the edit. Reintroduced grain during export or compression can ruin a photo. Lock in your denoise with high-quality export settings that preserve detail without inviting new noise. Consider platform differences—test on a few apps to see how your file holds up. Keep a RAW/high-res backup to revisit edits if needed, ensuring How to Remove Grain from Night Photos on iPhone 17 and Galaxy S25 remains actionable for future shares.
Export at max quality if possible (high JPEG quality or lossless options), embed color profiles (sRGB for social), and avoid extra sharpening. If you shoot RAW, export in the same color space used during edits to avoid mismatches that mimic grain after compression.
Best export settings to preserve denoise edits
Export at high quality (JPEG 85–100 or lossless if available) with embedded color profile. Avoid aggressive subsampling and extra sharpening during export to preserve denoise results. If you used RAW, export in the same color space you edited in to prevent compression artifacts that mimic grain.
Preview exports on several devices before posting to ensure grain stays suppressed across platforms. If issues appear, adjust export settings or denoise level accordingly.
How compression raises visible grain on social apps
Compression trims data, which can smear subtle color shifts and textures. This can reintroduce grain in smooth skies, shadows, and skin tones after upload. To combat this, maintain balanced denoise and avoid excessive sharpening. Since social apps compress differently, test across multiple platforms to know what to expect when sharing.
Export at max quality and avoid heavy compression
Export at the highest quality your workflow allows to preserve denoise and reduce reintroduced noise. If resizing is necessary, do it before exporting to minimize compression impact. Often, export once for major platforms at max quality and reuse the asset for others when possible.
Troubleshoot and fix grainy night photos
Night photos can appear noisy, but practical fixes exist. Check camera mode and lighting, switch to Night Mode, or use a slower shutter with a tripod to improve light capture. If a photo is already taken, edit gently—boost exposure slightly and apply a mild denoise. The goal is to reduce grain without sacrificing texture. With practice, you’ll know when grain is unavoidable versus when post-processing can fix it.
For post-processing, start with native editors or trusted apps. Apply a small amount of sharpening after noise reduction to retain edges without reintroducing grain. If you zoom in, you should still see city lights and textures. Build a preset for grain reduction and exposure adjustments to speed up future edits and keep night photos crisp and true to life.
How to Remove Grain from Night Photos on iPhone 17 and Galaxy S25
No matter the device, begin with light denoise and careful sharpening. Compare edits often to avoid a washed-out look. If grain persists, stacking or a denoise app can help, especially for skylines or night portraits. With these techniques, you’ll achieve stronger, cleaner night photos that still feel real.

Smartphone Night Photography Enthusiast & Founder of IncrivelX
Vinicius Sanches is a passionate smartphone photographer who has spent years proving that you don’t need an expensive camera to capture breathtaking images after dark. Born with a natural curiosity for technology and a deep love for visual storytelling, Vinicius discovered his passion for night photography almost by accident — one evening, standing on a city street, phone in hand, completely mesmerized by the way artificial lights danced across wet pavement.
That moment changed everything.
What started as a personal obsession quickly became a mission. Vinicius realized that millions of people were carrying powerful cameras in their pockets every single day, yet had no idea how to unlock their true potential after the sun went down. Blurry shots, grainy images, and washed-out colors were robbing everyday people of memories and moments that deserved to be captured beautifully.
So he decided to do something about it.
With years of hands-on experience shooting city streets, starry skies, neon-lit alleyways, and creative night portraits — all with nothing but a smartphone — Vinicius built IncrivelX as the resource he wished had existed when he was just starting out. A place with no confusing jargon, no assumptions, and no gatekeeping. Just honest, practical, beginner-friendly guidance that actually gets results.
Vinicius has tested dozens of smartphones from every major brand, explored dark sky locations across multiple states, and spent countless nights experimenting with settings, compositions, and editing techniques so that his readers don’t have to start from scratch. Every article on IncrivelX comes from real experience, real mistakes, and real lessons learned in the field.
When he’s not out shooting at midnight or writing in-depth guides for the IncrivelX community, Vinicius can be found exploring new cities with his phone always within reach, looking for the perfect shot hiding in the shadows.
His philosophy is simple: the best camera is the one you already have — you just need to learn how to use it in the dark.