How to Photograph City Streets at Night with iPhone 17, Galaxy S25, and Pixel 10
Prep your phone for night photos
You’re stepping into low light, and your phone is your main tool. The right prep means faster captures and cleaner images, so you don’t miss the moment. Organize essentials like your preferred night modes, a quick-access shortcut, and a stable tripod mount if you have one. Prep lays the groundwork for crisp city lights, not chasing them after you’ve started shooting.
Choose one or two night-specific modes you actually use. If your device has Night or Night Sight, keep it handy and test it on a familiar scene so you know what to expect when the streets glow. Pair it with Manual or Pro mode, if available. Practicing a few settings like ISO and shutter speed ahead of time makes you faster when the moment arrives. Aim for a clean balance of brightness and noise.
Set a simple habit for night shoots: save your best shot in a fast-access folder and keep a backup plan for motion. If you’re with friends, you’ll thank yourself later for a quick way to lock focus and capture a steady frame. Your goal is consistency: predictable results you can repeat, even when traffic hums in the background. With prep in place, you’ll chase the city glow without fret.
Update camera app and firmware
Keeping your camera app current is like giving your phone upgrades. Updates often bring better noise reduction, faster autofocus, and improved image processing, which can mean the difference between a muddy night photo and a clean skyline. Expect fewer glitches and more reliable results, especially with tricky lighting like street lamps and storefront reflections.
Firmware updates fix bugs that can ruin a shot in the dark and can improve power efficiency. After updating, test a few night scenes you’ve shot before. If performance and color feel richer, you’re in the clear. If something seems off, a quick reset or rolling back to a previous version may help, but only if you’re comfortable.
Clear lens and free up storage
Dirt, fingerprints, and smudges soften edges and dull highlights. A quick wipe with a microfiber cloth sharpens pixels and improves contrast in bright signs and dark alleys. When you’re aiming for crisp city lights, clean glass is a tiny but mighty upgrade.
Storage matters more than you think. Night photos eat space due to longer exposures and higher detail. If you’re running low, delete clutter, move old shots to the cloud or a computer, and consider saving RAW files for the best moments. Keeping room in your phone lets you shoot next frames without deleting prior shots.
Check battery and power bank
Late-night shoots drain power fast, so check your battery before heading out. If it’s under half, plug in a portable power bank before you start. A steady charge means you’re less likely to miss the moment to a low-battery warning. If you carry a power bank, pick one with an always-on indicator.
Carry a spare cable or two, because micro USB or USB-C cables can tangle in your bag. A quick top-up during a break helps you keep shooting. For a long night, map out recharge points along your route so you stay in the flow.
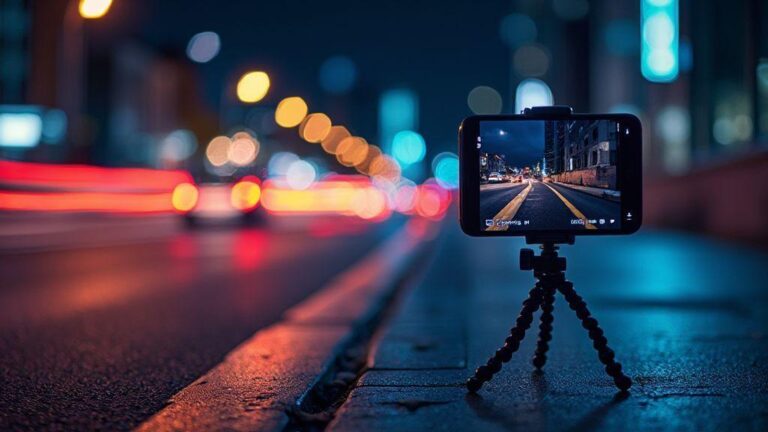
Stabilize your phone to avoid blur
Sharper night photos come from a still phone. Blur happens fast in low light, so you need solid support and smart technique. Keep the camera from moving as you press the shutter or during long exposures. If your hands tremble, the shot loses detail. Stabilizing gives the sensor time to collect light without turning the scene into a fuzzy mess.
A steady base is the secret. A tabletop, bench, or other stable surface can be your launchpad. If you don’t have a stand, use your body as a brace, but look for a solid point. Even a small breeze can blur a night shot, so treat every frame like a tiny tripod you’re building with what you have. Focusing on keeping the camera still makes your night photos pop with clarity.
Practice grips and positions, then compare results. You’ll learn what tiny moves ruin a shot and what small adjustments help. The better you get at holding still, the more you’ll enjoy those city lights.
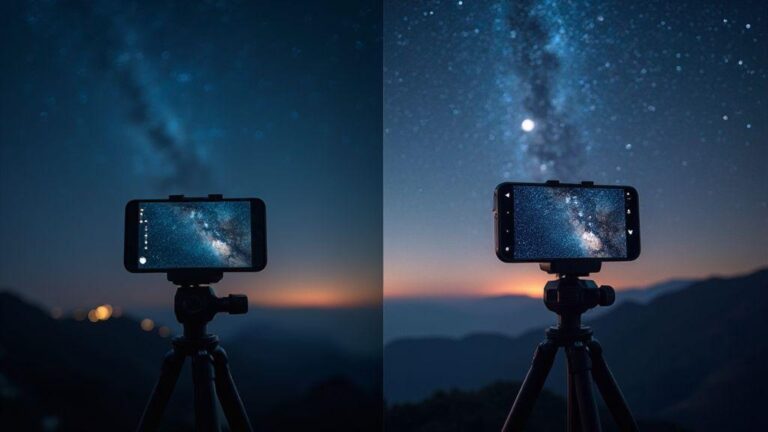
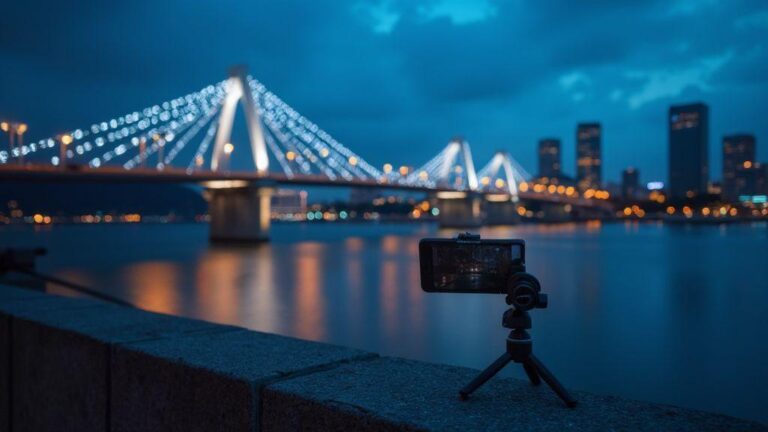
Use a tripod or flat surface
A solid platform is the simplest way to cut blur. A real tripod is best, but a flat surface works too. Clamp your phone or place it on a stable book or box so it hardly moves. A dedicated phone mount with a weight helps. Your night cityscape deserves that solid foundation.
Think of it as building a tiny stage for your shot. The more rigid the stage, the clearer your lights and silhouettes. Even a shallow angle can reduce blur if the base is steady. Set your camera a few inches above the surface to avoid touching it during the shot. Small changes yield big detail.
Try handheld steadiness techniques
When you don’t have a tripod, use clever steadiness tricks. Tuck elbows in, hold breath, and press the phone gently to minimize bounce. Use your body as a stabilizer: lean into a wall or sturdy furniture. For longer exposures, keep your hand close to your torso and picture stabilizing a rifle—steady and calm.
A two-handed grip helps: one hand under the phone, the other along the side. Rotate wrists before you press the shutter, not after, to reduce tiny shakes.
Use timer or remote shutter
A timer or remote shutter removes the final shake on press. Set a short delay (about 2 seconds) so your finger isn’t moving the phone when you click. A Bluetooth remote lets you snap without touching the phone at all, especially useful for long exposures.
If you’re in a quiet spot, the camera’s self-timer can create a calm, still shot. The goal is less movement for crisper light trails, windows, and skyline outlines.
Use night mode and long exposure tools
Night mode pulls in more light without motion blur, and long exposure lets car lights and water trails become smooth lines. A tripod or solid surface helps a lot; hold the sensor open longer for richer detail. If you’re moving, use a faster shutter to keep the frame sharp and blend modes later to preserve glow without shake.
Night mode lets you press the shutter and stack frames to reduce grain. Long exposure emphasizes motion: car headlights create trails, trains blur, and waves smooth. Adjust ISO and exposure to balance brightness and noise. Practice on your favorite corner and compare how lights bloom with different settings.
Keep framing simple at night: a clear foreground, a strong middle ground, and bright background lights. Use grid lines to stay straight, and consider a leading line or a zigzag of streetlamps to guide the eye. If possible, lock focus on a bright sign or building edge, then switch to manual exposure to avoid flicker. Practice makes perfect; test night mode against standard photos.
Night mode stacking vs long exposure
Night mode stacking uses multiple frames to reduce noise and pull in light. It’s ideal for static scenes with little motion, giving natural colors and reduced grain. If there’s motion (people, cars), stacking can blur the movement.
Long exposure blends light over time, producing smooth trails and glassy water. It’s best for motion-rich scenes and requires a tripod or solid base plus a timer/remote. Try both and pick the look that fits your city moment.
When to use Galaxy S25 long exposure night shots
Long exposure shines for dramatic light trails and silky water. On busy streets, it captures neon glow without blurring people, turning lights into lines. Wet pavement reflections become stripes. For moving crowds, shorter exposures keep people sharp; longer ones need a tripod for a clean backdrop.
Galaxy S25 handles low light well, but long exposure excels near water, on boardwalks, or bridges. Have a stable base, a steady shutter finger, and a plan to blur motion slightly for a dreamy effect. If shooting from a balcony or rooftop, you can capture city lights spanning the frame. Try 4, 8, and 12 seconds to compare moods.
Try dedicated long exposure apps
Dedicated long exposure apps offer more control than the stock camera. They let you set shutter times precisely, stack images, and preview motion blur live. Features like interval shooting, exposure bracketing, and remote control help avoid shake. For ultra-smooth water or star trails, these apps are worth a quick test run.
Pick the right lens and zoom on your phone
You don’t need a fancy camera to nail night shots—just the right lens and a smart zoom plan. Lenses matter: wide for context, telephoto for tight details like neon signs or distant lights. Adapt quickly so the image looks natural, not stretched or blurry. Keep a steady stance and breathe out slowly to cut shake.
Test frames in quick succession: wide captures the street, telephoto isolates a detail. Telephotos compress depth, bringing highlights closer. If you’re moving, switch lenses as you move to keep key details sharp while preserving atmosphere. Your goal is balance: enough context to tell the story, enough zoom to highlight what matters.
On tricky streets, use both lenses in one frame strategy: start wide to lock in environment, then zoom to a leading light or action. Lighting changes quickly, so be ready to switch lenses fast to avoid missing moments. Optical zoom should stay optical when possible to keep edges clean and colors true. Practice on familiar streets to learn where an extra step or quick zoom makes the biggest difference.
When to use wide vs telephoto
Wide lenses capture the whole street story—storefronts, people, and reflections. Telephotos isolate a subject without background clutter. Use wide for atmosphere; use telephoto for details that would be lost in a crowd.
Telephoto compresses the scene so lights feel closer. Great for intimate moments or sharp signage behind moving subjects. If unsure, start wide, then zoom into the most compelling part to compare mood shifts.
iPhone 17 night street photography lens tips
The iPhone 17 offers smart night options. Use the main wide lens for broad scenes and switch to telephoto for tight compositions without crowding. Tap to focus, then fine-tune exposure to prevent blown highlights. If you’re in a lit alley, on-device HDR can balance deep shadows and bright highlights.
Motion matters: neon flickers, cars, and pedestrians. A steady hand or small tripod saves sharp lines. Brace your phone against a railing or wall for storefronts, and use mid-shutter speeds to keep moving subjects clear while preserving neon glow. The goal: clean color, minimal blur, and a scene that feels alive.
Avoid digital zoom for sharpness
Digital zoom softens your photo and can ruin a night shot. Keep it optical; if you need more reach, crop later rather than zoom in-camera. Digital zoom often introduces noise and reduces detail, especially in dark areas. If you lack the right lens, move closer or reframe instead of stretching the image.
Control light and exposure for clean shots
You want sharp images that aren’t blown out when city lights are bright. Start by setting a fixed white balance for consistent colors across frames. Use a sturdy tripod or stable surface since long shutters amplify any shake. Think of your scene as a puzzle: bright lights, dark streets, and just enough light on your subject without washing the scene out. Shoot in manual mode to lock exposure for a clean baseline, then adjust only what you need. This keeps night shots from turning muddy.
Use your histogram to judge exposure. If the graph skews right, highlights are blown; if left, underexposed. Aim for a balanced curve with detail in shadows and lights. If whites clip, dial down exposure or lower the shutter notch. You’ll see more depth in brick facades and neon when highlights stay intact. You can brighten later if you shoot RAW.
Consider light sources. Street lamps create halos and color casts. Use a mid-range aperture to hold crisp edges; avoid going too small or you’ll need a longer shutter. In busy areas, wait for traffic lights to sync with people and cars—the glow adds atmosphere without extra editing.
Use exposure compensation to protect highlights
When bright signage or headlights dominate, adjust exposure compensation to protect details. If overexposed, push negative compensation until bright areas stop clipping. If your subject is dark, apply a touch of positive compensation to reveal texture without washing the background. Check the histogram after a shot—this quick test helps you stay intentional with highlights.
Be aware that exposure changes affect the whole frame. If needed, fine-tune with a quick test shot and review the histogram. For skylines with a bright moon or streetlights, you’ll often nudge compensation toward protecting highlights and then fine-tune in post.
Balance ISO and shutter for low light
In low light, balance ISO and shutter to minimize noise while preserving motion. Start with a lower ISO for crisp detail, then open the shutter to capture more light if needed. If your subject moves, temporarily raise ISO to keep sharpness, but avoid excessive grain. A practical rule: keep ISO under 800 for clean shots, and adjust shutter to capture the motion you want, whether car trails or a pedestrian pause.
For steady subjects on quiet streets, a longer shutter with modest ISO can create smooth light trails without noise. In busy nightlife, lean toward a faster shutter to freeze motion, then raise ISO slightly if required. Test a few frames quickly to find the sweet spot between brightness and texture.
Lock focus and exposure before shooting
Before you press the shutter, lock both focus and exposure. Tap and hold on a subject to lock focus, then adjust exposure compensation if needed. This prevents shifts as you frame, common with moving cars or blinking neon. Locking exposure is crucial when lighting changes rapidly—cityscapes flip from bright storefronts to dark alleys in seconds. Once locked, reframe and shoot with confidence.
If your camera lacks a dedicated lock, use exposure compensation to hold a steady baseline and manual focus to keep the subject sharp. Practicing this helps you shoot faster in real streets with real people.
Quick-start checklist for How to Photograph City Streets at Night with iPhone 17, Galaxy S25, and Pixel 10
- Prep your phone: organize night modes, shortcuts, and stabilization options.
- Update camera apps and firmware for better noise control and faster focus.
- Clean the lens and free up storage; shoot RAW when possible.
- Ensure battery life with a power bank and spare cables for long sessions.
- Stabilize: use a tripod or flat surface; practice handheld steadiness.
- Use night mode with longer exposure where appropriate; compare with stacking.
- Choose lenses wisely: wide for context, telephoto for emphasis; keep optical zoom.
- Control light: set fixed white balance, use histograms, and apply exposure compensation to protect highlights.
- Lock focus and exposure before shooting to maintain sharpness through scenes.
Conclusion
If you’re chasing reliable results in tricky city lights, remember to control light first, protect highlights, balance ISO and shutter, and lock focus and exposure. With practice, you’ll nail clean shots even in busy nocturnal scenes. For a practical example, consider the guide: How to Photograph City Streets at Night with iPhone 17, Galaxy S25, and Pixel 10. Your workflow stays simple, and your photos stay crisp.
Capture motion and light trails with intent
Tell a story with night shots, not just dark pictures. Pick a scene with moving elements—cars, bikes, or glowing pedestrians—and plan how their paths lead your composition. Set slower shutter speeds for dramatic trails, but ensure your setup is steady. Use the concept of painting with light: each passing vehicle becomes a brush stroke across the frame. Adjust ISO to avoid overbright trails; you want clean lines, not noise-filled blobs.
Anchor your composition with a foreground element like a railing or sign to guide the eye. If trails grow too long or chaotic, shorten the shutter and reframe. The aim is a balance between motion and clarity that makes viewers feel they’re watching a moment in real time.
Use slower shutter for vehicle light trails
Long exposures let car headlights and taillights write bright, continuous lines. Keep the camera as still as possible; a tripod or solid surface is your best friend. Shoot at dusk or after dark when ambient light is enough to keep the scene recognizable but not overpowering the trails. If trails become too intense, lower the ISO or close the aperture to tame brightness. Layer multiple passes for varying colors or speeds to create a dynamic, busy moment.
Use panning to keep moving subjects sharp
Panning keeps moving subjects crisp while the background blurs into motion. Align your subject so they fill a comfortable portion of the frame, then move the camera in the same direction as their movement as you shutter. Use a slower shutter that matches their speed. Practice with a friend walking under streetlights to learn how arms, wrists, and shoulders work together. If you lose the subject, reset and try again.
Stabilize for long exposures
Long exposures need rock-solid stability. A tripod is non-negotiable, especially in wind or crowded areas. If you lack a tripod, improvise with a solid surface and use a remote shutter or 2-second timer to avoid shake. Start with a low ISO, a small aperture, and a long shutter to capture the motion you want. If the scene is too bright, reduce exposure time or use a neutral density filter. The goal is a crisp city night with defined lights and visible detail in the shadows.
Compose strong urban night photos
Plan scenes with life after dark—neon signs, busy crosswalks, or reflections on wet pavement. Balance light with shadow to keep the city glow from washing out your subject. Use leading lines, reflections, and symmetry to add depth and drama. Include a foreground element to frame the scene and consider timing as the city evolves—colors shift, reflections change, and crowds move. A mix of planned shots and spontaneous moments often yields the best results.
Use leading lines, reflections, and symmetry
Leading lines guide the viewer to your subject; reflections add texture; symmetry offers a calm, powerful feel when lines align. Keep your camera level and center your subject for symmetry, or experiment with off-center rules for bold results. Practice from different angles to discover which lines pull the eye most effectively.
Apply urban night photography composition smartphone tips
Smartphone cameras are capable with a few tricks: steady grip or tiny tripod, grid lines for balance, and HDR to preserve highlights. Don’t fear manual controls; a small exposure adjustment can prevent blown-out lights. In crowds, frame your subject with space around them to convey motion naturally. For street portraits, use a street lamp for warmth. Review shots quickly; small tweaks can lift a good image to a great one.
Use grid and level for straight horizons
Activate grid and level features to keep horizons crisp. Align building edges with the grid to avoid leaning lines. Verifying level before you shoot saves post-processing time and preserves the night’s mood.
Edit night photos to reduce noise and boost detail
Evaluate your base image: noisy shadows may need noise and detail adjustments, with careful contrast so you don’t look plastic. If you shot RAW, you’ve already gained a head start.
Shoot RAW for better shadow recovery
RAW offers more latitude for extracting detail from dark scenes. Start by lowering highlights to preserve brightness, then raise shadows to reveal texture without introducing noise. If your camera supports non-destructive RAW edits, keep adjustments in RAW until export. Compare versions side by side to decide what looks natural.
Use noise reduction and selective sharpening
Apply noise reduction where it helps without killing detail. Sharpen edges selectively with a mask to keep skies soft and textures crisp on windows, railings, and signs. If halos appear around bright sources after sharpening, back off slightly.
Keep edits natural and preserve highlights
Aim for edits that look like natural night scenes. Maintain highlight detail and avoid over-smoothing. Let some grain remain to preserve the city’s mood. Compare edited and original versions to ensure the scene still feels like a night out.
Stay safe and respectful while shooting at night
Plan ahead to stay safe. Scout areas during daylight, note tricky spots, and carry a small safety kit. When the sun sets, slow down and stay aware of people around you. If you’re in a risky area, have a plan to exit. Stay visible with reflective gear near traffic and keep gear compact to avoid hazards. Follow local laws and respect private property and people’s privacy. If a location asks you not to shoot, comply.
Share photos responsibly and credit locations when possible. Blur faces if permission isn’t granted, anonymize sensitive spots, and avoid exposing private spaces. Thoughtful captions help viewers understand the scene without compromising privacy.
How to Photograph City Streets at Night with iPhone 17, Galaxy S25, and Pixel 10
You’ll want to pace yourself, choose stable spots, and adjust exposure to keep bright signs from washing out. Use night modes and experiment with longer exposures, but stay mindful of safety and privacy rules. Practice framing a city block, a neon sign, or reflections on wet pavement, and you’ll see how subtle shifts in angle change the mood. The goal is to capture the story of the night, not just a pretty image.

Smartphone Night Photography Enthusiast & Founder of IncrivelX
Vinicius Sanches is a passionate smartphone photographer who has spent years proving that you don’t need an expensive camera to capture breathtaking images after dark. Born with a natural curiosity for technology and a deep love for visual storytelling, Vinicius discovered his passion for night photography almost by accident — one evening, standing on a city street, phone in hand, completely mesmerized by the way artificial lights danced across wet pavement.
That moment changed everything.
What started as a personal obsession quickly became a mission. Vinicius realized that millions of people were carrying powerful cameras in their pockets every single day, yet had no idea how to unlock their true potential after the sun went down. Blurry shots, grainy images, and washed-out colors were robbing everyday people of memories and moments that deserved to be captured beautifully.
So he decided to do something about it.
With years of hands-on experience shooting city streets, starry skies, neon-lit alleyways, and creative night portraits — all with nothing but a smartphone — Vinicius built IncrivelX as the resource he wished had existed when he was just starting out. A place with no confusing jargon, no assumptions, and no gatekeeping. Just honest, practical, beginner-friendly guidance that actually gets results.
Vinicius has tested dozens of smartphones from every major brand, explored dark sky locations across multiple states, and spent countless nights experimenting with settings, compositions, and editing techniques so that his readers don’t have to start from scratch. Every article on IncrivelX comes from real experience, real mistakes, and real lessons learned in the field.
When he’s not out shooting at midnight or writing in-depth guides for the IncrivelX community, Vinicius can be found exploring new cities with his phone always within reach, looking for the perfect shot hiding in the shadows.
His philosophy is simple: the best camera is the one you already have — you just need to learn how to use it in the dark.