How to Fix Orange Color Cast from Streetlights Using AI Color Correction
Why streetlights make your photos orange
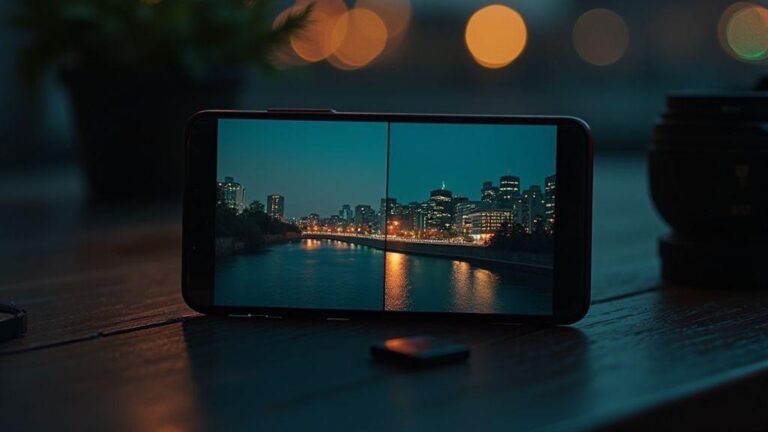
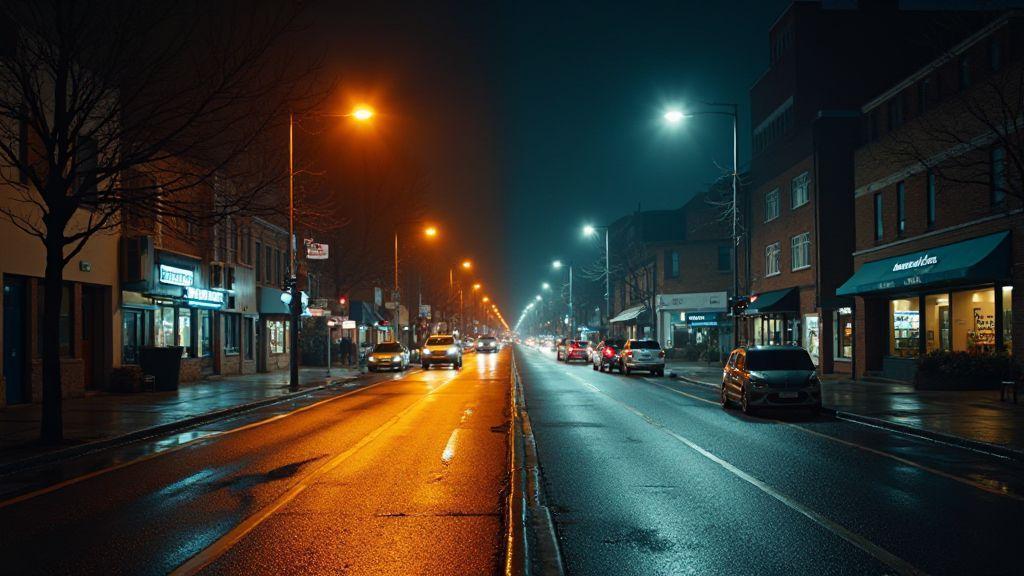
Streetlights glow with a warm, orange hue that seeps into night shots. You’ll notice it most when you’re capturing cool blues or whites, like a city street or a park path. That orange veil isn’t just a cosmetic flaw; it changes the mood and can lock in during exposure and white balance. So you’re not imagining it—night photos truly carry this orange whisper from the lights above.
Sodium vapor lamps push out a warm, orange cast. If your camera’s white balance is on auto, it will chase the orange and sometimes overcorrect, leaving blue-tinted areas and inconsistent color across the frame. The orange glow can also soften shadows and reduce contrast, masking details in bricks, signs, and faces. This makes editing longer and less natural. For clean, natural night photos, minimize the orange in-camera whenever possible and fix what remains in post.
Sodium vapor lamps and color temperature
Sodium vapor lamps emit light with a narrow orange-yellow color temperature. Your camera may read this as neutral WB, but it isn’t truly neutral. Whites drift toward amber, especially in highlights. To dodge the cast, consider a cooler white balance or shoot RAW to edit later without compounding color flaws. If you stay under sodium lamps, lean into the cast as part of the scene’s atmosphere and correct with care in post.
Another option is to limit orange light entering the frame by choosing mixed lighting or waiting for fixtures to dim. If you’re committed to shooting under sodium lamps, plan your edits to preserve skin tones while embracing the atmosphere.
How orange color cast harms your night photos
Orange casts can ruin skin tones, turning faces peach to terracotta. It also distorts colors in clothing, signs, and architecture. Editing becomes a chase to restore whites and preserve detail, making the process slower. The cast also reduces overall contrast, dulling shadows and flattening midtones, and can shift blues and neon signs toward a uniform orange halo. If you share your shots, viewers will notice color accuracy more than mood or composition. The best strategy is to minimize the orange in-camera and fix the rest with careful color management in post.
Quick fact on color temp numbers
- Sodium vapor lamps typically sit around 2000K to 2200K, which reads as orange to amber on many cameras.
How to Fix Orange Color Cast from Streetlights Using AI Color Correction
Using AI color correction can save time and deliver consistent results. Start by shooting RAW so the AI tool has full color data. Feed the AI a few sample images from the same scene and lighting to teach it the target look. The AI can neutralize the orange tint while preserving skin tones and details.
If you’re not ready for full automation, try dedicated color correction plugins or apps that include orange-to-neutral cast removal. Set your target white balance to neutral or slightly cool, then let the AI refine global and local color to retain contrast and texture. Review faces and key objects to ensure correction hasn’t softened essential details. How to Fix Orange Color Cast from Streetlights Using AI Color Correction isn’t about erasing character; it’s about aligning the scene with your vision. When done right, night photos stay dramatic and true to life, with natural skin tones and colors that pop.
What AI color correction does for you
AI color correction removes the orange glow from streetlights, restoring whites and blues. It analyzes the warm tint from sodium or LED streetlights and adjusts tones while keeping skin tones intact. You get cleaner skies, truer greens, and less muddy shadows, with batch processing possible for consistent galleries.
When to use AI vs manual white balance correction streetlights
AI shines when you have many photos with the same lighting and want speed and consistency. It’s great after a shoot with changing lighting. For a very precise look—like matching a specific film stock—manual white balance offers more control. Use AI for bulk work; switch to manual when you need exact targets or artistic intent.
Fast overview of steps
- Open your photo and apply AI color correction to reduce the orange cast.
- Check skin tones and key colors; fine-tune temperature and tint if needed.
- Compare before and after; save a version with the corrected look.
- For tricky frames, switch to manual white balance on the groundwork and blend in the AI result where it fits.
Choose RAW to help orange color cast removal
RAW files hold more color data, giving you better control over white balance without irreversible decisions. They provide separate color channels and more latitude to salvage shadows and highlights. If you don’t shoot RAW, you can still improve with careful editing, but you’ll be working with less data.
Why RAW keeps white balance data
RAW stores white balance alongside full sensor data, offering flexibility to adjust WB after the shot while preserving detail in lights and shadows. This makes it easier to correct orange glow without sacrificing texture. RAW edits may take longer, but they preserve color accuracy and detail.
How to salvage JPEGs with AI color correction night photos
If you only have JPEGs, you can still improve orange cast with AI color correction. Boost overall WB toward cooler tones, apply targeted color tools to reduce orange in affected areas, and refine manually to avoid muddy shadows. Expect a bit more noise, but you can recover a lot of detail with careful masking and selective adjustments.
Simple file rule to follow
Keep an organized folder structure. Name RAW files with a simple pattern (date-loc-subject) and store JPEGs in parallel folders for quick edits.
Use automated color cast correction tools
Automated tools analyze the overall tint and suggest fixes to balance whites and skin tones. Start with a quick auto-fix, then dial in temperature, tint, and exposure. If your shot has mixed lighting, try a neutral or creative balance preset and adjust as needed. Save presets for future shoots to speed up your workflow.
Popular apps for streetlight color correction
- Lightroom: smart sliders for temperature, tint, and a noise-reduction panel; HSL to target oranges and yellows.
- Snapseed: White Balance and Curves with selective edits for lamp hotspots.
- Luminar: AI-driven corrections balancing sky, pavement, and lamp light.
- Photoshop (Camera Raw or Neural Filters): precise color correction for high dynamic range scenes.
- Mobile editors (Instagram, etc.): quick night-mode fixes, though not as precise as desktop editors.
How machine learning color grading fixes tint
ML color grading studies night scenes to learn how color behaves under common lighting, predicting balanced tones while preserving contrast. It can reduce excessive warmth and keep neon glows, offering a clean, natural look. Use ML as a baseline and refine with targeted adjustments.
One-click tool tip
Try a one-click color cast adjustment with a contrast-aware streetlight preset. After one click, review skin tones and edge highlights, then tweak temperature or tint if needed.
Fix white balance manually with AI guides
Guide AI with simple steps: treat white balance as natural colors, start with a baseline, then fine-tune targeted moves. Split work into a baseline pass and a few precise adjustments to keep whites white and blues true.
Use temp and tint sliders to remove sodium vapor orange tint
Nudge temperature toward cooler values, then adjust tint to avoid greens or magentas. Compare versions side by side to choose the most natural balance.
Pick a neutral point or gray card for accurate correction
Reference a neutral area in your scene or use a gray card to lock white balance. This anchors colors across shots and helps batch edits feel cohesive.
Quick manual tweak
Polish by adjusting highlights and shadows after WB fixes to preserve texture while maintaining natural color balance.
Mask and local adjust to protect natural tones
Masking helps protect skin tones and surroundings from being overcorrected. Use layers and soft brushes to limit edits to problem areas. A layered approach lets you control glow, shadows, and skin tones, creating a believable night scene.
Select streetlight glow without changing skin tones
Isolate glow around lamps and correct that area without altering skin. Use soft brushes and feathered edges to blend the correction.
Blend corrected areas with layer masks and feathering
Feather masks to soften edges and prevent halos. Use multiple masks for glow, shadows, and skin tones. Check at 100% zoom for edges and adjust as needed.
Best masking tip
Mask with intent and keep corrections non-destructive. Build corrections gradually to preserve texture and natural look.
Batch process your night shots with machine learning color grading
Batch processing saves time and maintains consistency. Train or choose a prebuilt color grading profile that matches your common streetlight colors, then apply it across a batch. Review results and tweak the profile if needed. Always preview a few frames before exporting to ensure skin tones and whites remain natural.
Create presets for consistent streetlight color correction
Presets enable repeatable corrections for orange/yellow casts. Include adjustable sliders for intensity, warmth, and tint to suit different scenes. Test on a small batch, then save a master preset with minor variants for quick access.
Automate white balance correction streetlights across photos
Automate WB across a batch to keep skin tones and overall color believable. Review edge cases and adjust manually if necessary. The goal is cohesive warmth or neutrality across your gallery.
Export with the right color space for sharing
Choose a color space that preserves edits across devices. For most night photos, sRGB is the practical choice for social sharing, preserving your edits and keeping blues and streetlight glow true.
Choose sRGB for social and preserve edits
Export in sRGB to avoid platform-induced color shifts and keep your edits consistent. Save a master project with all layers intact for future tweaks.
Compress without adding color cast back
Use moderate compression to preserve detail in shadows and avoid banding. Export in sRGB first, then share the best balance of quality and size.
Final export checklist
- Confirm color space is sRGB
- Use moderate compression to preserve detail
- Preview on mobile to ensure consistency
- Save a high-quality master with layers
- Export a social-ready version with the same edits
Fix stubborn orange tint with deep learning color correction
Some night shots resist simple fixes. Deep learning color correction can reduce orange casts while preserving details. Use a model trained on night scenes and color-neutralization tasks, compare before/after, and adjust midtones if needed. Combine AI results with manual tweaks for best results, applying targeted local edit to preserve texture.
Use targeted neural filters for night scene color restoration
Neural filters tuned for night scenes can correct mixed lighting. Use global corrections first, then refine skin tones and highlights with local brushes.
When to combine AI and manual fine tuning
AI provides a solid baseline, but mixed lighting or shiny surfaces often require manual adjustments. After AI corrections, use color grading tools to fine-tune white balance, exposure, and luminance in critical zones.
Final quality check before sharing
Check color consistency across focal areas and inspect shadows and highlights for banding or posterization. If needed, correct locally with a soft brush and verify on multiple devices. Save a clean export and a layered backup for future tweaks.
How to Fix Orange Color Cast from Streetlights Using AI Color Correction (revisited)
This guide shows how AI color correction can streamline turning orange streetlight casts into natural night tones. By combining RAW workflow, AI-based corrections, and selective manual tweaks, you can achieve consistent color across a night portfolio without sacrificing mood or detail. For ongoing work, save presets, batch process reliably, and export in the right color space to ensure your final shares look true to your vision.
If you’re aiming for a simple, repeatable approach, try the exact method described in How to Fix Orange Color Cast from Streetlights Using AI Color Correction and adapt it to your preferred editing suite. The combination of AI and careful local adjustments is the fastest path to clean, natural night photography.

Smartphone Night Photography Enthusiast & Founder of IncrivelX
Vinicius Sanches is a passionate smartphone photographer who has spent years proving that you don’t need an expensive camera to capture breathtaking images after dark. Born with a natural curiosity for technology and a deep love for visual storytelling, Vinicius discovered his passion for night photography almost by accident — one evening, standing on a city street, phone in hand, completely mesmerized by the way artificial lights danced across wet pavement.
That moment changed everything.
What started as a personal obsession quickly became a mission. Vinicius realized that millions of people were carrying powerful cameras in their pockets every single day, yet had no idea how to unlock their true potential after the sun went down. Blurry shots, grainy images, and washed-out colors were robbing everyday people of memories and moments that deserved to be captured beautifully.
So he decided to do something about it.
With years of hands-on experience shooting city streets, starry skies, neon-lit alleyways, and creative night portraits — all with nothing but a smartphone — Vinicius built IncrivelX as the resource he wished had existed when he was just starting out. A place with no confusing jargon, no assumptions, and no gatekeeping. Just honest, practical, beginner-friendly guidance that actually gets results.
Vinicius has tested dozens of smartphones from every major brand, explored dark sky locations across multiple states, and spent countless nights experimenting with settings, compositions, and editing techniques so that his readers don’t have to start from scratch. Every article on IncrivelX comes from real experience, real mistakes, and real lessons learned in the field.
When he’s not out shooting at midnight or writing in-depth guides for the IncrivelX community, Vinicius can be found exploring new cities with his phone always within reach, looking for the perfect shot hiding in the shadows.
His philosophy is simple: the best camera is the one you already have — you just need to learn how to use it in the dark.