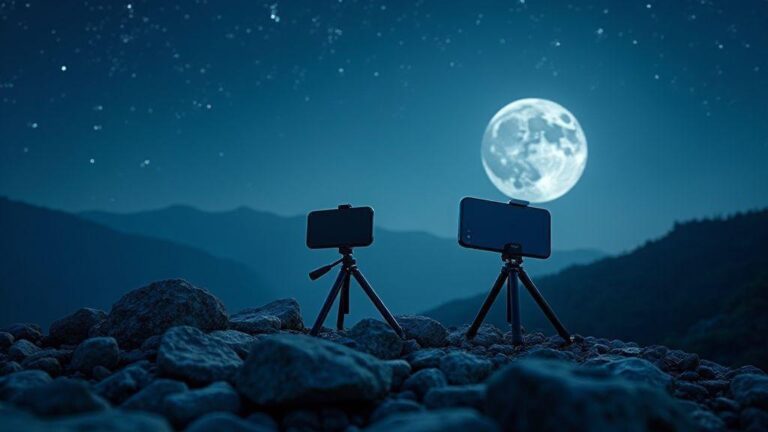
How to Find the Best Spots for Night Photography in Any City Using AI Tools
AI tools for finding night photo locations
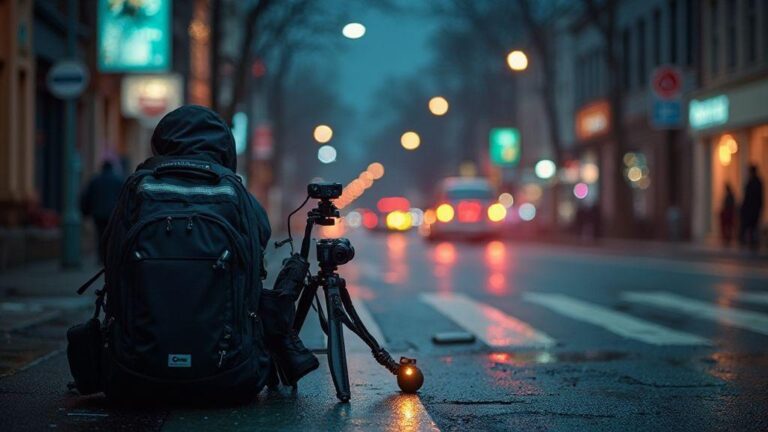
Finding great night photo spots is half the battle. AI tools cut the guesswork, surfacing scenes that glow after dark based on real-time lighting, crowds, and access. The aim is dramatic silhouettes, reflections, and safe access after sunset. AI acts as a scouting buddy, flagging spots you might miss and ranking them by photogenic potential.
When you start, feed the AI rough ideas—neon signs, quiet waterfronts, or busy city centers with long-exposure potential. The tool sifts images, geotags, and tips to surface options that match your vibe, blending classic viewpoints with hidden corners mapped to ideal lighting hours. The result is a curated list you can trust, not a random shuffle of places you’ll never reach.
As you review suggestions, AI highlights key details: crowd patterns, traffic, and post-sunset safety. Filter by distance, accessibility, and features like foreground objects or skyline drama. The more you use it, the sharper its recommendations become—like a local guide who knows where night photography magic happens.
How AI finds and ranks spots for you
AI scans thousands of signals—images, heatmaps, and comments—to build a map of potential views. It weighs factors like light pollution, sky color, and the time of day you want. Spots with clear lines, strong silhouettes, and few crowds rise to the top. The ranking also considers safety and ease of access, so you won’t chase risky locations.
You’ll see each spot described with practical notes: best vantage points, expected crowd level, and the time window for blue hour or city lights. The AI may suggest nearby landmarks that amplify your shot, or note reflections from rivers and glass towers that add depth. It’s like having a mental checklist you can tweak—distance, noise level, and your shooting style all get weighed.
As you compare options, you’ll appreciate the transparency. Each listing highlights why it ranks where it does, plus caveats like seasonal closures or useful angles. You can save favorites, set alerts for new spots, and even request alternates if a place gets crowded. The system grows with you, learning what you actually shoot and what you skip.
Best AI apps for night photography scouting
The top apps pull in crowdsourced tips and street-level data, then present clean maps and clear reasons to pick a spot. You’ll see color-coded markers for safety, accessibility, and the kind of light you’ll get there. Some apps specialize in cityscapes; others lean toward nature views along rivers or coastlines. Pick one or two that match your city and your style, then let them do the legwork before you drive out.
These apps usually offer a quick-start mode: you type in neon street or waterfront with skyline, and the tool returns a handful of strong candidates. You can narrow by distance, time of day, or how crowded a place typically gets. When you tap into live feeds or user photos, you’ll gauge the vibe and what lenses or settings work best for that location. The more you use them, the more precise their suggestions become for your nights out.
A smart move is to combine AI scouting with your own reconnaissance. Use the app to sketch a short list, then check in person at dusk to confirm lighting and access. If a spot looks great online but brings crowds or fences in real life, you’ll know quickly and switch plans. It’s about blending smart data with your eyes.
Use social media geotags with AI
Link social posts to AI to uncover spots you wouldn’t find in traditional guides. When people tag locations, the AI learns which places draw good night photography energy—neon, reflections, or long exposure opportunities. You’ll see trends: certain streets glow on weekends, riverside viewpoints sparkle after dark, or rooftops offer dramatic city horizons. Use this to expand your shortlist beyond the usual suspects.
Combine geotag insights with your own criteria: safety, access after dark, and the kind of backdrop you want. The AI can filter out spots that get crowded or are near noisy bars, so you still get quiet moments for clean shots. Add your notes after you shoot, and the AI will tailor future recommendations to your taste, making each scouting session faster and sharper.
Map layers to scout night skylines
Night photography is a game of layers. You’ll start with a broad map view and zoom into the best pockets of sky, light, and view. Layers act like sheets of glass you stack: each adds a piece of the picture without smashing the whole scene. Plan ahead so your point of view isn’t blocked by a bright sign or tall building. When you study the skyline, you’re learning where you can stand, what you’ll see, and how long you have before the lights change. Use these layers to map a route that feels natural and gives you room to breathe in the frame.
You’ll want a base map with streets and landmarks so you don’t get lost at night. Then add a second layer for streetlight intensity to avoid harsh glare. A third layer should show elevation and building heights, so you know where rooftop shots could work. Finally, bring in a constellation layer—stars, Milky Way if you’re lucky, and vehicle trails if you’re shooting long exposures. With every layer, you sharpen your intuition about where the sky will breathe and where your camera can sit comfortably.
Practice makes perfect. Start with a familiar neighborhood and set up a few routes: a rooftop near a quiet street, a park with a clear horizon, or a bridge with city silhouettes. The more you map, the easier it is to pick a good spot in a hurry when the light fades. Keep a notebook or a simple notes file on your phone to jot down what each spot showed you on different nights. You’ll build a mental map you can trust when the clock starts ticking.
Light pollution and dark‑sky maps
Dark skies are the secret weapon in night photography. When you study light pollution maps, you’ll spot pockets of clearer night air where stars and city lights don’t fight each other. Pick spots where the sky looks deeper, not just a glow behind a skyline. The best shots come when the horizon seems to melt into the dark, and the city’s glow sits below your lens. Compare maps over time to spot shifts—from new buildings to changes in a stadium’s lights—that influence where you shoot next.
Color and temperature matter. A cooler, deeper sky gives you more contrast for stars and the Milky Way, while a warmer glow can help pull the city into the scene without washing it out. Use dark-sky maps to predict how the sky will look at different times of night. If you see a lull in the glow, that’s your cue to position yourself for a clean horizon and a crisp constellation. Elevation matters too: higher ground often means a darker horizon and clearer air, with more star trails and less light pollution.
If you can’t climb, a sheltered rooftop or upper-floor vantage with a wide view can still give you long exposures that let the city glow without washing out the stars. Test your focus before the sun goes down and plan for wind and safety. Your best shots come from patience and a little planning on paper first.
Elevation, rooftops, and sightlines
Rooftops give you dramatic sightlines you can’t get from the street. When you scout elevations, look for a clean horizon and a frame that balances sky and city. A foreground element—like a railing or chimney—adds depth, but avoid clutter. If you have a clear sightline to a bridge, river, or open square, you’ll have space to capture moving lights without losing the stars.
You’ll want to test sightlines at dusk and a bit after dark. Find a spot with a stable surface and a safe way to stay still for long exposures. Check how the sky behaves as you shoot—are there clouds creeping in, or is the Milky Way hiding behind a high rise? A quick practice run helps you lock focus and framing, so you don’t waste minutes when the lights start to glow. Elevation isn’t about showing off height; it’s about controlling the frame so every element lands where you want it.
If you can’t reach a perfect rooftop, look for a balcony, fire escape, or a ledge with a similar perspective. A slight downward tilt can capture the ground’s glow while keeping stars sharp. Protect your gear and yourself—night shoots require a calm pace and clear boundaries. Your eye for lines and layers will guide you to the best perch, even from street level.
Combine maps with AI-powered filters
AI tools can turn rough map ideas into precise shooting plans. Feed your map layers into an AI filter to suggest the best times, angles, and exposure settings for a given night. The AI can flag overlaps between bright signs and the sky or point out rooftops with ideal sightlines you might have missed. You’ll save time and avoid chasing bad light.
Use AI to simulate how a scene will look at different exposure times, ISO, and white balance. It helps you see the possibility of a shot before you step outside. Trust the AI as a helper, not a replacement for your eye. You still pick the spot, judge the glow, and decide when to pull the trigger. If you’re ever unsure, run a quick test shot and compare it with the AI’s suggestion.
In practice, you’ll combine your map layers with AI insights to decide where to stand, when to shoot, and how long to expose. The end result is fewer wasted trips and more consistent night images. If you want a practical starter guide, start with How to Find the Best Spots for Night Photography in Any City Using AI Tools and adapt the tips to your city.
Plan angles and composition for night shots
In night photography, your angles and composition set the mood. Start by outlining your shot on the fly, then lock in a plan you can follow. Think about balance: a bright light on one side and a dark silhouette on the other creates drama. Place key elements along the rule of thirds, but don’t hesitate to break it for bold shapes or contrasts. Your goal is to guide the viewer’s eye from a strong foreground to an interesting background. With a plan, you’ll move faster and capture cleaner frames as the light changes.
Consider your perspective. Crouching low can exaggerate reflections in puddles or glass, while a high angle reveals city grids and street patterns. Your lens choice tells the story—wide for sweeping skies or tight for crowded streets. Map where leading lines—roads, rails, or light trails—will pull you into the frame. If you know where strong lines appear, you can position yourself before the scene changes. Thinking ahead saves you from scrambling with settings when the moment arrives.
Keep a simple shot list in your head. Two solid compositions per location can be enough. Note where you’ll include a reflection, a bright window, or a streetline. Often, the best results come from a strong foreground with a clean background. Planning angles and composition gives you confidence when the lights flicker or crowds shift.
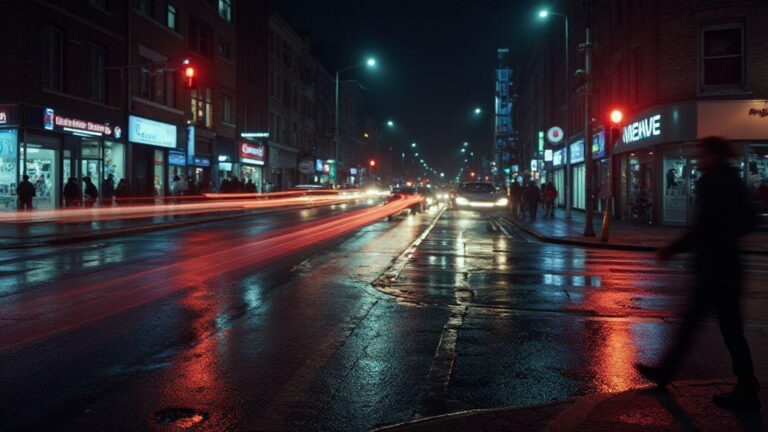
Find leading lines and reflections
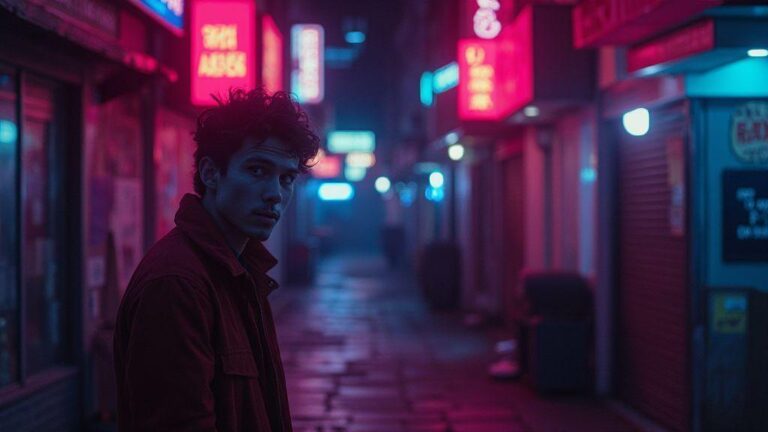
Leading lines are your compass at night. Spot rails, roads, or rows of lamp posts that pull the eye toward a focal point like a glowing sign or distant skyline. Reflections—rain-slick streets, glass storefronts, or water surfaces—double the impact without crowding the frame.
When composing around lines, aim for clean edges and minimal clutter. If a line ends abruptly, that moment becomes your anchor point. Include a foreground line and a distant element that repeats the line’s rhythm for depth. If the background gets busy, back up or switch angles to keep the line feel intact. Reflections work best with contrast—bright highlights against dark water or pavement—so seek scenes where light meets shadow.
Practice quick adjustments: nudge a step left or right to align a line with the frame edge, or tilt the camera to keep reflections crisp. Lines straight and reflections sharp yield more satisfying results, even in busy scenes. Over time, finding lines and reflections becomes second nature, giving your nights a signature look.
Use AR and AI previews to frame
Augmented reality previews act as a night-hiking map. They let you see how a scene will look before you press the shutter—visualize composition, adjust the frame, and anticipate shadows. With AR, test where leading lines meet the subject and how foregrounds balance with the background. It saves time when the city is buzzing and light is changing fast.
AI previews take it further. They can suggest tweaks to your frame, like shifting your subject for symmetry or increasing depth by lowering the camera. You’ll get instant feedback on exposure and color balance, helping you decide on a final look. Use these previews to experiment with angles you might not try in the moment. The goal is a strong, intentional frame.
Test compositions with AR previews
AR previews let you test multiple compositions without moving around. Line up a skyline behind a silhouette, then switch to a foreground bridge and compare. Look for how the lines guide the eye and how reflections perform at different angles. You’ll quickly spot which setup feels most dramatic and which is too busy. Keep your hands ready to adjust, but decide before you press shutter.
How to Find the Best Spots for Night Photography in Any City Using AI Tools
Finding the right spots can be easier when you lean on AI tools. You’ll input a few preferences—vibe, neighborhood, and the kind of light you want—and the AI returns potential rooftops, bridges, or waterfronts with great night views. Use this to plan your route, not replace your eyes. You still scout with your feet and your camera.
As you explore, note how AI suggests timing for the best glow—city lights, street lamps, and reflections. It can propose less crowded spots or safe vantage points you might not consider. Remember to verify safety and access regardless of what the tool shows. With practice, you’ll mix human instinct with AI insights to find spots that feel tailor-made for your night stories.
Camera settings and techniques for low‑light work
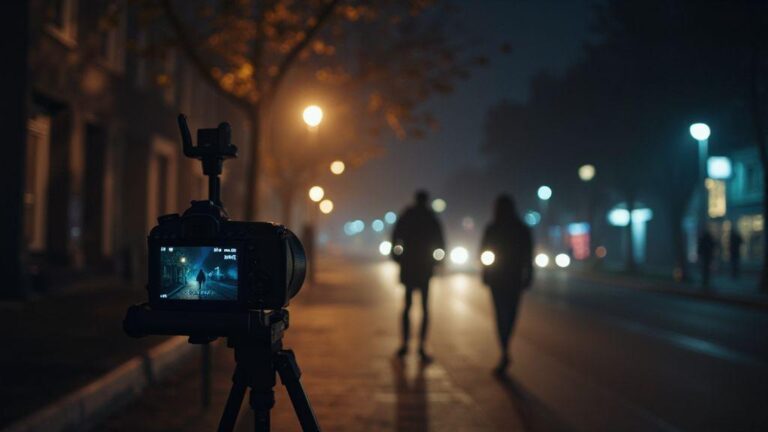
When you’re chasing night photos, your camera becomes your best tool. You’ll think in steps: stabilize first, then choose settings that keep your image clean and bright without losing mood. Start by picking a scenario that matches your goal—city lights, stars, or a quiet street—and adjust as you go. In low light, small changes in exposure or focus can make a big difference in clarity and color. Use your intuition: if you see blur, tighten your shutter or raise ISO just enough to keep motion in check. The key is to balance exposure with noise, so your final image feels natural rather than gritty. Fast lenses like 35mm or 50mm give you more flexibility in dim conditions, letting you shoot without pushing ISO too far.
Night scenes demand patience. Take multiple quick shots to compare exposure and sharpness, especially as lighting changes. If you’re on a busy street, a sturdy tripod is your ally, but you can also improvise with a solid surface. Use manual focus or live view magnification to nail fine details in dark areas. Think about the rhythm of lights—bright windows, street lamps, passing cars—and let that guide your composition. Your end goal is a scene that feels dimly lit but alive, not flat or washed out.
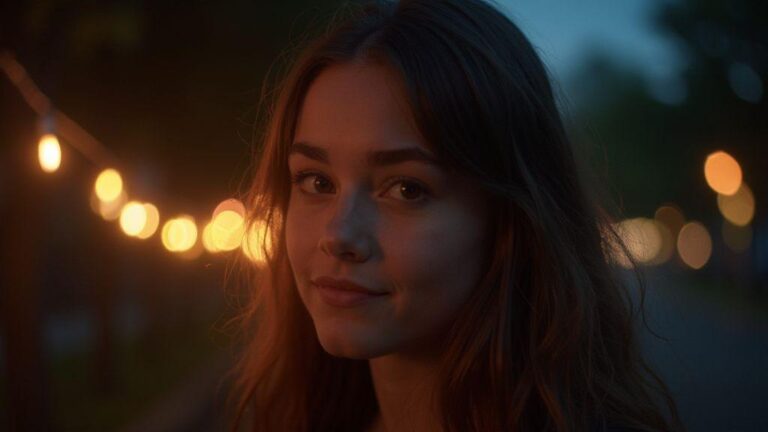
Keep in mind the vibe you want: a long exposure can render motion as silky trails, while a short exposure freezes action for crisp lines. Both rely on smart shutter speed and aperture choices. If moving elements are present, plan for motion blur: slower shutter to show movement, faster to freeze it. White balance should feel true to the scene; avoid neon-green casts. Practice with a simple scene first, then add complexity as you get comfortable. Your confidence grows with each shot you review—learn what works and repeat it.
Stabilization and long exposures
Stability is your first friend at night. A tripod is ideal, but you can improvise with a solid surface or a backpack on a chair if needed. Lock your tripod, use a remote shutter or self-timer, and enable mirror lock or silent shooting if available. Long exposures reveal motion—cars, clouds, water—so plan where movements help the story and where they ruin sharpness. Use a timer or remote to avoid camera shake. If wind or vibration is an issue, weigh your setup down or shield it to keep your frame crisp.
Experiment with longer exposures to test how light pools in the frame. If you see heat trails or shake, adjust the tripod or shorten the delay. Use a low ISO to hold detail and push exposure in post if needed. For star trails or smooth water, stack shorter frames to reduce noise. Remember, every extra second of exposure increases blur risk, so balance it with motion in the scene.
If your lens has stabilization, turn it off on a sturdy tripod to avoid conflicts. If you have a mirrorless body with in-body stabilization, you can still benefit, but don’t rely on it alone for sharp night photos. Pair a solid mount with careful exposure choices. Practice in one location to learn how wind, traffic, and humidity affect your shot, then reuse that setup for similar spots.
ISO, aperture, and noise control
Your ISO toolkit for night work includes two things: you want enough light, but you don’t want noise. Start with a moderate ISO and a wide aperture to keep shutter speeds reasonable without flooding the sensor with noise. If you see grain, drop ISO and compensate with a longer exposure or brighter post. The goal is clean tones while preserving texture in lights and shadows.
Shoot RAW to recover shadows and highlights without sacrificing color. Keep the aperture wide enough to collect light (f/2.8–f/4 is common for street scenes), then adjust ISO to keep shutter around 1/15 to 1/60 second depending on movement. If essential mood involves water or clouds, test how your gear handles slower shutters and higher ISO first. Noise reduction in post helps, but capturing clean data at the sensor is better than heavy noise removal later.
Watch for color cast under artificial lighting. White balance saves you from green neon or orange sodium skies. A neutral gray card in a representative frame can guide balance, then fine-tune in post. If you stack frames for noise reduction, ensure perfect alignment to avoid ghosting or halos. Your aim is smooth, natural tones that keep the scene believable.
Use AI exposure calculators
AI exposure calculators speed up night planning. They help estimate shutter speed, aperture, and ISO based on scene type and lighting. Use them as a starting point, then adjust by eye for the final look. They can suggest exposure brackets for HDR nights or stack-friendly sequences, saving you from guesswork. You’ll still rely on your eyes and taste, but these calculators give a solid baseline so you don’t waste time tweaking in the field.
Safety, permissions, and legal checks at night
Night shoots are exciting, but you still need to stay smart and legal. Plan your route, check what’s allowed after dark, and keep your gear tucked away when you’re not shooting. If you’re unsure about a spot, choose a safer, well-lit area or shoot from public land where rules are clear. Your goal is to capture mood without risking fines or danger.
Visibility is your best tool. Wear bright or reflective clothing when moving through busy streets or near traffic, and keep a small flashlight handy for adjusting settings. A headlamp can save you from tripping or fumbling with gear in the dark. Keep lenses and batteries warm in a bag to prevent moisture and be ready when light changes.
If you’re unsure about a location, slow down and ask. Check local ordinances, park rules, and signs. Don’t assume a public space is open at night just because it’s daytime. Photograph in open, designated areas and respect posted hours. When in doubt, move to a well-lit public area or a location known to permit night photography. Your careful approach keeps you safe and streets friendly for photographers.
Check permits and private property rules
Verify permits or access rules before you shoot. Some spots look public but require permission or a permit for professional gear or long setups. If a property is private, you’ll need consent from the owner or manager to be there after dark. Without permission, you risk fines, confiscation of gear, or being asked to leave. Always confirm the status of the location beforehand.
Always have a plan B in case your first choice is off-limits. If you’re unsure, call the park office, city hall, or the property manager. Be clear about your intent, gear, and timing. A quick, written OK or permit saves you from awkward confrontations and lets you shoot with confidence. If you can’t secure permission, choose a location that clearly allows photography at night. Your preparation shows respect for the space and its rules.
If you obtain permission, carry copies of permits or letters and keep them handy. You’ll need to show these if questioned. Some places require temporary photography passes or business licenses for professional setups. By keeping the paperwork ready, you stay focused on composition rather than arguing your case. Your professionalism keeps your night session flowing.
Personal safety tips for night shoots
Night shoots demand heightened awareness. If possible, go with a buddy or shoot in areas with others around. Share your plan and check in after a set time. Keep your camera bag zipped and tripod secured when moving between spots. I’ve learned to tuck valuable gear out of sight when not actively shooting to stay calm and ready.
Carry a small first-aid kit and a charged phone with emergency contacts saved. Use well-lit routes back to your car or transit, and avoid shortcuts through dark alleys. If you’re near water or construction zones, stay alert for hazards like uneven ground, loose gravel, or moving equipment. Balance curiosity with caution to chase dramatic light without trouble.
When setting up, test your footing, then secure your tripod. Use a lens hood and weather-sealed gear if rain or spray is possible. If near traffic, position yourself and gear to stay clear of vehicles and pedestrians. You’ll shoot more confidently knowing you’ve minimized risks and protected yourself and others.
Use AI to flag restricted areas
You can use AI to check for restricted zones before you go out. Upload a map or coordinates and let the AI flag private property, restricted government spaces, or areas with time-based access limits. This helps you plan safer routes and avoids unwanted encounters. The goal is to use technology to keep your night photography smooth and legal, so you can focus on striking shots.
Find and share spots with AI-powered communities
You’ll love how AI-powered communities help you discover night photography spots you’d miss on your own. The moment you join a local group, you tap into real-time tips from neighbors who shoot after dark. You get map pins, photos, and seasonal insights all in one place, so you don’t waste time wandering. When you post your own finds, the community learns your taste—you’ll see more spots that fit your style, from quiet riverfronts to busy neon streets. This collaborative approach makes every shoot feel practical, like having a tiny guide in your pocket.
As you contribute, AI curates the best spots for you. It ranks suggestions by lighting, crowds, and safety, then adds notes on when the scene shines. You’ll see crowd-free hours, weather tips, and even composition ideas based on what you’ve photographed before. The more you engage, the smarter the recommendations become. You’ll end up with a personal map of reliable locations you can return to—without the guesswork.
Finally, you can share your own night shots directly through the platform. The AI helps craft captions, tag relevant features, and attach tips for others. You’ll build a living archive of your journeys, turning each shot into a conversation starter. The result is a collaborative guide you and peers continuously improve together.
How you discover local locations with AI
You start by letting AI analyze public photos near you. It spots recurring landmarks, bridges, and skylines that glow at night. The tool surfaces promising spots based on color, light, and mood—so you find scenes that match your vibe quickly. Filter by vibe (industrial, romantic, quiet) and accessibility to see only what you can reach after dark.
Next, you receive suggested routes. AI trims the best paths between two spots, noting traffic flow and safe walking areas. Save these routes and run them in a single evening or weekend. If a spot looks crowded, the AI can propose a nearby alternative with similar lighting. It’s like having a local explorer who knows the city’s night secrets, minus the guesswork.
You also get timing tips. AI tells you the best days and hours for specific scenes, factoring moon phases, tides, and forecasts. You’ll know when neon reflects off rain-slick streets or city lights pop against a clear sky. With these cues, you plan shoots that hit the sweet spot every time.
Use AI to edit, tag, and optimize posts
When you finish a shot, use AI to edit quickly without losing your style. The tool offers gentle adjustments to exposure, contrast, and color balance, preserving your night atmosphere. You’ll keep your signature look while nudging images toward the strongest version. Then you tag the post with scene descriptors like neon reflections or long exposure stars, so others can find it by vibe.
AI optimization goes beyond edits. It suggests headline ideas and captions that grab attention without sounding pushy. You’ll see recommended keywords that help your post show up in searches for similar night scenes. The more you post, the more precise these suggestions become. Your work starts to attract people who care about the same night-time moments as you do.
Finally, you’ll get performance feedback. AI tells you which tags, times, and spots tend to resonate with the community. You can fine-tune future posts for higher engagement and quicker saves and shares. It’s smarter posting that respects your voice.
Save routes and best times with AI
You save routes you love and lock in the best times for each spot. The AI keeps a calendar of your favorites, with reminders for optimal windows. You’ll know when the city lights peak or crowds thin, so you never miss the shot you wanted. It’s a simple plan: pick a route, pick a time, go shoot.

Smartphone Night Photography Enthusiast & Founder of IncrivelX
Vinicius Sanches is a passionate smartphone photographer who has spent years proving that you don’t need an expensive camera to capture breathtaking images after dark. Born with a natural curiosity for technology and a deep love for visual storytelling, Vinicius discovered his passion for night photography almost by accident — one evening, standing on a city street, phone in hand, completely mesmerized by the way artificial lights danced across wet pavement.
That moment changed everything.
What started as a personal obsession quickly became a mission. Vinicius realized that millions of people were carrying powerful cameras in their pockets every single day, yet had no idea how to unlock their true potential after the sun went down. Blurry shots, grainy images, and washed-out colors were robbing everyday people of memories and moments that deserved to be captured beautifully.
So he decided to do something about it.
With years of hands-on experience shooting city streets, starry skies, neon-lit alleyways, and creative night portraits — all with nothing but a smartphone — Vinicius built IncrivelX as the resource he wished had existed when he was just starting out. A place with no confusing jargon, no assumptions, and no gatekeeping. Just honest, practical, beginner-friendly guidance that actually gets results.
Vinicius has tested dozens of smartphones from every major brand, explored dark sky locations across multiple states, and spent countless nights experimenting with settings, compositions, and editing techniques so that his readers don’t have to start from scratch. Every article on IncrivelX comes from real experience, real mistakes, and real lessons learned in the field.
When he’s not out shooting at midnight or writing in-depth guides for the IncrivelX community, Vinicius can be found exploring new cities with his phone always within reach, looking for the perfect shot hiding in the shadows.
His philosophy is simple: the best camera is the one you already have — you just need to learn how to use it in the dark.