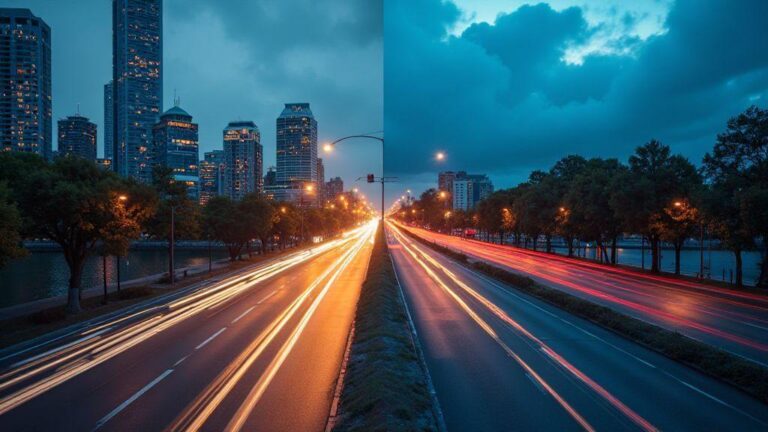
How to Create Light Trail Photos Using Long Exposure on Android 15 Devices
Best apps for long exposure on Android 15
When you want to blur motion or light up night scenes, you need apps that give you real control. Look for apps that let you adjust shutter speed, ISO, and focus manually, not just automatic modes. The best Android 15 apps let you lock exposure and white balance, so your long exposure stays consistent from start to finish. Some apps are simple, others offer every dial and slider you might want. Pick one that fits your style, whether you’re chasing traffic trails or silky water.
Reliability matters too: choose apps that stay solid across updates and don’t drain the battery quickly. Long exposure can tax your camera, so pick apps that optimize processing and save your photos quickly. If you shoot in RAW, you’ll have more flexibility to adjust later without losing detail. In short, the right app lets you focus on composition while the app handles the tech.
If you’re new to this, start with a calm setup. A steady hand matters more than a million settings. As you gain confidence, you can experiment with longer exposure times and different light sources. The goal is to capture the motion you see, not fight your tools.
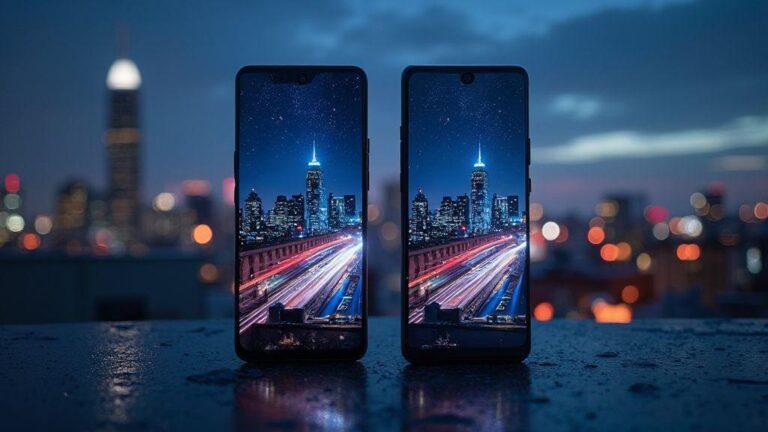
Compare Camera2 API support
Camera2 API support matters because it tells you how much control your app has over the camera hardware. Some apps use the older camera API, which limits manual options. With solid Camera2 support, you’ll get full manual controls like shutter, ISO, focus, and RAW capture. You’ll notice crisper detail and less automatic stabilization fighting your exposure. If you’re serious about long exposure, this is a must.
Match your device’s hardware and software. Some Android 15 devices have better Camera2 compatibility than others, and updates can change things. Look for app notes or user reviews that mention how well the app interacts with your model. Frequent complaints about limited controls are a red flag. You want an app that exposes the levers you need for precise long exposure shots.
Pick apps with manual mode
Manual mode is your best friend when you want creative control. In manual mode, you set the shutter speed, ISO, focus, and white balance. This locks in your look and keeps it consistent from frame to frame. You’ll be able to shoot traffic trails, star trails, or misty water with predictable results. The payoff is the ability to fine-tune exposure for every scene instead of guessing.
When you pick an app, confirm it offers independent control of shutter and ISO, plus focus peaking or at least clear manual focus. Some apps also let you lock exposure after you compose your shot, which stops brightness from drifting as light changes. If you’re working in tricky light, manual mode is worth its weight in gold.
Install a trusted long exposure app
Install only a trusted app from a reputable source. Read reviews, check permissions, and verify that the app hasn’t asked for things it doesn’t need for long exposure work. After you install, test a few quick shots in bright light to see how the app handles exposure and focus. Then try a night scene to verify you can lock exposure and achieve smooth, consistent results. If something feels off—noise, missed focus, or lag—try another app.
When you’re ready, save a couple of test shots as RAW if your app supports it. That way you can compare before-and-after edits and see which app preserves detail best. A trusted app is worth its weight because you won’t fight with it to get results you want.
Manual shutter speed on Android 15
You’re diving into manual shutter speed on Android 15, and you’ll get cleaner shots when you control how long the sensor collects light. Shutter speed is like blink time for your camera—short bursts freeze motion, long ones blur it into trails or smooth water. On Android 15 you can set it to fractions or seconds, but longer exposures create dramatic effects like light trails or night scenes. Start with practical goals: test a few seconds in low light, then compare to your auto mode to see how much control you have.
Longer shutter speeds demand a steady hand or a tripod. Moving to manual shutter speed forces the camera to capture more light over time, amplifying color and motion. Try 1 second, then 2, then 4 seconds to build intuition. On Android 15, you’ll find the option under Pro/Manual modes, allowing exact seconds rather than auto guesses.
Practice helps you understand how your subject reacts to time. With longer shutters, moving cars become light trails, waterfalls look silky, and stars form trails. You’ll learn to anticipate results before you press the shutter. Keep your phone steady for sharp long exposures.
Set seconds, not fractions
Start by setting the shutter in whole seconds to simplify planning. Begin at 1 second and move to 2, 3, or 4 seconds. You’ll see the frame brighten in stages, and motion blur responds accordingly. This approach is beginner-friendly and makes it easy to compare how different lengths change the image.
Start with 1–8 second trials
Begin with a mini set: 1, 2, 4, 8 seconds. This range covers quick action, gentle motion, and dramatic trails. Keep the environment constant while testing so differences come from shutter time, not other changes. Longer seconds need support: a tripod or stable surface is helpful in the dark. If not available, use a sturdy object and a timer to minimize shake.
Lock shutter speed before shooting
Before you press the shutter, lock the shutter speed so it doesn’t jump to a different value if you tap the screen. Locking keeps exposure consistent across frames. Once locked, you can focus on timing your shot and balancing brightness with ISO and focus. A locked shutter is your steadier hand in the digital world.
Long exposure settings on Android 15
Long exposure on Android 15 lets you capture light trails and smooth motion. You’ll want to experiment, but a few solid starting points help you get cleaner results. Balance light and motion so photos don’t look washed out or blurry.
Balance ISO and shutter time
Your first move is balancing ISO with shutter speed. Longer shutter times let in more light, brightening trails but increasing border blur risk if you’re not perfectly still. Start with a moderate shutter like 1/4 to 1 second, then lower ISO to reduce noise as you lengthen the shutter. Keep ISO at or below 100 on many devices for cleaner trails. If the scene is too dark, lengthen the shutter slightly before raising ISO.
Use low ISO for less noise
Low ISO is your friend for long exposures. It minimizes grain and keeps colors true, especially with bright trail points. Begin at ISO 100 or 200 and lock it if possible. If the shot looks too dark, lengthen the shutter rather than increasing ISO. Clean trails and smoother skies come from keeping ISO quiet.
Save custom exposure presets
Saving a preset lets you skip setup on future shoots. Dial in ISO, shutter time, white balance, and focus, then save as a custom preset. This helps you jump into a repeatable setup, handy for specific scenes or light shows. If your device supports multiple profiles, label them clearly (e.g., Trail-1). This keeps your workflow fast and consistent.
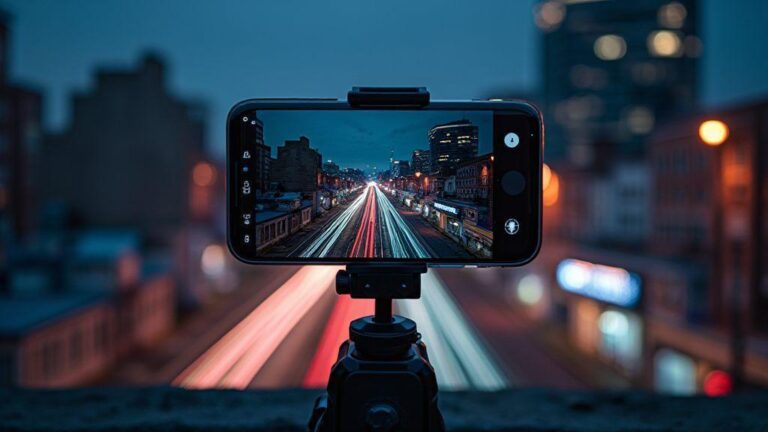
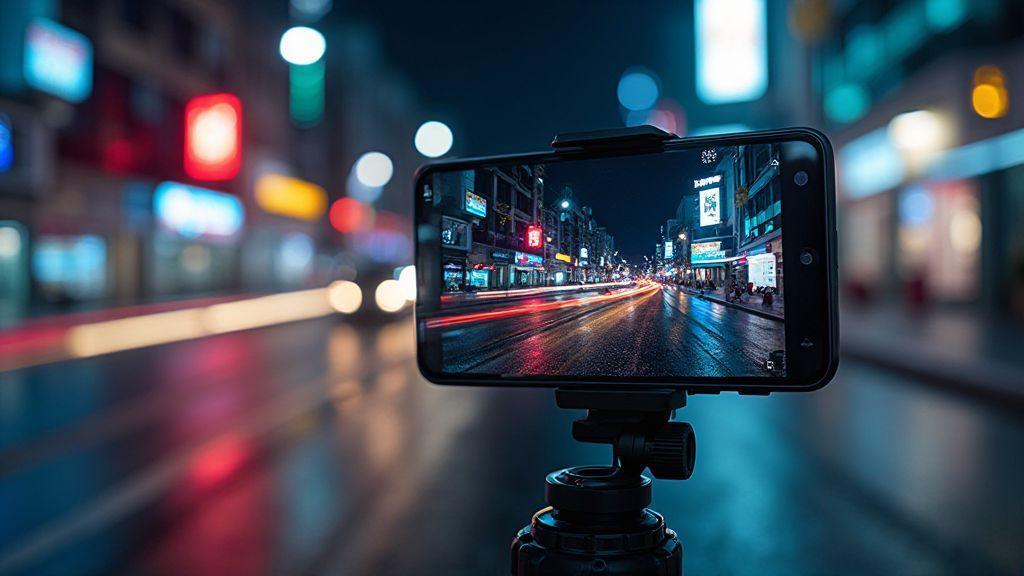
Steady shots tripod tips for Android long exposure
Long exposure can turn busy scenes into smooth photos. Pair the right equipment with a simple setup to reduce blur and keep composition clean.
You’ll notice the difference when you start using these tricks. A steady base helps you keep a consistent frame, easing post-editing later.
Use a sturdy tripod or flat surface
A real tripod provides the most stability. If you don’t have one, place your phone on a solid flat surface—avoid wobbly spots. Lock tripod legs and keep the lens roughly at chest height for easy framing. If the surface isn’t perfectly level, adjust slightly and check the horizon. A small bubble level helps, but you can also fix in post if needed. A stable base means fewer post-shot fixes.
Use a remote or timer to avoid shake
Do not touch the phone when the shutter opens. Use a remote, Bluetooth clicker, or the timer. A 2–5 second delay can save you from tiny shakes that blur trails. Indoors, the self-timer can suffice. A longer exposure time depends on your device, but even short delays beat camera shake. For steadier results, enable anti-shake features if available, but remember tripod timer is still king.
Stabilize your phone with a clamp
A clamp prevents slipping on the tripod or surface. Secure the grip and tighten until there’s no movement. If you lack a clamp, improvise with a padded holder or car mount on a stable surface. Test a few seconds after clamping to confirm nothing shifts. The trio you’ll want: a sturdy tripod, a reliable remote, and a solid clamp.
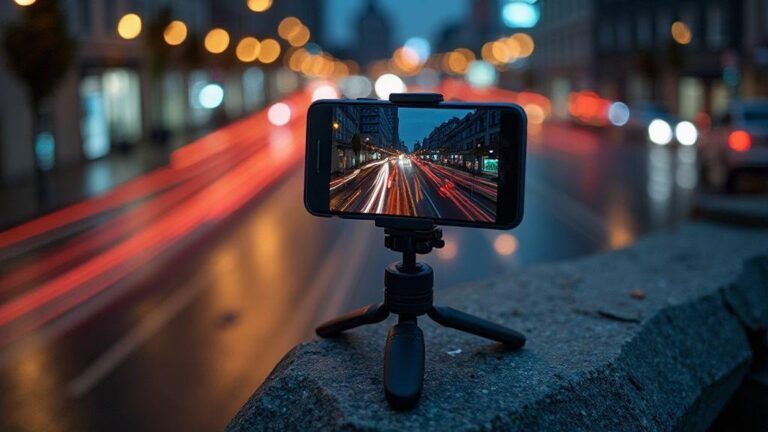
Light trail photography tips on Android
You’re chasing glow and motion, and your phone is the tool. Learn to capture bright streams with long exposure on Android, choosing spots, guiding trails, and planning shots so lines look intentional. Control, timing, and a steady hand matter, and yes, you can do this on Android 15 devices.
Choose busy streets or moving lights
Pick scenes with motion to create visible trails. Busy streets with cars or buses yield long lines. If you’re near a park, look for moving lights from lamps or bicycles at dusk. Safety and permission matter; shoot on public areas if possible. Arrive early to test angles and avoid surprises once exposure starts.
Use leading lines for better trails
Leading lines pull the viewer’s eye toward the main subject. Look for roads, sidewalks, or railings that sweep toward an intersection or focal point. Place your camera so lines guide trails to the center or a bright spot. Low angles can make trails look longer; higher angles capture more of the scene but may shorten trails. Plan angles to keep lines clean and purposeful.
Plan where trails will enter frame
Treat each light trail as a line you’re drawing. Decide where movement begins and ends before pressing the shutter. Frame so trails cross the scene diagonally for dynamic movement. Sketch paths mentally or note them, then adjust position or timing to line up with your planned entry point.
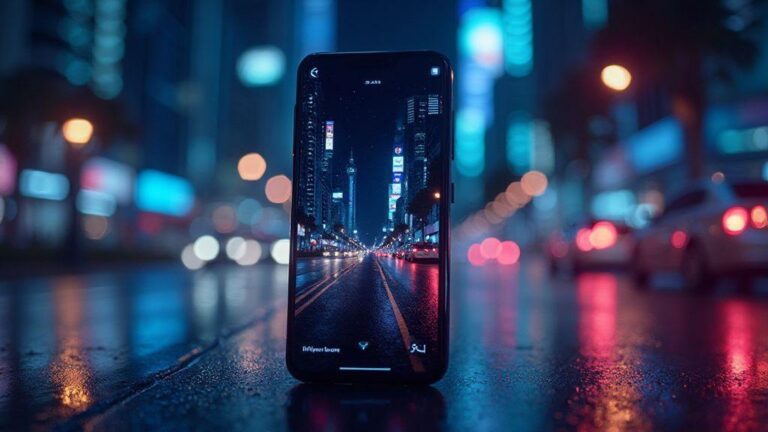
Night photography Android 15 light trails
Chase smooth, bright lines by thinking in stages: timing, setup, and steady exposure control. Start with low ISO and slow shutter speeds to reduce noise and keep trails bright. A sturdy tripod and a timer/remote help avoid shake. Aim for continuous lines from edge to edge, balancing exposure to prevent overexposure.
Shoot during blue hour for color
Blue hour yields rich tones that help light trails pop. Set white balance to around 4000K–5000K for a cool tint. A tripod and remote help minimize shake. Watch trail thickness—exposures that are too long blur the tail. Practice at known spots to learn how the sky and lights interact.
Avoid bright background lights
Bright backgrounds can steal attention from trails. Shade backlight with a lens hood or screen, keep ISO low, and lengthen the shutter enough to render trails clearly. If halos appear, reduce exposure or lower ISO. Shoot RAW if possible for post-edit flexibility.
Scout locations in daylight
Walk spots in daylight to map angles and safe setups. Note where trails start and end, and how curves shape the line. Return at night with a plan and a tripod ready. Test frames with short exposures to anticipate results when lights go on.
Motion blur light trails on Android phone
To capture light trails, use longer exposures and keep your phone steady. With Android 15, experiment in manual mode and adjust shutter speed. The longer the shutter, the longer the streaks. Use a stable surface or a tripod, and consider panning or moving with the subject for dynamic effects. If trails look smeared, shorten the exposure or adjust angle. Shooting RAW helps you recover detail later, and a quick post-check lets you refine your approach.
Use continuous vehicle movement for streaks
For smooth streaks, keep the subject moving continuously. Pan with the subject or tilt slightly to maintain trail length. Constant motion usually yields better results than starting and stopping. Keep the composition simple with a clear foreground to make trails pop.
Try panning for dynamic effect
Panning follows the subject, keeping it relatively sharp while the background blurs. Start with a slower shutter, then smoothly follow the subject. A light touch helps; avoid aggressive motion. Burst mode can help you capture several attempts quickly.
Camera2 API long exposure on Android 15
The Camera2 API is your toolkit for reliable long exposure. Long exposure is a dance between light and time; you’re the choreographer guiding every step.
Before you dive in, know that firmware variations may affect features like RAW and manual controls. Verify access to Camera2 controls with a preferred app and have a plan for testing.
Check app access to Camera2 features
Confirm your app can reach Camera2 features (RAW, manual ISO, shutter, focus). If you see these options, you’re in the right place. If not, consider a different app or enabling developer options. Do a quick before-and-after test: compare auto with manual, and look for better dynamic range and cleaner shadows.
Enable RAW and manual controls if available
Turn on RAW capture and manual controls where possible. Saving RAW allows post-edit flexibility; pair it with JPEG for quick sharing. Use a low ISO baseline and longer shutter to capture trails. If fixed focus is necessary, lock focus at a safe distance. Exposure compensation can be used sparingly to avoid blowing highlights.
Test Camera2 settings before night shots
Run quick tests: start with 2–4 seconds at low ISO, review trails and noise. If needed, lengthen to 5–10 seconds and observe how brightness stacks. If highlights blow out, back off exposure or reduce ISO. Keep notes on shutter, ISO, focus distance, and trail length to reuse later.
How to Create Light Trail Photos Using Long Exposure on Android 15 Devices
How to Create Light Trail Photos Using Long Exposure on Android 15 Devices is a practical framework for capturing luminous trails with confidence. Start by shooting RAW, then lock exposure and manual settings to maintain consistency. Use a sturdy tripod, a timer or remote, and a fixed focus for sharp lines. Begin with modest shutter speeds (1–4 seconds) and low ISO, then adapt as the scene dictates.
- Prepare by testing a few frames in bright light, then move to night scenes to verify exposure remains stable.
- Save custom exposure presets so you can jump into repeatable setups for familiar spots.
- Export your light trails in web- and social-friendly sizes (e.g., 1920×1080 for feeds, 1080×1350 for stories) in sRGB color space.
- Back up RAW originals and edited files to keep your options open for future edits.
This guide reinforces that the key to great light trails on Android 15 is deliberate control, steady technique, and thoughtful planning. With practice, you’ll turn busy streets and neon into bold, clean lines that read as intentional art.
Backup originals and edited files
Back up RAW originals to cloud or external storage. Keep a separate folder for edited exports with clear naming (e.g., LightTrailAndroid15YYYYMMDDRAW and LightTrailAndroid15YYYYMMDDEDIT01). Backups protect your bold explorations and speed up your workflow on future shoots.

Smartphone Night Photography Enthusiast & Founder of IncrivelX
Vinicius Sanches is a passionate smartphone photographer who has spent years proving that you don’t need an expensive camera to capture breathtaking images after dark. Born with a natural curiosity for technology and a deep love for visual storytelling, Vinicius discovered his passion for night photography almost by accident — one evening, standing on a city street, phone in hand, completely mesmerized by the way artificial lights danced across wet pavement.
That moment changed everything.
What started as a personal obsession quickly became a mission. Vinicius realized that millions of people were carrying powerful cameras in their pockets every single day, yet had no idea how to unlock their true potential after the sun went down. Blurry shots, grainy images, and washed-out colors were robbing everyday people of memories and moments that deserved to be captured beautifully.
So he decided to do something about it.
With years of hands-on experience shooting city streets, starry skies, neon-lit alleyways, and creative night portraits — all with nothing but a smartphone — Vinicius built IncrivelX as the resource he wished had existed when he was just starting out. A place with no confusing jargon, no assumptions, and no gatekeeping. Just honest, practical, beginner-friendly guidance that actually gets results.
Vinicius has tested dozens of smartphones from every major brand, explored dark sky locations across multiple states, and spent countless nights experimenting with settings, compositions, and editing techniques so that his readers don’t have to start from scratch. Every article on IncrivelX comes from real experience, real mistakes, and real lessons learned in the field.
When he’s not out shooting at midnight or writing in-depth guides for the IncrivelX community, Vinicius can be found exploring new cities with his phone always within reach, looking for the perfect shot hiding in the shadows.
His philosophy is simple: the best camera is the one you already have — you just need to learn how to use it in the dark.