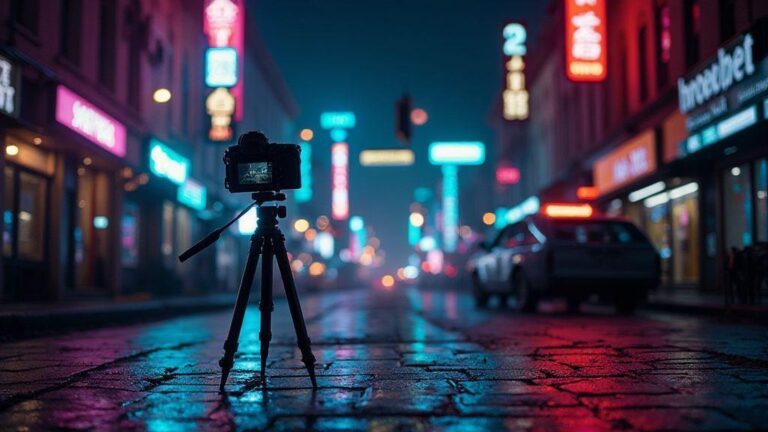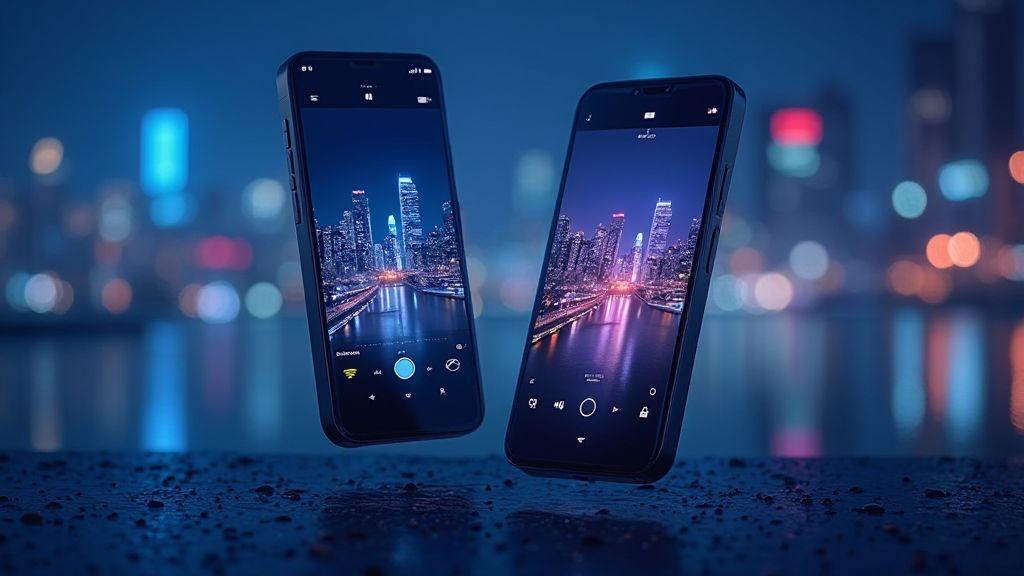
How to Combine Pro Mode and Night Mode for Stunning Results on iPhone 17 and Galaxy S25
Understand Pro Mode and Night Mode
In this section you’ll learn what each mode does and how they can change your photos. Pro Mode gives you control, while Night Mode helps you squeeze light from dark scenes. You’ll see where to tweak settings and when to use each one for the best effect. Think of Pro Mode as your toolbox and Night Mode as your torch in low light. You can use them separately, or together, to get clear, sharp pictures.
Pro Mode is your manual override. It lets you set the shutter speed, ISO, white balance, and focus like a pro. You’re not guessing—you decide how your shot should look. This is great for consistent results across a series of photos or when lighting is tricky. Night Mode acts like a smart helper. It analyzes the scene, brightens shadows, and reduces noise in dark corners. It can slow the shutter a bit to gather more light so your photos aren’t grainy. Use it when you’re in a dim place but want the scene to feel natural.
Together, Pro Mode and Night Mode form a powerful combo. Start with Night Mode to grab a clean baseline in low light, then switch to Pro Mode to nudge exposure or color the way you want. Night Mode often handles the light while Pro Mode handles the details you care about.
What Pro Mode controls
When you pick Pro Mode, you control key pieces of the exposure puzzle. The first thing you set is the shutter speed. A fast shutter freezes motion but needs more light; a slow shutter lets in more light but can blur moving subjects. Next is ISO—the brightness you want. Higher ISO adds brightness but can introduce grain. White balance keeps colors true in different lighting, and focus locks onto your subject so it doesn’t drift. You’re deciding how the camera should capture what you see, not relying on the phone guessing.
Your goal with Pro Mode is to get exactly the look you want. For a sunset, you might use a slower shutter for a smooth sky, a lower ISO to keep noise down, and warm white balance. Indoors with motion, you’ll want a faster shutter to freeze action and careful ISO to avoid grain. Keep notes of your favorite combos so you can repeat them later.
What Night Mode does
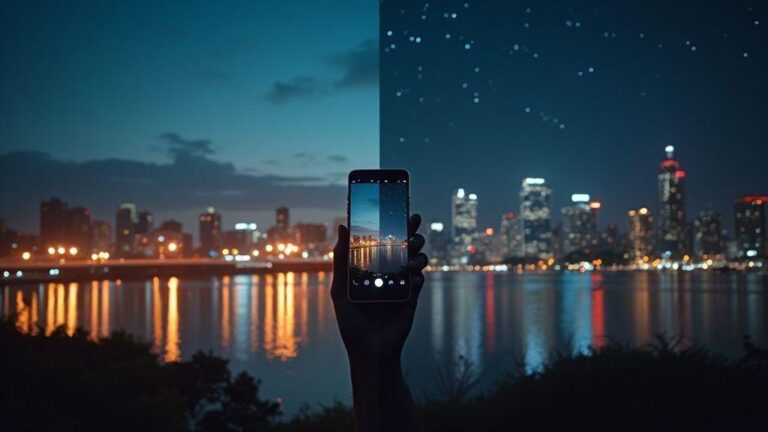
Night Mode brightens dark spots by using a longer exposure and intelligent processing to reduce noise. It smooths shadows so details appear where you expect them. The result is a brighter, clearer image even if your hand is a bit shaky. It shines in dim rooms, city nights, and starry skies.
Night Mode minimizes grain and reveals detail in dark areas, balancing brightness and sharpness. It steps in to prevent overexposure on bright highlights while preserving context. It’s like carrying an extra light in your pocket without a flash.
Key terms to know
- Shutter speed: How long the sensor is exposed to light. Faster speeds freeze motion; slower speeds gather more light but can blur moving subjects.
- ISO: Sensor sensitivity to light. Higher ISO means brighter images but more noise.
- White balance: Color temperature setting that keeps whites white and colors accurate.
- Focus: Where the lens locks onto detail.
- Noise: Grainy spots in a photo, common in low light or high ISO.
- Exposure: Overall brightness, a blend of shutter speed, ISO, and aperture (if available).
When to use Pro Mode with Night Mode
Pro Mode gives precise control over exposure, shutter speed, and focus—great for moving subjects or tricky lighting. Night Mode brightens images with advanced processing. Together, they can yield clean, detailed photos, but you’ll benefit from a plan: assess steadiness, scene brightness, and whether you need to freeze action or preserve ambiance. In a dim cafe, Night Mode may suffice. On a city street with blinking signs and pedestrians, Pro Mode helps you dial in the exact shutter and ISO.
As you grow comfortable, you’ll notice Pro Mode lets you dial in settings like shutter, ISO, white balance, and focus; Night Mode optimizes sensitivity and uses longer exposure with computational enhancements. Start with Night Mode for quick snaps, then switch to Pro Mode to tailor exposure or handle motion. If timing matters, Pro Mode helps you lock the shutter; for softly lit, atmospheric shots, Night Mode does most of the heavy lifting.
Low light scenes that need manual control
In truly low light switch to Pro Mode. Control shutter speed to freeze or show motion, and set ISO to balance brightness and noise. Use a tripod or stable surface if possible. In a dark room with a lamp, set a moderate shutter and low ISO to keep skin tones natural, then adjust white balance to avoid green or blue casts. If someone is moving, raise the shutter slightly to reduce blur. Pro Mode lets you fine-tune focus to keep details sharp.
Contrast helps: Night Mode can handle noise, but Pro Mode preserves detail in bright spots like lamps or windows. In a dim cafe, balance a slower shutter for ambiance with enough light for facial details. Practice with different shutter speeds and ISO values to learn what looks natural.
When Night Mode alone is enough
Night Mode is your ally when the scene is still and you’re in a hurry. It combines longer exposure with smart processing to reduce grain and boost brightness, delivering clean, balanced images. It shines in a dim street or candlelit room with still subjects. Expect a soft, ambient look with some smoothing and detail enhancement that software provides. It’s most effective when you’re okay with automatic processing and don’t need precise color or action freezing.
Limits remain: moving subjects can cause motion blur or over-aggressive noise reduction. In those cases, switch to Pro Mode or use Night Mode for a shot base and then reclaim control mid-shot.
Decision checklist
- Is the scene still or moving slowly? If still, Night Mode can handle most exposure; if moving, use Pro Mode to set shutter speed and focus.
- Do you need precise control over exposure, white balance, or focus? Pro Mode is best.
- Can you stabilize the shot? If yes, longer exposures in Pro Mode or Night Mode with less noise are possible.
- Is color accuracy important? Pro Mode lets you dial white balance, ISO, and shutter to preserve tones.
- Do you want speed or flexibility? Night Mode is fast with good results; Pro Mode offers flexibility, at the cost of setup time.
iPhone 17 Pro Mode Night Mode settings
You’re about to take control of your iPhone 17 Pro. In Night Mode you balance light and motion with intention. Start by understanding how Pro Mode tunes ISO and shutter, then add ProRAW and Night features to push dynamic range and color accuracy. Practice: set up a scene, see how the camera responds, and adjust one knob at a time.
When you shoot at night motion is your enemy. With a steady hand or a tripod, you can slow the shutter for more light without blurring. Indoors, use just enough ISO to keep noise down. Outdoors with moving subjects, use a faster shutter to freeze motion. Pro Mode gives you control to dial in exactly what you need, and a small White Balance tweak can keep neon from looking too purple or too green.
Your goal is consistency. Once you find a setup that works, duplicate it in similar scenes. The more you practice, the less you guess and the more you protect night photography from being good enough to wow.
Adjust ISO and shutter on iPhone 17
In Pro Mode, set ISO to the lowest value that still yields brightness. Low ISO means less grain. If your subject is still and you have a tripod, you can drop ISO further and lengthen the shutter for brighter results. If motion is involved, use a faster shutter and raise ISO just enough to balance exposure. Preview and tweak exposure as you change shutter speed.
Tune shutter speed to motion: static scenes allow longer exposures to capture ambient glow; moving subjects require faster speeds to avoid blur. In very dark scenes on a tripod you might push to 1/20 or 1/10 of a second; if hand-holding, aim for 1/60 or faster. Preview and adjust ISO to balance exposure.
Use ProRAW and Night features
ProRAW gives a raw-like file with more latitude for editing. It’s larger but flexible: pull shadows without crushing highlights. For calm night shots with clear skies, ProRAW helps recover texture in shadows. Pair ProRAW with Night features to add dynamic range to low-light brightness. Shoot RAWJPEG for quick sharing or use ProRAW for important scenes where you’ll edit later.
iPhone quick settings
Quick settings should include ISO, shutter, white balance, exposure compensation, and a ProRAW toggle. A quick exposure nudge can brighten a dark corner, then snap. The faster you react, the more you capture what you saw.
How to Combine Pro Mode and Night Mode for Stunning Results on iPhone 17 and Galaxy S25
This is the vibe you’re chasing: a seamless blend where Pro Mode control meets Night Mode brightness. Start by setting a low ISO, a longer shutter for a still scene, then switch on Night features to keep colors true. If you’re handheld, stabilize with a firm stance or small tripod, then capture in ProRAW for maximum editing latitude. Practice this mix in a few scenes so you can repeat the recipe whenever you want the same look. This approach—How to Combine Pro Mode and Night Mode for Stunning Results on iPhone 17 and Galaxy S25—blends control and brightness for consistent results.
Galaxy S25 manual Pro Mode with Night Mode tips
You’re about to unlock sharper detail and richer color in low light. In Pro Mode you control exposure, shutter speed, ISO, and focus. Night Mode adds AI brightness and multi-frame stacking to keep noise low. Use them together to push your photos from okay to wow. Think of Pro Mode as the manual knob, and Night Mode as the helper that brightens without blowing out highlights. You’ll notice the difference in dim restaurants or twilight streets. Practice makes this a quick, natural part of your routine.
In this guide you’ll learn how to set exposure and ISO, pair Nightography with Pro controls, and access these features from Galaxy quick settings. Your goal is clean shadows, accurate colors, and detail in bright spots. Start with simple scenes: a café table, a dim hallway, or a sunset.
Set exposure and ISO on Galaxy S25
In Pro Mode, set exposure with the shutter speed to hold detail in bright or dark areas. For handheld shots, slower shutter only if the subject isn’t moving. For still scenes like a statue or a sunset, push the shutter longer to gather light.
Set ISO to balance brightness and noise. Lower ISO keeps noise down but needs more light; higher ISO brightens quickly but adds grain. In dark rooms start around ISO 400–800 and adjust. If there’s motion, you may need a higher ISO and faster shutter to keep the image clean. Preview and tweak until exposure feels balanced. Remember to check white balance so skin tones stay natural.
Combine Nightography and Pro controls
Nightography uses multi-frame processing and AI to brighten scenes, but it shines when paired with Pro controls. Frame your shot on a stable base, then set a reasonable shutter speed in Pro Mode to avoid blur, letting Night Mode stack frames. Balance ISO to prevent noise; Night Mode can compensate some, but too high ISO brings noise back. Use manual focus to lock onto a subject, especially in low light. If subjects move, choose a slightly faster shutter and let Night Mode handle the rest. Review color accuracy—Night photos can skew blue in some rooms. Adjust white balance presets or manually for natural colors.
Galaxy quick settings
Open Quick Settings to toggle Pro Mode and Night Mode quickly. Pro Mode may be a dedicated option or in the modes list; pin it for instant access. Night Mode is often on by default in low light but can be forced on or off. Quick adjustments keep you shooting fast without losing control. Enable grid lines, histogram, and exposure lock to maintain consistency across frames. Save presets for quick setup.
Exposure, ISO, and shutter speed tips
You’re in control of light, so start with a target look: clean, bright, or dramatic. For everyday scenes, use a low ISO and adjust shutter to freeze or blur. In bright sun, you’ll need faster shutter to avoid overexposure. Softer feels come with slower shutter speeds. Balance ISO, shutter, and exposure compensation. RAW is often best for post-editing flexibility; use RAWJPEG if you want quick previews plus edit latitude. Steady hands or a tripod help you push longer exposures without losing sharpness.
Keep ISO low to reduce noise
Keep ISO as low as possible. Lower ISO means less grain and more color fidelity. If you must raise ISO, do it in small steps. Save noise reduction for post-processing and shoot with a clean base.
Use longer shutter for light trails
Longer shutter speeds create light trails from moving cars or wet streets. Use a tripod and start with a few seconds, adjusting to taste. If the scene is bright, you may need a neutral density filter or smaller aperture to avoid overexposure.
Exposure reference
Keep a quick cheat sheet: note meter reading, ISO, shutter, and any aperture used for similar scenes. Maintain a small log to reproduce settings quickly.
Stabilization and shooting technique
Crisp photos start with how you hold the camera and plan each shot. Stabilization isn’t optional; it’s essential when using manual controls or shooting in low light. If you’re not using a tripod, tuck elbows, stand with feet shoulder-width apart, and exhale as you press the shutter. Enable image stabilization if handheld. Stabilization works best with solid exposure and thoughtful framing.
Use a tripod or steady support
A tripod provides a rock-solid base for long exposures and landscapes. If you don’t have one, use a stable surface or a monopod. For macro or close portraits, a makeshift stand can work as long as it remains stable during exposure.
Use timer, burst, or remote for sharp shots
A timer prevents finger shake. Bursting captures multiple angles for later selection. A remote keeps your shot completely still, especially with long exposures.
Stabilize checklist
- Stand steady, elbows in, feet shoulder-width apart.
- Use a tripod or solid surface when possible.
- Enable image stabilization for handheld shots.
- Use a timer, burst, or remote to minimize shake.
- Maintain a steady breathing rhythm while shooting.
- Pause briefly between shots to reset stance.
- Check frame after each shot and adjust as needed.
Focus and white balance for night shots
Night photography demands precise focus and accurate color. Switch off autofocus hunting and use manual focus or a single focus point with magnification to nail sharpness, then lock it. If re-framing, re-check focus.
Lock focus and avoid autofocus hunting
In low light, autofocus can hunt. Lock focus with manual focus or a fixed point, then recheck after recomposing.
Set white balance or use Kelvin presets
White balance is critical in neon and sodium-vapor streets. Start around 3400–3600K for warm streetlights or 4000–4200K for cooler LED lighting. Prefer Kelvin presets for precision, or shoot RAW and adjust in post.
Color and focus tips
Aim for pop without oversaturation. Control contrast, deepen shadows, and manage highlights. Verify sharpness at 100% on your display and use a bright detail as an anchor.
RAW capture and simple editing workflow
RAW provides sensor data with broad editing latitude. It may look flat initially, but it offers more flexibility for color, texture, and exposure. Start edits by correcting exposure, white balance, and contrast, then tweak shadows and highlights. Experiment with curves for subtle tonal shifts. If new to RAW, compare RAW vs JPEG to see the benefits.
RAW vs ProRAW
RAW gives broad editing latitude; ProRAW adds more camera processing. ProRAW is larger but offers finer control over color, texture, and noise. Use RAW for speed and storage constraints, ProRAW for maximum editability on complex scenes.
Basic edits for low light photos
Begin with a slight exposure lift if needed, then reduce noise gently. Adjust white balance to suit the mood; avoid oversaturation. Sharpen just enough to reveal edges without artifacts. If you can, shoot on a tripod to push exposure without blur. Finish with a light contrast boost to separate subject from the background.
Edit workflow
Make edits repeatable and fast. Import RAW files, select keepers, correct exposure and white balance, then adjust shadows and highlights. Apply a gentle clarity or texture boost to make surfaces pop. Create a personal preset for similar scenes to speed future edits. Export in the right format and size, preserving metadata for organization.
When to shoot RAW or ProRAW
- RAW: Great for most scenes with post-editing, especially landscapes and high contrast. Easy to learn editing.
- ProRAW: Extra data and processing for peak flexibility, ideal for astrophotography or high-end portraits, but larger files. If storage is tight, RAW remains a strong option.
Compare results and fix common issues
Compare shots side by side for sharpness, color accuracy, and exposure. Note how each device handles skin tones and skies, and adjust to balance scenes. Check consistency across subjects—close-ups, landscapes, backlit scenes. Keep a tally of focus accuracy, shadow noise, and overall texture.
How to compare iPhone 17 vs Galaxy S25 results
Line up the same subject under similar lighting and shoot in RAW if possible. Compare dynamic range, skin tones, and highlight recovery. If one device clips highlights, adjust exposure or use a neutral density filter in real life. Calibrate color in editing, aiming for in-camera accuracy. Use a mid-tone gray card to judge white balance quickly and reliably.
Troubleshoot blur, noise, and color casts
- Blur: tighten focus, steady hands, or use a tripod. If autofocus hunts, switch to manual focus.
- Noise: shoot at lower ISO when possible; use longer exposures only with stability. In dark scenes, rely on Night modes and post-process to restore texture.
- Color casts: adjust white balance or use a preset; for mixed lighting, shoot RAW and correct in post.
Quick troubleshooting
- Blur: stabilize and use faster shutter in bright scenes; tripod in dim ones.
- Noise: lower ISO and slightly longer exposure; ensure subject remains sharp.
- Color casts: select a native white balance preset and fine-tune in editing to restore natural skin tones.

Smartphone Night Photography Enthusiast & Founder of IncrivelX
Vinicius Sanches is a passionate smartphone photographer who has spent years proving that you don’t need an expensive camera to capture breathtaking images after dark. Born with a natural curiosity for technology and a deep love for visual storytelling, Vinicius discovered his passion for night photography almost by accident — one evening, standing on a city street, phone in hand, completely mesmerized by the way artificial lights danced across wet pavement.
That moment changed everything.
What started as a personal obsession quickly became a mission. Vinicius realized that millions of people were carrying powerful cameras in their pockets every single day, yet had no idea how to unlock their true potential after the sun went down. Blurry shots, grainy images, and washed-out colors were robbing everyday people of memories and moments that deserved to be captured beautifully.
So he decided to do something about it.
With years of hands-on experience shooting city streets, starry skies, neon-lit alleyways, and creative night portraits — all with nothing but a smartphone — Vinicius built IncrivelX as the resource he wished had existed when he was just starting out. A place with no confusing jargon, no assumptions, and no gatekeeping. Just honest, practical, beginner-friendly guidance that actually gets results.
Vinicius has tested dozens of smartphones from every major brand, explored dark sky locations across multiple states, and spent countless nights experimenting with settings, compositions, and editing techniques so that his readers don’t have to start from scratch. Every article on IncrivelX comes from real experience, real mistakes, and real lessons learned in the field.
When he’s not out shooting at midnight or writing in-depth guides for the IncrivelX community, Vinicius can be found exploring new cities with his phone always within reach, looking for the perfect shot hiding in the shadows.
His philosophy is simple: the best camera is the one you already have — you just need to learn how to use it in the dark.