How to Capture Light Trails from Cars Using Long Exposure on Smartphones
How to Capture Light Trails from Cars Using Long Exposure on Smartphones
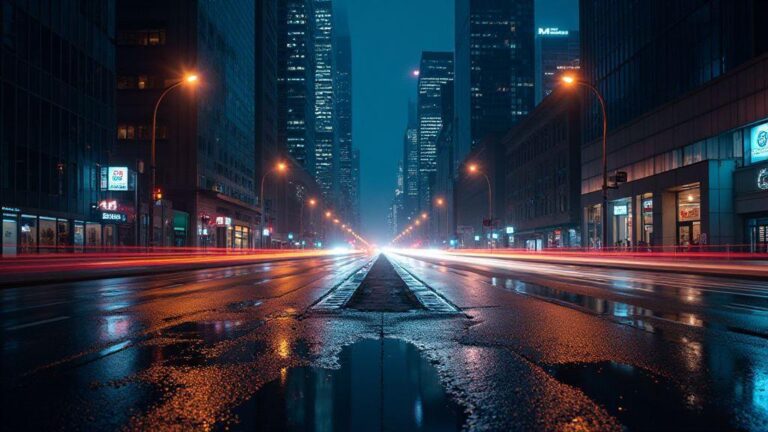
You want to make night streets glow with streaks of light, and your phone can do it. Long exposure on a smartphone makes car lights blur into lines that feel like magic. The trick is to plan, steady your shot, and pick settings you can trust. When you see those bright red taillights sweep across the frame, you’ll know you nailed it. This method works on most modern phones, and you don’t need a fancy camera to get striking results.
First, think about where you stand. A quiet road with passing cars at a steady pace is ideal. If you choose a busy street, you’ll get longer, denser trails. You want enough movement to create lines, but not so much that the picture becomes a mess. Your goal is clean lines that guide the eye through the frame. Keep your phone steady and your frame simple—too much clutter makes the trails hard to read. Before you shoot, check the horizon and keep your phone level so the lines run straight.
Finally, remember to keep your expectations reasonable. You won’t get perfect trails every time, but you will learn what settings give you the best look for your city or street. Each attempt teaches you where to position yourself and how to frame the scene. With practice, you’ll start to predict how the trails will appear, and your nights out will feel less trial-and-error and more like you are painting with light.
Pick your simple gear for night photography long exposure phone
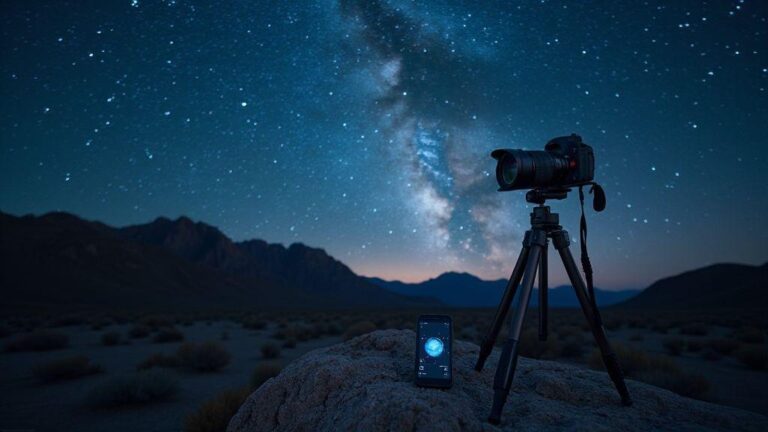
Choosing the right gear doesn’t have to be complicated. You just need a stable base and your phone. A small tripod or a sturdy surface is enough to keep the shot from shaking during the long exposure. If you don’t have a tripod, a stack of books or a solid ledge can work in a pinch. The key is to keep the phone rock-steady so the light trails stay smooth and continuous.
Another simple tool that helps a lot is a remote trigger or timer. A short press on the shutter can introduce blur, so use a remote or the phone’s timer to avoid touching the screen during the shot. If you don’t have a remote, the self-timer setting is your friend. It gives you a moment to settle the phone and relax your hands before the exposure starts. Don’t overthink the gear—your phone plus a stable base and timer is enough to begin.
If you want a tiny upgrade, consider a lens clip or inexpensive night-sky filter. They won’t turn a basic shot into a pro-level image, but they can boost contrast and help control glare from street lights. Still, even without extras, you can produce striking light trails by focusing on the basics: stability, timing, and composition.
Use a stable base and remote trigger for steady shots
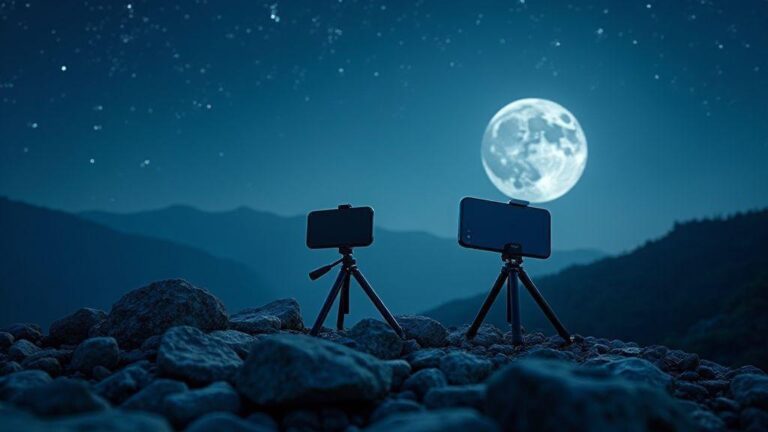
A stable base keeps your phone from wobbling as the light trails form. Place the phone in landscape orientation to capture longer trails and a wider view of the street. Ensure the surface is dry, flat, and free from vibrations. If you notice movement during the shot, retune your grip or change your base to something firmer.
A remote trigger helps you avoid finger shake altogether. If you can’t get one, use the timer and step back a moment before the exposure begins. A 2- to 5-second delay usually works well for night trails because it gives cars enough time to enter the frame after you press the shutter. You’ll get cleaner lines and less blur in the foreground. Keep your setup balanced and aimed where the light lines will fill the frame, not just the center.
Test settings before you start
Before you commit to a full pass, run quick test shots. Start with a longer shutter speed, like 2–4 seconds, and a lower ISO to reduce noise. If you see too much blur or the lines look chunky, shorten the exposure a bit or move farther from the street to widen the view. If the trails feel dull, try a longer exposure or a slightly higher ISO, but don’t push the ISO too hard or you’ll get grainy lines.
Check your frame for clutter and distractions. Night scenes can hide objects you don’t want to draw attention away from the trails. Keep the frame simple: the road, the moving cars, and the sky or building silhouettes. Once you find a sweet spot in exposure, save that setting as a quick preset if your phone lets you. Practice with a few different spots and return to the ones that produced the cleanest trails.
Choose your apps for smartphone long exposure tips
If you want sharper night shots, you need the right apps that let you control how long your shutter stays open. You’ll love apps that give you manual controls, RAW support, and easy previews so you can see what you’re getting before you leave the scene. Your goal is to keep the camera quiet and steady while the night tells its story. With the right pick, you’ll be surprised at how much detail you can pull from darkness. The best path is to choose apps that emphasize stability, precise timing, and RAW capture, so your colors stay true and you’re not stuck with muddy images when you edit later.
When you’re choosing, look for apps that feel intuitive. You want big, clear sliders for shutter, ISO, and focus, not a maze of menus. A clean interface helps you stay on task and keep your finger on the rhythm of the shot. If you’ve ever tried to snap long exposure with your phone and ended up with grainy results, you know why a solid app matters. Your aim is smooth exposure stacking, clean highlights, and little to no motion blur in places you want sharp. Pick apps that help you lock the focus and exposure so you don’t drift as you shoot.
As you get more confident, you’ll notice apps that offer quick presets for night photography, light trails, and star scenes. Those presets aren’t magic, but they save you time and reduce guesswork. You’ll also find apps that support RAW capture, so your post-processing can rescue color and contrast without crushing the image. And if you shoot with a tripod, some apps let you enable interval shooting directly, so you don’t touch the phone and introduce shake. The better the app, the more you can experiment with different night moods without swapping tools.
Look for manual shutter smartphone and RAW support
Manual shutter control is your first rule of thumb for night shooting. You want to dial in exact shutter speeds to balance light and movement, especially when you’re chasing light trails or city glow. When you can set a longer shutter time and still retain detail, you’ll feel the night opening up in your hands. RAW support is the second essential piece, because RAW gives you the widest latitude when you edit later. With RAW you won’t be forced to push your JPEG too hard; you’ll have more latitude to recover shadows and tame highlights.
If your phone supports RAW natively, make sure the app can use RAW files and not just JPEGs. You’ll thank yourself when you pull up the images in your editor and see clean color data and less compression. In practice, you’ll set a longer shutter, lock exposure, and shoot multiple frames if you’re aiming for light trails or busy traffic. The combination of manual shutter and RAW saves you from muddy results and lets you craft the final look with confidence.
Choose apps that make manual shutter easy to tweak with one press, and that show you a live histogram so you can gauge exposure as you go. A good app will also let you adjust ISO without jumping through hoops, which keeps your shot steady and avoids grain. If you’re shooting a city scene with lots of neon, RAW capture can preserve that neon glow better than JPEG, especially when you later adjust white balance.
Try the best apps for long exposure with interval timers
An interval timer is your secret weapon for long exposures because it stitches multiple seconds into one smooth line of light. When you’re capturing traffic or stars, this helps you build a longer composite without bumping the phone. Look for apps that let you arrange many frames with precise timing, so your interval stays consistent from shot to shot. You’ll feel like you have a tiny studio timer in your pocket.
Use interval timers to shoot light trails from cars or the starry road. You’ll set up a sequence of frames, then let the app run while you stay still. This reduces camera shake and helps you capture clearer trails. If you want to stack images for HDR-like night scenes, interval timers let you control both the number of frames and how long each frame holds. The result is smoother light turns and less flicker in the final.
Some apps combine interval timing with automatic exposure adjustments, which can be helpful in changing light, but you’ll want to monitor so you don’t drift too far from your intended look. If you’re practicing how to capture light trails from cars using long exposure on smartphones, the interval timer is your best friend for consistent, repeatable results.
Update apps and read permissions
Keep your apps up to date so you get the latest long exposure features and fixes. New options can improve stability, reduce lag, and add better interval timers. Also check that you’ve granted the necessary permissions, like camera, storage, and microservices access if the app asks. Without these, your shots won’t save, and that’s the opposite of what you want when you’re chasing night moments.
Stabilize your phone with tripod alternatives
Stabilizing your phone is the first step to sharp night photos. You don’t need a fancy tripod to win at long exposures. You can improvise with items you already have. A steady base keeps your shutter from blurring and helps you hold your line as you frame the shot. Try setting your phone on a solid surface like a brick wall, a park bench, or a sturdy rail and brace it with your hand for extra stability. The less shake you have, the more your night scenes pop.
Another smart move is to use objects around you as makeshift supports. If you’re in a dim street, prop your phone on a low ledge or a rock and keep your elbows tight to your body. You can also stack a couple of books to lift your phone to the right height without touching the screen. The key is to pick something that won’t tip over in a breeze and will hold your phone’s weight steady. With a steady base, your long exposures come out clean and you’ll see less grain and more detail in the night.
If you’re worried about movement when you press the shutter, enable the timer or use a voice command if your device supports it. A brief delay lets the camera settle after your touch, so you don’t introduce tiny shakes. Also, switch to a higher shutter speed if the scene allows, or use a shorter exposure and stack frames later if you’re chasing light trails. Stabilization isn’t glamorous, but it is the backbone of sharp night photos.
Use beanbags, fence tops, or car roofs safely
Using safe, simple props can dramatically improve stability. A small beanbag can cradle your phone and prevent it from sliding on slick surfaces. If you’re near a fence, you can set the phone on the top rung with a gentle press to keep it level. A car roof can be a surprisingly solid platform after you clear it of dust and wind. Always check for traffic and never lean into moving cars or unstable surfaces. Safety first keeps your gear intact and your shoot smooth.
Beanbags are cheap and easy to carry. You can fill a small pouch with beans or rice and use it as a wedge at the base of your phone. This works on uneven ground and reduces tipping. On a metal or wooden fence top, you’ll want a microfiber cloth between the phone and the surface to prevent slipping. If you’re using a car roof, ensure the area is dry and flat, and avoid tilting toward the edge. A stable, safe setup lets you focus on the shot, not the stumble.
On busy sidewalks or busy roads, pick a spot with good footing and enough space to maneuver. Never place your phone where someone could bump it or where a passerby could trip over it. If you’re shooting while walking, use a friend to hold your other end or set your phone in a portable stand that clamps to a sturdy pole. Safety keeps your night work enjoyable and your photos solid.
Tape or clamp to reduce vibration on uneven surfaces
Tape or clamps can tame vibration when the surface isn’t perfectly flat. Clear tape can create a quick guard between your phone and a rough surface, helping it stay still and level. A quick clamp or binder clip can hold the phone steady on an irregular ledge, and you can wedge it with a folded cloth to prevent slipping. Don’t overdue the tape or force; you want a light, secure hold that won’t peel off in wind or during adjustments.
If you’re using a wooden or metal rail, a small clamp can be a game changer. Place the clamp’s jaws away from the camera and avoid blocking the lens with any part of the clamp. Use a micro-grip pad on the contact points to minimize any scratch risk and to dampen tiny vibrations. By stabilizing the phone on uneven ground, you keep your exposure clean and your night scene readable.
For a quick fix, use a rubber band to create a gentle squeeze around a rough edge. It won’t be as secure as a clamp, but it can reduce wobble long enough to capture a few crisp frames. Always test and adjust before you start shooting to ensure you’re holding steady throughout the exposure.
Level your phone before shooting
Before you tap the shutter, check that your phone is perfectly level. A slanted frame makes landscapes look off, and a leaning horizon can ruin a night shot of stars or cars. Use your phone’s built-in level, or place a spirit level on the surface under you and align your device with it. A quick check now saves you time later, when you’re trying to stack or merge long exposures.
If you’re hand-holding, prop your elbows in and keep your wrists loose but steady. A level frame helps you compose more confidently, and it prevents a lot of post-processing headaches. Once you’ve confirmed level, you’re ready to shoot and capture the scene as you see it.
Set your long shutter speed smartphone settings
When you want dramatic night shots, your first move is tuning your phone for long exposure. You’re chasing light trails, stars, or softly lit streets, and the right settings make all the difference. If you don’t lock in the basics, you’ll end up with grainy images, blown-out highlights, or blurry motion. Start by finding the longest safe shutter speed your phone offers and pairing it with a steady grip or tripod. Your goal is to let in just enough light without turning your photo into a noisy mess. Think of it like pouring paint: too fast and you miss the trails, too slow and the color smears. You want clean lines and clear shapes that tell the story of the scene.
Long shutter speeds on smartphones can be tricky because of tiny sensors. To get usable results, you’ll want to avoid the built-in auto modes that frequently jump the shutter or push ISO too high. Set your shutter to a longer duration, then test a few frames. If your image looks washed out, you’re overexposing. If it’s too dark, you need a tad more exposure or a steadier stance. You’ll notice the quiet magic of night when the world slows in the frame; a steady hand or tripod keeps the motion smooth and the lights crisp. With practice, you’ll pick up how to balance the motion you want with the noise you can tolerate.
As you experiment, save a few go-to settings you know work for your phone model. Having a quick-reference plan helps you skip wasted tries and get straight to the good shots. Remember, long shutter speed is a tool, not a magic fix. You’ll still need patience, a steady setup, and a ready eye for light as it moves. Keep your fingers relaxed, breathe, and shoot. The more you practice, the more natural it becomes to predict how a scene will look with your chosen shutter length.
Start with 1–10 second long shutter speed smartphone
A 1–10 second range is your friendly starting point for night shots. Begin with 1 second to test how your phone handles motion and brightness in a dim scene. If the photo stays clear but a little dark, slowly bump up to 2 or 3 seconds. You’ll start to see light trails from moving cars, stars appear as tiny points, and the sky gain a gentle glow. If your trails look overly long or smeared, reduce the time back toward 1 or 2 seconds. It’s a dance between capturing enough motion and keeping the image sharp where you want it.
When you’re chasing light trails from cars, this range helps you learn where the sweet spot lives. A 5–7 second shot often reveals smooth, continuous trails without breaking the frame into hazy lines. If you’re near a busy street, a 6–8 second exposure can give you bright, continuous streaks. If you’re in a quieter night scene, stick closer to 1–3 seconds to keep the lights from becoming blobs. Your goal is to see the trails without losing the surrounding details, so practice both ends of the range and compare results.
Keep ISO low to cut noise in night photography long exposure phone
Keeping ISO low is your best defense against grainy images in dark scenes. A higher ISO invites noise, especially on small phone sensors, which hurts clarity and color. Start with a low ISO, then rely on your shutter speed to gather enough light. If your shot is too dark, you can nudge the exposure a touch higher, but avoid jumping too far. The moment you see noise speckles, you’ll know you’ve crossed into trouble. Low ISO also helps preserve color accuracy, which is key when you’re trying to capture how the night actually feels.
If you’re using a long exposure to capture trails, you’ll often be best off with ISO in the lowest usable range for your phone. Your goal isn’t perfectly bright images; it’s clean lines and smooth light trails. You can test a couple of frames with ISO 100, then try 200 if needed. Compare the difference in noise and brightness. You’ll likely find that a crisp, slightly darker image with longer exposure beats a bright, noisy one. Stay mindful of the limits of your camera’s sensor, and don’t force more light when it creates more noise.
Use manual shutter smartphone mode
Manual shutter mode gives you control that automatic modes can’t. You’re steering the exposure like a coach guides a game. Set the shutter speed to a fixed value you’ve tested, then lock in a comfortable ISO and white balance that matches the scene. This consistency helps you compare shots and learn what works. If your phone offers M or Manual mode, pick it for long-exposure night work. You’ll feel the difference in how steady the image becomes and how the lights behave in motion.
In manual shutter mode, you’re nudging the camera to blend brightness and motion in your favor. Lock the focus, keep your frame stable, and avoid jostling the phone while the shutter stays open. If you’re shooting light trails, you’ll want the camera to stay put as the city lights scroll past. Manual mode also makes it easier to shoot in RAW if your device supports it, giving you more latitude in post-processing to reduce noise and fine-tune the curves.
Compose your frame to capture car light trails phone
When you’re chasing car light trails, the frame you choose can make or break the shot. You want the street, the cars, and a hint of motion to all play together. Start with a clean foreground that adds context—maybe a quiet curb, a sign, or a lone bench. This static piece gives your moving lights a place to rest and read as you blur the rest. Keep your camera low enough to feel the street’s texture but high enough to keep the cars centered in your view. If you can, frame a straight road that stretches away from you to emphasize the sense of speed. Use the phone’s exposure lock to keep the scene bright but not blown out, so the light trails stay crisp behind a grounded backdrop. Your goal is to balance a steady foreground with the busier motion behind it, so the trail reads clearly without drowning everything else.
Next, think about your subject’s path. Light trails show their movement, but you decide where to place those lines. A simple approach is a road that curves slightly—trailed lights trace gentle arcs rather than chaotic streaks. This keeps the image readable and dynamic. Include a nearby landmark that stays still, like a tree, a lamppost, or a storefront silhouette. This static element anchors the shot, giving your eye somewhere to land after following the lines. If you’re using a smartphone, you can still mimic this effect by setting a longer exposure and tapping to focus on the foreground, ensuring your trails don’t blur your anchor too much. Keep your composition clean, with enough space for the trails to breathe and your foreground to stay recognizable.
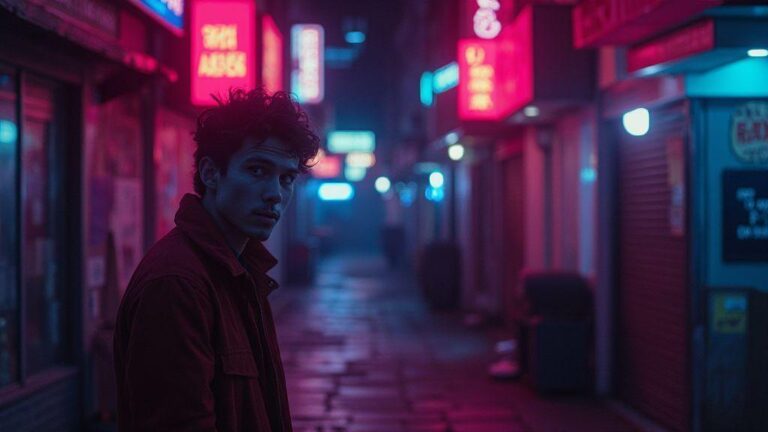
Finally, think about color and mood. Cars bring bright white, red, and yellow dots across the frame. A darker sky or dim street lights help those colors pop. You can subtly tilt your frame to add drama, but don’t overdo it—you want the trails to lead your viewer’s eye smoothly. If your location has neon signs or storefronts, let a single color glow into the foreground for contrast. When you post, a caption that mentions the technique keeps people clicking through, especially if you’re sharing a quick tip like how to balance motion with a stable foreground.
Use leading lines and include a static foreground
Your leading lines are your best friend here. They guide the viewer’s eye from the bottom of the frame toward the horizon or the brightest part of the trails. On a phone, you can create these by aligning the road, curb, or painted lines so they converge toward the center or a point of interest. A static foreground is your anchor—think a fence, a bench, or a parked car that won’t move. This steadiness gives the eye a place to rest and makes the motion feel intentional, not chaotic. When you compose, place the static element off-center to create more tension and drama, then let the light trails sweep from one corner toward that anchor. Don’t crowd the frame; space lets the leading lines breathe and keeps the trails clean.
Timing matters for those lines. If you want longer trails, keep your shutter open longer and let more cars pass by. Shorter trails read as dots and lines, which can feel more graphic and modern. Your phone can do this with a simple manual or semi-manual mode; lock focus on the foreground, then switch to a long exposure or night mode. If your scene has a lot of activity, you might need to shoot a few frames at different exposure settings and pick the one where the leading lines feel strongest and the static foreground stays sharp.
Color adds texture to your leading lines. White headlights are crisp; red brake lights create a warm glow that contrasts a cool night. If you’re near neon, think about how those colors bend along the road’s lines and add a hint of drama without over-saturating. Finally, review your shot at full res to confirm the static foreground is sharp and the trails carry the motion you wanted. Your goal is a clean balance: lines that pull you through the frame, anchored by something steady.
Position your camera for flowing trails and balance
Positioning is everything for flowing trails. You’ll want the camera level for even lines, but a slight tilt can add energy if your scene is too static. Start with the phone at around hip height and angle it slightly toward the road so the trails arc toward the horizon. If you have a tripod or a stable surface, use it to keep the foreground crisp while the lights blur. A slight rise in your camera position can help the trails bloom across the frame rather than bunching up in one corner. You’re aiming for a balance where the trails feel continuous, not snapped into segments, and the foreground remains a clear, steady anchor.
As you shoot, watch for odd motion in the foreground that could blur—handshake, swaying street signs, or leaves. If needed, raise the camera a notch or two to keep those elements in focus. Shoot in bursts if your phone allows, then pick the frame where the balance looks natural: long, clean trails with a solid, sharp foreground. If you want to emphasize speed, let the trails fill more of the frame by positioning the camera closer to the road while still including a static foreground. The trick is to keep the balance between motion and stillness so your eye doesn’t trip on either.
Lighting balance matters too. You want the foreground lit enough to be seen, but not so bright that it steals attention from the trails. Use exposure compensation or manual exposure to keep the lights crisp. If your phone lacks precise control, shoot in RAW if possible, then adjust brightness and contrast afterward to preserve the trails’ glow and the foreground’s texture. Your finished shot should feel cohesive, with the trails leading you through a well-lit path and a solid anchor keeping everything grounded.
Scout angles in daylight if possible
If you can scout during daylight, you’ll save hours of guessing later. Walk the area and look for roads, intersections, or curves that could produce dramatic trails at night. Note where the sun hits the street so you know where shadows will fall, and mark spots for a clean foreground idea. Consider vantage points: a sidewalk corner, a bridge rail, or a parking lot edge can become your anchor while traffic creates the motion elsewhere. In daylight, you can test framing, measure distances, and imagine how different heights affect the trails’ width and density. This prep helps you nail a great shot when the sun goes down.
Bring a simple compass or use your phone’s tools to map potential setups. Check the street’s flow: do cars pass quickly in one direction or in both? Dual directions can yield crisscross trails that feel more dynamic, but they demand careful balance so one side doesn’t overpower the other. If you can, visit at the same time of night you plan to shoot; traffic patterns shift throughout the week, and a daylight recon helps you anticipate those changes. The better your prep, the quicker you’ll lock in an ideal frame when the lights come on.
Time your shots to capture car light trails phone
You’ll get cleaner light trails if you time your shot right. Start by setting your phone to a long exposure or a brightness-compensated mode, then pick a spot where cars pass at a steady pace. If you pick a highway, you’ll likely see a smoother ribbon of light; city streets give jagged lines that feel chaotic. Think of it like drawing with light: you want one continuous stroke, not a bunch of dashed marks. When the traffic line is steady, your trails look intentional and cinematic. If you’re unsure when traffic will be calm, watch for a minute or two before you press the shutter and choose a moment when not every lane is packed.
Your best bet is to lock the scene in at dusk or night when there’s just enough light to see silhouettes but not so bright that the trails vanish. If you see streetlights forming consistent gaps, you’re in the right zone. Use a tripod or a stable surface; any shake will ruin the long exposure effect. On smartphones, enable Pro or manual mode, set a longer shutter speed, and keep ISO low so you don’t burn out the trails. You want a balance: slow enough to draw the long arc, fast enough not to blow out the highlights. And don’t forget to tap the frame to focus on a distant tail light; this helps you keep the trail sharp from start to finish.
If you’re shooting from a bridge or overpass, you’ll often get the most dramatic results because the car lines run along a single plane. Position yourself so you see the lanes curving toward or away from you; that adds depth. Bring a remote shutter or use a timer so you don’t jostle the phone when you press. You’ll be surprised how the scene changes as traffic shifts—one minute you have clean curves, the next you’ll see streaks that feel like painted lines. With practice, you’ll time your shots to catch the perfect length of trail.
Shoot during blue hour or later for richer colors
Blue hour gives you cooler tones that mix beautifully with artificial lights. You’ll notice the sky still has some depth, which makes the car lights pop without washing them out. If you wait a little longer, after midnight or when the street lamps dominate, you get those rich amber and red trails that feel almost neon. Your phone’s white balance will play a big role here; try a cooler setting during blue hour, then switch to auto or a warmer tone as the lights take over.
Color is your friend in night photography. You’ll see reflections on wet pavement turning the trails into ribbons of color. If you aim for blue hour, test different white balances and decide which color temperature makes the trails stand out most against the dark sky. Don’t stress about perfection; slight color shifts can give your shot more mood. Keep an eye on neon signs or storefronts nearby—they add extra color accents that spice up the image.
Later in the night you’ll get deeper blacks and brighter lights. The contrast makes the trails feel sharper and cleaner. Use a longer exposure and lower ISO to prevent grain, then adjust in post if your app lets you. If you’re worried about noise, shoot in RAW if your phone supports it, so you have more control over color and brightness later. Your aim is to have long, smooth lines that betray nothing about the moment you pressed shutter.
Watch traffic flow and lane patterns for better trails
Understanding how traffic moves gives you cleaner, more predictable trails. If lanes stay in a straight line, your trails will look organized. If lanes curve, your lines bend gracefully across the frame. You can read the flow like a map: left exits, right merges, and gaps where cars slow down. Pick a spot where you have a clear view of several lanes, so you can see a whole river of light rolling by.
Plan your frame to capture the most prominent trails. Align your camera so the trails converge toward a point you want in the image, like a traffic circle or a bridge pier. This helps the eye follow the lines naturally. If you see a lot of brake lights, you’ll have bright interruptions that break the flow; wait for a moment with steady traffic to reduce those interruptions. Your goal is a clean, continuous band of light across the frame.
Use foreground elements like railing lines, a lamppost, or a parked bicycle to add depth. They give the eye something to rest on while the light trails sweep past. If you can, shoot from a lower angle so the trails rise and fall with the perspective, similar to a long painting stroke. You’ll end up with a more dynamic image that shows both motion and stillness in one frame.
Avoid peak traffic for cleaner results
Peak traffic often creates busy, overlapping trails that look messy. If you can time your shot to come after rush hour, you’ll get longer, uninterrupted lines. Fewer cars mean fewer breaks in the trail, so your final image reads as one continuous glow rather than a web of flickers. It’s nearly impossible to predict exact traffic, but you can plan around typical rush hours in your area and test different days—weeknights can be calmer than weekends in some places.
If you must shoot during busy times, use a shorter exposure and higher ISO to keep the trails from overpowering the frame. This keeps the lines visible without blowing out the image. You’ll still capture motion, but with a more dotted, energetic look rather than a smooth ribbon. Consider bracketing: take a few quick shots at different exposures and pick the best balance later. It’s like choosing the right dial on a radio until you hear the crispest light trail.
Always check the frame after a few test shots. If the trails look crowded or smeared, shift your position or wait for a lull in the traffic. A small move—one step left, right, or up—can make a big difference in how clean the trails look. Your patience will pay off with longer, more elegant lines that tell a clear story of motion.
Focus and sharpness for light trail photography smartphone
When you’re chasing light trails with a smartphone, focus and sharpness are your secret weapons. You’ll want your distant lights to stay crisp while the traffic blur becomes your glow. Start by aiming your camera at a bright, distant light and lock the focus there. If your phone lets you pin focus with a tap and hold, do that. Otherwise, use the manual focus if you have it, set it to infinity, and avoid touching the screen after you’ve locked it. The goal is to keep the far lights in sharp relief while the car trails fade into smooth, glowing lines. If the scene changes, be ready to re-lock quickly so you don’t drift into soft edges.
Another trick is to use a tripod or a stable surface. Even a small shake can ruin the sharp line where the light meets the street. With light trails, you mostly want motion blur from the moving cars, not a wobbly frame. If you can, switch to a lower ISO and a modest shutter speed to keep the brightest trails from blowing out. That balance helps the lines stay clean rather than smeared or grainy. Also, check your phone’s exposure by tapping the brightest strip in the frame; you’re aiming for detail in the lights without clipping.
If your phone supports focus peaking or a magnified focus aid, use it to confirm the distant lights are truly sharp. You’ll notice the difference in how crisp the far lamps look, which makes your final image more impactful. Remember: even though the goal is motion, the anchor—those distant lights—must stay clearly defined. Keep practicing on different scenes, and you’ll find the sweet spot where focus, sharpness, and glow align.
Use manual focus or lock focus on distant lights
When you’re shooting night traffic, use manual focus or lock focus on the distant lights first. This is your anchor. Tap to focus on a bright streetlamp or traffic light far away, then lock it so nothing shifts as cars pass. If your phone has a focus lock or AE/AF lock, enable it before you start the exposure. This keeps the distant lights sharp even as the exposure continues. The extra step avoids the auto-focus hunting in the dark, which can ruin the light trails with blurry edges.
If you don’t have a true manual focus, try the closest you can get to infinity. Zoom in on the distant light, grab a clear focus, then back out to compose. A locked focus means the camera won’t try to refocus on a passing tail light, which could soften the trail you’re trying to preserve. You’ll thank yourself later when the lines look clean and the background isn’t softer than a shadow.
Try to recheck focus after you set the frame. A quick tap to re-lock if the scene changes—like a pedestrian moving into view or a new streetlight turning on—keeps your result sharp. Your goal is consistent focus that survives the whole exposure, so you get those crisp distant lights and smooth trails in harmony.
Enable RAW capture to recover detail in editing
If your phone supports RAW, turn it on for light-trail shots. RAW gives you more detail to rescue in editing, especially in the bright trails and the dark streets. With RAW, you can pull back highlights and bring up shadows without creating nasty noise. This is incredibly useful when you want those car lights to glow without losing the texture in the pavement or the night sky.
After you shoot in RAW, you’ll have more latitude to adjust white balance, exposure, and color without sacrificing quality. It’s like having a better toolbox: you can fine-tune the glow, the contrast, and the overall mood. Don’t rely on JPEG’s quick punch; RAW helps you craft a cleaner, more dramatic final image of your light trails.
If you’re new to RAW, start by small tweaks: slightly lower exposure to preserve bright lines, then lift shadows just a bit to recover details in darker areas. You’ll see your trails pop while the rest stays balanced. Remember to save your edits and compare with the original so you can repeat what works next time.
Hold exposure and focus locks before each shot
Before you press the shutter, confirm both exposure and focus are locked. This ensures every frame in your sequence keeps the same brightness and the same sharp distant lights. A quick lock saves you from chasing flickering results when cars roll by. If you’re using a timer or interval shooting, double-check that the lock remains intact across frames.
In practice, set your focus lock on the distant lights, then lock the exposure to a level that preserves the glow without clipping. Keep the scene steady and frame the same way for consecutive shots. If something changes—like a streetlight flickers—re-lock quickly so your series stays consistent. This habit turns a bunch of random shots into a coherent set of light trails.
Keep your fingers off the screen during the shot. Any touch can cause autofocus to shift or exposure to adjust mid-frame. Let the locks do the work, and you’ll build a clean sequence of smooth, bright trails instead of a jittery pile of imperfect frames.
Edit and enhance your light trails on the phone
You’ve captured those glowing lines, now it’s time to polish them on your phone. Start with a clean base, keeping the trails bright but not blown out. Think exposure like a faucet: steady, not a flood. You’ll see the motion blur and car lights come together, forming a smooth river of color instead of a jagged mess. Your goal is clarity, so protect silhouettes and let the trails glow without washing out the scene. This is where quick taps and deliberate tweaks decide if your night shot feels alive or flat.
Next, fine-tune the mood. Boost contrast so the trails pop against the dark sky, and nudge highlights to keep the neon glow from clipping. If the image looks a bit flat, try a gentle saturation lift on the color channels that carry the most punch (usually reds and blues) to give the trails a cinematic edge. Keep edits balanced; you’re enhancing, not overpowering.
Finally, assess overall balance. A small shadow lift can reveal textures in the road and sky, while a touch of vibrance keeps the scene natural. Save the edited version in a high-quality format, so you have a clean master you can revisit. The best edits feel invisible: the trails look effortless, like they were meant to be there from the start.
Adjust exposure, highlights, and contrast for clarity
Your first move is to set exposure so the trails glow without washing the scene. If the roads look gray or the lights fade, raise exposure a notch, then compare with the untouched shot to ensure you’re not clipping detail in the brightest spots. Highlights need the same careful hand; lower them just enough so the car headlights still blaze, but the sky isn’t a flat pane of black. You want drama, not a blown-out glare.
Next, dial in contrast to give depth. A touch more contrast makes the white trail lines stand out against the dark pavement and sky, while keeping the midtones readable. If the image feels harsh, back off a bit. Your goal is crisp edges and a smooth gradient, not a graphic poster vibe. Play with the curve or contrast slider until the trails look clean and continuous, like a single stream rather than scattered sparks.
As you wrap this step, check balance across the frame. If the foreground looks dull compared to the trails, a tiny shadow lift can recover texture without pulling attention away. If colors look muddy, a slight warmth or coolness adjustment can unify the scene. You want every frame to guide the eye toward the motion, not toward a misaligned brightness clash.
Reduce noise and sharpen trails with trusted apps
Night shots bring noise, especially in the shadowed areas. Use a trusted app with a dedicated noise reduction tool, and apply only enough to smooth the grain without losing detail in the light trails. You’ll notice the moving lines become crisper once you quiet the speckle. Don’t push the noise reduction too far, or you’ll end up with a plasticky look that kills the glow in the trails.
Sharpening comes next. Target the edges of the light trails to sharpen their motion without amplifying noise. A light, selective sharpening on the trails can help them stand out, while keeping the rest of the image soft and natural. If you see halos around bright points, back off the sharpening a touch or mask it to protect the glow. The trick is clarity without harshness.
When you’re done, compare before and after to confirm you’ve improved readability. Your light trails should feel smoother and more defined, as if you watched them travel across the frame in real time. Trust the little adjustments; they’re what convert a casual shot into a keeper.
Export high-quality copies for sharing
Export settings matter. Save a high-resolution copy that preserves the edits, choosing a format like PNG or a high-quality JPEG with minimal compression. Keep color accuracy by using the sRGB profile, so your trails look right on phones, tablets, and social feeds. Name the file clearly so you can find it later—something like NightTrailsYourName_01.
When you’re ready to share, export a smaller version optimized for web, but keep the original safe. That way you can repost with fresh edits if you want, or crop for different platforms without losing the master file. The goal is to have a pristine, ready-to-publish version that looks good on any screen.
Stay safe and legal when you capture light trails
You want to shoot light trails without getting in trouble or hurting someone. First, plan your spot in advance, check local rules, and pick a safe, quiet area. Look for sidewalks, public verges, or wide shoulders where you can stand without blocking traffic. Stay out of the roadway and never step onto busy lanes. If a road is active, wait for a calm moment or switch to a location you can still frame with your camera from the curb. Your goal is to let cars pass by in the frame, not to be inside their path.
Keep your gear organized and ready. Set up on a stable surface, use a tripod, and keep cables tucked away so you don’t trip. Use a remote or self-timer to avoid moving the camera after you press the shutter. You’ll get cleaner trails if you avoid wind or vibration, so choose a sheltered spot and shield your lens from sudden gusts. Always be aware of pedestrians and cyclists; they deserve space, too. You’ll shoot more confidently if you know where you’re allowed to stand and you’ve checked local photography rules in advance.
If you’re unsure about a spot, pick a backup plan you can reach quickly. Being prepared reduces risk and helps you stay focused on the light trails. And remember, you’re capturing movement, not chaos: your job is to keep yourself safe, not to chase the best angle at the expense of safety or legality. With practice, you’ll feel the rhythm of the city glow without crossing lines.
Keep off the road and use sidewalks or public verges
You’ll get better results when you stay off the roadway. The safest choice is a sturdy sidewalk with a clear line of sight to the traffic you want to capture. Public verges can be a good alternative if they’re wide enough and you’re not blocking pedestrians. Your tripod should sit on solid ground, not on soft dirt or loose gravel that could wobble. If you need to shoot on the verge, check for any no photography signs or local rules first.
Choose a spot where you can see cars coming and going without stepping onto the street. Position yourself with your camera aimed toward the lanes you want to record, but keep yourself and your gear well clear of traffic. You’ll protect yourself and others, while still giving your lens a clean path to capture those streaks. It’s all about keeping your stance stable and your surroundings calm.
If a sidewalk is crowded, move to a quieter stretch or wait for a lull. Use your backpack as a weight to stabilize the tripod, and keep cables organized so nobody trips. When the light trails begin, you’ll be glad you chose a safe, well-lit location with a good view, not a risky spot that invites danger.
Respect private property and local photography rules
You’ll save yourself headaches by asking and respecting boundaries. Before you set up, scout the area for private property signs, fences, or homeowner access guidelines. If you’re near driveways or apartment complexes, keep your distance and avoid lingering where you’re not invited. If in doubt, pick a spot in a public space so you’re not trespassing or upsetting neighbors.
Know the local rules around photography in public areas. Some places restrict tripods or long exposures in certain zones. If you’re unsure, ask a manager, a security guard, or a local photographer who knows the area. You’ll avoid fines and you’ll keep community goodwill intact when you show you’re courteous and compliant with rules.
If you do encounter a private property owner who asks you to move, respond calmly and relocate quickly. Demonstrating respect for others’ space helps you build a good reputation as a photographer who plays by the rules. You’ll be welcome back to return to your craft another night.
Bring a partner and wear visible clothing at night
You’ll feel safer and more relaxed when you head out with a friend. A buddy can watch your back, help carry gear, and keep an eye out for hazards you might miss. Wearing bright or reflective clothing makes you easy to spot in low light, which helps drivers see you and avoid incidents. Add a small flashlight to your pocket and a reflective vest if you plan to stay out after dark.
Your partner can also help you test angles and run a quick check while you set up. With two heads, you’ll cover more ground and reduce the chance of you stepping into traffic or tripping over equipment. Keeping visibility high gives you confidence to stay focused on your shot and not on your safety worries.

Smartphone Night Photography Enthusiast & Founder of IncrivelX
Vinicius Sanches is a passionate smartphone photographer who has spent years proving that you don’t need an expensive camera to capture breathtaking images after dark. Born with a natural curiosity for technology and a deep love for visual storytelling, Vinicius discovered his passion for night photography almost by accident — one evening, standing on a city street, phone in hand, completely mesmerized by the way artificial lights danced across wet pavement.
That moment changed everything.
What started as a personal obsession quickly became a mission. Vinicius realized that millions of people were carrying powerful cameras in their pockets every single day, yet had no idea how to unlock their true potential after the sun went down. Blurry shots, grainy images, and washed-out colors were robbing everyday people of memories and moments that deserved to be captured beautifully.
So he decided to do something about it.
With years of hands-on experience shooting city streets, starry skies, neon-lit alleyways, and creative night portraits — all with nothing but a smartphone — Vinicius built IncrivelX as the resource he wished had existed when he was just starting out. A place with no confusing jargon, no assumptions, and no gatekeeping. Just honest, practical, beginner-friendly guidance that actually gets results.
Vinicius has tested dozens of smartphones from every major brand, explored dark sky locations across multiple states, and spent countless nights experimenting with settings, compositions, and editing techniques so that his readers don’t have to start from scratch. Every article on IncrivelX comes from real experience, real mistakes, and real lessons learned in the field.
When he’s not out shooting at midnight or writing in-depth guides for the IncrivelX community, Vinicius can be found exploring new cities with his phone always within reach, looking for the perfect shot hiding in the shadows.
His philosophy is simple: the best camera is the one you already have — you just need to learn how to use it in the dark.