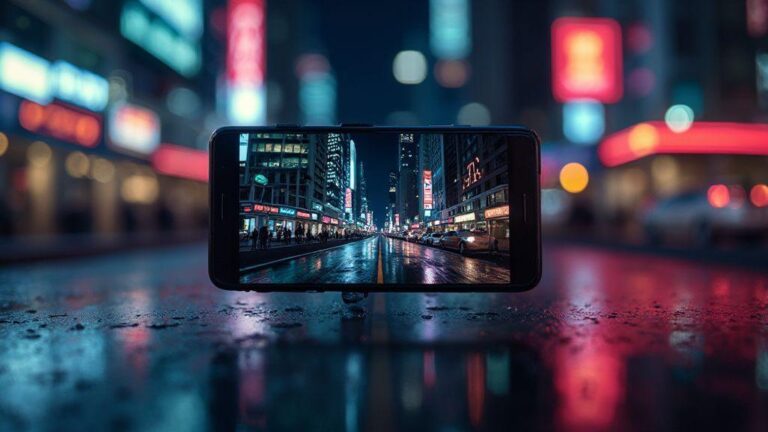
How Phone Manufacturers Train AI to Recognize Dark Scenes Automatically
How Phone Manufacturers Train AI to Recognize Dark Scenes Automatically
This guide explores How Phone Manufacturers Train AI to Recognize Dark Scenes Automatically and translates those practices into approachable steps for building robust, real-world low-light imaging pipelines. By combining real-world datasets, synthetic augmentation, and on-device optimization, you can improve night shots while preserving privacy and efficiency.
Collecting real-world low-light datasets
In this guide, you’ll learn how to build strong, real-world low-light image datasets that help your smartphone camera perform better at night. Focus on authentic scenes, logging exact settings, and protecting people’s privacy. Think of your dataset as a training ground for your phone’s eye when the lights go down.
- Choose environments with variety: streets, cafes, parking lots, and indoors with mixed lighting.
- Shoot at different times—dusk, midnight, pre-dawn—to reflect the full range of available light.
- Keep the process simple and repeatable: consistent folder names, clear labels (scene type, time, light level).
A well-organized dataset saves time and makes your AI training more reliable, helping you study scenarios like night street with moving cars or dim indoor restaurant after midnight.
Capture varied scenes and times
You’ll want a broad mix of scenes to train your camera’s night vision. Include residential streets, busy avenues, storefront interiors, and dim rooms. Add moving subjects to observe motion blur and rolling shutter. Pair bright windows with dark corners to reveal how exposure adapts. Shoot at blue hour, after sunset, late at night, and before dawn to capture color, contrast, and noise variations. Capture bursts to analyze how changes in brightness are handled.
Reflections and mixed lighting—neon signs, street lamps, screen glare—are tricky but informative, showing how noise reduction and tone mapping respond under pressure.
Log camera settings and metadata
Keep precise notes for every shot: camera model, lens, focal length, ISO, shutter speed, white balance, HDR/night mode, scene type, time, and location if comfortable. A simple log (digital sheet or notebook) helps reproduce conditions and compare results. Record exposure triangle values and any post-processing steps. If you switch modes, note why.
As your dataset grows, your logs reveal patterns (e.g., high ISO adds grain; longer shutter makes motion trails). Clean logs support reproducibility and consistent improvements.
Protect subject privacy
Privacy matters, especially at night. Blur faces and license plates when possible. If identifiable people are included, obtain explicit permission or blur faces before saving. If you wouldn’t want your own face captured, don’t include it. Use scenes with anonymized or cropped subjects. This practice keeps your work respectful and trustworthy.
Synthetic low-light data augmentation
You’ll learn to bolster night-shot models by creating synthetic night images that feel real. This sandbox approach helps the AI recognize challenging lighting: scarce streetlight, shadowy interiors, and mixed color casts. Synthetic augmentation broadens the model’s wardrobe for dark scenes.
- Synthetic data should shape the model’s mistakes so it learns to fix them.
- Balance is key: enough variation without overfitting to unrealistic patterns.
- Expect improvements in fewer wrong white balances, reduced grain in critical areas, and better detail in dark corners.
Simulate dimming and color shifts
Simulate dimming to teach the model to notice what the eye might miss in low light. Layer gradual brightness reductions with diverse color casts (warm streetlights, cool moonlight, mixed storefront lighting). Maintain enough real structure so the model relies on shapes, not just brightness. This builds resilience for urban alleys and dim cafes alike.
Add synthetic noise and blur
Noise and blur are intrinsic to night imaging. Add synthetic noise to mimic sensor grain and teach the model to distinguish grain from texture. Include softened edges to help the model recover important shapes. Use a mix of easy and hard cases to prevent overfitting and train the model to recover detail under varied conditions.
Improve model robustness
With synthetic noise, dimming, and color shifts, the model becomes less sensitive to lighting quirks. It learns across scenes from neon glow to deep shadows, reducing surprises when switching environments. Robustness means more usable shots, fewer re-framing, and less post-processing.
Sensor-focused night-imaging concepts
Sensor noise modeling for night photography
Night photography depends on taming noise, which comes from shot noise (photon limits) and read noise (electronics). Modeling how these noises behave helps you predict image quality and apply appropriate tweaks. This enables better detail preservation and prevents grain from overwhelming shadows or highlights. Understanding noise helps you compare devices and adapt shooting strategies to preserve texture and color fidelity.
Model shot and read noise
Shot noise scales with light; read noise is the sensor’s electronic signature. Darker areas show more texture from noise, while brighter areas stay cleaner up to a limit. Balancing ISO and exposure helps maintain detail without washing highlights or amplifying grain. Building a personal noise map for your device guides future shooting decisions.
Calibrate sensors per phone model
No two phones handle night differently. Calibration involves learning each model’s baseline noise at various ISOs and temperatures and how processing changes outcomes. Keep notes on modes that preserve detail without washing texture. Test under similar conditions to identify patterns like shadow over-brightening or highlight clipping, and adapt using RAW, night modes, or multi-frame stacking as appropriate.
Match real sensor patterns
Edits should reflect real sensor behavior. Compare RAW noise textures to processed JPEGs and preserve authentic textures in shadows while avoiding over-brightening. Align edits with sensor patterns to keep night photos natural and engaging.
Exposure estimation and scene understanding on mobile
Exposure estimation models for mobile cameras
Smartphones estimate brightness by analyzing brightness, scene zones, and context from EXIF data. The aim is to keep shadow detail without clipping highlights, within the sensor’s limits. Some devices sample multiple zones to avoid single-dark-corner bias. Knowing how these models work helps you decide when to trust auto settings or switch to manual.
Predict proper exposure in dark scenes
In dim light, cameras balance longer exposure and noise. Start with neutral exposure and adjust to preserve shadows or protect highlights. Consider scene specifics: neon signs may require a lower exposure to avoid blown signage; distant lights might benefit from slight brightening to reveal textures. If motion is present, favor faster shutters and higher ISO or use stabilization. Decide between RAW and JPEG based on editing flexibility and file size.
Use histograms and metering maps
Histograms show brightness distribution; aim for a non-clipped right edge with data in shadows. Metering maps divide the frame into zones to guide exposure decisions. After shooting, check histograms for clipping and adjust accordingly. Practice with scenes like a doorway with light spill or a subject against a dark wall to see how exposure changes.
Reduce motion and clipping
Night shooting benefits from stabilization and shorter shutters to minimize motion blur and clipping. When necessary, bracket shots with different exposures and blend later. Keep bright sources in frame but not dominant to protect scene texture and subject detail.
Image enhancement and model efficiency
Image enhancement neural networks for dark scenes
Night photography relies on intelligent enhancements to lift shadows without oversmoothing. Neural networks learn to preserve textures, avoid color shifts, and maintain natural mood. RAW shots often benefit more from these networks, but well-designed night modes can leverage them effectively.
- Denoising and contrast enhancement
- Lightweight nets for real-time use
- Preserve texture and color
Image enhancement: Denoising and contrast enhancement
Denoising reduces grain while preserving texture; contrast enhancement restores legibility to dark areas without washing details. Aim for natural tones and warmth that match the scene’s mood.
Lightweight nets for real-time use
On-device, real-time nets deliver immediate improvements without long waits. They are designed for modest hardware, conserve battery, and enable quick iterations when framing or recapturing shots.
- Preserve texture and color
Transfer learning and model fine-tuning
Transfer learning for low-light imaging
Start with a strong pretrained model and adapt it for dark scenes. This approach saves time and helps the network learn night-specific textures, noise patterns, and color shifts. A larger base model supports better generalization to diverse night scenes.
Start from large pretrained models
Large pretrained models provide a robust baseline for night imagery. They help avoid common pitfalls like blown highlights or muddy shadows. The model can quickly adapt to your setup, improving convergence and reducing training mistakes with limited data.
Fine-tune on small low-light sets
Fine-tuning on small, focused datasets tailors the model to your style and typical scenes. Emphasize your most frequent environments (dim interiors, neon-lit streets, dawn silhouettes). Small, curated datasets allow rapid iteration and noticeable gains in brightness, color accuracy, and texture preservation.
- Mix in synthetic low-light variations to boost resilience
- Expect cleaner shadows, crisper edges, and fewer color shifts
Cut training time and data
Efficient strategies include selective sampling, early stopping, and targeted augmentations that mimic real-world night noise and color shifts. Keep the end-to-end pipeline mobile-friendly, focusing on inference speed and memory usage from the start.
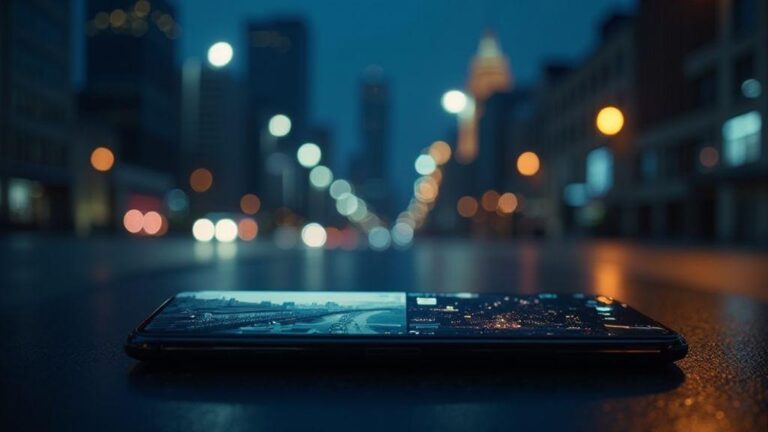
How phones detect dark scenes automatically
When you point your phone at a dim scene, it quickly assesses brightness, pixel responses, and EXIF cues to decide how to capture. A better system uses brightness, histograms, and EXIF data to infer darkness and adjust exposure accordingly. This leads to a more honest preview and final image, not simply a brighter or grainier shot.
- Trigger night mode with AI training techniques: devices learn patterns from thousands of scenes to decide when night mode is appropriate.
- Switch modes without user input: seamless handoffs avoid missing moments as lighting changes.
Model optimization for on-device inference
On-device inference and efficiency
Shaping the model to run fast on-device keeps data private and reduces latency. Focus on memory efficiency, lightweight layers, and real-world night-shot testing to ensure reliable previews and sharp results.
Apply quantization and pruning
Quantization lowers precision to save memory and speed up calculations; pruning removes inconsequential weights. Start with post-training quantization and move to quantization-aware training, followed by pruning with validation to preserve shadow detail.
Leverage NPU, DSP, and hardware acceleration
Utilize device-specific accelerators (NPU, DSP) to handle core AI tasks like edge detection, noise reduction, and local tonemapping. Vendor optimizations can drastically reduce latency and power use, enabling real-time night processing.
- Save power and latency: keep the pipeline lean and batch tasks offline when possible.
Save power and latency
Minimize passes and memory moves. Use dynamic voltage and frequency scaling (DVFS) for the AI path to balance energy use with performance. The goal is instant feedback and crisp, natural night shots.
Evaluation and user testing for night shots
Evaluation and user testing
Test night photos in real-world conditions. Build a simple checklist: time of night, lighting level, subject, and whether colors look natural. Compare scenes with and without night mode to observe consistency in color balance, edge sharpness, and brightness.
- Involve others for feedback: real-user opinions reveal practical issues you might miss.
- Use structured A/B tests to compare modes and measure preferences for detail, color, and realism.
Measure PSNR, SSIM, and perceptual scores
PSNR, SSIM, and perceptual scores help quantify differences, but focus on what matters to your eye: clarity, reduced noise, and natural colors. Compare representative night shots against a consistent reference, and assess whether improvements translate into images you’d share.
Run real-world user studies and A/B tests
Arrange small studies with friends or family: test two modes on the same scene and gather preferences. Track not just preference but reliability (motion handling, processing speed). Real feedback helps you refine night-shooting behavior.
Define pass/fail quality thresholds
Set clear criteria for acceptable results, such as recognizable faces, manageable noise levels, natural color, and balanced exposure. Use a quick checklist to decide whether a shot passes or if you should switch modes or adjust settings.
This structured approach mirrors how How Phone Manufacturers Train AI to Recognize Dark Scenes Automatically, translating industry practices into practical, reader-friendly steps you can apply to your own night photography workflow.

Smartphone Night Photography Enthusiast & Founder of IncrivelX
Vinicius Sanches is a passionate smartphone photographer who has spent years proving that you don’t need an expensive camera to capture breathtaking images after dark. Born with a natural curiosity for technology and a deep love for visual storytelling, Vinicius discovered his passion for night photography almost by accident — one evening, standing on a city street, phone in hand, completely mesmerized by the way artificial lights danced across wet pavement.
That moment changed everything.
What started as a personal obsession quickly became a mission. Vinicius realized that millions of people were carrying powerful cameras in their pockets every single day, yet had no idea how to unlock their true potential after the sun went down. Blurry shots, grainy images, and washed-out colors were robbing everyday people of memories and moments that deserved to be captured beautifully.
So he decided to do something about it.
With years of hands-on experience shooting city streets, starry skies, neon-lit alleyways, and creative night portraits — all with nothing but a smartphone — Vinicius built IncrivelX as the resource he wished had existed when he was just starting out. A place with no confusing jargon, no assumptions, and no gatekeeping. Just honest, practical, beginner-friendly guidance that actually gets results.
Vinicius has tested dozens of smartphones from every major brand, explored dark sky locations across multiple states, and spent countless nights experimenting with settings, compositions, and editing techniques so that his readers don’t have to start from scratch. Every article on IncrivelX comes from real experience, real mistakes, and real lessons learned in the field.
When he’s not out shooting at midnight or writing in-depth guides for the IncrivelX community, Vinicius can be found exploring new cities with his phone always within reach, looking for the perfect shot hiding in the shadows.
His philosophy is simple: the best camera is the one you already have — you just need to learn how to use it in the dark.