How Night Portrait Mode Works on 2026 Smartphones and When to Use It
Night portrait tech overview
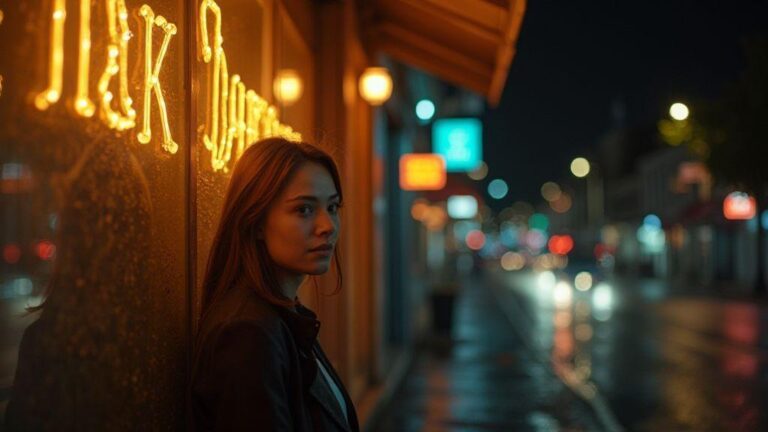
Night portrait photography lets your phone brighten shots without making skin look odd or grainy. Think of it as a trio: you set the scene, the phone analyzes the light, and the subject remains natural. The result is a sharp face with pleasing lighting and a softly blurred background that preserves mood and context. Picture a streetlamp, a cafe window, or warm amber light in a doorway—night portrait mode shapes the scene so faces stay true while the surroundings glow.
How night portrait mode works on 2026 smartphones
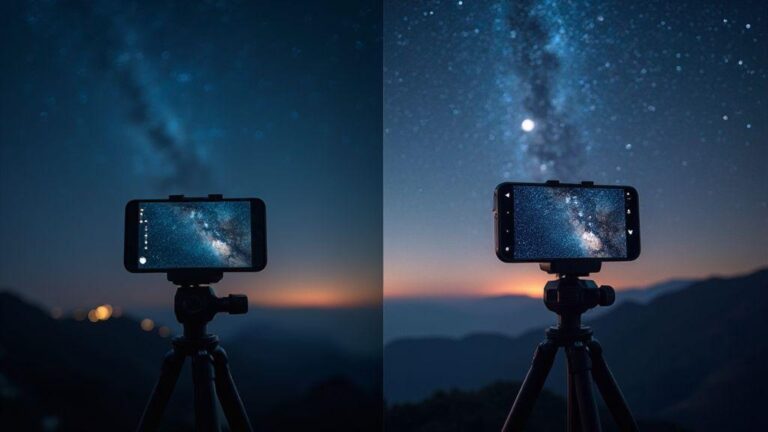
When you enable night portrait mode, the phone blends multiple frames, reduces noise, and nudges color for a natural look. In 2026, smarter software and better hardware stack light from several frames, keep the best data, and softly illuminate the subject so skin tones stay intact. The result is a clean portrait where the background remains atmospheric without overpowering the subject, even in tricky lighting like neon signs, streetlamps, or candles.
Key parts: sensor, ISP, AI
- Sensor: gathers light and creates raw data.
- ISP (image signal processor): balances brightness, color, and edge detail.
- AI: analyzes the scene, detects faces, and guides smoothing and contrast so the subject stands out naturally.
Together, they form a compact team: you capture the moment, the sensor records it, the ISP polishes it, and AI decides what to emphasize. This teamwork yields clearer faces with rich backgrounds in dim light.
Sensor stacking and long exposure
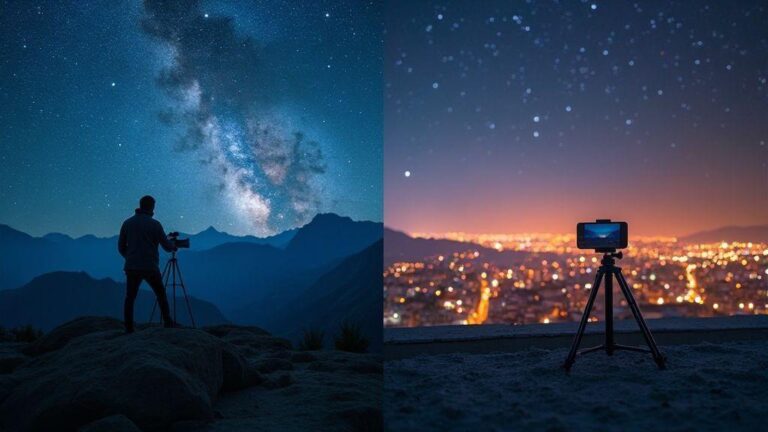
Sensor stacking pulls more detail from the night while limiting noise. Stacking multiple frames creates a brighter image with crisper shadows and less grain. You control how many frames to stack to balance brightness and motion. Small adjustments in ISO and shutter time influence the final look, building confidence shooting in low light.
When data from many exposures is combined, random noise averages out and faint light is captured. Keep a steady subject; if there’s motion, use shorter exposures or a separate pass for motion to avoid blur.
How stacked sensors capture more light
Stacking merges several shorter exposures into one, increasing brightness and reducing noise. Precise alignment is essential; movement causes ghosting. Still-life scenes benefit from more frames, while moving subjects may require fewer frames or a different approach to preserve sharpness.
Long exposure portrait techniques
Long exposure portraits can look cinematic. Use a tripod, low ISO, and a timer or remote to avoid camera shake. A longer shutter lets in more light, smoothing skin tones and creating ambient glow. For subtle motion, introduce moving lights in the background. You can shoot multiple short portraits and merge them to keep the subject crisp while background lights blur softly. Watch exposure to avoid blown highlights or missed mood.
Handling blur and subject motion
To minimize blur, use fast shutter speeds for the subject and a stable base for the camera. A tripod, remote, or self-timer helps. If the subject moves, shorten the exposure or have them hold still briefly. You can also shoot two passes—one with the subject sharp and another longer exposure for the background—and blend them in editing.
Multi-frame noise reduction for portraits
Multi-frame noise reduction (MFNR) stacks several frames to smooth grain while keeping the subject sharp. It often yields cleaner skin tones and fewer speckles. Shoot a few frames with steady hands or a tripod, then merge in-camera or in software. Balance brightness across frames to avoid halos around edges.
Frame alignment and averaging methods
Frame alignment is the backbone of MFNR. Use a tripod or a solid surface, align key features (eyes, jawline), and fine-tune with manual adjustments if available. Averaging methods vary: simple mean can blur edges; median or weighted averaging preserves edges better while reducing noise. If the subject moved, align before averaging to keep a readable portrait silhouette.
Higher frame counts reduce noise but may soften fine detail. Real-time alignment helps you preview results as you shoot. If handheld, brace well and use shorter frame intervals to limit motion, then rely on smarter averaging.
Noise vs detail trade-offs
MFNR trades some detail for lower noise. More frames often reduce noise more but can soften delicate textures. To keep realism, limit smoothing around facial features and protect eye and lip details. If you push MFNR too hard, fine edges may blur. A two-pass approach—light overall noise reduction with a targeted pass to recover texture on critical features—can help.
AI subject segmentation in low light portraits
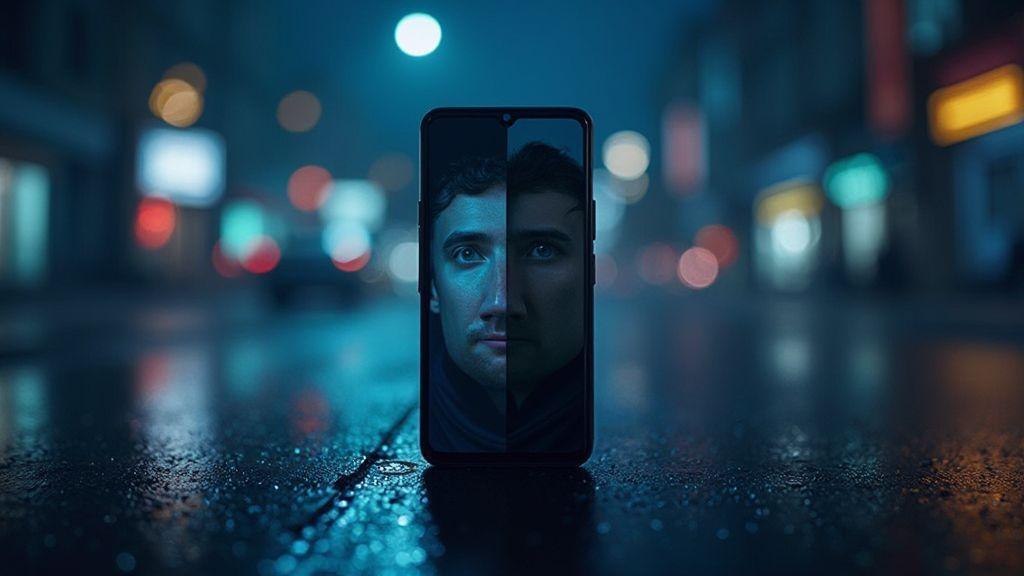
In dark scenes, AI helps separate you from the background. The goal is to keep your face, hair, and clothing distinct from surrounding glow so you look crisp. Edge detection creates a clean mask around contours like jawlines and cheekbones. If the mask misreads, a quick manual tweak can fix halos or glow.
Edge detection and mask creation
Edge detection helps the mask sit on skin and clothing without grabbing background. Check for halos on hair or bright threads and adjust exposure and noise reduction to keep edges clean.
Preserving skin tone and texture
Preserve natural skin tones by avoiding over-smoothing. Gentle lighting rimming the face or shaping the background helps keep brightness balanced. The best results keep skin colors accurate while the background falls away.
Correcting segmentation mistakes
If the mask bleeds onto hair or jewelry, refine the edges or push the mask away from stray pixels. If skin tones shift, adjust color balance and contrast to maintain a natural look.
Bokeh generation in night portrait mode
Bokeh should feel deliberate: in-night portraits, the background becomes soft circles while the subject stays sharp. Higher ISO and a slightly slower shutter boost background glow, simulating painterly light. Move closer to intensify the blur; choose scenes with small bright points to create distinct round bokeh rather than smeared light shapes.
Synthetic bokeh vs optical blur
- Synthetic bokeh is computer-generated and fast but can look cartoonish if edges aren’t clean.
- Optical blur comes from the lens and often looks more natural with softer edges and authentic blur. Prefer optical blur for portraits when possible.
Depth maps and matting accuracy
Depth maps guide where to blur. If separation is weak, halos around edges can appear. Increase subject-background distance or use a longer focal length to improve matting accuracy. Fine-tune lighting and portrait settings to keep features crisp and the glow soft.
Autofocus and exposure metering for night portraits
Lock onto the subject’s eyes with a bright focus point, then reframe to protect the background. Metering should bias toward the face to keep skin tones natural. Use exposure compensation to avoid blown highlights on shiny surfaces. In bright backlights, evaluative or face-based metering helps preserve tone. If AF hunts, switch to One-Shot AF for stills or use a steady subject with continuous AF only if movement is slow.
Low-light AF systems like PDAF and laser
PDAF works well with contrast on the subject; laser assist helps with dim backdrops. If the background confuses AF, switch to manual focus or use a single AF point on the subject’s eye. Focus peaking can help verify sharpness.
Metering for faces versus background
Face metering anchors skin tones; bias toward the face if the background is too bright. If backlighting is strong, slightly overexpose the face to retain detail while keeping the background mood.
When AF and metering fail
If autofocus and metering fail, shoot with a wider aperture, modest ISO, and a slower shutter to gather light. Review and adjust for the next shot. Use focus peaking and try a shorter focal length to keep more of the scene in focus.
When to use night portrait mode (2026)
Night portrait mode shines when you want a friendly, lit subject against a darker background. In 2026 smartphones, it blends a quick subject exposure with scene-long exposure tricks, softening the background while brightening faces. It’s ideal for parties, cafes, or city streets, where ambient light creates mood without harsh flash.
- Best scenes: urban night walks, indoors with mixed lighting (cafes, windows, street glow), and intimate indoor parties with soft background light.
- When to choose normal or flash: use normal mode for pure, unaltered light and mood; reserve flash for filling shadows in bright rooms, but sparingly to avoid flat textures.
Quick on-the-spot checklist
- Ensure subject distance and steadiness before tapping the shutter.
- Center or use the rule of thirds for a flattering background.
- In low light, rely on AI for balance while maintaining comfortable skin tones.
- Review the shot and adjust exposure to enhance mood without washing out the subject.
Portrait lighting alternatives to flash at night
- Screen fill, portable LEDs, and reflectors offer natural control without harsh flash.
- Screen fill uses a white card or diffuser to soften shadows and brighten eyes.
- Portable LEDs provide power and color control; adjust brightness and color temperature to match room lighting.
- Use ambient light from street lamps with a reflector to balance mood and avoid flat results.
Screen fill, portable LEDs, and reflectors
- A white card bounced near the camera softens shadows and adds catchlights.
- Portable LEDs add punch for cheekbones and edges; color temperature should feel natural.
- Reflectors reclaim lost detail without harshness and are quick to deploy.
Using ambient light and street lamps
Let ambient glow shape the scene, then fill shadows with a small LED or reflector. Distance adjustments can soften or sharpen the look, and mixing color temperatures can tell a richer story.
Low-cost lighting setups
A USB-powered LED panel, a small reflector, and a white foam board provide an affordable, effective lighting kit. Position the LED at a slight angle to sculpt the face and bounce to the cheek for natural catchlights.
Tips for better night portrait photos on smartphones
- Steady hands, braced elbows, and a stable surface help prevent blur.
- Adjust exposure to keep skin tones natural while letting background glow through.
- White balance may need tweaking in neon or warm streetlight; try a warmer or cooler setting for natural skin tones.
- Use simple edits: sharpen eyes, reduce noise, and crop to place eyes on the top third.
Simple edits after capture
- Apply light contrast to separate subject from background.
- Reduce noise modestly and protect skin texture.
- Use selective clarity on the subject and soften surroundings to keep focus on the face.
- Crop to improve composition and try a subtle vignette to draw attention to the eyes.
How Night Portrait Mode Works on 2026 Smartphones and When to Use It
Night Portrait Mode on 2026 smartphones blends multiple frames into a single, cleaner image, reducing noise while preserving detail in low light. It stabilizes automatically and can handle longer exposures, keeping the subject sharp with steady hands. Use it when you want a natural background glow without heavy processing—perfect for streets, sidewalks, cafes, and doorways where creative light plays a role. If your subject stays still, faces pop with soft illumination; if they move, you’ll see some motion blur, so a steady stance and controlled background help. Try it in concerts, cafes, or entryways where lamps cast color halos; the mode balances color so faces look natural and surroundings glow.
If you’re exploring How Night Portrait Mode Works on 2026 Smartphones and When to Use It, this guide aims to give you practical tips, clear terminology, and workflow ideas to get consistently strong night portraits without a heavy setup.

Smartphone Night Photography Enthusiast & Founder of IncrivelX
Vinicius Sanches is a passionate smartphone photographer who has spent years proving that you don’t need an expensive camera to capture breathtaking images after dark. Born with a natural curiosity for technology and a deep love for visual storytelling, Vinicius discovered his passion for night photography almost by accident — one evening, standing on a city street, phone in hand, completely mesmerized by the way artificial lights danced across wet pavement.
That moment changed everything.
What started as a personal obsession quickly became a mission. Vinicius realized that millions of people were carrying powerful cameras in their pockets every single day, yet had no idea how to unlock their true potential after the sun went down. Blurry shots, grainy images, and washed-out colors were robbing everyday people of memories and moments that deserved to be captured beautifully.
So he decided to do something about it.
With years of hands-on experience shooting city streets, starry skies, neon-lit alleyways, and creative night portraits — all with nothing but a smartphone — Vinicius built IncrivelX as the resource he wished had existed when he was just starting out. A place with no confusing jargon, no assumptions, and no gatekeeping. Just honest, practical, beginner-friendly guidance that actually gets results.
Vinicius has tested dozens of smartphones from every major brand, explored dark sky locations across multiple states, and spent countless nights experimenting with settings, compositions, and editing techniques so that his readers don’t have to start from scratch. Every article on IncrivelX comes from real experience, real mistakes, and real lessons learned in the field.
When he’s not out shooting at midnight or writing in-depth guides for the IncrivelX community, Vinicius can be found exploring new cities with his phone always within reach, looking for the perfect shot hiding in the shadows.
His philosophy is simple: the best camera is the one you already have — you just need to learn how to use it in the dark.