Finding the Perfect Dark Sky: Leveraging 2026 Apps for Optimal Astrophotography Locations
Top dark sky finder apps 2026
Finding the Perfect Dark Sky: Leveraging 2026 Apps for Optimal Astrophotography Locations
In 2026, the right dark sky tools can transform a night under the stars. This guide shows how to choose apps that reveal where the stars are strongest, light pollution is lowest, and weather will shape your night, so you can plan Milky Way shots or quiet star trails with confidence. Look for apps that combine maps, user reviews, and up-to-date satellite data you can trust on screen.
Dark sky finder apps should let you compare sites at a glance, with filters for elevation, accessibility, safety, and offline maps. A great app saves time: tap a spot, verify a few facts, and decide whether to drive now or wait for a better night. If you shoot with others, the best tools let you share locations or plan as a group. In short, the right app is your compass when the night hides behind clouds.
Reliability matters: apps should update moon phases, cloud forecasts, and light pollution levels frequently. Tutorials or tips on timing exposure, dealing with dew, and choosing the right lens for darker skies are a plus. The more you trust the data, the more you can focus on framing your shot and enjoying the moment.
Best astrophotography locations app features
You need an app that pinpoints spots with clear skies and minimal light pollution. Look for a feature that marks your current location and shows nearby dark-sky sites at a glance. It saves time when you’re rushing to catch a clear window between clouds. A good feature also includes a rating system for site safety, road access, and parking, so you don’t waste a drive only to find a locked gate or a crowded field.
Another essential feature is weather awareness. The app should forecast cloud cover, transparency, wind, and humidity for your chosen spot. The best tools combine long-range forecasts with minute-by-minute updates, so you don’t pack up in the middle of a drizzle. You want this to be simple: a few taps to decide if tonight is a go, or if you should plan for tomorrow.
Add a learning layer with tips on when to visit, the best moon phase for your target, and recommended exposure settings for your camera. A built-in guide that translates astronomy into practical steps for your gear helps you get a smart plan for your night.
2026 astrophotography app comparison
Compare the top apps side by side on map accuracy, real-time updates, and offline usability. Some apps push heavy maps that take time to load; others stay lean but deliver solid dark-sky data. Check bookmarking, saved routes, and cross-device syncing. Strong offline maps are valuable in remote skies.
Price matters too. Some apps are free with optional premium features. See if premium perks include higher-resolution maps, extra site details, or ad-free viewing. Look for transparent data sources—claims should trace to observatories, space agencies, or citizen-science networks. Test the user experience: is it easy to search, filter, and compare at a glance, or do you need a manual?
Read reviews for real-life stories: finding a last-minute open site on a cloudy night, or an offline map saving a trip when service dropped. Your goal is an app that feels instinctive, not one that requires a manual. If you find one that blends accuracy, speed, and simplicity, you’ve found your tool for the year.
App selection tips
Choose an app that blends accuracy, offline access, and clear planning tools. Look for a clean interface, fast loading, and accurate cloud forecasts for your exact site. Prioritize offline maps so your plan holds up out of data range. Favor apps with active communities or recent updates to keep dark sky data fresh.
Light pollution map app 2026
The best maps cut to what matters: where the night sky is dark enough for shots. In 2026, the top maps combine real-time data with clear visuals so you know exactly where to point your camera for the least light interference. A good app shows both current conditions and long-term patterns, helping you plan around clear, dark nights rather than guessing.
Open the map and you’ll see a mix of colors and markers. Brighter colors indicate more light pollution; deeper blues and dark grays mark prime skies. Use this contrast to decide whether to drive farther or stay closer to home. The map becomes a trusted quick reference, not a guess after you pack your bag.
Over time, rely on the map as part of your routine. Bookmark favorites and compare seasons to catch events like meteor showers or the Milky Way window. The right app saves you time, so you spend more minutes behind the camera and fewer searching for a safe, dark spot.
Read Bortle and VIIRS maps
The Bortle scale shows sky darkness, while VIIRS shows light emissions. Reading these maps together reveals both quality and consistency. Some areas with decent Bortle ratings still glow from nearby towns—vote with your feet and pick a spot farther away or plan around city lights. Seasonal changes also affect darkness, so watch the patterns to catch the right window.
Using Bortle and VIIRS together provides practical guidance, not just numbers. Quickly compare nearby sites and pick the one with the cleanest sky, avoiding trips that chase dreams that don’t translate to sharp, star-filled images.
Use overlays for roads and campsites
Road and campsite overlays are your compass when scouting at dusk. Major routes and bright campsites can bring more light at night, so plan routes to avoid flare and find a quiet, safe spot. Overlays help you decide how far to travel from civilization to reach truly dark skies.
Toggle overlays to test routes. If a road trace intrudes into your frame, adjust position or timing. Bright campsites signal you to look elsewhere for a cleaner shot. The goal is balance: easy access with minimal light intrusion.
Map layers to check
Check several layers at once: light pollution, terrain elevation, and weather overlays. Elevation helps you find clearer, drier air; weather layers show cloud cover and wind that can affect your lens line of sight. This combo gives a practical snapshot for shoot night.
Turn on wind and humidity for long exposures. Higher, drier air often means crisper stars, while moisture can soften Milky Way detail. Road and campsite layers reveal crowded areas, helping you pick a quiet pocket within reach. You’ll plan nights when the data aligns for best results.
Real-time sky conditions app for photographers
A real-time sky conditions app is your best friend for planning shoots. You’ll see live cloud cover, wind, and transparency updates that matter for night photography. It helps you decide whether to chase a clear sky across town or stay put for a brief moment of clarity.
These apps combine live data from weather stations, satellites, and user reports. Expect quick color codes for cloud density, wind speed, and humidity, plus alerts when skies clear. Use updates to time the sunset-to-night transition or choose a camera location with the best balance of sky visibility and foreground interest. Check often—conditions can flip quickly.
For Milky Way shoots or auroras, a real-time sky app can guide you to darker spots when urban glow shifts. A simple interface highlights the key detail: whether the sky will stay clear in your window. It’s a practical plan you can trust for tonight or the weekend.
Cloud, seeing, and transparency forecasts
Seeing forecasts tell you how clear the atmosphere will be at your target, not just at ground level. Low turbulence yields crisper stars and Milky Way detail. Pair this with transparency forecasts to know how much light reaches your lens; high transparency means darker skies and brighter stars, while low transparency lowers contrast. Cloud forecasts help you map your shot sequence: wait for patches to reveal a window, then time exposures for maximum clarity. Short, purposeful sessions beat wandering in the dark.
Clouds can still provide dramatic opportunities if you time gaps. Use forecasts to plan breaks for Milky Way arcs or a lone comet. Seeing and transparency work together, while cloud forecasts keep surprises at bay.
Moon phase and rise and set times
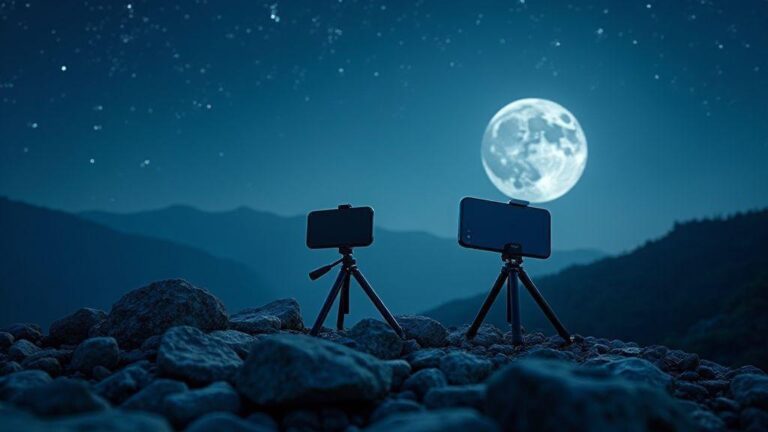
Moon phase matters: a bright full Moon can drown faint galaxies, while a slim crescent adds contrast and shadow. Check current phase and its nightly shifts to plan around the Moon’s position. For deep-sky drama, shoot near a new Moon; for foreground glow, balance twilight and Moonrise.
Moonrise and Moonset times are timing radar. A rising Moon can illuminate foreground or wash out the sky, depending on when it rises. Knowing when the Moon crosses the horizon helps you position yourself and plan shots. For long star trails, you may want the Moon to clear before you begin; for silhouettes with lunar glow, let it rise into your frame. Use these times to choreograph your entire shoot, not just a single frame.
Moon phase transitions also affect how long you have in darkness. Rapid shifts reduce your window, so plan around key moments. A precise calendar lets you say yes to clear skies and no to cloudy ones.
How to find dark skies for astrophotography
Finding the perfect night sky starts with a plan for minimal light pollution, clear weather, and safe access. Consider your local horizons and driving distance. For wide Milky Way shots, aim for a dark baseline, not city glow on the edge. Check recent cloud cover and humidity, since haze can erase a good night. A true dark sky is a canvas of deep, even darkness with speckles of stars.
Use a mix of official dark sky maps, guides, and common sense to pick spots. Start with locations known for dark skies and low traffic, so you’re not fighting car lights or crowds. Test multiple nights and times after sunset to observe how quickly darkness settles. Keep a simple log of location, moon phase, and arrival time to streamline future trips.
As you practice, learn to read the sky before you set up: look for subtle gradients and practice recognizing a true dark frame. Understand how star trails move and when dawn begins. The goal is consistency: deep darkness that reveals faint stars without pushing ISO too high. With the right dark sky, your photos improve in small, steady steps.
Dark sky reserve locator app tips
Use a dark sky reserve locator app to find officially protected spots with minimal light pollution. Compare nearby reserves for accessibility, hours, and access. Mark favorites and set alerts for conditions, especially around new moons when skies are darkest. Check accessibility notes to avoid locked gates.
Verify safety rules and recent visitor feedback. Learn if drones are allowed, where to park, and any hazardous areas. If others shoot nearby, study how they manage nearby light pollution to improve your own setup. The app helps you plan routes that minimize light intrusion and maximize telescope-friendly horizons for wide shots.
Open the app, tap a reserve, and scan the sky brightness map. Read recent reviews for access changes. If you see moonless nights listed, add it to a short list for a new moon window. Relying on these tools makes your night shoots feel like a well-timed workout rather than luck.
Check access, permits, and safety rules
Before you pack, confirm access hours and permit requirements. Some dark sky areas require night permits or post-dark entry. Call ahead or check official sites to avoid closed gates or surprise fees. If areas are crowded after sunset, plan off-peak times for space to set up. Calmer shots come from fewer crowds and brighter headlights out of the frame.
Safety rules guide better photo sessions: wildlife rules, fire restrictions, and tripod placement without disturbing others. Know the nearest exit and how to reach help in an emergency. Respecting rules keeps access open for future shoots and protects the places you love to photograph.
If unsure, contact the park or reserve office for clarification. A simple packing checklist with permits and contact info helps you stay organized on the road.
Leave no trace
Leave the site as you found it. Pack out trash, batteries, and wrappers. If you used lights, switch to red-light mode and aim lights away from the sky. Protect the night environment to keep these places welcoming for future visits.
Mobile apps for night sky photography
You’ll love how these apps simplify the dark hours. First, find apps that guide you to clear skies and low light pollution to avoid wasted minutes. Second, use tools that help plan shots around Moon phase, sunset times, and Milky Way visibility. Third, rely on real-time hints for camera settings and shot composition on your phone. This makes night photography feel less guesswork and more craft.
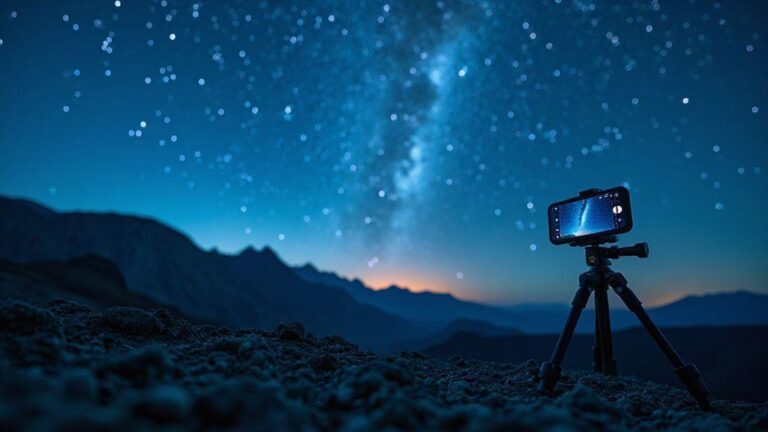
Newcomers should start with a sky planning app that maps Milky Way rise and dark-sky pockets nearby. It helps you picture your shot—be it a lone tree, a rocky ridge, or a quiet lake under a star canopy. For seasoned shooters, more technical tools track photons and star trails, enabling precise timing and framing without fumbling in the dark. These apps act as copilots to chase crisp stars instead of chasing confusion.
Don’t overlook community features: share tips, compare locations, and swap scouting ideas. Use them to set reminders for peak skies, then step out with confidence, knowing you’ve done the groundwork.
Remote control and exposure apps
A good remote app lets you start and stop long exposures without touching the camera, preserving frame integrity for star trails or crisp Milky Way shots. It saves battery and reduces shake. Exposure apps guide you to exact settings based on sky brightness, providing live readouts for star brightness and safe shutter durations. Foreground-heavy scenes benefit from balanced sky-to-ground exposure.
Intervalometer features help you shoot sequences with precise gaps for star trails or evolving night scenes. The better you understand these tools, the more you can focus on composition and timing rather than fumbling with gear.
Star tracking and stacking helpers
Star tracking keeps the sky steady during long exposures, aligning with true north and locking follow modes if supported. This minimizes star drift and lets you extend shutter times for richer Milky Way colors.
Stacking multiple short exposures reduces noise and enhances detail. It requires consistency across frames—same white balance, focus, and framing. Stack to reveal fainter stars and sharper skies, though it requires patience and careful workflow.
The best stacking results from repeatable settings and a deliberate process, yielding a single, crisp night rather than a patchwork of frames.
Settings cheat sheet
For wide-angle shots under a star-bright sky: ISO ~1600, f/2.8–f/4, shutter 15–30 seconds. For faint Milky Way details: ISO 3200–6400 (watch for noise; stack if needed). Use manual focus and confirm sharp stars by zooming on a bright star, then back off slightly.
Plan trips to optimal celestial photography sites 2026
Confidence comes from a solid plan. Start with spots known for clear skies, low light pollution, and safe access—prioritize sites with reliable Milky Way arcs and dark horizons. Consider seasons and lunar cycles: new moon nights are darkest, while a crescent moon can glow a foreground scene without washing out stars. Read recent trip reports for weather patterns, road conditions, and local quirks. Choose destinations that fit your skill level and gear.
Map out a rough timeline: golden hour before dark, the main astronomy window, and a backup if clouds roll in. Prefer locations with a backdrop you love—lakes, mountains, or distant city silhouettes. Keep plans flexible on timing, but solid enough to avoid wandering in the dark. Note access times, vehicle restrictions, and permit needs to stay prepared.
Write down your target window, forecast, and backup plan, plus a simple map for reference. You’ll sleep easier knowing you’ve thought through routes, safety checks, and contingencies. With a solid plan, you’ll chase stars with confidence.
Route, timing, and local weather windows
Your route should minimize light pollution along the way and stay close to familiar landmarks for easy backtracking. Timing matters: chase the Milky Way when the core is high, or capture long star trails when conditions permit. Review local weather windows—clouds, humidity, and wind can break a shoot. If a favorable window appears, commit to it rather than dithering. Be mindful of wind on open plains or cliffs; tripods can suffer in gusts.
Coordinate timing with lunar phases: a new moon offers the cleanest sky, while a thin crescent can illuminate foregrounds without washing out the sky. Set a rough start time, target shot window, and a clear backup. Monitor sunset and sunrise times for dramatic foreground colors. Your plan should be simple to follow in the dark, so memorize the steps and keep your route map handy.
Weather remains a wild card. Check a reliable forecast for wind, precipitation, and humidity. If humidity is high, stars may halo; adjust exposure accordingly. If you spot a clear stretch during the day, stake your claim early so you’re set when night falls. Save energy by knowing where to park, how you’ll access the site, and what safety checks are required for a smooth shoot. Your timing should be tight but adaptable, with a clear plan for forecast changes.
Combine planning apps for final shot list
Sync planning apps to build a concise final shot list. Use a star-tracking app to forecast the Milky Way’s position for your locale and date, aligning foreground elements like trees or rock formations. Pair this with a weather app for hourly cloud cover and wind data to anticipate sky gaps. A route app will map the drive, parking, and any hike segments. Combining these tools creates a clear path from your doorstep to your best shot, timed for maximum drama.
Create a final shot list that blends science with your style: target compositions, star arc angles, and whether to shoot long exposures or stack for a clean Milky Way. Add backup shots for cloudy nights—perhaps a silhouette with foreground glow or a planets-in-view shot if the sky clears late. Maintain a simple dashboard on your phone with location, arrival time, gear, initial exposure settings, and backup plans. This keeps you focused on the night, not hunting for missing pieces.
Save a few practice targets for low-wind or low-humidity nights. Test one exposure to lock the foreground, then another to balance the Milky Way. Document what worked and what didn’t across sites, times, and seasons. This approach helps you hit the moments that make your night shots sing.
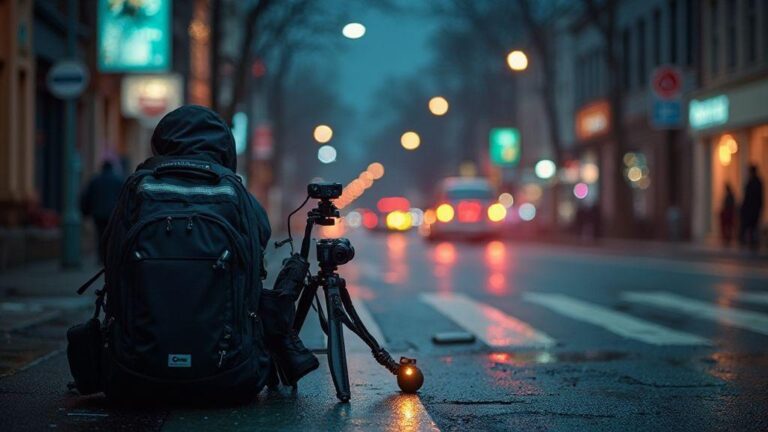
Pack list for night shoots
Keep gear simple but complete: sturdy tripod, fast prime lens, wide-angle zoom with solid noise control. A remote shutter or intervalometer saves blur on long exposures. Bring extra batteries and a portable charger—cold nights drain power fast. A headlamp with red mode reduces glare while you check your kit. Include a microfiber cloth for lenses, a small flashlight for quick checks, and spare memory cards. Add a lens hood and rain cover if dew or mist is likely.
Ergonomics matter: bring a compact chair or padded mat to rest during long waits. Hydration and snacks keep energy up, especially if you’re far from help. A fold-out map or GPS backup, plus a whistle or beacon for safety, makes field work safer. Don’t forget a small first-aid kit and a power bank as a safety net. This setup helps you focus on composition and timing rather than scrambling for gear in the dark.
Balance essentials with space. Don’t overpack a heavy bag, but don’t skip crucial items. Keep the essentials accessible and pack non-essentials separately. This streamlined approach lets you move quickly between locations and stay focused on the sky.

Smartphone Night Photography Enthusiast & Founder of IncrivelX
Vinicius Sanches is a passionate smartphone photographer who has spent years proving that you don’t need an expensive camera to capture breathtaking images after dark. Born with a natural curiosity for technology and a deep love for visual storytelling, Vinicius discovered his passion for night photography almost by accident — one evening, standing on a city street, phone in hand, completely mesmerized by the way artificial lights danced across wet pavement.
That moment changed everything.
What started as a personal obsession quickly became a mission. Vinicius realized that millions of people were carrying powerful cameras in their pockets every single day, yet had no idea how to unlock their true potential after the sun went down. Blurry shots, grainy images, and washed-out colors were robbing everyday people of memories and moments that deserved to be captured beautifully.
So he decided to do something about it.
With years of hands-on experience shooting city streets, starry skies, neon-lit alleyways, and creative night portraits — all with nothing but a smartphone — Vinicius built IncrivelX as the resource he wished had existed when he was just starting out. A place with no confusing jargon, no assumptions, and no gatekeeping. Just honest, practical, beginner-friendly guidance that actually gets results.
Vinicius has tested dozens of smartphones from every major brand, explored dark sky locations across multiple states, and spent countless nights experimenting with settings, compositions, and editing techniques so that his readers don’t have to start from scratch. Every article on IncrivelX comes from real experience, real mistakes, and real lessons learned in the field.
When he’s not out shooting at midnight or writing in-depth guides for the IncrivelX community, Vinicius can be found exploring new cities with his phone always within reach, looking for the perfect shot hiding in the shadows.
His philosophy is simple: the best camera is the one you already have — you just need to learn how to use it in the dark.