Essential Astrophotography Gear for Smartphones in 2026: Beyond the Tripod
Pick a smartphone star tracker 2026
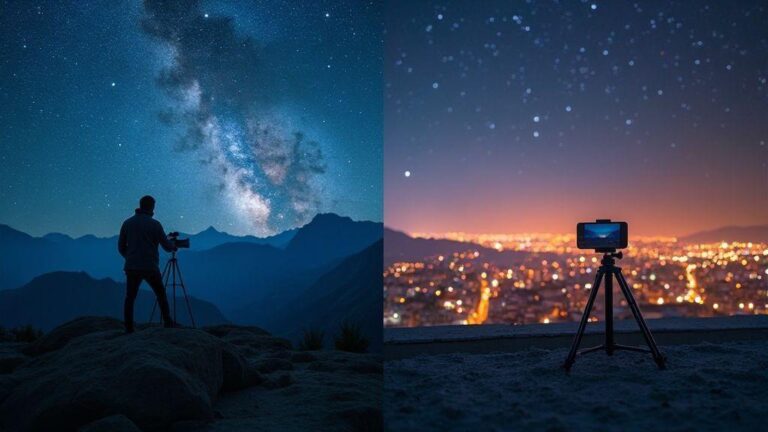
You’re chasing crisp night skies, and a smartphone star tracker is your best ally. With a steady mount, your phone can capture stars, the Milky Way, and faint nebulae without blur. A good tracker makes night photography feel routine: set up, connect, and shoot while the sky does the heavy lifting. Choose a tracker that fits your phone, stays steady, and travels light. Your future self will thank you for avoiding shaky frames when the stars appear.
A solid star tracker helps you stay in the frame as the Earth spins. It follows the sky’s motion so long exposures don’t smear. You’ll see brighter stars and color you couldn’t catch handheld, and you can shoot longer sequences for more Milky Way detail or star trails. If you’ve tried long exposures on a windy night, you know how hard it is without a tracking mount. A tracker keeps your aim true so you don’t waste batteries on retries. Your night becomes more predictable and fun.
When you pick a smartphone tracker, look for compatibility, battery life, and a travel-friendly design. The right model supports multiple charging options, quick setup, and easy calibration. You’ll want controls that feel natural on your phone, not a cramped remote. A sturdy build matters because you’ll carry it in the dark and set it on uneven ground. If you plan to shoot through the night, choose a tracker that handles cold temperatures and has clear app guidance. Your gear should feel reliable, not tentative, as you chase star glow.
How a star tracker helps you
A star tracker keeps the sky in your shots by matching your phone’s movement to the stars. When the Earth spins, the tracker moves your phone enough to cancel that motion, allowing longer exposures without blur. You’ll notice smoother foregrounds too, as the tracker stabilizes the sky while your camera brightens the scene. It’s like having a tiny, patient tripod that follows the heavens.
With a tracker, you’ll experiment more. Auto mode helps you learn what works, while manual tweaks push for dramatic Milky Way arcs or crisp star trails. You’ll see less noise from long exposures because you can keep ISO lower and still gather light. The result is consistent, shareable photos that show progress and curiosity.
Beyond long exposures, a tracker helps with time-lapse sequences of the night sky. You can capture seamless star trails as the device keeps the stars in frame, and it makes panoramic nightscapes easier by preventing drift between frames. The tracker gives you a professional edge without the complexity of heavier gear.
Key specs to check
You want a tracker that pairs smoothly with your phone, so check the mounting range and quick-release options. Look for a model that supports common phone sizes and has a simple alignment routine. Battery life matters for long shoots, so review continuous run time and supported charging methods. A compact, lightweight design helps you travel light to dark skies.
App compatibility is crucial. Choose a tracker with a clean app that guides you through setup, calibration, and shooting modes. Features like polar alignment hints, exposure presets, and stacking options are a big plus. If you shoot in cold weather, confirm the case or grip stays warm to your fingers and won’t slip. Better software means fewer headaches in the field and more to capture.
Durability rounds out the list. A splash-proof shell or rugged coating helps if you’re out after rain or dew. You’ll also want solid knobs and locking pins that won’t loosen as you adjust angles. Reliability is the lifeline of a night shoot, so pick something with proven build quality and good customer support.
Fast setup tips
- Pre-balance the tracker at home on a stable surface.
- Align the phone camera with the zenith and save your alignment profile for quick reuse.
- Use a simple mount that clamps your phone without obstructing the lens.
- Charge both the tracker and your phone the night before, and pack a spare power bank.
- When you arrive, power up, select your profile, and you’re ready to shoot in minutes.
In the field, set a timer to avoid rushing your first shot. Calibrate quickly using a bright star, then switch to your preferred exposure. If you’re chasing the Milky Way, use a low ISO and a longer shutter to gather detail with minimal noise. Practice makes fast, so run a couple of test frames to confirm focus and framing.
Use mobile lens adapters and telephotos
You want sharper night photos, and that means widening your kit beyond the bare phone. Mobile lens adapters give you real glass to pull in more light and reduce softness at night. Pair a wide or micro-lens with your phone to capture more sky and crisper stars. Start simple, then move to a faster lens if you’re chasing faint nebulae or the Milky Way. A solid adapter that locks tight and stays aligned reduces reliance on long exposures.
A telephoto attachment can turn a static night scene into a detailed portrait of the sky. With a longer focal length, you compress the foreground and bring distant stars closer for dramatic Milky Way shots or constellations. Choose a lightweight telephoto that’s easy to mount to avoid shake. Test different distances to find your sweet spot; higher magnification often means more camera shake, so brace your hand or use a stable surface.
When you choose adapters, check compatibility with your phone’s case. Some adapters require removing bulky cases, which is a hassle at 2 a.m. Look for multi-element designs that minimize distortion and vignetting. A solid build with snug clamps helps you avoid drift between shots, especially when moving between landscapes and star trails.
Choose mobile astrophotography lens adapters
Adapters designed for astrophotography minimize edge blotches and keep stars round. Look for night-friendly coatings to reduce reflections and a design that maintains alignment across multiple lenses so you don’t waste time re-focusing in the dark. Prefer adapters with a secure grip and easy interchangeability to switch lenses quickly as sky conditions change.
Test your adapters with a quick star test: aim at a bright star and check for trailing or soft edges. If you see distortion, tighten the mount or upgrade to higher-quality elements. A good adapter should feel solid and give you confidence to shoot without fuss.
Smartphone telephoto attachments night sky options
Telephotos let you isolate clusters or capture distant features, but steadier hands are essential. Choose a telephoto with low chromatic aberration so colors stay natural. For night skies, a moderate zoom (around 2x–4x) often works best with smartphones, balancing magnification and light loss.
Pair telephotos with a fast exposure routine: shoot a quick base frame, then stack multiple frames to reduce noise. If your phone supports RAW, shoot RAW for stacking later. Remember that telephotos can reduce light, pushing you toward longer total exposure times, so a sturdy tripod or firm surface is key.
Mounting safety tips
Mount your phone with a steady hand and a firm base. Ensure clamps are tight and the lens sits cleanly over the camera. A loose mount causes subtle shake that ruins night shots. On uneven ground, use a rock or backpack as a stabilizer and avoid sudden movements during long exposures.
Always check for heat buildup during long sessions. Your phone can overheat after a few minutes of constant exposure, so give it breaks and monitor temperature. If you’re shooting in damp air or light drizzle, keep a microfiber cloth handy to wipe lenses between frames.
Add cooled mobile astro sensors and scope adapters
Cooled mobile sensors are a game changer for crisper night shots. Lowering the sensor heat reduces foggy, grainy looks, delivering longer, cleaner views of the sky. Pair a cooled sensor with a scope adapter to maintain alignment and stability, getting closer to dedicated astro rigs without carrying heavy gear.
Cooled sensors help you push longer exposures without washing out the signal. You’ll notice less random brightness and fewer color specks, enabling you to capture fainter nebulae or galaxies with your phone. The better the cooling, the more detail you gain. Proper airflow, insulation, and a reliable power source are essential.
Why cooled mobile astro sensors for phones reduce noise
Cooled sensors shrink heat noise that builds up during long exposures. Heat adds random brightness (grain) to night images. Lowering temperature yields a cleaner signal, so stars stay sharp and colors stay true. You’ll see richer Milky Way bands and more detail in faint galaxies. When the sensor isn’t fighting heat, you can stack more frames, smoothing noise while preserving real light.
Setup matters: ensure good airflow, insulation, and a power source. Balance ease of use with cooling performance so you can shoot more on chilly nights.
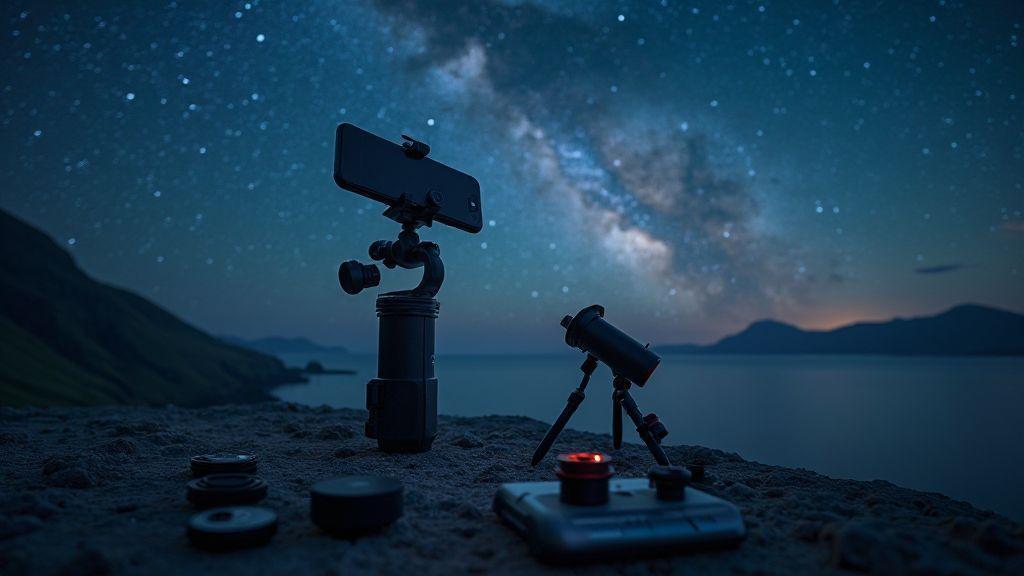
Use a smartphone to telescope mount adapter
A smartphone-to-telescope mount adapter bridges your pocket camera with the night sky. With the right adapter, your phone sits securely on the eyepiece holder for a steady, direct line to the telescope. Align, lock, and focus—then shoot quick, clear shots that used to require heavier gear.
Make sure the adapter fits your phone width and the telescope’s eyepiece. A snug fit prevents slippage during long exposures. A basic guide setting helps keep your target centered. Pair the adapter with a small tripod or monopod at the scope end to track stars as they drift. It’s not about turning your phone into a pro rig; it’s about dependable, repeatable shots of the Moon, planets, or bright deep-sky objects.
Compatibility checklist
- Ensure your phone supports the adapter’s connector type.
- Check that the telescope eyepiece diameter matches the adapter grip.
- Confirm clamps are firm without scratching.
- Verify you can dial in focus with the phone’s screen, preferably with a magnified live view.
- Look for adjustable alignment to compensate small tilts.
Cut sky glow with light pollution filters
Light pollution filters help you cut city glow, letting stars pop and Milky Way bands look natural. Choose a filter that targets common wavelengths from street lamps without dulling the stars you want to capture. A good filter reduces post-processing color balance, letting you frame cleaner shots.
If you’re new to filters, start with a broad-spectrum type that blocks common sodium and LED emissions. As you gain confidence, try two-layer sets or variable-density options to tune glow. Use lighter filters for wide-angle nightscapes and more specialized filters for Milky Way or star trails. Compatibility with your phone and case is essential; test different strengths to see how they affect sky mood and foreground brightness.
When to add a filter in the field: attach after finding composition and exposure targets. Test the sky glow before locking exposure; you can remove the filter for foreground tests and reapply for the final render. If you’re threading a filter onto a lens, carry a cleaning cloth to wipe fingerprints. Magnetic or clip-on filter systems save time in the dark. Map out moments when the sky changes quickly—just after astronomical twilight is ideal for trying a filter and comparing results to unfiltered shots.
Light pollution filters for smartphone astrophotography types
For wide-angle nightscapes, a subtle filter reduces orange glow and expands the sky. For Milky Way or star trails, use a filter that preserves star color while cutting pollution. For casual shots, a single well-chosen filter may suffice; for serious sessions, carry a small set to dial in the look you want.
Keep compatibility in mind, as some filters clamp over the lens while others slide in front of a case. If you shoot through a case, choose a filter that attaches securely. Test filters on a quick night walk to understand how each one changes the sky and ground. The right choice makes post-processing easier because you start closer to the final result.
When to add a filter in the field (revisited)
Attach after composition and exposure are set. If lighting is fading, test sky glow first to gauge filter impact. Remove for foreground tests, then reapply for the final render. For quick field changes, consider magnetic or clip-on filters to avoid unscrewing in the dark.
Cleaning and storage tips
Keep filters clean with a microfiber cloth and gentle cleaning solution. Store them in a padded case to prevent scratches. Label or color-code filters to avoid mix-ups in the dark. Dry, cool storage is best; heat and moisture can warp coatings. If you notice wear or scratches, replace the filter.
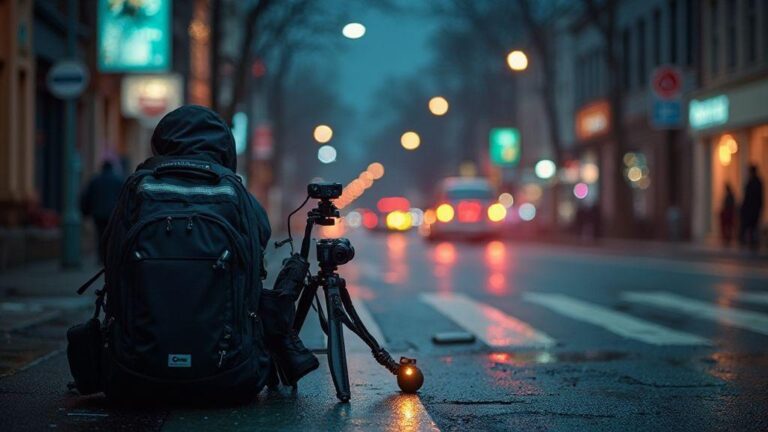
Secure power and remote control for long shots
Long night shoots demand reliable power and easy control. Plan your session, estimate duration, and choose power accordingly. A stable energy source means fewer interruptions and better frames when the Milky Way appears. Keep your camera stable and your nerves calm when power won’t die mid-frame.
Power planning isn’t just about extra batteries. It’s about smart setups you can trust in cold temps. Use a portable power bank with enough capacity for several hours, plus a car or additional pack if you’re far from a plug. For long, steady shots, a setup that can run a cooling system or intervalometer without overheating is worth it. If budget is tight, prioritize high-capacity packs that support continuous use.
Remote control keeps you in the moment without touching the camera. An intervalometer or smartphone app can trigger shots on a timer, keeping consistent exposure and spacing for star trails or time-lapses. A remote lets you scout the horizon, adjust focus, or frame the next star cluster without bumping the tripod. In cold weather, you’ll thank yourself for avoiding finger numbness by not fiddling with the shutter.
Portable power solutions for night sky photography
Choose compact packs that deliver steady power. Look for high-capacity power banks designed for cameras, with multiple outputs and sufficient wattage for long exposures. A dedicated battery grip or external power adapter can let your camera draw power from a pack while you shoot. Think minutes of continuous shooting rather than hours; pick a solution that handles your typical night session without dying mid-frame. For longer sessions, add a solar charger only if you’re shooting near daylight or dawn. In most cases, rely on charged banks and a buffer.
If you’re using a compact mirrorless or DSLR, ensure your power bank’s voltage and connectors match your camera’s requirements. A single versatile pack beats several tiny ones that barely last. A reliable power plan reduces worry about wind, cold, or breaks in cloud cover so you can stay focused on composition.
Remote shutter intervalometer for smartphone astrophotography use
A remote shutter keeps your hands off the lens and avoids blur. With smartphone control, you can stack shots for star trails or create smooth time-lapses without wobble. Set intervals to match your exposure; for trails, use short exposures every few seconds and stack hundreds of frames later. A robust app can handle long sessions, show battery use, and alert you if something goes wrong. In the field, a compact remote control beats fiddling with the phone in the cold, helping you stay warm and consistent.
Safe charging and heat tips
Charge in a wind-protected, cool spot when possible. Never cover heat vents on battery packs. In the field, use sleeves or wraps to insulate against cold, but avoid trapping heat if a pack gets warm. If overheating occurs, pause, let gear cool, then continue. Mind heat and moisture to protect your kit and extend its life.
Use AI and computational apps to boost images
AI and computational tools can elevate night photos from good to great. You’re not just stacking frames anymore; smart software can align, reduce noise, and balance exposure beyond manual capabilities. Start with apps that align and stack automatically, then let AI sharpen stars and brighten faint clouds without blowing highlights. The magic lies in how these apps learn from countless night-sky images, delivering cleaner results with less effort. You’ll notice less grain, crisper stars, and more color in the Milky Way while staying in control of the look you want.
Treat AI as a partner, not a replacement. You still need solid source images: steady, dark skies and sharp focus. Use AI to remove hot pixels, correct color casts, and merge frames for a smooth deep-sky result. If you prefer a natural feel, dial back AI adjustments rather than applying them fully. With practice, your workflow becomes fast: capture, AI stack, tweak, export, and share.
AI stacking astrophotography apps for smartphones to try
Look for apps that explicitly mention stacking and alignment. These guide you through capturing a sequence, then automatically align and combine exposures for less noise and clearer stars. Another option is an app with modules for stacking, noise reduction, and color calibration, allowing you to control each step and avoid overprocessing. Start with a modest stack, compare before and after, and save a version you’re happy with. It’s like a pocket darkroom—fast and efficient.
Checklist: Essential Astrophotography Gear for Smartphones in 2026: Beyond the Tripod
You’ll want smart tools that go beyond the basic tripod. A sturdy, compact mount with quick-release legs makes setup in the dark easier. A remote shutter or timer helps you avoid camera shake. A solid lens attachment or wide-angle adapter pulls in more sky without stressing the phone’s sensor. A small rechargeable power pack keeps you shooting through long sessions.
Don’t skip a simple, quick-clean cloth for the lens and a portable heat shield or dew heater for chilly conditions. A portable storage solution, like an SSD or fast microSD reader, saves you from rushing to offload images after a session. Finally, a basic red flashlight helps you see controls without washing out the night scene. This toolkit keeps you shooting longer with better consistency.

Smartphone Night Photography Enthusiast & Founder of IncrivelX
Vinicius Sanches is a passionate smartphone photographer who has spent years proving that you don’t need an expensive camera to capture breathtaking images after dark. Born with a natural curiosity for technology and a deep love for visual storytelling, Vinicius discovered his passion for night photography almost by accident — one evening, standing on a city street, phone in hand, completely mesmerized by the way artificial lights danced across wet pavement.
That moment changed everything.
What started as a personal obsession quickly became a mission. Vinicius realized that millions of people were carrying powerful cameras in their pockets every single day, yet had no idea how to unlock their true potential after the sun went down. Blurry shots, grainy images, and washed-out colors were robbing everyday people of memories and moments that deserved to be captured beautifully.
So he decided to do something about it.
With years of hands-on experience shooting city streets, starry skies, neon-lit alleyways, and creative night portraits — all with nothing but a smartphone — Vinicius built IncrivelX as the resource he wished had existed when he was just starting out. A place with no confusing jargon, no assumptions, and no gatekeeping. Just honest, practical, beginner-friendly guidance that actually gets results.
Vinicius has tested dozens of smartphones from every major brand, explored dark sky locations across multiple states, and spent countless nights experimenting with settings, compositions, and editing techniques so that his readers don’t have to start from scratch. Every article on IncrivelX comes from real experience, real mistakes, and real lessons learned in the field.
When he’s not out shooting at midnight or writing in-depth guides for the IncrivelX community, Vinicius can be found exploring new cities with his phone always within reach, looking for the perfect shot hiding in the shadows.
His philosophy is simple: the best camera is the one you already have — you just need to learn how to use it in the dark.