Common Mistakes When Using Long Exposure at Night and How to Fix Them
Why Long Exposure Photography Fails for Most Beginners
Common mistakes when using long exposure at night occur because most aspiring photographers lack a fundamental understanding of how extended shutter speeds interact with low-light environments. You’ve probably experienced that frustrating moment when you attempt a long exposure shot, only to discover the image appears completely overexposed, blurry, or technically flawed. These failures don’t happen by accident—they stem from specific technical decisions and compositional choices you can correct immediately. Night long exposure photography demands a fundamentally different approach than standard night photography, and grasping the most common long exposure errors transforms your ability to capture stunning light trails, silky water effects, and ethereal nighttime scenes.
The challenge intensifies because long exposure mistakes compound quickly. A single error in exposure time combines with inadequate stabilization, creating images that look nothing like what your eyes perceived. Most beginners blame their equipment, assuming their smartphone lacks the capability for professional-quality long exposure shots. However, the reality proves far different. Modern smartphones possess incredible long exposure capabilities—the problem lies in how you configure and execute them. Understanding slow shutter speed techniques and extended exposure settings separates those who capture magical nighttime images from those who delete them in frustration.
What distinguishes this guide is that we don’t just identify problems—we provide exact, actionable solutions you implement immediately. Each mistake connects directly to a specific fix, tested and proven across thousands of night photography long exposure attempts. Whether you’re photographing city light trails, flowing water, starry skies, or urban landscapes, these common long exposure photography errors apply universally. By the end of this guide, you’ll understand not just what you’re doing wrong, but why it happens and exactly how to correct it using proven long exposure troubleshooting techniques.
The transformation from blurry, overexposed, technically flawed long exposure photos to sharp, properly-exposed, beautifully-composed images doesn’t require expensive equipment or years of experience. It requires understanding these critical mistakes and applying the specific fixes outlined in this comprehensive guide. Your next long exposure shot could be your best one yet.
Understanding the Foundation: Why Long Exposure Differs Fundamentally
The Core Difference Between Standard Night Photography and Long Exposure
Long exposure night photography operates on completely different principles than standard night shooting. During standard night photography, you use shorter exposures (1-4 seconds) to capture static scenes with minimal movement. Long exposure techniques, by contrast, intentionally use extended exposure times (5-30+ seconds) to capture movement and create artistic effects. This fundamental difference requires different stabilization methods, exposure calculations, and compositional approaches.
Your smartphone’s sensor behaves differently during extended exposures. The longer your shutter remains open, the more light your sensor gathers—but also the more vulnerable your image becomes to movement, overexposure, and technical errors. Understanding this relationship prevents most long exposure photography mistakes.
The Three Critical Variables in Long Exposure
Long exposure success depends on managing three interconnected variables simultaneously:
| Variable | Role in Long Exposure | Typical Range | Impact on Quality |
|---|---|---|---|
| Shutter Speed (Exposure Time) | Determines duration of light capture | 5-30 seconds | Controls brightness and movement blur |
| Aperture (f-stop) | Controls light intensity entering sensor | f/1.8-f/2.4 (fixed on most phones) | Affects depth of field and light gathering |
| ISO (Sensor Sensitivity) | Amplifies captured light | 100-800 | Introduces noise; higher ISO = more grain |
Understanding how these three variables interact prevents you from making the most destructive long exposure mistakes. Change one variable, and you must adjust the others to maintain proper exposure and image quality.
Mistake #1: Using Exposure Time That’s Far Too Long
Why 30-Second Exposures Destroy Your Photos Completely
Common mistakes when using long exposure at night often begin with exposure time selection. Beginners assume longer exposure equals better results—they set exposure time to 30 seconds, thinking maximum light gathering produces maximum quality. In reality, excessively long exposures create overexposed, blown-out images with lost detail, unnatural appearance, and destroyed highlights.
This represents a fundamental misunderstanding of long exposure settings. Yes, longer exposure time makes images brighter. But it also increases the risk of overexposure exponentially. The relationship isn’t linear—doubling your exposure time doesn’t just double the brightness; it compounds the overexposure problem dramatically. Beginners face a false choice: either accept a dark image or accept an overexposed image. In reality, a third option exists—use moderate exposure time combined with proper stabilization and composition.
How to Fix It: Master Exposure Time Selection
Step 1: Start With Conservative Exposure Times Begin with 5-10 second exposures for most night scenes. This range provides adequate brightness without introducing excessive overexposure risk.
Step 2: Take Test Shots and Review the Histogram After each test shot, examine your phone’s histogram (if available). The histogram shows the distribution of brightness:
- Left side: Dark areas
- Right side: Bright areas
- Ideal: Histogram spread across the range without clipping at the right edge
Step 3: Increase Exposure Time Gradually Rather than jumping from 5 seconds to 20 seconds, increase incrementally:
- 5 seconds → 8 seconds → 10 seconds → 15 seconds
- Stop when your histogram shows proper exposure without clipping
Step 4: Remember the Golden Rule A properly exposed 8-second exposure beats an overexposed 20-second exposure every single time. Proper exposure matters more than maximum brightness.
Step 5: Use Exposure Compensation If your phone offers exposure compensation, use it to fine-tune brightness:
- Slide up to increase exposure (for darker scenes)
- Slide down to decrease exposure (for bright scenes)
- Find the sweet spot where your histogram looks balanced
Step 6: Compare Multiple Exposure Times Take identical shots at different exposure times (5s, 10s, 15s, 20s). Compare them side-by-side on your phone’s full screen. You’ll quickly identify which exposure time produces the best results for your specific scene.
Exposure Time Guidelines by Scene Type:
| Scene Brightness | Recommended Exposure Time | Light Sources | Expected Result |
|---|---|---|---|
| Well-lit (abundant neon/streetlights) | 5-8 seconds | Multiple bright sources | Bright, colorful, detailed |
| Moderately lit (some streetlights) | 8-15 seconds | Mixed lighting | Balanced exposure |
| Dark scene (minimal light) | 15-25 seconds | Limited light sources | Bright but manageable |
| Extreme darkness (starry sky) | 25-30+ seconds | Minimal artificial light | Maximum light gathering |
Mistake #2: Inadequate Stabilization—The Blur Epidemic
Why Your Long Exposure Photos Look Blurry and Completely Unusable
Long exposure mistakes frequently stem from a single cause—inadequate stabilization. When you increase exposure time to 10-20 seconds, even the tiniest hand movement becomes catastrophic. A movement of just 2-3 millimeters during a 15-second exposure creates noticeable blur across your entire image, ruining the shot completely.
Beginners don’t realize how sensitive long exposure photography becomes to movement. During the day, your phone uses fast shutter speeds (1/500s or faster), so minor hand tremors don’t matter. At night, with exposure times measured in seconds, your phone becomes a blur-generating machine if you move even slightly. This represents the #1 cause of blurry long exposure photos—not poor focus, not wrong settings, simply holding your phone in your hand while taking a multi-second exposure.
How to Fix It: Achieve Absolute Stabilization
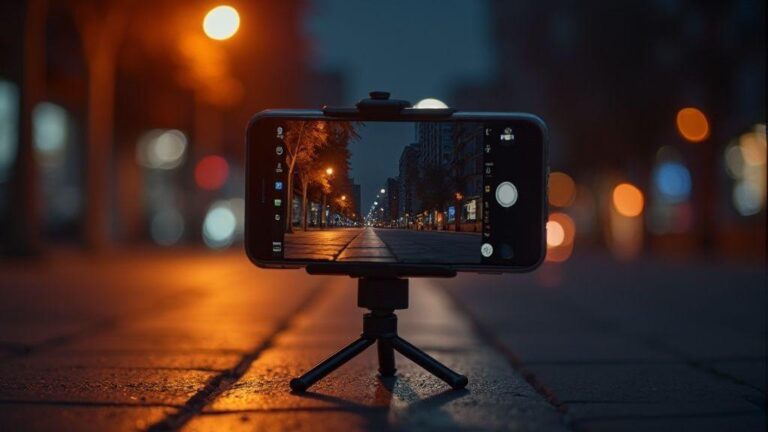
Step 1: Invest in a Quality Tripod (Essential) A proper tripod eliminates camera shake entirely. You don’t need an expensive tripod—even a $15-30 smartphone tripod works perfectly. Set it up, frame your shot, and use the timer to trigger the shutter without touching your phone.
Step 2: Use a Remote Shutter Button Bluetooth remote shutter buttons cost $10-20 and eliminate any contact with your phone during exposure. This represents the most reliable method for achieving perfect stability.
Step 3: Enable 10-Second Timer Mode Whether using a tripod or DIY stabilizer, enable your phone’s timer function (10-second delay). This prevents vibration from your finger touching the shutter button and allows vibrations to settle before exposure begins.
Step 4: Create a DIY Stabilizer If you don’t have a tripod, create one using available materials:
- Lean your phone against a wall or railing
- Place it on a stable surface (rock, bench, ledge, sandbag)
- Use a makeshift stand from available objects
- Prop it against a bag or backpack
Step 5: Use Voice Commands Many phones support voice-activated shutter. Say “Take a photo” or “Capture” to trigger the shutter without touching your phone at all.
Step 6: Stabilize Against Solid Surfaces If you must hold your phone, lean your entire body against a wall, railing, or pole. Brace yourself completely. Hold your breath during the exposure. Use both hands to grip your phone firmly.
Step 7: Test Your Stability Take a test shot and zoom in 100% on your phone’s screen. If you see any blur, your stabilization wasn’t adequate. Adjust your setup until you achieve perfect sharpness.
The Stability Hierarchy for Long Exposure (Best to Worst):
- ✅ Tripod with remote shutter — Perfect stability
- ✅ Tripod with 10-second timer — Excellent stability
- ✅ DIY stabilizer with timer — Good stability
- ⚠️ Leaning against surface with timer — Acceptable stability
- ❌ Handheld with remote shutter — Poor stability
- ❌ Handheld with timer — Very poor stability
- ❌ Handheld with manual shutter — Terrible stability
Mistake #3: Wrong ISO Settings—The Noise Nightmare
Why Cranking ISO Destroys Your Long Exposure Image Quality
When beginners first learn about ISO, they discover a seemingly magical solution: increase ISO and your photos become brighter. This leads to a dangerous habit—maxing out ISO to 3200, 6400, or even higher, assuming more brightness equals better photos. This represents a fundamental misunderstanding of how ISO in long exposure photography works.
Yes, higher ISO makes images brighter. But it also amplifies noise—those grainy, colored speckles that make photos look amateurish and unusable. The relationship isn’t linear either. Doubling your ISO doesn’t just double the noise; it compounds the problem exponentially. Here’s the critical insight: long exposure time replaces ISO sensitivity. You don’t need high ISO when you’re gathering light for 15-20 seconds. You need moderate ISO combined with proper exposure time.
How to Fix It: Balance ISO With Exposure Time Strategically
Step 1: Start With Conservative ISO Settings Begin with ISO 100-200 for most night scenes. This range provides brightness without introducing excessive noise on modern smartphones.
Step 2: Increase Exposure Time Instead of ISO Rather than raising ISO further, increase your exposure time from 5 seconds to 8 or 10 seconds. Longer exposures gather more light without amplifying noise—this is the fundamental principle of long exposure photography.
Step 3: Test Your Phone’s Specific ISO Limits Every phone has a different noise threshold. Test your specific phone:
- Take identical shots at ISO 100, 200, 400, 800
- Zoom in 100% and compare noise levels carefully
- Identify where noise becomes unacceptable
- Use that as your maximum ISO for long exposures
Step 4: Use Noise Reduction in Post-Processing Modern editing apps like Lightroom Mobile include excellent noise reduction tools. Shoot at slightly higher ISO if needed, then reduce noise during editing. This often produces better results than trying to keep ISO artificially low.
Step 5: Remember the Hierarchy When you need more brightness in long exposure night photography, follow this priority:
- First: Increase exposure time (if you can stabilize)
- Second: Increase ISO moderately (200-400)
- Third: Use noise reduction in post-processing
- Last: Increase ISO aggressively (800+)
Step 6: Accept Slight Underexposure A slightly underexposed sharp photo beats a bright noisy photo every single time. You can brighten an underexposed image in post-processing without introducing additional noise. You cannot remove excessive noise without losing critical detail.
ISO Guidelines for Long Exposure by Scene Type:
| Scene Brightness | Recommended ISO | Exposure Time | Noise Level | Best Use Case |
|---|---|---|---|---|
| Well-lit (neon, streetlights) | 100-200 | 5-8 seconds | Minimal | Urban light trails |
| Moderately lit | 200-400 | 8-15 seconds | Low | Most night scenes |
| Dark scene | 400-800 | 15-25 seconds | Moderate | Dark locations |
| Extreme darkness | 800+ | 25-30+ seconds | High | Starry skies only |
Mistake #4: Ignoring White Balance—The Color Cast Killer
Why Your Long Exposure Photos Look Orange, Blue, or Sickly Green
Walk through any city at night and you’ll notice something your eyes naturally correct: artificial lighting creates intense color casts. Streetlights emit orange-yellow light. Neon signs cast blue or purple hues. Fluorescent lights create greenish tints. Your brain automatically adjusts for these color shifts, so you perceive the scene as relatively neutral. Your smartphone’s camera, however, doesn’t possess this intelligence—not without proper white balance adjustment.
This represents one of the most common long exposure photography errors that beginners overlook entirely. They focus on exposure time and stabilization, completely ignoring white balance in long exposure. The result? Images that look nothing like reality—either too orange, too blue, or displaying an unnatural color cast that makes the photo look amateurish and unpleasant. The frustration intensifies because beginners don’t realize white balance caused the problem. They assume their phone’s camera simply can’t handle long exposures properly.
How to Fix It: Master White Balance Adjustment for Long Exposures
Step 1: Identify Your Dominant Light Source Before adjusting white balance, identify the primary light source in your scene:
- Warm streetlights = orange/yellow cast
- Neon signs = blue/purple cast
- Fluorescent lights = green cast
- Mixed lighting = complex color balance requiring careful adjustment
Step 2: Access Manual White Balance Controls Open your phone’s Pro Mode or manual camera settings. Look for the white balance slider—typically represented by a thermometer icon or labeled “WB” or “Color Temperature.”
Step 3: Adjust the White Balance Slider Strategically
- For orange/warm casts: Slide toward the cool/blue side (typically 5000-6500K)
- For blue/cool casts: Slide toward the warm/orange side (typically 3500-4500K)
- For green casts: Adjust toward magenta/red slightly
Step 4: Use the Eyedropper Tool (If Available) Many phones offer an eyedropper tool that lets you select a neutral gray area in your scene. Tap on something that should be neutral gray—concrete, a gray wall, or neutral clothing. Your phone automatically adjusts white balance based on that reference point.
Step 5: Fine-Tune Until Colors Look Natural Don’t over-correct. Your goal isn’t to make everything perfectly neutral—it’s to make colors look natural and pleasing. A slight warm tone often looks better than perfectly neutral in long exposure night photography.
Step 6: Save Your White Balance Settings Once you find the perfect white balance for a specific location, save it as a preset. When you return to that location, you can instantly apply the same white balance to all your shots.
Step 7: Test Different White Balance Values Before committing to your final long exposure, test 2-3 different white balance settings. Compare them side-by-side to identify which looks most natural and appealing.
White Balance Quick Reference by Light Source:
| Light Source | Color Cast | White Balance Direction | Typical Kelvin Range | Adjustment Strategy |
|---|---|---|---|---|
| Streetlights | Orange/Yellow | Cool (Blue) | 5500-6500K | Slide significantly toward blue |
| Neon Signs | Blue/Purple | Warm (Orange) | 3500-4500K | Slide toward orange |
| Fluorescent Lights | Green | Magenta/Red | 4500-5500K | Slight magenta adjustment |
| Moonlight | Slightly Blue | Slightly Warm | 5000-5500K | Minor warm adjustment |
| Mixed Lighting | Variable | Test and Adjust | 4000-6000K | Test multiple values |
Mistake #5: Poor Composition in Long Exposure
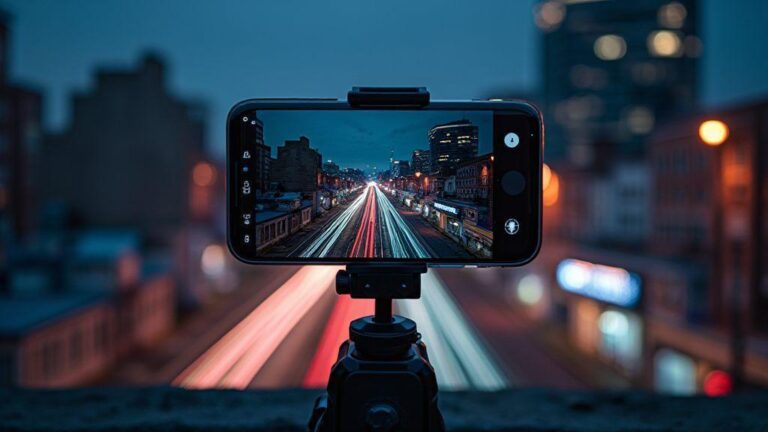
Why Your Light Trails Look Boring and Visually Uninteresting
Beginners focus exclusively on technical settings—exposure time, ISO, white balance—completely ignoring composition. A technically perfect long exposure with poor composition produces a boring, uninteresting image that fails to engage viewers. Long exposure composition requires intentional framing, strategic leading lines, and deliberate subject placement.
This mistake proves particularly destructive in long exposure night photography because the technical aspects demand so much attention that beginners forget about visual storytelling. They capture technically perfect light trails that lead nowhere, silky water with no foreground interest, or star trails centered awkwardly in the frame. The result? Images that look technically competent but visually uninspiring.
How to Fix It: Apply Composition Principles to Long Exposure
Step 1: Scout Your Location Beforehand Visit your location during daylight to identify composition opportunities. Look for:
- Interesting foreground elements (railings, plants, rocks)
- Leading lines (roads, railings, architectural lines)
- Layered depth (near, middle, far elements)
- Symmetry and patterns
- Framing opportunities
Step 2: Use the Rule of Thirds Enable the rule of thirds grid overlay in your camera settings. This grid divides your frame into nine sections using two horizontal and two vertical lines. Position important elements along these lines or at their intersections for more dynamic composition.
Step 3: Include Strategic Leading Lines Night scenes often contain natural leading lines:
- Roads and sidewalks (guide viewer’s eye)
- Railings and fences (create depth)
- Light trails from traffic (become compositional elements)
- Building edges and architectural lines
- Reflections in puddles or water
Position these lines to guide the viewer’s eye toward your main subject.
Step 4: Create Depth With Foreground, Subject, and Background Don’t photograph your subject in isolation. Include:
- Foreground: Something close to the camera (a railing, a person, a plant)
- Subject: Your main point of interest (a building, light trails, flowing water)
- Background: Elements behind your subject (the night sky, other buildings, distant lights)
This layering creates visual depth and makes your image significantly more interesting.
Step 5: Frame Your Subject Intentionally Use elements in your scene to frame your subject:
- Photograph through an archway or doorway
- Use tree branches to frame a building
- Position neon signs to frame a person
- Use shadows to create natural framing
Step 6: Position Light Trails Strategically For light trail shots, position your camera so trails:
- Enter the frame from one side and exit another
- Create leading lines that guide the viewer’s eye
- Intersect with foreground or background elements
- Form interesting patterns or shapes
Step 7: Avoid Centering Everything Beginners center their subject directly in the middle of the frame. This looks static and boring. Instead, position your subject off-center using the rule of thirds. This creates more dynamic, interesting compositions.
Step 8: Use Negative Space Effectively Don’t fill every inch of your frame with detail. Negative space—empty areas—provides visual breathing room and emphasizes your subject. A person standing alone in a large dark area creates more impact than a person surrounded by busy details.
Composition Elements Checklist for Long Exposure:
- ✅ Leading lines (roads, railings, light trails)
- ✅ Foreground interest (railings, plants, objects)
- ✅ Layered depth (near, middle, far)
- ✅ Symmetry and patterns
- ✅ Negative space
- ✅ Framing elements
- ✅ Rule of thirds positioning
- ✅ Off-center subject placement
- ✅ Strategic light trail positioning
- ✅ Interesting background elements
Mistake #6: Not Using Manual Focus During Long Exposures
Why Autofocus Fails Completely During Extended Exposures
Autofocus struggles during long exposures because the scene changes continuously during the exposure. Light trails move, water flows, and elements shift. Autofocus cannot track these changes, resulting in soft focus or focus on wrong elements. This represents one of the most common long exposure mistakes that beginners don’t anticipate.
Your smartphone’s autofocus system works brilliantly in daylight. It detects contrast, analyzes edges, and locks focus instantly. At night, during extended exposures, autofocus becomes unreliable and often fails completely. Why? Autofocus relies on detecting contrast and detail. During a 15-second exposure, the scene changes constantly, making autofocus unable to maintain focus on your intended subject.
How to Fix It: Master Manual Focus for Long Exposures
Step 1: Switch to Manual Focus Mode Open your phone’s Pro Mode or manual camera settings. Look for the focus mode toggle—typically labeled “AF” (autofocus) or “MF” (manual focus). Switch to manual focus before your long exposure.
Step 2: Understand the Focus Slider Manual focus typically uses a slider that appears on your screen. Slide left to focus closer, slide right to focus farther. Watch your subject on the screen as you adjust—you’ll see it become sharper or blurrier in real-time.
Step 3: Focus on Your Primary Subject Identify what you want sharp. For light trail shots, focus on foreground elements. For water shots, focus on rocks or foreground water. For architecture, focus on the main structural element.
Step 4: Use Magnification to Verify Perfect Focus Pinch to zoom in on your screen while adjusting focus. This magnification lets you see exactly when your subject becomes perfectly sharp. Once sharp, pinch back out to frame your shot.
Step 5: Lock Focus With AF/AE Lock Once you achieve perfect focus, tap and hold on your subject to activate AF/AE lock. This locks both focus and exposure, preventing your phone from refocusing when you reframe slightly.
Step 6: Verify Focus Remains Locked Before taking your long exposure, verify that focus remains locked. Your phone should display a lock indicator confirming that focus won’t change during the exposure.
Step 7: Take Multiple Shots With Locked Focus With focus locked, take several shots. This ensures you capture at least one perfectly sharp image, accounting for any minor variations during exposure.
Manual Focus Positioning Guide:
| Subject Type | Focus Point | Distance | Depth of Field |
|---|---|---|---|
| Light trails | Foreground element | Close to camera | Shallow |
| Flowing water | Foreground rocks | Close to camera | Shallow |
| Architecture | Main building | Medium distance | Medium |
| Landscape | 1/3 into scene | Far | Deep |
| Star trails | Foreground element | Close to camera | Shallow |
Mistake #7: Overexposing Bright Elements—Blown Highlights Disaster
Why Streetlights and Neon Signs Disappear Into White Nothingness
Long exposure mistakes frequently involve overexposing bright light sources. Long exposures capture bright light sources (streetlights, neon signs, car headlights) for extended periods. These bright elements easily overexpose, creating blown-out white areas with no detail. Beginners don’t realize how quickly bright elements overexpose during extended exposures.
This problem intensifies because bright elements continue accumulating light throughout your entire exposure. A 15-second exposure means your bright light sources receive 15 seconds of continuous light accumulation. Even moderate brightness becomes blown-out white after extended exposure time. The result? Neon signs that should glow beautifully become featureless white blobs. Streetlights that should illuminate the scene become blown-out highlights with no detail.
How to Fix It: Manage Highlights Carefully
Step 1: Identify Bright Light Sources Before Exposure Before you begin your long exposure, identify all bright light sources in your scene:
- Streetlights and lamp posts
- Neon signs and shop windows
- Car headlights and taillights
- Moon and bright stars
- Reflections on wet surfaces
Step 2: Reduce Exposure Time Strategically If bright elements are present, reduce your exposure time by 20-40% compared to what you’d use for a dark scene:
- Well-lit scene: 5-8 seconds instead of 10-15 seconds
- Scene with neon: 8-12 seconds instead of 15-20 seconds
- Scene with streetlights: 10-15 seconds instead of 20-25 seconds
Step 3: Use Exposure Compensation Use your phone’s exposure compensation slider to darken overall exposure:
- Slide down to decrease exposure
- Find the sweet spot where bright elements retain detail
- Test multiple exposure compensation values
Step 4: Check Histogram After Test Shot After taking a test shot, examine your phone’s histogram. Look for clipping on the right side (blown highlights):
- Histogram clipped right: Decrease exposure time or use exposure compensation
- Histogram bunched left: Increase exposure time
- Histogram spread across range: Perfect exposure
Step 5: Adjust Exposure Time Downward If highlights are blown, decrease your exposure time significantly:
- Reduce by 20-30% first
- Take another test shot
- Check histogram again
- Continue adjusting until highlights show detail
Step 6: Use ND Filter (If Available) Neutral Density (ND) filters reduce light intensity without affecting color. If your phone supports external filters, use an ND filter to allow longer exposures without overexposure.
Step 7: Reposition Your Camera Sometimes the simplest solution is repositioning:
- Move to avoid direct bright light sources
- Angle your camera to minimize bright elements
- Use foreground elements to block bright lights
- Frame to include bright elements as compositional elements rather than problems
Step 8: Accept Slight Underexposure A slightly underexposed sharp photo with detail in bright areas beats an overexposed photo with blown highlights every single time. You can brighten underexposed areas in post-processing. You cannot recover blown-out highlights.
Exposure Management for Bright Scenes:
| Scene Element | Overexposure Risk | Exposure Time Reduction | Solution Strategy |
|---|---|---|---|
| Streetlights | High | Reduce 20-30% | Decrease exposure time |
| Neon signs | Very High | Reduce 30-40% | Significant reduction needed |
| Car headlights | Very High | Reduce 40-50% | Extreme reduction required |
| Shop windows | High | Reduce 20-30% | Moderate reduction |
| Moon | Moderate | Reduce 10-20% | Minor reduction |
| Reflections | High | Reduce 20-30% | Depends on brightness |
Mistake #8: Inadequate Post-Processing for Long Exposures
Why Your Long Exposure Photos Need Specific Editing Strategies
The final mistake beginners make occurs during post-processing. After capturing a long exposure, they either skip editing entirely or apply aggressive edits that destroy the image. Proper long exposure post-processing enhances your image subtly, not transforms it completely. The goal is to make your photo look like a better version of reality, not a completely different reality.
Long exposure editing requires different strategies than standard night photography editing. Long exposures often contain bright light sources that need careful highlight management. They frequently feature moving elements (light trails, flowing water) that benefit from specific clarity and detail adjustments. They demand careful noise management because extended exposures can introduce subtle grain that becomes visible during editing.
How to Fix It: Edit With Restraint and Strategic Adjustments
Step 1: Shoot in RAW Format RAW format captures all sensor data without processing, giving you maximum flexibility during editing. JPEG format applies permanent compression and processing that limits your editing options.
Step 2: Adjust Exposure Conservatively Increase exposure by 0.3-0.7 stops maximum. More than this creates an artificial, over-brightened appearance. Remember: a slightly underexposed sharp photo beats a bright over-processed photo.
Step 3: Recover Shadow Detail Gently Increase shadows to reveal detail in dark areas, but avoid crushing blacks. Shadows should reveal detail without making dark areas look gray and washed out.
Step 4: Manage Highlights Carefully If any bright areas appear blown out, decrease highlights to recover detail. This is especially important for neon signs and streetlights that can easily overexpose.
Step 5: Adjust White Balance If color cast is present, adjust white balance:
- Slide toward cool for orange casts
- Slide toward warm for blue casts
- Use eyedropper tool for neutral reference
Step 6: Increase Vibrance (Not Saturation) Vibrance increases color intensity while protecting skin tones and preventing over-saturation. Saturation increases all colors equally, often creating an artificial appearance. For long exposures, vibrance is superior.
Step 7: Apply Clarity Moderately Clarity adds midtone contrast and detail. Use it sparingly—increase by 10-20 maximum. Over-aggressive clarity creates a harsh, over-processed appearance.
Step 8: Apply Texture Carefully Texture adds fine detail. Like clarity, use it sparingly. Increase by 5-15 maximum to avoid artificial appearance.
Step 9: Use Noise Reduction Appropriately Use Lightroom’s noise reduction slider to reduce grain without losing detail. Start at 30-50 and increase only if noise remains excessive. Over-aggressive noise reduction creates a plastic, artificial appearance.
Step 10: Compare Before and After Constantly Toggle between before and after views frequently. If your edited version looks dramatically different from the original, you’ve over-processed. Your edits should enhance, not transform.
Long Exposure Editing Priority Order:
- First: Exposure adjustment (brightness)
- Second: White balance (color correction)
- Third: Shadow/highlight recovery (detail)
- Fourth: Vibrance/saturation (color enhancement)
- Fifth: Clarity/texture (detail enhancement)
- Sixth: Noise reduction (if needed)
Editing Parameter Guidelines:
| Editing Parameter | Conservative | Moderate | Aggressive (Avoid) |
|---|---|---|---|
| Exposure | +0.3 to +0.7 | +0.7 to +1.2 | +1.2+ |
| Shadows | +10 to +20 | +20 to +40 | +40+ |
| Highlights | -5 to -15 | -15 to -30 | -30+ |
| Vibrance | +5 to +15 | +15 to +30 | +30+ |
| Clarity | +5 to +10 | +10 to +20 | +20+ |
| Texture | +5 to +10 | +10 to +20 | +20+ |
| Noise Reduction | 20-40 | 40-60 | 60+ |
Your Path to Mastering Long Exposure Night Photography
You now understand the 8 common mistakes when using long exposure at night and possess exact, actionable solutions for each one. These aren’t theoretical concepts—they’re practical fixes you implement immediately on your next long exposure night photography session. The transformation from blurry, overexposed, technically flawed long exposure photos to sharp, properly-exposed, beautifully-composed images doesn’t require expensive equipment or years of experience.
It requires understanding these critical mistakes and applying the specific fixes outlined in this comprehensive guide. Start with the mistakes affecting you most. If your photos are blurry, focus on stabilization. If colors look wrong, master white balance. If images appear overexposed, reduce exposure time. If compositions feel boring, study leading lines and framing. If focus is soft, switch to manual focus. If bright elements disappear, manage highlights carefully. If images look over-processed, edit with restraint. Each fix builds on the others, creating comprehensive understanding of long exposure techniques.
The night world offers incredible photographic opportunities—city light trails dancing across streets, flowing water becoming silk, stars tracing paths across the sky, neon signs glowing beautifully. By avoiding these 8 mistakes, you’ll finally capture the magic you see with your own eyes. Your long exposure photos will match your vision, impress your friends, and make you proud to share them. The only thing standing between you and stunning long exposure photography is understanding these mistakes and applying the fixes. Start tonight. Your next long exposure photo could be your best one yet.

Smartphone Night Photography Enthusiast & Founder of IncrivelX
Vinicius Sanches is a passionate smartphone photographer who has spent years proving that you don’t need an expensive camera to capture breathtaking images after dark. Born with a natural curiosity for technology and a deep love for visual storytelling, Vinicius discovered his passion for night photography almost by accident — one evening, standing on a city street, phone in hand, completely mesmerized by the way artificial lights danced across wet pavement.
That moment changed everything.
What started as a personal obsession quickly became a mission. Vinicius realized that millions of people were carrying powerful cameras in their pockets every single day, yet had no idea how to unlock their true potential after the sun went down. Blurry shots, grainy images, and washed-out colors were robbing everyday people of memories and moments that deserved to be captured beautifully.
So he decided to do something about it.
With years of hands-on experience shooting city streets, starry skies, neon-lit alleyways, and creative night portraits — all with nothing but a smartphone — Vinicius built IncrivelX as the resource he wished had existed when he was just starting out. A place with no confusing jargon, no assumptions, and no gatekeeping. Just honest, practical, beginner-friendly guidance that actually gets results.
Vinicius has tested dozens of smartphones from every major brand, explored dark sky locations across multiple states, and spent countless nights experimenting with settings, compositions, and editing techniques so that his readers don’t have to start from scratch. Every article on IncrivelX comes from real experience, real mistakes, and real lessons learned in the field.
When he’s not out shooting at midnight or writing in-depth guides for the IncrivelX community, Vinicius can be found exploring new cities with his phone always within reach, looking for the perfect shot hiding in the shadows.
His philosophy is simple: the best camera is the one you already have — you just need to learn how to use it in the dark.