Brand Battle: Why Night Mode Photos Differ Across iPhone, Samsung, Google, OnePlus, and Xiaomi in 2026
Brand Battle: Why Night Mode Photos Differ Across iPhone, Samsung, Google, OnePlus, and Xiaomi in 2026
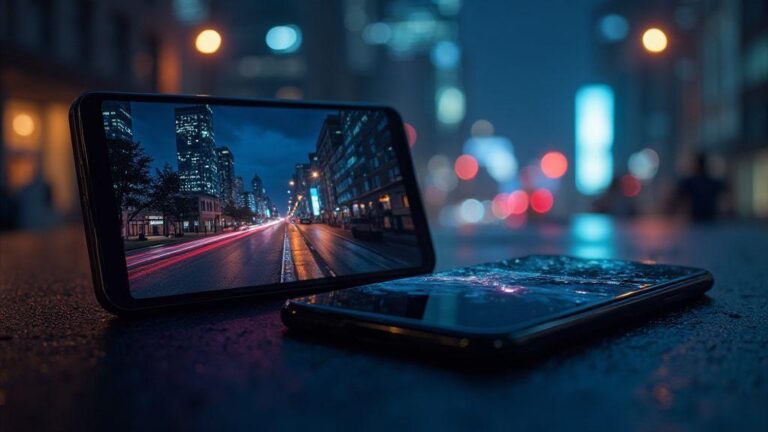
In 2026, night-mode photography across the major brands has converged on brighter, cleaner images. This Brand Battle reveals how sensor size, software processing, and computational photography shape your night shots—and what to expect from iPhone, Samsung, Google, OnePlus, and Xiaomi.
Sensor vs Software: What you need to know
When you shoot a night photo, your camera’s sensor and software team up, but they’re not the same thing. The sensor is the light-catching part—the bigger it is, the more light you can gather. The software processes that light into what you see. The sensor is the raw canvas and the software the painter. You’ll get different results depending on how each part is designed and used in your phone.
At night, the balance matters more than ever. A larger sensor can collect more light, but smart software can stretch that light into detail and color. Some phones push noise reduction and edge sharpening to cover weak spots, while others keep things more true to life with less manipulation. Brands lean on fast hardware changes or smarter algorithms. The trick is understanding which part you’re relying on when your night shots come out.
If you want to improve your night photos, you don’t just buy a bigger sensor or a faster processor. You change how you shoot and how you edit. You can hold steady, use a longer exposure when possible, and pick a scene with good contrast. In editing, tweak brightness, shadows, and color balance to get the look you want. Your best night photo is a mix of what your sensor captures and how your software renders it.
How sensor size shapes your night shots
The size of your sensor matters because it determines how much light you can collect in the same moment. A bigger sensor means bigger pixels, which catch more photons. That’s why low-light shots from phones with larger sensors can look cleaner, with less grain. You’ll notice better detail in dark areas and fewer smeared or muddy spots.
But size isn’t everything. A smaller sensor can still impress if the software is smart and the lens is sharp. Some phones use tricks like taller aspect ratios or better microlenses to squeeze more light in. When the lights go down, you’ll usually feel the difference: bigger sensors give brighter, clearer night images more reliably.
If you’re deciding between two phones, think about your typical night scenes. Do you shoot street scenes with deep shadows, or fast-moving lights? For steady landscapes, a larger sensor often shines. For quick snaps in a dim cafe, strong software can help. Your choice should line up with your nightly photography needs.
Why pixel binning helps your low light photos
Pixel binning combines smaller pixels into larger ones to gather more light without needing a bigger sensor. It pools light to reduce shadows’ loudness. In very dark places, binning can cut noise and yield smoother tones. You’ll see cleaner skies and better textures in dim corners.
The trade-off is resolution. If you bin too much, you lose fine detail. That’s acceptable for mood and exposure in many night scenes. Some phones switch binning modes automatically, and you can sometimes control it in pro or night modes. Think of binning as crowd-sourcing light to improve the overall photo.
You’ll notice the effect most in low-contrast shots, where shadows are heavy. Binning helps keep the image from looking grainy and gray. In bright city lights, binning may be less noticeable, but in a dark alley you’ll appreciate the smoother result.
sensor vs software low light performance
Sensor quality sets the ceiling for how bright your image can get. Software decides how closely you can approach that ceiling without losing color or texture. In practice, you’ll see hardware-led performance in how quickly a phone locks focus and manages exposure, and software-led performance in how clean the final image looks after processing.
How brands use computational photography for you
You might think your phone just takes a picture, but your brand sits behind the lens with clever tricks. Computational photography uses math and software to stack images, adjust exposure, and reduce noise. That means your night shots can look brighter and clearer without you touching a dozen sliders. Brands train their models to recognize light, text, skin, and motion so you get a usable photo even when the street is dim. You notice it as all those tiny details staying sharp as you pan or zoom, and colors that don’t look muddy. When you switch modes, you’re really choosing a smarter brain behind the camera, not just a faster shutter.
Different brands push their systems in unique ways. Some lean into long exposure, others favor multi-frame stacking, and a few mix in LiDAR or depth data to stabilize scenes. You’ll see that your friend’s shot from the same cafe can look noticeably different depending on the phone you’re using. That’s deliberate software design learning from countless night scenes. You get to enjoy usable photos right away, even if you don’t know the science behind it. It’s like having a professional editor in your pocket, guiding light and color with every tap.
As you compare phones, you’ll notice strengths: some phones brighten shadows aggressively, others preserve natural skin tones, and a few reduce motion blur best. Your decision should hinge on what you value most at night: glow in the streetlights, true-to-life colors, or crisp motion. Brand differences aren’t just what you see, but how the camera’s algorithm decides how many frames to stack and how it balances noise. You’re not just buying a camera; you’re adopting a tiny, smart helper for every late-night moment.
What iPhone night mode differences mean for your photos
iPhone Night Mode uses long exposure tricks to brighten scenes, but it’s not the same on every model. Newer iPhones often show smoother skies and less grain in low light. Apple refined its frame stack and color science to keep skin tones natural. If you shoot neon signs, signs stay bright without turning orange or green. You get photos that feel clean and balanced, even as light dips.
A key difference is how iPhone handles motion. If someone moves, the camera keeps their outline clear while the background softly blurs. That makes walking photos or quick moments easier to share without heavy editing. In very dark shots, highlights can look a bit blown out—that’s the trade-off for faster, ready-to-share images. Your Night Mode experience becomes more predictable as you upgrade.
Compared to older iPhones, you’ll notice calmer shadows and a cleaner overall look. Steadiness helps a lot—even a small hand tremor can shift results. A steady stance or a tiny tripod dramatically improves consistency. In the end, photos feel polished and true to the moment, even when the room is dim.
google night sight vs competitors
Google Night Sight focuses on extracting maximum light from each frame. You’ll often see brighter colors and more detail in dark corners, thanks to clever blending and testing. The result can look cinematic, with a natural glow that doesn’t aggressively saturate.
Compared with competitors, Night Sight often edges ahead in very dark scenes with little motion. Processing may take a moment longer, but the payoff is a smoother, clearer image with less noise. Some brands push sharper edges or brighter shadows for social feeds, but that can feel less realistic. Your choice depends on whether you want the most light in one frame or a faithful, easy-to-share look.
If you want accuracy, Google’s approach often yields a natural balance between light and color. If you prefer punchy night shots with high contrast, another brand might suit you better. Either way, Night Sight pushes the bar for usable night photos, especially in dim rooms or near street lamps.
computational photography brand differences
Brands train their photo brains a bit differently. Four big patterns emerge: how they stack frames, processing speed, color handling, and motion stabilization. Some aim for ultra-fast, clean captures; others prioritize detail with a slower process. Your night photos reflect these choices in clarity, glow, and texture.
Your photos from one brand may look cooler or warmer than another. That’s a deliberate color recipe, not a bug. Skin tones can drift toward pink or yellow depending on the algorithm. Motion handling varies too: a phone that’s steady while standing still may blur when you’re walking, while another might freeze motion more aggressively. Your best approach is to choose the brand whose night vibe matches your eye.
For the simplest path to good night photos, pick a phone whose computational photography aligns with your typical scenes—quiet streets, indoor gigs, or crowded bars. The more you shoot, the more you’ll see which brain fits your style.
Multi-frame processing made simple for you
Multi-frame processing helps your night photos look clearer. Hold steady and let your phone blend several frames. It’s like stacking small building blocks to create a sharper image. The phone does the math, so you don’t have to. Think of it as taking several quick snaps and blending them into one better shot.
With multi-frame processing, you get brighter photos without raising ISO too high. That keeps color truer and reduces grain. You’ll notice more texture in scenes—from brick walls to twinkling lights. For quiet streets or busy festivals, this approach helps photos stay natural instead of fake or noisy. Stay still, tap to capture, and wait a moment while the camera blends.
The best part is you can use this on most modern phones without extra gear. Stay still, capture quickly, and let the camera manage the frames. Your night photos become easier to share and closer to what you remember. It’s a practical upgrade that fits into your regular photography routine.
What exposure stacking does for your photos
Exposure stacking takes several photos at different brightness levels and combines them. You get a photo that captures both very dark and very bright areas at once. This preserves stars, street lights, and textures from washing out or turning muddy. You’ll notice more dynamic range, making night shots look closer to real life.
When you use exposure stacking, you avoid over-brightening a single frame. The dark parts stay rich, and the bright parts don’t glare. Colors stay natural, not oversaturated. It’s especially useful for scenes with mixed lights, like a cafe window beside a dark alley. You’ll get a balanced image where every part has its moment.
If you’re new, start with a steady hand or a small tripod, then shoot a few frames in quick succession. Your phone will merge them into one shareable photo. This technique moves you from one-shot captures to a smarter blend, with clear results.
temporal fusion multi frame processing
Temporal fusion uses information from multiple frames over time to improve a single final image. It’s not just stacking brightness; it compares frame-to-frame changes and keeps the best bits. This reduces motion blur from small shakes and preserves more detail in motion, like leaves in a breeze or a bus passing by.
With temporal fusion, textures are smoother and artifacts fewer. Night photos gain depth because the camera can reference several moments to choose the cleanest pixels. The result is a more faithful picture of what you saw, even in tricky lighting. It helps when shooting moving subjects or flickering lights.
Think of it as a collage built from several moments. Each frame adds a piece, and the final photo looks steady and sure, with fewer exposure jumps or grain.
ai denoising exposure stacking
AI denoising adds a smart cleanup after stacking. It identifies noise patterns and removes them while keeping edges sharp. You’ll get cleaner night photos without losing essential textures in fabrics or brick.
This is where you gain the edge after your frames blend. AI filters smooth grain in dark areas but preserves subtle lines in signs or distant skylines. The result can feel crisp and natural, almost like you upscaled a normal shot with a gentle touch.
AI denoising and sharpening for your photos
AI denoising and sharpening are the quiet heroes in night photography. You’ll notice less grain, more clean lines, and colors closer to real life. Noise in low light is common, but AI denoising acts like a smart sieve, removing noise while keeping edges intact. Sharpening then helps you regain fine detail after noise removal. If you overdo it, halos appear; if you underdo it, everything looks soft. The trick is balance: let the AI handle noise, then decide how much sharpen to apply for your preferred contrast.
You’ll get smooth skies and crisp subject separation because AI denoising understands context. It weighs shadows, highlights, and color blocks to decide what is noise and what is texture. Think of denoising as tidying a messy room without discarding your favorite posters. Sharpening follows the same logic—focus on important edges and avoid boosting flat areas. The end result should feel natural, not engineered, so your night shots feel like you witnessed them, just clearer.
To use these tools well, start with a mild denoise pass and a subtle sharpen. Compare side by side: the edit should look cleaner, not edited. If unsure, dial back and increase gradually. You’ll learn your camera’s limits and how AI helps you stay in control. With practice, you’ll produce night photos that feel true to what you saw, minus stubborn grain.
How AI denoising improves your night shots
AI denoising improves night shots by targeting the most distracting noise in shadows and highlights. Practically, you’ll get cleaner skies, steadier dark areas, and colors that don’t look blown out. It’s like wiping a foggy windshield so you can see street signs clearly.
A good denoise pass preserves texture where it matters—brick, leaves, and fabric—while smoothing flat, noisy areas. Keeping detail in useful places makes the photo feel real and less processed. The balance is key: too much denoise can look plastic; back off and you’ll keep a natural vibe. With practice, you’ll develop a consistent style across nights and locations.
You’ll notice the difference most in scenes with mixed lighting: a street lamp, a building, and a dark sky all in one frame. AI denoising helps each element hold its own without competing noise. You’ll have a cleaner baseline to build on with light tweaks and color adjustments.
When sharpening hurts detail in low light
Sharpening can help, but overdoing it can ruin a night shot. In low light, edges are fragile—noise and compression can trick the eye into seeing more detail than exists. Too much sharpening creates halos, exaggerated textures, and a surreal feel. Think of sharpening as seasoning: a pinch enhances, a handful overwhelms.
A smart approach is to pair sharpening with denoising in a two-step dance. Start with light denoise, then apply modest sharpening to restore edge clarity. Check for halos along high-contrast borders, and mask sharpening to the subject if needed. In soft-texture scenes—like a night sky or calm water—keep sharpening minimal. The goal is subtlety, not drama.
For extra bite, try targeted sharpening on the main subject only. Some apps let you brush it on, leaving the background calm. If you’re new, practice on easy shots and notice where the balance sits. You’ll discover your preferred threshold and shoot more confidently at night.
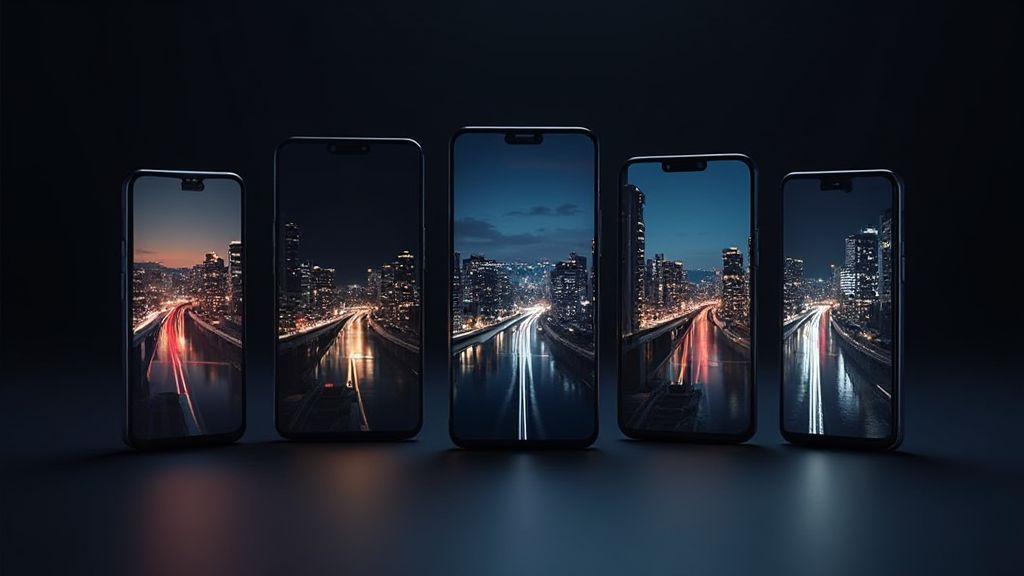
night mode comparison 2026
In 2026, night mode across brands has converged on one idea: more control with fewer consequences. You’ll see brighter, clearer scenes with less noise, and the ability to adjust on the fly. Brand differences still exist in color rendering and how aggressively noise is reduced, but gaps are narrower. Compare iPhone, Samsung, Google, OnePlus, and Xiaomi and you’ll find the same core: better low-light detail, smarter noise handling, and natural transitions between light and dark. It’s a set of options you can mix to fit your style, not a single best method.
When choosing a phone in 2026, consider your typical nights. Do you shoot city lights with vivid color, or scenes with deep shadows and subtle textures? Your answer guides you to the brand that most often delivers the mood you want with fewer edits. Even with a great algorithm, shooting thoughtfully helps: steady your hands, frame with intention, and shoot RAW where available. Better RAW helps AI shine.
Brand algorithm face-off: Samsung, OnePlus, Xiaomi
You’ll compare how these brands handle night shots on your phone. Here’s a quick guide to the differences, focusing on color, noise, and detail when lights drop. This Brand Battle illustrates how each company tunes its night photography to fit different styles.
In the Samsung corner, edges stay sharp while colors remain natural in low light. OnePlus pushes Nightscape toward brighter scenes while preserving skin tones and textures in people shots. Xiaomi tends to push brighter frames with stronger noise reduction, yielding a lantern-in-your-pocket feel. The goal is a balance where photos look real, not overly polished.
If you’re shooting in a dim cafe or outdoors at dusk, these differences matter. See how each algorithm brightens, sharpens, and handles moving subjects. Your preference—punchy colors or a more true-to-life look—will guide your choice for a night photo session.
samsung low light algorithm comparison you can trust
Samsung leans on multi-frame stacking to preserve detail in shadows. The camera tends to keep contrast reasonable so scenes don’t look gray. Textures on brick or fabric stay clearer with less noise at ISO-friendly distances. If you like colors that stay true and edges that aren’t smeared, Samsung’s low-light path is solid.
Samsung also manages motion by smoothing only what’s needed, so moving subjects don’t vanish. The downside: highlights can clip or brighten a bit if there’s a strong light source. Overall, Samsung’s night mode favors clarity and natural color over dramatic glow, giving you balanced, shareable photos.
Rule of thumb: Samsung’s approach is reliable and restrained—great for everyday night photos that friends can recognize without asking questions about color shifts.
oneplus nightscape processing 2026 and you
OnePlus pushes Nightscape toward brighter results while preserving skin tones and textures. You’ll notice warmer skin without orange overtones, helping in low-light portraits. The software aims to keep scenes readable as you push shutter speed, yielding usable photos in busy environments.
In practice, OnePlus emphasizes detail in shadows so facial features and fabric textures don’t vanish. It handles multiple light sources well, avoiding heavy color shifts. The trade-off can be a touch of digital polish, but you still get a natural look that feels approachable.
If your night photos include people, OnePlus often delivers brightness with accurate skin tones. It’s not the loudest glow, but it tends to feel friendly and true-to-life—great for memories without looking cartoonish.
xiaomi night mode algorithm comparison
Xiaomi tends to push brighter frames with strong noise reduction, so you’ll see less grain in shadows and faster posting without heavy editing. The trade-off is that some texture can feel a touch smooth, especially on rough surfaces like concrete.
In real use, Xiaomi’s night mode can give a bold, punchy overall look, which helps city scenes pop. If you chase standout color and glow, you’ll like Xiaomi’s handling of neon and reflections. Zoom in and you may notice some smoothing on fine texture.
If you shoot in mixed light with bright highlights, Xiaomi’s approach can yield dramatic contrast between lit areas and shadows. It’s handy for a bold, magazine-like vibe, with the caveat that natural texture may soften a touch.
Choose the best phone and settings for night photos
Choosing the right phone matters as much as your settings when you chase sharp, bright night photos. Look for strong night modes, decent sensor size, and reliable stabilization. In 2026, algorithms have improved, but you’ll still notice differences across models if you push very dark scenes. Start by checking a phone’s night-shot gallery and reviews focused on low light. Your goal is clean brightness, natural color, and controlled noise.
Pair the right phone with proper settings. If Night Mode or Low-Light Auto is available, keep it on and let the software decide exposure. You’ll get brighter images without cranking ISO, which keeps grain down. In mixed lighting—neon signs, street lamps, dark corners—narrow the focus and use longer exposure only with a tripod. Prioritize detail over brightness and turn on the grid to frame your shot. Clarity is the aim, not blown highlights.
Know your limits. Some phones excel at neon color accuracy, others preserve shadows better. If you shoot people, watch skin tones in Night Mode; some phones push warmth. If you want star-like lights to stay round, avoid long, uncontrolled exposures that create trails you didn’t ask for. With the right phone and mindset, you’ll consistently get share-worthy photos.
Simple settings to improve your night shots
Start with a basic setup: turn on Night Mode or Low-Light Auto if available. A longer exposure brightens the scene, but use a tripod or stable surface. A simple tip: set exposure a notch lower than you think to protect highlights.
Lock focus on your subject. Tap to focus, then use focus lock if available. Let the frame settle to gather light. In busy light scenes, a shorter exposure helps bulbs stay distinct. Controlling focus and exposure together yields more natural results.
Stabilize your shot. A steady hand helps, but a small tripod or stable surface is better. If none is available, brace your elbow and use a delayed shutter to reduce tremor. In dim spots you’ll see less motion blur and smoother lines. Keep these tweaks simple for steadier night photos.
how to read night mode comparison 2026 results
When comparing night mode results, look for brightness, noise, and color accuracy. A good night mode brightens without washing out details. Chunky noise in shadows indicates the sensor is near its limit. In 2026 results, some brands preserve color better in mixed lights, while others skew warmer or cooler. Look for natural skin tones, not overly saturated hues.
Next, check how highlights are handled. Strong night modes keep bright spots from clipping while preserving texture in darker areas. If you see blown lights, adjust the setting or switch modes. Texture in concrete, bricks, and foliage should remain discernible. Mushy textures indicate over-processed results. Weigh results to pick a phone that matches your style—natural color, sharp edges, minimal noise.
Also consider user experience. How fast is the shot? Does the phone load data quickly, or is processing noticeable? Are there extra modes for specific scenes like night portraits or architecture? Practical differences matter as much as the numbers. A clear read helps you choose the phone that fits your night-photo routine.
iphone night mode differences
iPhone Night Mode differences show up across models and lenses. Newer iPhones typically deliver less grain and more accurate color balance than older versions. The ultrawide can capture broader scenes but may introduce distortion or different color rendering. Portraits in Night Mode can look smoother, with warmth to skin tones that feels inviting.
When comparing iPhone models, note how highlights from street lamps are managed and how shadows recover in corners. Some versions preserve texture in bricks and sidewalks, while others lean toward a polished, cinematic feel. For night selfies, newer iPhones often offer better detail and skin tone, though differences can be subtle in tricky lighting.
Understanding these differences helps you pick the right iPhone for your style. If you want crisp, realistic night photos with reliable portraits, newer Night Modes are a good fit. If color warmth or a specific mood matters, check side-by-side comparisons in real-night scenarios to guide your choice.

Smartphone Night Photography Enthusiast & Founder of IncrivelX
Vinicius Sanches is a passionate smartphone photographer who has spent years proving that you don’t need an expensive camera to capture breathtaking images after dark. Born with a natural curiosity for technology and a deep love for visual storytelling, Vinicius discovered his passion for night photography almost by accident — one evening, standing on a city street, phone in hand, completely mesmerized by the way artificial lights danced across wet pavement.
That moment changed everything.
What started as a personal obsession quickly became a mission. Vinicius realized that millions of people were carrying powerful cameras in their pockets every single day, yet had no idea how to unlock their true potential after the sun went down. Blurry shots, grainy images, and washed-out colors were robbing everyday people of memories and moments that deserved to be captured beautifully.
So he decided to do something about it.
With years of hands-on experience shooting city streets, starry skies, neon-lit alleyways, and creative night portraits — all with nothing but a smartphone — Vinicius built IncrivelX as the resource he wished had existed when he was just starting out. A place with no confusing jargon, no assumptions, and no gatekeeping. Just honest, practical, beginner-friendly guidance that actually gets results.
Vinicius has tested dozens of smartphones from every major brand, explored dark sky locations across multiple states, and spent countless nights experimenting with settings, compositions, and editing techniques so that his readers don’t have to start from scratch. Every article on IncrivelX comes from real experience, real mistakes, and real lessons learned in the field.
When he’s not out shooting at midnight or writing in-depth guides for the IncrivelX community, Vinicius can be found exploring new cities with his phone always within reach, looking for the perfect shot hiding in the shadows.
His philosophy is simple: the best camera is the one you already have — you just need to learn how to use it in the dark.