Beyond Human Eye: How 2026 Smartphones See in the Dark – A Deep Dive into Sensor and Software
Stacked CMOS sensor advances
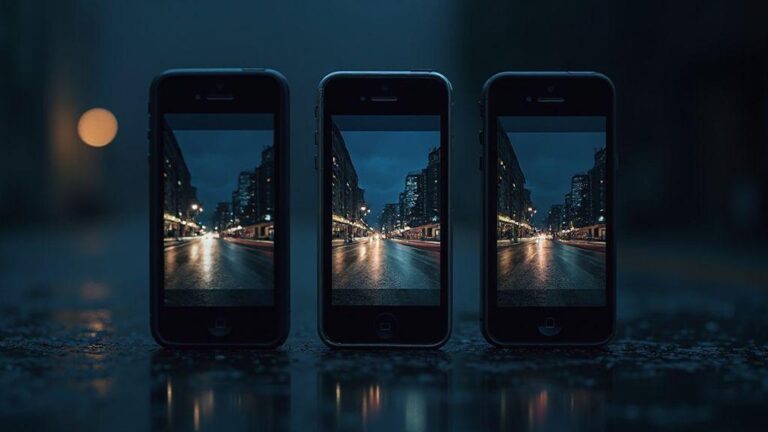
You’re stepping into a night where every detail matters, and the camera system in your phone is the key. Stacked CMOS sensors separate the memory layer from the photo sensing layer, enabling faster readouts and more efficient storage. This lets the sensor capture more light with less blur in low light or fast-moving scenes, producing crisper night photos that feel closer to what you remember.
As you hold your device up to the dark, stacked designs reduce electronic noise thanks to a shorter, more direct readout path. That means cleaner colors and better detail in shadows and highlights. When you snap a low-light photo, you’re less likely to see grain or smeared edges, and you can keep shooting without waiting for processing. The practical upshot is simpler, faster night photography you can rely on.
Behind the scenes, stacked CMOS sensors pair with smarter processing. Your phone’s image signal processor can work with the sensor data more efficiently, delivering better exposure and dynamic range. You get brighter midnight selfies and more natural night landscapes. If you’re upgrading or buying new, this tech means a noticeable difference in how your camera handles tricky lighting—more wow and less guesswork. This is part of the broader evolution described in Beyond Human Eye: How 2026 Smartphones See in the Dark – A Deep Dive into Sensor and Software.
stacked cmos sensor advancements
Stacked CMOS sensor advancements aren’t a single tweak; they’re a bundle of small improvements that add up. Moving critical electronics onto a separate layer frees room for faster readouts, reducing the delay between pressing the shutter and seeing the shot. The result is sharper images in moments under streetlights or when tracking moving subjects.
A key advantage is faster readout times. With electronics on the second layer, phones pull in light data and push it through the pipeline quicker, reducing motion blur in handheld night shots and enabling higher night-mode frame rates for smoother stacks. You’ll notice less lag and more consistent results across lighting scenarios.
Another facet is improved heat management. Stacked designs can spread heat more efficiently, keeping performance steady during long exposures or night video. Practically, you’ll enjoy more reliable performance during late-night shoots without slowdowns from overheating.
larger pixels improve low light smartphone cameras
Larger pixels on the sensor catch more photons, which is your night photo’s best friend. In dim settings, every extra photon counts, delivering brighter pictures with less noise and more faithful texture in shadows—like brick walls or streetlamp glow.
With larger pixels, you also get better color accuracy. Fewer color shifts appear in low light, so skin tones, neon signs, and skies stay truer. It’s the difference between a photo that looks like midnight and one that captures the moment as you saw it.
When comparing phones, look for pixel size and how it interacts with the sensor area. You don’t need the most expensive model to benefit—just a sensor that uses bigger pixels efficiently. Night photos will thank you with cleaner highlights and richer midtones through tricky lighting.
faster readout for night capture
You’ll feel the benefit of faster readout the moment you press the shutter in a dark scene. The camera can grab light data quickly and start processing, reducing waiting time and missed moments. Faster readout helps with steady exposure and quicker autofocus in low light, so you can capture moments with confidence even when you’re moving.
If you’re a night photography fan, this upgrade shows up as less lag and more reliable night-mode results because the processor has more information to work with, frame by frame.
Optical basics for night shots
You want cleaner night photos, and that starts with understanding how light behaves in your phone. Your camera isn’t magic; it’s a tiny, clever machine that catches photons and turns them into images. When you point your phone at a dark scene, decisions about aperture, shutter, and stabilization determine the result on screen. Night photography is about balancing enough light with sharpness and realism. Small changes in settings can yield brighter, crisper memories rather than grainy silhouettes.
In practice, you’ll feel the difference when you hold still and give the camera time to gather light. The more time your camera has, the more details you’ll see in shadows. If you move, you’ll blur, and the processor must squeeze color and sharpness from noise. Optical tricks—not just software tweaks—do the heavy lifting. Balance exposure with stability to get better night shots without new gear.
When you interface with your camera at night, you’re playing with crawl-speed science: how slow you can go while staying still enough for the image to hold together. Practical tips include modes that optimize light gathering and stabilization. Avoid blasting brightness; overexposed highlights wash out details. Keep a natural balance between highlights and shadows to let the sensor reveal texture.
aperture and lens light gathering
Your camera’s aperture is a doorway for light. A wider opening brings in more light, but also affects depth of field. In night shots, you want more light without losing sharpness. Phones with larger apertures can expose brighter images in dim streets, but too wide an aperture can blur backgrounds if you’re close to a subject. It’s about finding the right balance for the scene.
Your lens matters, too. A better lens collects more photons before you press the shutter. In dim settings, good transmission and coatings save shadows from turning muddy. Higher-quality glass and coatings translate to clearer colors and smoother gradations. For sharper edges in low light, a lens designed to limit bright spots from blooming helps.
The practical tip: shoot with the widest practical aperture for your scene and stabilize your phone. In a nighttime street scene, position yourself to maximize light from lamps rather than blasting the entire frame. Let enough light reveal texture without overexposing highlights.
optical image stabilization and sharpness
Optical image stabilization (OIS) helps counteract hand shake in the dark. Longer exposures stay steadier, so you can hold still a bit longer without a tripod. OIS is especially helpful for moving subjects or subtle nightlife textures. For still night landscapes, OIS helps keep lines crisp and edges clean.
Sharpness comes from steady hands, good focus, and sensor processing. In low light, focus may take longer, especially on small details. Tap to focus on a bright spot or the main subject, then hold steady as the camera finishes. Some phones combine sensor data across frames to sharpen the final image, best when the subject isn’t moving much. A tripod or solid surface further maximizes sharpness.
Practical tip: enable OIS, rest on a stable surface, and frame around stable elements. If photographing people, have them stay still briefly as you lock focus, then snap for crisper facial features in streetlight glow.
lens coatings reduce flare
Lens coatings matter at night because bright lights create halos or starbursts. Coatings absorb or redirect stray light, preserving scene contrast. This keeps night photos clearer with fewer ghosting around lamps and reflections in windows, yielding truer colors and sharper textures.
When comparing phones, look for lenses described as having advanced coatings or multi-coated elements. It’s practical protection for your night shots, not mere glitter.
The practical tip: shoot toward light sources with a steady hand, then compare shots on devices showing reduced flare. Small improvements in coatings can keep neon accents from turning into glare, preserving texture in highlights and shadows.
Multi-frame capture and stacking
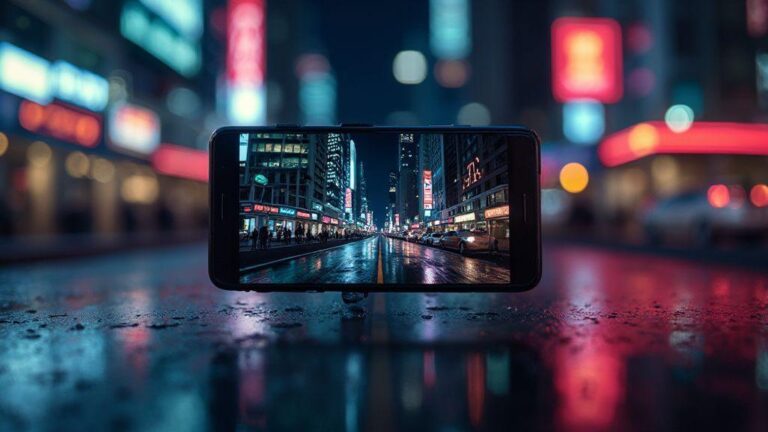
You’ll get clearer night shots with multi-frame methods that capture several frames quickly and stitch them together, reducing noise and increasing light intake. Think of it as taking multiple quick photos of a city at night and blending them so lights don’t smear into gray blobs. The camera does the heavy lifting; your job is to keep the scene steady and let the phone decide which frames to stack. The result is a brighter, cleaner image with fewer speckles, especially in shadowed areas. If your phone offers a night mode or multi-frame option, switch to it and hold steady for the capture cycle.
Typically, the app starts with a short burst and then extends the stacking period. The goal is to average out random noise while preserving true details. In windy or moving scenes, frames may be re-aligned or dropped to prevent ghosting. In low light, extra frames add light without overexposing bright parts, delivering an image closer to what you remember seeing. For sharper results, use a stable surface or tripod to ensure precise alignment; even a small shake in the first frame can affect the entire stack. Stability pays off with intentional night photos you can share confidently.
multi frame noise reduction
Multi-frame noise reduction blends several frames to smooth grain without washing out details. Colors stay true and textures like brick or bark maintain edges. Let the camera select the best frames while you remain still for the process. If movement occurs, ghosting may appear; stationary subjects yield the cleanest night photos with preserved shadows and textures.
Watch for halos around bright lights—those indicate misalignment between stacking and noise reduction. A longer exposure or manual mode can help rebalance. For stationary scenes, results are clean and detailed, especially in shadows and midtones.
frame alignment and deghosting
Frame alignment keeps the final image clean by matching edges and patterns across frames. Misalignment causes ghosting, while in static scenes alignment is easy and the stacked result is sharp. In scenes with motion, the software drops or warps frames to prevent ghosting, but using a tripod maximizes success.
Deghosting protects against artifacts from moving elements between frames. The camera blends frames to remove ghost traces, giving cleaner skies and crisper silhouettes. Indoors, ask subjects to stay still when possible for natural balance.
Practice with simple scenes first—like a streetlight against a dark sky. If ghosting or halos appear, shorten the stacking window or tighten alignment in the camera settings. With time, you’ll capture scenes true to life.
smart stacking for cleaner images
Smart stacking picks the best frames and discards the rest to deliver a cleaner photo. It preserves highlights on bright lights and shadows without muddying textures, resulting in a natural image that’s easy to edit later. Different scenes gain from stacking—quiet facades, starry skies, or storefront lines—where movement is minimal. In busy scenes, stacking remains effective but may require tweaks afterward. In short, smart stacking yields reliably clean night photos you can share with confidence.
Neural denoising and on‑device AI
You want clean night photos without cloud processing. Neural denoising on device targets grain and smooths noise as you shoot. On‑device AI runs inside the camera app, using the phone’s processor to handle tricky light without sending data away. The result is sharper textures and more accurate colors in dark scenes, with less blur when you move.
Neural denoising preserves edges while smoothing noise, keeping skies speckled and bricks textured. Some phones show a snappier camera experience—the preview matches the final shot more closely, so you see what you’ll get before you tap. For frequent low-light shooters, this means faster results, less post-processing, and fewer artificial patches in the shadows. That’s the magic of keeping the brain of the camera on your pocket device.
neural denoising algorithms explained
Neural denoising uses trained models to predict clean pixels from noisy ones. It’s a smart filter that preserves natural textures while reducing grain. The model understands typical night patterns—street lights, reflections, and shadows—so skies stay starry, bricks keep their roughness, and eyes stay natural. Balance is key: over-smoothing can blur details; under-smoothing leaves noise intact. Firmware tuning ensures consistent results across frames, improving color consistency and reducing flicker in bursts.
You also get frame-to-frame consistency. When shooting a burst in low light, the model preserves color and reduces noise across the sequence, yielding a cohesive night photo even with small movements.
night mode ai processing on phones
Night mode AI processing turns your camera into a low-light helper. It builds brighter, cleaner images by combining exposures and applying smart enhancements. The AI decides when to stack shots or sharpen edges, producing balanced results without looking overprocessed.
On phones, this processing runs in the background. You press the shutter, and it adapts to the scene—dark streets, dim interiors, or starry skies—to deliver a natural, yet vivid, look. If you’ve delayed a photo to avoid blur, night mode AI is the practical win you wanted. The processing stays on the device, keeping your photo private while staying fast.
real‑time neural inference
Real‑time neural inference lets the camera make fast, smart decisions while you frame the shot. The model runs on-device, adjusting noise and color balance as you move. You’ll notice fewer seconds between tap and a cleaner image on screen, which helps you keep up with changing light as you walk or move through a room.
With live inference, you get immediate feedback. Tilt toward brighter areas and the AI shifts focus to preserve detail. Hold still and you’ll get a cleaner, lower-noise capture right away. This is the practical edge of on‑device AI: fast, responsive, and predictable results.
Conclusion
HDR night fusion and dynamic range
You want balanced night shots, not washed out or grainy images. HDR night fusion blends multiple exposures into one frame, preserving bright highlights while retaining shadow detail for a natural, cinematic feel. It shines in scenes with neon signs, car headlights, or glowing windows, where the goal is to capture what your eye actually sees. HDR fusion captures textures you’d miss with a single exposure, but halos around bright edges can appear—adjust exposure ranges or use shorter brackets if needed.
To maximize HDR night fusion, plan your scene: position subjects away from extreme light sources, stabilize with a tripod if possible, and shoot RAW when available for more post-edit flexibility.
hdr night fusion techniques
Techniques for best results: enable HDR night fusion and use a small exposure bracket; keep the camera steady; shoot RAW if possible. Timing matters—late-night shots with streetlights can benefit from longer shutter settings but require minimal movement to avoid blur. Experiment with angles to reveal building textures and road surfaces that HDR helps bring out.
merging exposures for detail
Merging exposures is the heart of HDR night fusion. Several pictures at different brightness levels are combined so highlights aren’t blown out and shadows aren’t crushed. The payoff is detail in window frames, brick textures, and reflections. Small exposure steps preserve natural gradations and avoid cartoonish contrasts.
Your phone does most of the work, but you can guide it. Base exposure should capture midtones for a solid middle ground. If the merge looks flat, boost contrast or adjust shadows in post. Aim for a natural blend where lights glow softly and dark areas stay readable.
To maximize detail, shoot steadily and limit movement between frames. In busy scenes, choose moments of minimal traffic to reduce motion blur in the merge. After merging, check for halos around bright lamps and adjust exposure range or tone mapping as needed.
tone mapping for natural look
Tone mapping compresses the wide dynamic range into something your eyes perceive, preserving texture in both bright and dark areas without oversaturation. If the image looks too flat, tweak midtones to restore that sense of presence. Tone mapping is the final polish that makes a merged HDR photo feel real.
Test presets or manual tweaks. Gentle shadow lift, some highlight recovery, and modest local contrast can make night scenes pop without looking artificial. When artificial lights dominate, aim for a natural glow rather than neon halos. The goal is balance so highlights stay readable and shadows retain detail.
Infrared and mobile night vision
In this guide, you’ll learn how smartphones use infrared and other tricks to help you snap in the dark. Infrared is a secret glow your eye can’t see but your camera can detect. Understanding it helps you spot good infrared use and know when to switch modes for clearer photos at night. With the right setup, a dim street can become surprisingly sharp, almost like turning a lantern on in your hand.
You’ll also see how software augments hardware. The blend of sensor tech and clever processing makes modern night modes feel real. If you’ve wondered why some shots look daylight-like and others flat, this section breaks down the magic. You’ll learn to spot signs of good infrared use and when to switch modes for better results.
Finally, practical tips you can apply tonight: steady hands, scene choice, and light-aware composition. This isn’t magic—it’s a mix of light, physics, and smart software you can master. Beyond Human Eye: How 2026 Smartphones See in the Dark – A Deep Dive into Sensor and Software helps you understand why certain phones outperform others in infrared and night vision scenarios.
infrared mobile imaging basics
Infrared imaging relies on light your eyes can’t see. Some phones dedicate an infrared camera; others reuse the main sensor with special processing. Infrared can reveal warm objects or far edges; you’ll notice color shifts and a glow around lights, which are normal signs of infrared processing.
Infrared exposure is longer or stacked frames, which can introduce motion blur if you shake. For reliability, look for phones with strong low-light performance and good noise control. Infrared basics balance light detection with smart editing to reveal more in the dark.
active vs passive night vision options
Active night vision uses an extra light source or near-infrared to illuminate a scene. This can reveal details natural light wouldn’t, but may look artificial and drain battery. Active modes can brighten the scene, but you may sacrifice realism.
Passive night vision relies on existing light plus sensor sensitivity and software tweaks. Results look more natural, especially for people and landscapes, but can struggle in very dark spaces unless the sensor is strong and processing smart.
When choosing, consider your goal. For realism in low light, go passive. For more texture in shadows, active might help—understand you may get a brighter but less natural look.
IR filters and sensor sensitivity
IR filters sit in front of the sensor, deciding which wavelengths reach the chip. A good filter lets useful infrared through while suppressing unwanted wavelengths. If the filter isn’t right, photos can look washed out or color-tinted. Some phones use neutral filters to keep colors true, while others lean into infrared glow for drama.
Sensor sensitivity helps in the dark. A larger sensor or better microlenses catches more light, reducing grain. Lower ISO reduces noise but may require longer shutter times. When evaluating night shots, look for phones with strong low-light specs and good noise reduction—the final image will feel cleaner when the sensor and filter work in harmony.
Beyond Human Eye: How 2026 Smartphones See in the Dark – A Deep Dive into Sensor and Software
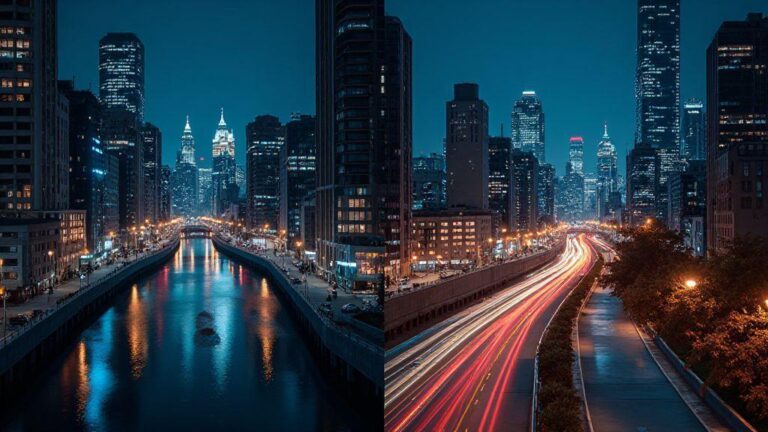
In real life, you’re seeing with your eyes, but your phone uses tricks to get more light. This is the example of Beyond Human Eye: How 2026 Smartphones See in the Dark – A Deep Dive into Sensor and Software—the hardware-software partnership that lifts night photos from fog to clarity. Better sensors capture more photons, and smarter software tightens the result. You’ll notice the difference when you compare a basic shot to a night-mode photo that stacks frames and reduces noise.
Understanding this helps you pick the right phone and use the best mode. If you want clearer stars, sharper faces, and less grain, look for phones with strong night modes, long-exposure options, and good dynamic range in dark scenes. A phone that updates its software often will deliver improvements over time because the best night photography often comes from clever algorithms that learn and evolve.
Image signal processor and software pipeline
Your night photos start with the hardware and software working together. The image signal processor (ISP) handles light, color, and detail as soon as you snap a shot. It converts raw sensor data through steps like demosaicing, noise reduction, sharpening, and white balance. The ISP runs these tasks in real time, bringing you closer to your envisioned image. The software pipeline then builds the final image on screen, layer by layer, like a relay race: sensor to ISP, ISP to processing stack, final polish on display.
Practically, phones use a mix of hardware accelerators and software layers to optimize for night scenes. The ISP makes quick exposure, color, and noise decisions while the camera app applies stabilization and smart blends. You’ll often get a shot that balances highlights and shadows with more detail in dark corners. Depth and motion estimation for portrait and stabilization features further help keep night shots from feeling flat or smeared. This chain explains why a night photo can feel vibrant after you press the shutter.
When you compare phones, look for a strong ISP and a well-tuned software stack. A good ISP handles low light without washing out textures and preserves skin tones, fabric detail, and starry skies. Firmware updates can refine performance, sometimes boosting sharpness or better highlight control even if the hardware stays the same.
computational photography for night
Night mode isn’t magic; it’s a set of smart tricks that pile up light. Longer exposure stacks blend frames to reduce motion blur and noise, letting you keep a steady hand and still gain clarity. The software aligns frames, reduces grain, and merges them to keep bright areas bold while preserving shadows. The result is smoother skies, cleaner streetlights, and better brick textures without an artificial look.
The phone also uses algorithms to separate foreground from dark backgrounds, pulling up detail in signs, trees, and faces without overprocessing. If you shoot from a moving car, this tech helps keep the scene usable by reducing blur while preserving light. The goal is a natural result: you see as much as you can, with fewer compromises.
With night shots, you’re balancing exposure, noise, and texture. Pushing exposure too high creates halos around lights; too low, and the scene looks flat. The right computational photography setup makes the scene feel as you perceived it, just clearer and more stable.
ISP role in raw to final image
The ISP is the bridge from raw sensor data to the finished photo. It demosaics, calibrates color, reduces noise, and sharpens to prevent grain in low light. It also handles color science, keeping whites and blues realistic. This stage shapes your night photo’s first impression on your screen.
After raw-to-processed steps, the software stack adds compression, tone mapping, and finishes. Different ISPs and pipelines can yield different night photos in the same scene. A strong setup preserves texture and color without flattening the image.
Firmware tweaks can sharpen textures or improve highlight control. Better ISPs and processing can push higher ISO with less noise, improving low-light performance. Updates matter even if the hardware is unchanged.
Hardware trade‑offs: battery and heat
Night photography pushes two limits: heat and battery. Long exposures and heavy stacking drive the device, causing warmth and throttling to protect hardware. Heat builds in waves as the sensor and processor handle data, then cools slowly. If you keep shooting, the system throttles, which can reduce detail and increase noise. Planning shorter bursts with cooldown breaks helps maintain consistency.
Battery is another limit. Processing, stacking, and higher ISO drain power quickly. For extended sessions, carry a charger or plan bursts with breaks. Smarter settings can preserve detail without exhausting your battery, balancing detail with endurance.
thermal limits on long captures
Thermal limits become apparent during long captures. The phone may slow down to cool, reducing frame rate or image quality. Plan shorter sessions with rest periods to maintain sharpness and stability.
battery drain from heavy processing
Heavy processing—like stacking, multi-frame denoising, or advanced HDR in darkness—drains power quickly. Expect faster battery drop during peak night modes. To preserve energy, limit processing or shoot in bursts with breaks. Smart settings keep detail without derailing your night out.
performance throttling and cooling
When chips overheat, phones throttle to cool, slowing captures and adding lag. If you see slower frames, pause to let temperatures drop. During long sessions, switch to lower processing modes and reserve high-detail work for focused bursts. Cooling isn’t glamorous, but it keeps night photos sharp.
Practical tips to shoot better at night
Night photography on a smartphone is doable with a few practical moves focused on light, steadiness, and timing. Frame your shot to place light where you want it, preview shadows with screen brightness, and tap to focus on a bright detail first. Aim for contrast without blowing highlights or losing subtle tones in shadows.
Move slowly and test angles to reveal textures you’d miss at eye level. Keep your hands steady by tucking your elbows in and breathing out as you press the shutter. Resting your phone on a ledge or wall helps prevent shake. Small distance or angle changes can alter how a light source appears, so experiment for the best result.
Plan your shot around a strong light source—neon signs, cafe lamps, or distant glow—to anchor the composition and add depth. If the image looks flat, increase brightness around the light and adjust shadows to recover detail. It’s a simple balance that makes night photos feel alive.
shooting technique for low light smartphone cameras
Grasp that your camera is a light collector. In low light, longer exposure and higher ISO can introduce noise. Use the lowest ISO that keeps your image clear (start around 100–400) and reserve longer shutter times for stable holds or a tripod to avoid blur from moving subjects.
Tap to lock focus on a bright detail near your subject to keep it sharp while the background softens. For moving subjects, try a faster shutter speed and adjust exposure accordingly. Mid-range shutter speeds (roughly 1/30–1/60 sec) work well in mixed lighting, depending on brightness and motion.
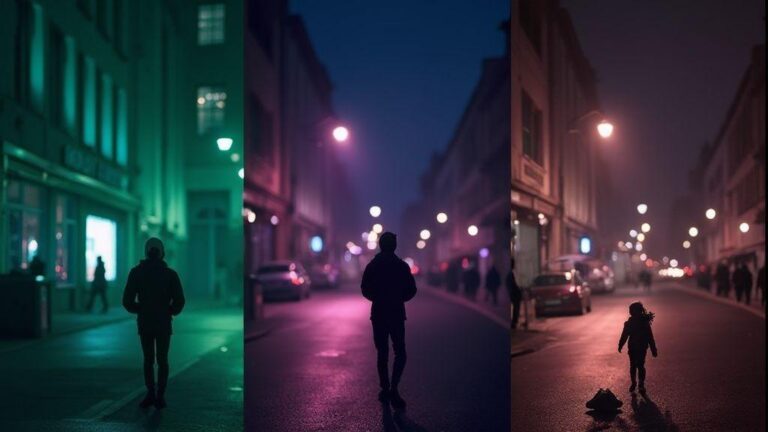
Ambient light becomes part of your composition. Let streetlights outline shapes and textures; use side or back lighting to sculpt features for drama without perfect illumination. Try white balance options for mood—warmer or cooler lighting can enhance atmosphere.
best settings with night mode ai processing
Night mode with AI helps fill in details the eye misses. Enable night mode and let the phone choose longer exposures if suggested, but watch for motion blur if you aren’t still. In handheld shots, use shorter bursts rather than one long exposure to reduce shake.
Adjust AI processing level if available. A bit more AI can sharpen texture and reduce noise, but too much can oversmooth faces or skies. Seek a natural balance where skin tones stay true and textures like brick or fabric remain visible. For moving subjects, try burst shooting in night mode and pick the best frame later.
In scenes with mixed light, use AI processing to preserve color accuracy. The software can prevent reds and blues from oversaturating while maintaining a natural baseline. After capture, review full size to ensure details matter—like a sign’s letters or a distant skyline. If needed, slightly reduce saturation to avoid neon halos around bright lights. Beyond Human Eye: How 2026 Smartphones See in the Dark – A Deep Dive into Sensor and Software remains a guiding reference for how AI processing shapes real-world night results.
tripod, apps, and steady hands
A tripod is your best friend for sharp night shots. If you don’t have one, stabilize on a solid surface and cradle the phone with both hands. A steady stance is crucial in low light, where tiny tremors show up as blur. Use a timer or remote shutter to avoid jostling the moment you press the shutter button.
There are apps that enhance your phone’s built-in controls. Look for apps offering manual exposure, focus, and white balance, and set fixed ISO and shutter speeds for consistency. Some apps stack multiple frames to reduce noise in dark scenes.
Even with apps, your technique matters. Practice a steady grip: hold the phone with both hands, tuck elbows, and brace your body. If you shoot from a vantage point, use your body to stabilize rather than only your arms. A small tripod or clamp can dramatically improve night photos in seconds.

Smartphone Night Photography Enthusiast & Founder of IncrivelX
Vinicius Sanches is a passionate smartphone photographer who has spent years proving that you don’t need an expensive camera to capture breathtaking images after dark. Born with a natural curiosity for technology and a deep love for visual storytelling, Vinicius discovered his passion for night photography almost by accident — one evening, standing on a city street, phone in hand, completely mesmerized by the way artificial lights danced across wet pavement.
That moment changed everything.
What started as a personal obsession quickly became a mission. Vinicius realized that millions of people were carrying powerful cameras in their pockets every single day, yet had no idea how to unlock their true potential after the sun went down. Blurry shots, grainy images, and washed-out colors were robbing everyday people of memories and moments that deserved to be captured beautifully.
So he decided to do something about it.
With years of hands-on experience shooting city streets, starry skies, neon-lit alleyways, and creative night portraits — all with nothing but a smartphone — Vinicius built IncrivelX as the resource he wished had existed when he was just starting out. A place with no confusing jargon, no assumptions, and no gatekeeping. Just honest, practical, beginner-friendly guidance that actually gets results.
Vinicius has tested dozens of smartphones from every major brand, explored dark sky locations across multiple states, and spent countless nights experimenting with settings, compositions, and editing techniques so that his readers don’t have to start from scratch. Every article on IncrivelX comes from real experience, real mistakes, and real lessons learned in the field.
When he’s not out shooting at midnight or writing in-depth guides for the IncrivelX community, Vinicius can be found exploring new cities with his phone always within reach, looking for the perfect shot hiding in the shadows.
His philosophy is simple: the best camera is the one you already have — you just need to learn how to use it in the dark.