Best Poses for Night Portrait Photography That Work for Any Subject
Why Posing Matters More in Night Portrait Photography Than Daytime
Best poses for night portrait photography determine whether your nighttime portraits look professional and flattering or awkward and unflattering. Most beginners focus exclusively on technical settings—exposure, ISO, white balance—while completely ignoring how their subject positions themselves. Yet night portrait posing represents the foundation of creating stunning nighttime images that your subjects will treasure forever.
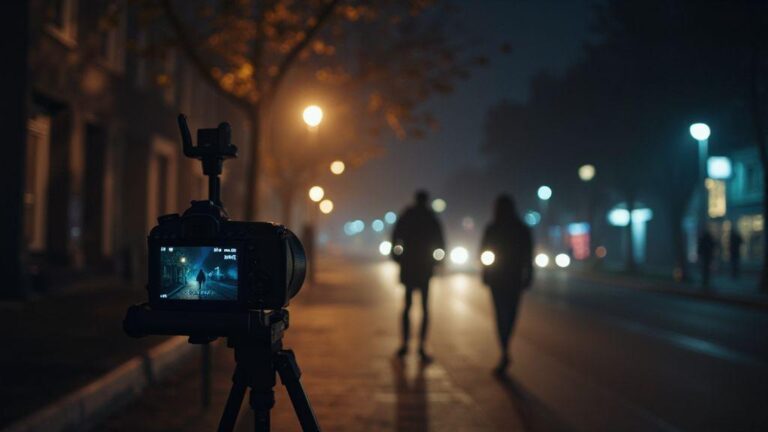
Night portrait photography presents unique challenges that daytime portraiture doesn’t face. Your subject must remain absolutely still during longer exposures (2-4 seconds), making pose selection critical. Any movement during these extended exposures creates motion blur that ruins the entire shot. Additionally, low light reveals every flaw in posing—awkward angles become more pronounced, poor body positioning looks worse, and unflattering face angles become glaringly obvious. Yet when you master portrait posing techniques for night photography, proper positioning creates flattering silhouettes, elegant lines, and professional-quality results even in challenging low-light conditions.
The difference between mediocre night portraits and exceptional ones comes down to understanding how to pose subjects at night. A technically perfect exposure with poor posing produces a disappointing image. A technically perfect exposure with excellent posing produces a stunning portrait your subject will love. This fundamental truth separates photographers who struggle with night portraiture from those who consistently create beautiful, professional-quality images that clients and subjects adore.
Understanding night portrait composition and posing transforms your ability to guide subjects confidently into flattering positions. You move from hoping your subject looks good to actively directing them into poses that enhance their best features. You move from accepting mediocre results to creating professional-quality portraits. You move from struggling with awkward positioning to confidently creating elegant, engaging nighttime portraits that tell stories and capture genuine emotion.
The Three Core Principles of Flattering Night Portrait Poses
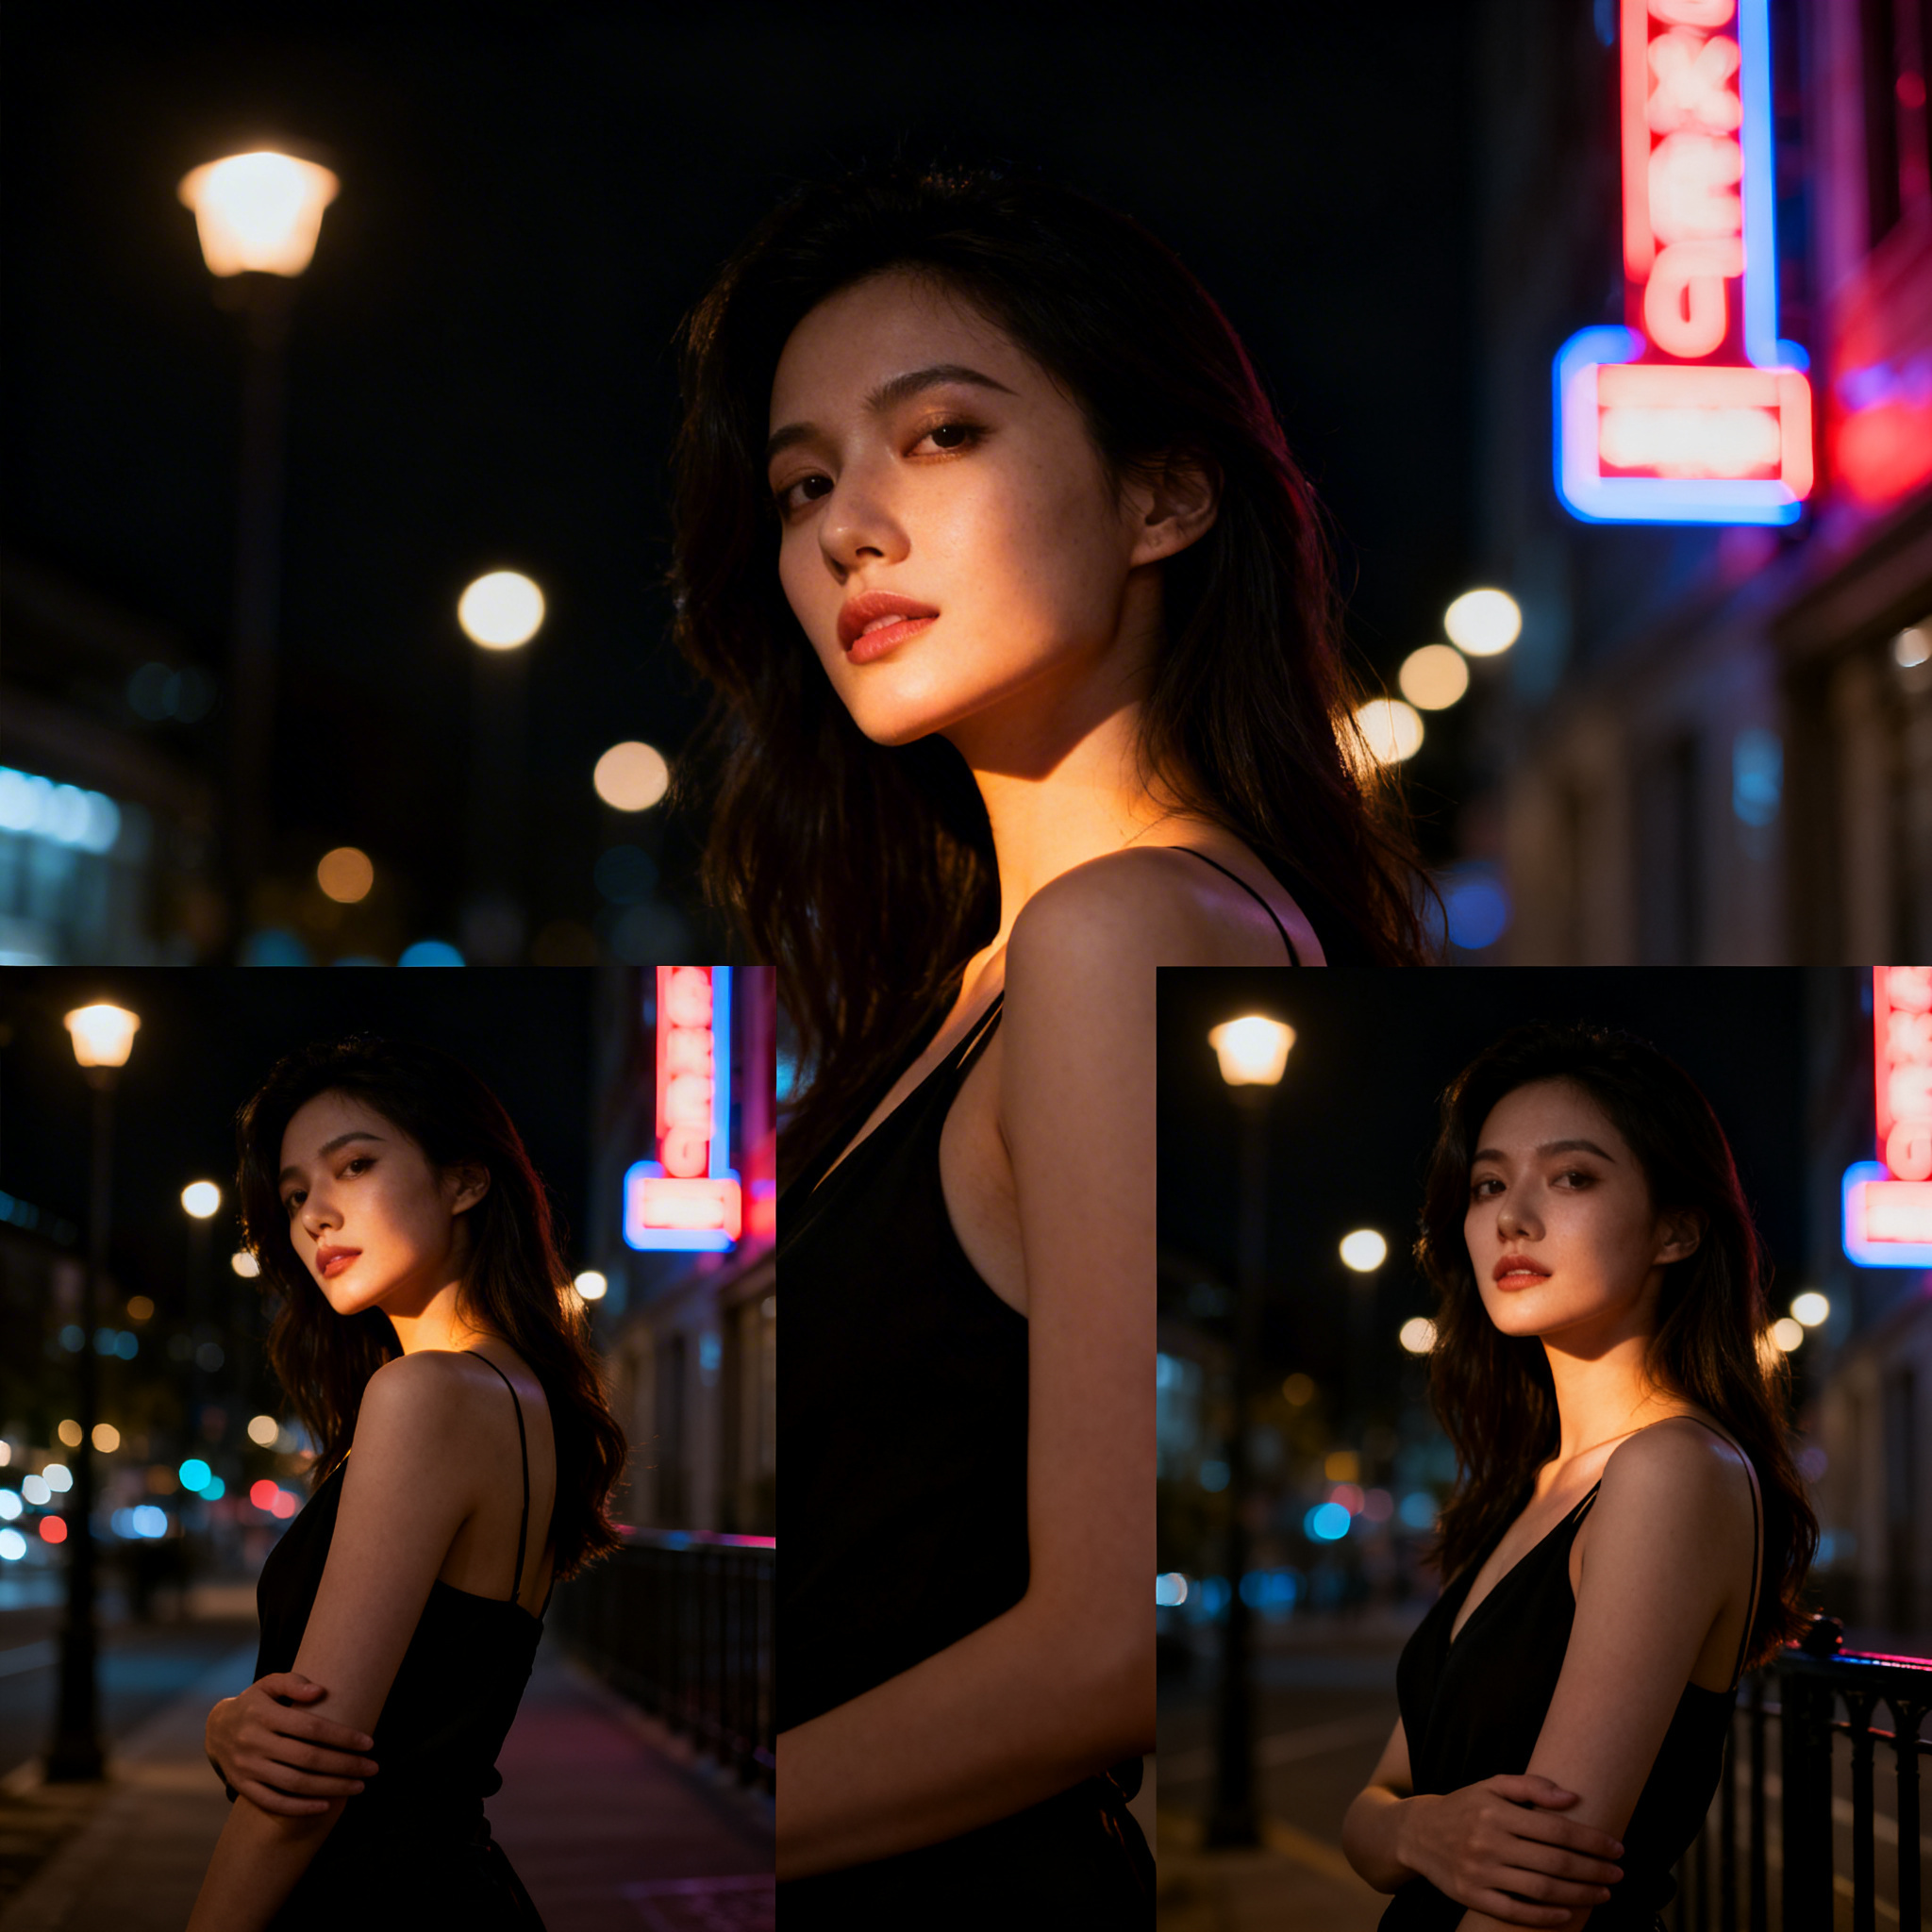
Principle #1: Create Angles, Not Straight Lines
Best poses for night portrait photography always incorporate angles rather than straight-on positioning. Straight-on positioning looks stiff, unflattering, and amateurish. Angles create dimension, elegance, and visual interest that immediately elevates your portraits.
Position your subject at 45-degree angles to the camera rather than directly facing it. This angled positioning creates flattering silhouettes, adds depth to your composition, and makes your subject appear more confident and relaxed. The 45-degree angle works universally—it flatters all face shapes, all body types, and all subjects. This represents one of the most powerful principles in portrait photography posing.
Principle #2: Create Space Between Body Parts
When body parts touch—arm against body, chin against neck, leg against leg—they appear wider and less flattering. Creating intentional space between body parts creates elegant lines, flattering silhouettes, and professional-quality results.
Have your subject position their arms away from their body (not pressed against it). Position their chin slightly forward and away from their neck. Position their legs with space between them. These small adjustments create dramatic improvements in how flattering your portrait appears. This principle applies to all night portrait poses and all body types.
Principle #3: Position Shoulders Back and Down
Shoulders forward and up create tension, unflattering posture, and an uncomfortable appearance. Shoulders back and down create elegance, confidence, and flattering lines that immediately improve your portraits.
Instruct your subject to relax their shoulders, pull them back slightly, and position them down. This simple adjustment transforms how confident and elegant your subject appears. Combined with the other principles, proper shoulder positioning creates the foundation for all flattering night portrait photography poses.
The Best Face Angles for Night Portrait Photography
The 3/4 View: The Most Flattering Angle
Position your subject at 45 degrees to the camera, with their head turned slightly toward the camera. This 3/4 view angle flatters most face shapes, creates dimension, and works universally for all subjects. The 3/4 view represents the most reliable angle for flattering night portrait poses.
Why it works: The 3/4 view shows both the front and side of the face, creating dimension and visual interest. It flatters most face shapes by showing the best features while minimizing less flattering angles. This angle works for all subjects—different ethnicities, ages, and face shapes.
The Profile: Creating Elegant Silhouettes
Position your subject perpendicular to the camera, showing their profile completely. This profile angle works exceptionally well for subjects with strong profiles and creates elegant silhouettes perfect for night portrait photography.
Why it works: The profile angle creates clean, elegant lines and works beautifully for silhouette portraits in night photography. It eliminates concerns about facial expression and focuses attention on the subject’s profile and body positioning.
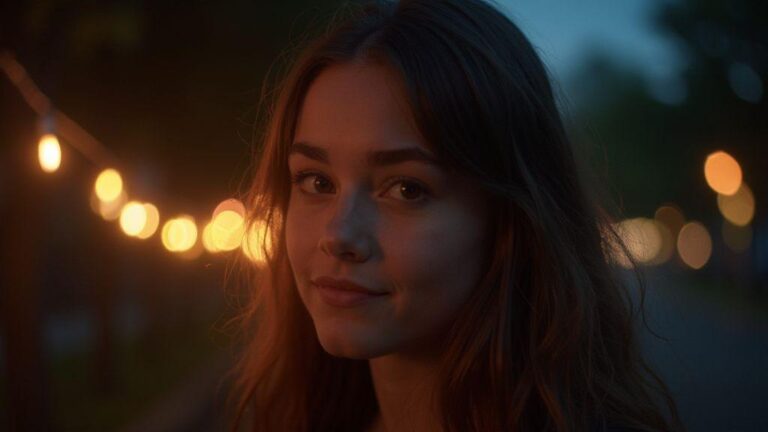
The Slight Turn: Maintaining Connection
Position your subject facing the camera but with their head turned slightly (15-20 degrees). This slight turn angle adds dimension while maintaining eye contact and connection with the viewer.
Why it works: The slight turn adds dimension to your portrait while maintaining the engagement of direct eye contact. This angle works well for subjects who feel uncomfortable with more dramatic angles.
The Chin Down: Creating Definition
Position your subject with their chin slightly down and forward. This chin down positioning flatters most face shapes and creates definition that photographs beautifully in low light.
Why it works: Positioning the chin down and forward creates flattering angles for most face shapes, minimizes double chins, and creates definition that photographs beautifully. This positioning works universally for all subjects.
The 10 Best Poses for Night Portrait Photography
Pose #1: The Classic Standing Pose
Description: The foundation pose that works for any subject, any body type, and any situation.
Step-by-Step Instructions:
- Position subject at 45-degree angle to camera (not straight-on)
- Place weight on back foot (creates natural posture)
- Position front foot forward (creates elegant lines)
- Keep shoulders back and down (creates confidence)
- Position arms naturally (not stiff against body)
- Tilt head slightly toward camera (adds dimension)
- Direct eyes toward camera (engages viewer)
- Relax facial expression (looks natural, not forced)
Why it works for night photography: This pose requires minimal movement, making it ideal for longer exposures. The angled positioning creates flattering silhouettes even in low light. The natural arm positioning looks intentional without appearing stiff.
Pose #2: The Seated Pose
Description: Creating elegance while sitting, perfect for intimate night portraits.
Step-by-Step Instructions:
- Position subject on edge of seat (not deep in chair)
- Keep back straight (creates elegant posture)
- Position legs at angle (not straight forward)
- Place one foot flat on ground (creates stability)
- Position arms naturally (on lap or on armrest)
- Lean slightly forward (creates engagement)
- Tilt head slightly (adds dimension)
- Direct eyes toward camera (maintains connection)
Why it works for night photography: Seated poses provide maximum stability for longer exposures. Subjects can remain completely still without strain. The positioning creates elegant lines and intimate feeling perfect for night portraits.
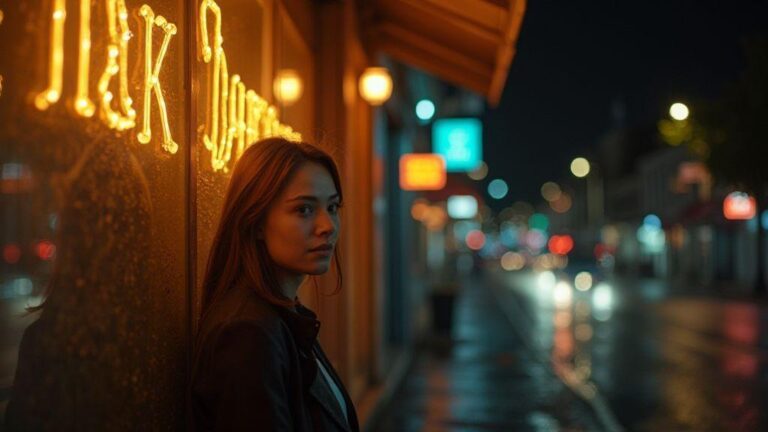
Pose #3: The Leaning Pose
Description: Creating casual elegance against surfaces like walls or railings.
Step-by-Step Instructions:
- Position subject against wall or surface (at angle, not straight-on)
- Shift weight to one leg (creates natural posture)
- Position other leg forward (creates elegant lines)
- Cross arms or position naturally (depends on mood)
- Relax shoulders (creates casual feeling)
- Tilt head slightly (adds personality)
- Direct eyes toward camera (maintains engagement)
- Relax facial expression (looks natural and approachable)
Why it works for night photography: Leaning poses provide stability for longer exposures. The casual feeling works well for lifestyle night portraits. The positioning creates flattering angles and natural-looking results.
Pose #4: The Walking Pose
Description: Capturing movement while maintaining sharpness for dynamic night portraits.
Step-by-Step Instructions:
- Position subject walking toward or away from camera (not across frame)
- Capture mid-stride (one leg forward, one back)
- Keep arms natural (swinging slightly)
- Direct eyes toward camera (if walking toward)
- Relax facial expression (looks natural)
- Use faster shutter speed (to freeze movement)
- Increase ISO if needed (to maintain shutter speed)
- Take multiple shots (to capture perfect moment)
Why it works for night photography: Walking poses create dynamic energy in night portraits. The movement adds visual interest. Multiple shots increase chances of capturing perfect moment with sharp focus and natural expression.
Pose #5: The Sitting on Ground Pose
Description: Creating intimate, vulnerable portraits with unique perspectives.
Step-by-Step Instructions:
- Position subject sitting on ground (legs extended or bent)
- Keep back straight (creates elegant posture)
- Position arms naturally (on lap, around knees, or extended)
- Tilt head slightly (adds dimension)
- Direct eyes toward camera or away (depends on mood)
- Relax facial expression (creates emotional connection)
- Position camera at subject’s eye level (creates intimacy)
- Use foreground elements (creates depth and context)
Why it works for night photography: Sitting poses provide stability for longer exposures. The positioning creates intimate, vulnerable feeling perfect for emotional night portraits. The lower perspective creates unique, engaging compositions.
Pose #6: The Back-to-Camera Pose
Description: Creating mystery and elegance while focusing on environment.
Step-by-Step Instructions:
- Position subject with back to camera (at slight angle)
- Keep posture straight and elegant (creates confidence)
- Position arms naturally (at sides or extended)
- Tilt head slightly (adds dimension)
- Position subject to show environment (creates context)
- Use lighting to create silhouette (if desired)
- Ensure subject remains still (for sharp focus)
- Compose to include interesting background (creates story)
Why it works for night photography: Back-to-camera poses eliminate concerns about facial expression or unflattering angles. They work well for silhouette portraits in night photography. The positioning creates elegant lines and focuses attention on environment and lighting.
Pose #7: The Over-the-Shoulder Pose
Description: Creating connection and dimension for couples or group portraits.
Step-by-Step Instructions:
- Position subject facing away from camera (slightly angled)
- Have subject look over shoulder (toward camera)
- Position shoulders back and down (creates elegance)
- Position arms naturally (at sides or extended)
- Tilt head slightly (adds dimension)
- Direct eyes toward camera (creates connection)
- Relax facial expression (looks natural)
- Use lighting to create dimension (separates subject from background)
Why it works for night photography: Over-the-shoulder poses create engaging perspectives and connection. They work well for couples or group portraits. The positioning creates flattering angles and interesting compositions.
Pose #8: The Hands-in-Hair Pose
Description: Creating elegance and personality with natural-looking hand positioning.
Step-by-Step Instructions:
- Position subject at 45-degree angle to camera
- Have subject place hands in hair (gently, not pulling)
- Position elbows out (creates elegant lines)
- Keep shoulders back and down (creates confidence)
- Tilt head slightly (adds dimension)
- Direct eyes toward camera or away (depends on mood)
- Relax facial expression (looks natural)
- Ensure hands look intentional (not awkward)
Why it works for night photography: Hands-in-hair poses solve the common problem of awkward hand positioning. They create elegant lines and natural-looking results. The positioning works well for fashion and lifestyle night portraits.
Pose #9: The Hands-on-Face Pose
Description: Creating intimacy and emotion with thoughtful positioning.
Step-by-Step Instructions:
- Position subject at 45-degree angle to camera
- Have subject place hands on face (cheek, chin, or forehead)
- Keep elbows positioned naturally (not awkwardly)
- Tilt head slightly (adds dimension)
- Direct eyes toward camera or away (depends on mood)
- Relax facial expression (creates emotional connection)
- Ensure hands look intentional (not awkward)
- Use lighting to create dimension (separates hands from face)
Why it works for night photography: Hands-on-face poses create intimate, emotional feeling. They solve the problem of awkward hand positioning. The positioning works well for emotional night portraits and creates engaging perspectives.
Pose #10: The Interaction Pose
Description: Capturing natural, engaging moments between subjects.
Step-by-Step Instructions:
- Position subjects interacting naturally (holding hands, hugging, laughing)
- Ensure both subjects are visible (not hidden behind each other)
- Position at angles to camera (not straight-on)
- Keep posture natural and relaxed (looks authentic)
- Direct eyes toward each other or camera (depends on mood)
- Relax facial expressions (looks genuine)
- Use lighting to separate subjects (creates dimension)
- Take multiple shots (to capture perfect moment)
Why it works for night photography: Interaction poses capture authentic moments and genuine emotion. They work well for couples and group portraits. The natural positioning creates engaging, memorable results.
Adapting Night Portrait Poses for Different Body Types
For Larger Body Types
- ✅ Position at angles (not straight-on)
- ✅ Create space between body parts
- ✅ Use darker clothing (creates slimming effect)
- ✅ Position arms away from body (creates space)
- ✅ Use flattering angles and lighting
- ❌ Avoid poses that compress body
For Petite Subjects
- ✅ Position on elevated surfaces (creates height)
- ✅ Use poses that elongate body
- ✅ Avoid oversized clothing (creates overwhelmed appearance)
- ✅ Position arms to create length
- ✅ Use flattering angles and lighting
- ❌ Avoid poses that compress body
For Tall Subjects
- ✅ Position to show full height
- ✅ Use poses that create elegant lines
- ✅ Avoid poses that emphasize height awkwardly
- ✅ Position arms naturally (not stiff)
- ✅ Use flattering angles and lighting
- ✅ Embrace height as asset
Common Posing Mistakes and How to Fix Them
| Mistake | Problem | Solution |
|---|---|---|
| Straight-on positioning | Looks stiff and unflattering | Position at 45-degree angles to camera |
| Arms against body | Makes subject appear wider | Create space between arms and body |
| Shoulders forward | Creates tension and unflattering posture | Position shoulders back and down |
| Stiff facial expression | Looks unnatural and uncomfortable | Have subject relax and smile naturally |
| Awkward hand positioning | Hands look unnatural or distracting | Use hands-in-hair or hands-on-face poses |
| Looking directly at camera | Can look confrontational or uncomfortable | Have subject look slightly away or down |
| Tense posture | Looks uncomfortable and unnatural | Have subject relax and breathe naturally |
| Poor composition | Subject positioned awkwardly in frame | Use rule of thirds and leading lines |
How to Guide Subjects Into Poses Naturally
Communication Tips for Confident Posing Direction
Step 1: Explain the pose clearly Show examples if possible. Describe exactly what you want your subject to do. Use clear, specific language rather than vague directions.
Step 2: Demonstrate the pose Show your subject what you want by demonstrating the pose yourself. Visual examples work better than verbal descriptions alone.
Step 3: Give specific instructions Provide step-by-step instructions rather than vague directions. Say “position your weight on your back foot” rather than “stand naturally.”
Step 4: Provide positive feedback Encourage your subject constantly. Celebrate successful moments. Build their confidence through positive reinforcement.
Step 5: Make adjustments gently Don’t grab or force your subject into position. Make adjustments collaboratively and gently. Ask permission before touching.
Step 6: Allow practice shots Let your subject take a few practice shots. Most subjects relax after the first few frames and produce better results.
Step 7: Create comfortable environment Reduce tension by creating a relaxed, fun atmosphere. Play music. Tell jokes. Make your subject feel comfortable and valued.
Step 8: Be patient and encouraging Build your subject’s confidence through patience and encouragement. Avoid critical comments. Celebrate their efforts.
Lighting Techniques That Complement Night Portrait Poses
Front Lighting: Illuminating Faces Fully
Front lighting illuminates your subject’s face completely, creating even exposure and flattering facial features. This lighting works well for facing poses and creates professional appearance.
Side Lighting: Creating Dimension and Drama
Side lighting creates dimension, drama, and separation from background. This lighting works well for profile poses and creates flattering shadows that enhance facial features.
Back Lighting: Creating Silhouettes and Rim Light
Back lighting creates silhouettes and rim light that separates your subject from background. This lighting works well for back-to-camera poses and creates dramatic, artistic effect.
Overhead Lighting: Creating Natural-Looking Light
Overhead lighting creates natural-looking light that works well for all poses. This lighting minimizes unflattering shadows and creates professional appearance.
Master Night Portrait Poses for Professional Results
Best poses for night portrait photography combine flattering body positioning, elegant angles, and natural-looking hand placement. These 10 poses work for any subject, any body type, and any situation. They provide reliable foundations for creating stunning night portraits that your subjects will treasure.
The transformation from stiff, awkward poses to elegant, flattering positioning represents a critical milestone in your portrait photography journey. You move from hoping your subject looks good to confidently guiding them into flattering poses. You move from accepting mediocre results to creating professional-quality portraits that your subjects adore.
Master these night portrait posing techniques. Study each pose carefully. Practice them with friends and family. Understand why each pose works. Learn to adapt poses for different subjects and situations. Your night portraits will transform from acceptable to exceptional. Your subjects will feel confident and beautiful. Your portfolio will showcase stunning, professional-quality night portraits that demonstrate your mastery of portrait photography posing.

Smartphone Night Photography Enthusiast & Founder of IncrivelX
Vinicius Sanches is a passionate smartphone photographer who has spent years proving that you don’t need an expensive camera to capture breathtaking images after dark. Born with a natural curiosity for technology and a deep love for visual storytelling, Vinicius discovered his passion for night photography almost by accident — one evening, standing on a city street, phone in hand, completely mesmerized by the way artificial lights danced across wet pavement.
That moment changed everything.
What started as a personal obsession quickly became a mission. Vinicius realized that millions of people were carrying powerful cameras in their pockets every single day, yet had no idea how to unlock their true potential after the sun went down. Blurry shots, grainy images, and washed-out colors were robbing everyday people of memories and moments that deserved to be captured beautifully.
So he decided to do something about it.
With years of hands-on experience shooting city streets, starry skies, neon-lit alleyways, and creative night portraits — all with nothing but a smartphone — Vinicius built IncrivelX as the resource he wished had existed when he was just starting out. A place with no confusing jargon, no assumptions, and no gatekeeping. Just honest, practical, beginner-friendly guidance that actually gets results.
Vinicius has tested dozens of smartphones from every major brand, explored dark sky locations across multiple states, and spent countless nights experimenting with settings, compositions, and editing techniques so that his readers don’t have to start from scratch. Every article on IncrivelX comes from real experience, real mistakes, and real lessons learned in the field.
When he’s not out shooting at midnight or writing in-depth guides for the IncrivelX community, Vinicius can be found exploring new cities with his phone always within reach, looking for the perfect shot hiding in the shadows.
His philosophy is simple: the best camera is the one you already have — you just need to learn how to use it in the dark.