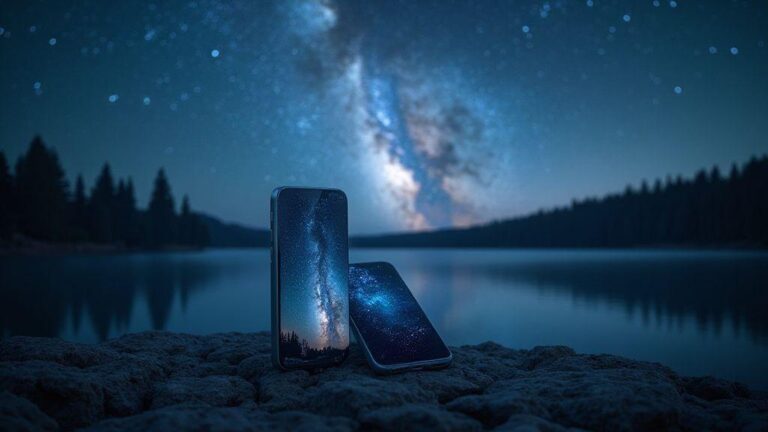
Aurora Borealis on Your Phone: Advanced Tips for Photographing the Northern Lights in 2026
Plan Aurora Shots with KP Index
You’re aiming for clear, memorable aurora photos, and the KP index is your compass. It’s more than numbers—it’s your sky-condition forecast. For mid-latitudes, a KP index around 3–5 offers a sweet spot: enough activity to light the sky without chaotic flickers. Plan a window where KP trends upward after midnight or during a predicted geomagnetic storm, matching your shoot to a calm, predictable rhythm. Perfection every minute isn’t required; a solid block of color and mood is.
When planning, consider location and forecast. A higher KP index can brighten the aurora but may add movement and camera shake if you’re not ready. Map out a spot with a clear foreground and a steady rhythm: dark skies, stable aurora bands, and a foreground you recognize. A simple rule for beginners: shoot as the KP index rises gradually, so the aurora builds rather than peaks and fades in an instant. Your final images will feel cohesive.
In the end, you’re building a field plan: check KP, pick a window, and remember that success comes from steady, thoughtful shooting. With a calm rhythm, you’ll capture aurora shots that feel intentional, translating the sky’s mood into a story your friends feel when they see your photos.
Planning Aurora Shots with KP Index for Phone
You don’t need fancy gear to start. A phone is enough to check the KP index and plan your night. A quick check tells you when to head outside or pause. Rising numbers signal a good chance to see something; flat numbers mean you wait for a better moment. Your phone becomes a checklist, helping you stay on track so you don’t miss the first glow.
Sync your plan with a rough timeline: note where you’ll look and what you’ll include—the horizon, a tree line, a lake, or a hill. A simple note can remind you to switch lenses or reposition for a stronger silhouette. You’ll feel confident as the sky wakes, and a hint of color confirms your plan paid off.
Check Cloud Cover and Moon Phase
Clouds and moonlight matter as much as the aurora. Clear windows are key; hourly forecasts help you decide to press on or wait. A thin veil can add drama; heavy clouds wash out color. A bright moon may require longer exposures to keep stars crisp, but too much moonlight can wash out the scene. Balance the moon’s glow with the aurora to avoid a washed-out sky.
Longer days without moonlight deliver the purest aurora glow. If the moon is near-new, push longer exposures and bolder color. If the moon is full, focus on darker patches of sky and tighter compositions to keep the aurora from washing out. Planning around cloud cover and moon phase keeps your chances steady and your photos cleaner.
Quick KP Guide
Watch a moving target: start shooting when KP is about 3–5 and rising, and be ready to adapt if it spikes. If you see a sudden jump, move to a fresh location or reframe to capture the best arc. If the sky stays calm with a modest glow, experiment with long exposures and multiple compositions. Your plan isn’t rigid—let the night teach you what works, and end with a set of shots that tell the same story from different angles.
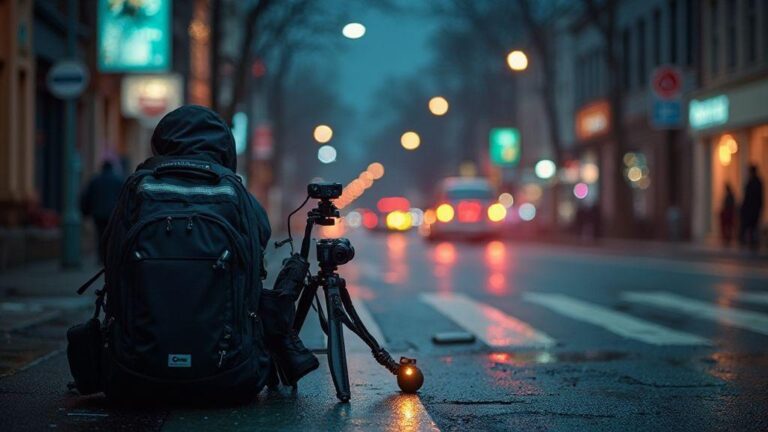
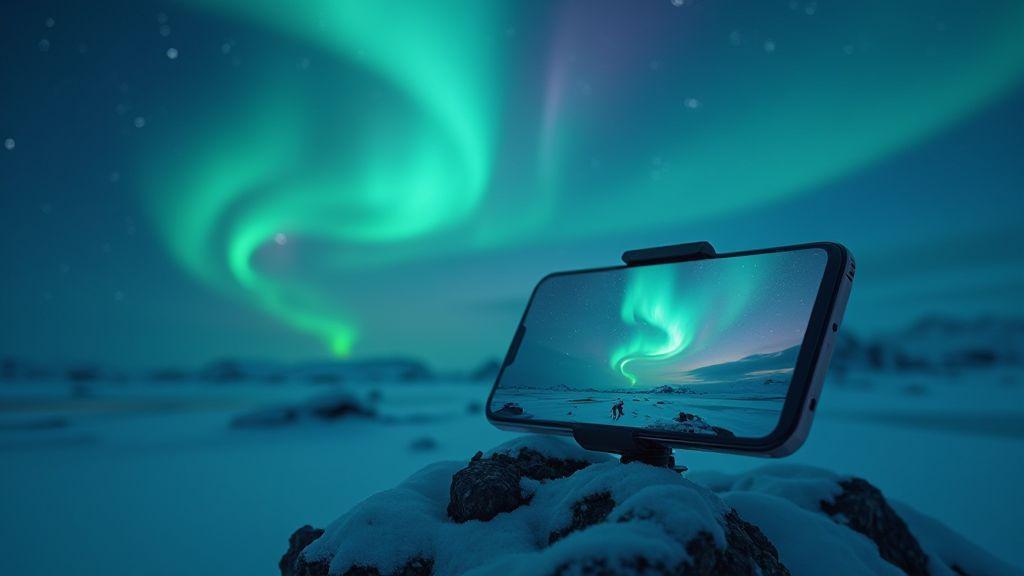
Stabilize Your Phone for Clear Shots
Stability is your best friend in night photography. A shaky hand turns crisp stars into specks and dulls aurora colors. Build a steady setup that fits in your pocket: start with a solid base like a lightweight phone tripod, and use it every time. If you don’t have one, prop your phone on a rock or backpack, but keep it as still as possible. The goal is to minimize movement during long exposures, capturing more light and fewer ghosts. With stability, you’ll see cleaner star trails and brighter auroras.
Stable shots also invite longer exposures, revealing more sky and landscape detail. Aim for consistency: longer exposures, controlled ISO, and careful focus yield cleaner, more shareable images. Pair stability with a timer or remote trigger to avoid nudging the screen mid-shot. A quiet setup makes a big difference in low light, letting you push for brighter auroras or deeper color.
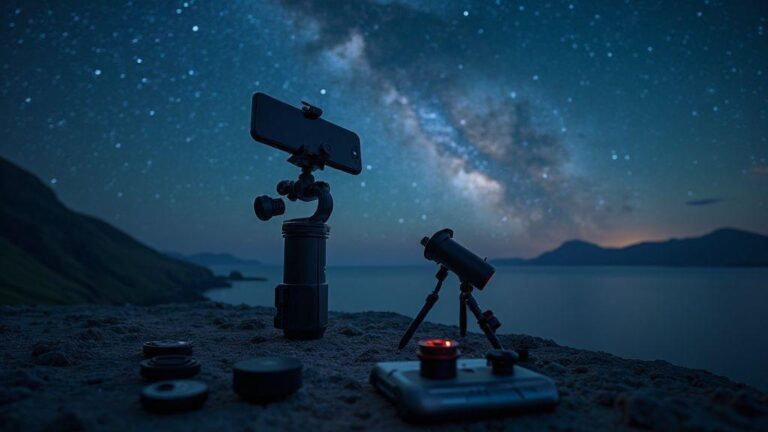
Smartphone Tripod Stabilization for Aurora Shots
A light, portable tripod gives a firm base on uneven ground, and you can angle the phone to frame sky and horizon. If you’re near trees or rocks, a flexible-leg tripod helps you wrap around surfaces for extra steadiness. Set the tripod low and angled slightly upward to capture the arc of light with a clean foreground. A simple clamp mount keeps your phone secure and lets you switch between horizontal and vertical layouts quickly.
When you set up, double-check level. A tiny tilt can skew the sky, complicating later stitching or frame comparison. If wind picks up, weigh down the legs with a bag or stones. A steady base yields more consistent aurora ribbons and brighter stars.
Remote Trigger and Vibration Control
A remote trigger is a small, mighty tool. It lets you start and stop recordings without touching the phone, reducing micro-movements that blur your image. Use it for longer exposures or bursts to capture changing aurora colors. If you don’t have a remote, the timer works, but a real trigger is more precise. Lock focus and exposure so you don’t drift between frames.
Vibration control matters, too. A loose case or a shakily held phone can soften edges. A strap or hand rest helps you keep still during countdown. On windy nights, shield the setup with your body or a backpack. Small steps like these stop tiny shakes from stealing your night shots.
Mount and Angle Checklist
- Ensure the mount is tight and level.
- Confirm the phone is secure in the clamp.
- Check tripod legs are spread for balance.
- Set the angle slightly up to frame sky and foreground.
Set Your Phone Camera for Aurora
You’re chasing that green glow across the sky, and your phone can be a capable tool if you set it up right. Start by knowing your limits: the Aurora is dim, so push your phone to performance without chasing noise. You want low motion blur and clear stars, which means longer shutter times with a steady hand or tripod. The goal is to capture light without turning the scene into a noisy mush.
Balance is key. You’ll trade some sharpness for more light, but keep the emerald shape of the aurora intact. If you have a night mode or pro mode, use it to lock exposure and keep ISO reasonable. This isn’t a bright-day shoot—your phone is your partner, not a magician.
In this journey, you’ll tune your setup for the best phone shots. Your Aurora Borealis on Your Phone: Advanced Tips for Photographing the Northern Lights in 2026 will feel within reach with steady hands, tripod use, and thoughtful framing. Your phone’s sensor can surprise you when you manage expectations and stay patient.
Phone Camera Settings for Aurora 2026: ISO and Shutter
Your ISO and shutter are the two levers to start with. Begin with a low base ISO to avoid noise. If the aurora is faint, raise ISO gradually rather than jumping up. A good starting point is ISO 800–1600, then adjust after testing. The shutter should be long enough to collect light but short enough to keep the aurora from smearing. Try 5–15 seconds as a test range, then refine.
If you’re using Pro mode, lock white balance around 3400–3800K to keep greens honest. Watch your histogram to avoid clipping highlights. If you see too much noise, drop ISO a notch and lengthen the exposure slightly. The aim is clean, faithful color with texture in the aurora bands.
In practice, you’ll iterate: shoot, review, adjust. You’ll soon learn where your phone breathes best—where ISO, shutter, and exposure align with the light show above. With the right balance, you’ll create images that feel true to what you see.
Manual Modes: Smartphone Astrophotography Northern Lights
Manual mode gives you control over aperture, shutter, and focus so you’re not at the mercy of automatic settings. Set focus to infinity or on a bright star to lock sharpness. If possible, use a small aperture to preserve depth of field while keeping light capture efficient; many phones cap around f/1.8–f/2.8, which works for aurora.
Experiment with exposure stacking: take a few shorter exposures and blend later to reduce noise and capture motion. If you’re new, keep it simple: one long exposure plus a couple of shorter frames for comparison. The goal is crisp stars and smooth aurora ribbons, not jagged lines.
When shooting in manual, consistency matters. Bring a small tripod and a remote or timer to avoid shake. In windy spots, use stabilization only after you lock exposure. The payoff is clean lines, less blur, and vivid emerald and lime hues.
Fast Setting Checklist
- Set manual focus to infinity and lock exposure first.
- Start with ISO 800–1600 and shutter 5–15 seconds; adjust after test frames.
- Use a tripod or stable surface; enable stabilization only after exposure is locked.
- White balance around 3400–3800K for natural greens; avoid oversaturation.
- Shoot in RAW if possible for post flexibility.
- Keep a few shorter frames to compare motion and keep stars sharp.
Capture Long Exposures and Time-lapse
Long exposures blur moving water, stars, or car lights into silky trails. Use a stable setup with a tripod and a remote shutter or timer to avoid shake. Start with ISO 100–200 and a wide aperture to gather light without blowing highlights. For stars, longer exposures help, but plan 15–30 seconds per shot to avoid trailing overly bright stars.
For time-lapse, set intervals to capture steady frames—every 1–3 seconds for moving crowds, or every 5–15 seconds for a starry sky. The final video should feel like a quiet, cinematic moment, not a jumble of frames. Consistency is key: same exposure, same interval, same framing.
Plan around the moon: a bright moon can wash out faint aurora details. If moonlit, shorten exposure or lower ISO; if the moon is low or absent, push exposure a bit longer to reveal subtle detail. Keep an eye on battery life—long sessions drain power quickly. The result should be a night that moves with you, not a collection of still frames.
Smartphone Long Exposure Northern Lights Basics
Start with a clean, stable setup. Use a tripod and enable long-exposure or Night mode if available. Use a low ISO to minimize noise and a bright foreground to keep detail. If your phone supports manual exposure, lock it to a comfortable value so you aren’t chasing brightness between frames. When in Night mode, let the camera do the heavy lifting, but tweak white balance to keep auroras looking natural.
Timing is everything. Watch for color shifts and curtain shapes. If the green glow begins, nudge exposure slightly to pull more detail, but don’t overdo it. If you shoot RAW, you can recover highlights or bring back details in post. Test a few frames at different exposures early, then lock settings for the rest of the session.
Time-lapse Northern Lights with Phone: 2026 Tips
Plan ahead: shoot a sequence of frames with a steady interval—about every 2–4 seconds for a dramatic aurora time-lapse. If using a third-party app, choose one that locks exposure and interval. Balance ISO: start around 800–1600 in dark skies, but drop it if the aurora is bright. A wide lens helps capture the full curtain. If you notice banding or color shifts, adjust white balance toward cooler tones to keep greens true.
When merging frames, aim for smooth motion. If you see long trails or jitter, adjust interval or exposure. A solid foreground anchors the sequence—think a snowy hill, a tree silhouette, or a calm lake. Keep the camera steady, and review previews regularly to ensure consistency. Your final sequence should feel like the night’s heartbeat in motion.
Exposure Length Guide
Exposure length is the throttle for light. Short exposures freeze motion; longer ones blur motion and create star trails. For auroras, aim for a middle ground—long enough to capture color and shape, short enough to keep stars sharp. If you’re new, start with 5–10 seconds at a low ISO and adjust gradually. You’ll learn how the aurora shifts and how your foreground responds, then tailor settings to your location and gear.
Use Apps to Track and Shoot the Lights
Apps help you plan and control in real time. They provide forecasts, alerts, and maps, turning a lottery night into a guided shoot. The goal is to make the night feel less random and more under your command. When you test these tools, remember apps don’t summon the aurora—they improve your odds when you know your settings and practice your composition.
Look for planning apps and control apps, then a few extras for flexibility. A weather radio plus a remote shutter is a helpful analogy for your kit.
Best Apps for Aurora Photography 2026 for Planning
Forecasts that combine solar activity, cloud cover, and location data help you pick a spot before dark. Use them to map several compositions so you’re not scrambling when the lights arrive. A good planning app reduces guesswork and makes your shoot feel organized.
Look for time-of-day forecasts so you know when the aurora might peak in your time zone. If you’re new, start with a couple of nearby vantage points and compare. Over time, you’ll build a short list of reliable spots for clear skies.
Apps for Manual Control and RAW Capture
Apps that let you tweak exposure, focus, and ISO without touching the camera in the cold are invaluable. When the aurora glows dimly, quick access to shutter priority or manual mode saves you from missing the moment. Use RAW capture to preserve detail for post.
Reliable interval shooting and timelapse options are a must. The right app handles long exposures and keeps settings steady in wind and cold. A smooth workflow makes high-resolution aurora photos more usable.
Top Free and Paid Apps
Free options cover weather, forecasts, and basic remote control. Paid apps unlock features like multi-location planning, enhanced live view, and better RAW support. If you shoot often, a small investment can reduce missed shots and improve consistency.
Choose apps that integrate with your camera brand to avoid fiddling with cables or Bluetooth in freezing temps. Look for one-click remote capture, focus peaking, and night-photography-focused exposure guides. Pick one or two favorites and stick with them for consistency.
Edit and Share Aurora Images on Phone
Editing aurora images on your phone should feel quick and empowering. Start with basics—contrast, exposure, and color balance—then dial in greens and purples to keep the sky glowing. The goal is a natural look with sharp aurora edges that pop on a small screen. With practice, your edits translate well to social media and chats, letting you share your night-sky wins in minutes. Subtle tweaks beat heavy edits.
When editing, replicate what your eye saw. If the lights looked bright but a touch flat, nudge warmth or vibrance gradually. If wispy trails danced over a dark sky, darken the background slightly to let the aurora stand out. Use presets as starting points, then customize. A simple workflow works: adjust exposure, tweak contrast, refine color, and save a copy before more dramatic edits.
Your final step is sharing. Export at the highest quality your device allows, crop for platforms if needed, and write a caption that hints at your night journey. Tag locations or contributors if relevant. A clean, confident post earns more eyes. By keeping edits natural and consistent, you’ll cultivate a recognizable style that people seek in the Aurora Borealis on Your Phone: Advanced Tips for Photographing the Northern Lights in 2026.
Postprocessing Aurora Photos on Phone Basics
Begin with auto-adjustments as a starting point, but fine-tune sliders yourself. Set exposure to protect highlights, then increase clarity to define wind-swept shapes. If you see noise, apply noise reduction—but avoid overdoing it or you’ll blur glow. White balance matters—try a cooler tone to honor the night, then nudge toward magenta if greens feel harsh. Use your histogram to avoid clipping highlights in the brightest aurora bands.
Adjust color with care. Boost greens and pinks enough to read as alive, not electric. If you used a long exposure, mute oversaturated colors that appear unnatural on small screens. Compare to the original to ensure detail isn’t lost in the darkest pockets. Aim for a balanced, faithful representation that still feels magical on a phone screen.
Reduce Noise and Adjust Color with Mobile Apps
Noise is the enemy of night shots; tackle it in layers. Start with light noise reduction, then sharpen selectively on the aurora edges. If your app has a Detail tool, use it around bright bands while keeping the darker sky smooth. For color, use selective adjustments to boost greens in the aurora while keeping the sky subtle.
Color correction is a two-step dance: stabilize white balance to avoid gray tones, then fine-tune saturation and vibrance so greens and purples pop with depth. If you see color fringing, apply a tiny hue shift toward teal for the bands or toward violet at the tips. The aim is a natural look that still feels vibrant on a phone.
Quick Export and Sharing Tips
Export at the highest quality your device allows. Choose a resolution appropriate for your platform and avoid heavy compression. Add a concise caption that hints at your night journey, and include a location if relevant. If possible, post during peak engagement times to reach more people. Keep edits consistent so your audience recognizes your Aurora Borealis on Your Phone: Advanced Tips for Photographing the Northern Lights in 2026.
Why This Guide Matters: Aurora Borealis on Your Phone: Advanced Tips for Photographing the Northern Lights in 2026
Aurora Borealis on Your Phone: Advanced Tips for Photographing the Northern Lights in 2026 consolidates practical phone-based techniques for planning, shooting, and editing auroras this year. This guide emphasizes stability, timing, and thoughtful post-processing to deliver true-to-life colors without excessive noise. By following these steps, you’ll move from guessing to deliberate artistry, creating phone-shot auroras that feel authentic and shareable. This story-in-a-phone approach helps you craft images that resonate.

Smartphone Night Photography Enthusiast & Founder of IncrivelX
Vinicius Sanches is a passionate smartphone photographer who has spent years proving that you don’t need an expensive camera to capture breathtaking images after dark. Born with a natural curiosity for technology and a deep love for visual storytelling, Vinicius discovered his passion for night photography almost by accident — one evening, standing on a city street, phone in hand, completely mesmerized by the way artificial lights danced across wet pavement.
That moment changed everything.
What started as a personal obsession quickly became a mission. Vinicius realized that millions of people were carrying powerful cameras in their pockets every single day, yet had no idea how to unlock their true potential after the sun went down. Blurry shots, grainy images, and washed-out colors were robbing everyday people of memories and moments that deserved to be captured beautifully.
So he decided to do something about it.
With years of hands-on experience shooting city streets, starry skies, neon-lit alleyways, and creative night portraits — all with nothing but a smartphone — Vinicius built IncrivelX as the resource he wished had existed when he was just starting out. A place with no confusing jargon, no assumptions, and no gatekeeping. Just honest, practical, beginner-friendly guidance that actually gets results.
Vinicius has tested dozens of smartphones from every major brand, explored dark sky locations across multiple states, and spent countless nights experimenting with settings, compositions, and editing techniques so that his readers don’t have to start from scratch. Every article on IncrivelX comes from real experience, real mistakes, and real lessons learned in the field.
When he’s not out shooting at midnight or writing in-depth guides for the IncrivelX community, Vinicius can be found exploring new cities with his phone always within reach, looking for the perfect shot hiding in the shadows.
His philosophy is simple: the best camera is the one you already have — you just need to learn how to use it in the dark.