Intro: VSCO for Night Photography: Best Filters and Manual Adjustments in 2026
VSCO for Night Photography: Best Filters and Manual Adjustments in 2026 helps you navigate filters, exposure, and color grading for low-light images. This guide compiles practical tips, filter ideas, and workflows to keep night shots natural, cinematic, and repeatable.
Top VSCO filters for night photos
- After dark, choose filters that lift shadows without washing color. A good base preserves highlight detail and boosts contrast enough to make textures pop. Lean toward cool tones for city nights, then switch to warmer tones for cozy, low-light scenes. The goal is natural-looking night images, not overcooked highlights. Compare a few looks side by side to match the mood and scene.
- For portraits or people in night environments, aim for subtle skin tones and clean shadows. Choose filters that soften grain while keeping color accuracy. If a lamp creates a strong glow, a slight exposure or contrast boost can prevent flatness. Watch white balance so whites don’t shift blue or yellow. If unsure, start with a mid-strength filter and dial back saturation to avoid neon halos around lights.
- Test a few filters designed for night scenery that enhance glow without blowing out highlights. You’ll learn faster by comparing how each handle bright spots and dark corners. If a filter stretches lamps, switch to one that preserves round shapes and subtle glow. Textures, colors, and light sources stay balanced to keep night photos feeling alive.
VSCO night photography filters 2026
In 2026, favor filters that feel modern yet not fake. Try those that emphasize bold lights and cool shadows for urban nights, and softer options for park nights with gentle lighting. Presets that brighten midtones without sacrificing contrast keep city streets cinematic and gritty. Select presets that render stars or dusk skies with just enough color to look real. Matching a filter to your scene becomes second nature after a couple of nights out.
If you shoot with higher ISO, you’ll notice grain that can help mood or ruin it. Choose filters that tame grain while preserving texture for a moody filmic look. For reflective surfaces—glass, rain, or wet pavement—use a filter that enhances highlight clarity while keeping skin tones natural. Your night frames stay sharp when paired with steady hands or a tripod.
Best VSCO presets for night photos
For night shots, the best presets preserve color accuracy and keep highlights in check. Look for Low Light or Night presets that avoid clipping. Seek presets with granular control to tune exposure, contrast, and white balance without starting from scratch. Compare favorites across rain, fog, or neon streets to speed up your workflow.
When sharing, keep edits consistent. Use a preferred preset as a base and adjust 1–2 sliders (like exposure or warmth) to fit the shot. If one preset adds too much blue, soften the temperature on the next. A cohesive feed comes from a steady rhythm rather than a series of jarring edits.
Quick filter tests for low light
- Shoot a fixed scene with three filters at the same exposure. Compare how each preserves shadow detail, whether lights glow, and whether skin tones stay natural.
- Note which filter brightens without clipping highlights. If you overdo clarity, the image can look gritty; back off slightly. Aim for a clean, vivid result that still feels real.
Manual exposure tips in VSCO
You want night photos to pop without shouting edited. Manual exposure helps you keep mood while making lights and stars readable. Start with a baseline exposure, then adjust to protect highlights and reveal shadow texture. Use a quick check with the histogram and brightest spots: if highlights clip, back off; if shadows crush, raise exposure a touch. Treat exposure like a dial you turn, not a button you mash.
As you edit, focus on mood rather than perfection. A small exposure bump can reveal brick texture in shadows without turning signs into lanterns. A dim alley benefits from a cautious exposure lift to reveal silhouettes and texture. Use a sequence: baseline, lights, balance, then refine with contrast and clarity. Trust your eye and remember RAW offers more latitude in post.
VSCO exposure settings night photography
- Start with a moderate base and adjust in small increments; night scenes can change with a single tap. Protect highlights while recovering shadow detail. Keep midtones readable and preserve the glow of lights for a natural look.
- Test different exposures for the same frame; tiny adjustments matter for dusk skylines or neon streets. Check on a larger screen after editing, as a view from a phone can misrepresent contrast. Aim for consistent results across a night series.
Exposure is your steady hand: use it to guide the light where you want while maintaining atmosphere.
Use highlights and shadows controls
- Treat highlights and shadows as tone guardians. Pinch highlights to keep glow from overpowering the scene; if brightest parts look washed, ease off. Lift shadows just enough to recover texture in darkest areas without introducing noise.
- If exposure is higher, guard against haloing around bright lights; otherwise, push shadows a touch to reveal brickwork or pavement textures. Balance is key: too much highlight recovery creates halos, too much shadow lift adds noise. Use highlights and shadows in tandem for a natural, polished look.
Meter then nudge exposure
- Meter on a neutral area to set a baseline, then nudge exposure in small steps to protect lighted signs and reveal shadow texture. The aim is a scene that reads as your memory, not a single number.
- If the scene feels flat, brighten slightly to wake midtones; if highlights seem blown, back off a notch. This measured approach keeps edits repeatable across a night series.
ISO and noise control in VSCO
- Start with the lowest ISO that still gives a usable exposure; lift shadows with care to avoid noise. If you push ISO, grain increases in dark areas. Let exposure do the heavy lifting, not ISO.
- Balance brightness and detail: first adjust exposure, then fine-tune contrast to keep edges crisp. If grain creeps in, reduce ISO and lean on exposure tweaks. Use grain and texture tools sparingly for character, not mud.
- Maintain consistency across night shots with a similar ISO limit and noise level. When sharing, briefly explain your ISO choices to help readers learn.
VSCO grain and noise reduction night
- A touch of grain can add mood; apply grain gently to restore life in dark areas. Avoid overdoing grain, which can ruin texture.
- Use noise reduction to smooth dark areas where specks appear, but avoid over-smoothing which hides texture. Compare before/after to preserve the night’s character.
VSCO ISO shutter speed recommendations
- ISO and shutter speed work together. Start with the lowest ISO that exposes the scene and pair it with a shutter speed that preserves motion where needed (faster for car-filled streets, slower for stars or reflections).
- Typical starting range: ISO 400–800 with 1/60s to 1/125s for mildly lit scenes; ISO 800–1600 with 1/30s for starry or moving lights. Test a few frames quickly to see grain and noise behavior.
Reduce ISO, add grain lightly
- Keep ISO low and add grain only where it serves the mood. Base exposure low, then add a whisper of grain for texture and a film-like vibe.
Color grading to set night mood
- Color grading sets the night’s mood: cool blues for quiet streets, warm ambers for cozy glow. Start simple: adjust shadows, highlights, and a touch of saturation. A blue tilt can add depth; reduce brightness in bright areas if the scene feels busy.
- Test looks quickly by saving presets or copying settings across similar shots to maintain a consistent vibe. Check results on multiple screens since colors shift with lighting. A quick warm/cool toggle helps you choose the right mood for the moment.
- Align color direction with others if editing a group: soften or punch tones consistently to keep a cohesive palette. Revisit highlights and shadows to ensure the night scene remains readable and inviting.
VSCO color grading night scenes
- Start with a moody base, then adjust shadows to reveal details in dark corners while preserving glow from lamps. A touch of fade softens harsh edges for a film-like feel. Neon signs can pop with selective saturation, while the rest stays subdued. Save a few go-to profiles for different night scenarios (rainy streets, skylines, quiet evenings) and tweak white balance to keep skin tones natural or reflections believable.
- Use grain sparingly; it adds texture without overdoing it. Label presets clearly to reproduce looks later. With practice, VSCO color grading can become a fast path to a deliberate night aesthetic.
Shift white balance for realism
- White balance keeps colors true in mixed lighting. Sample a neutral area and set a baseline; if the image feels too blue, warm slightly; if too orange, cool a bit. Tiny shifts matter, especially with neon, tungsten, and moonlight.
- After baseline, test small shifts in different parts of the image. Realism comes from balanced tweaks that preserve skin tones and mood without looking unnatural. Warmer balance can lift shadows; cooler balance can deepen them.
Create contrast and tone
- Contrast is the night image’s heartbeat. Slightly lower highlights to prevent bloom, lift shadows to reveal texture, and consider a gentle S-curve for depth. If flat, increase midtone contrast for bite without losing glow from lamps.
- Use texture and clarity to define edges without an artificial look. Brighten reflections selectively to add life while keeping surrounding areas steady. Aim for a balanced tonal range that keeps the scene believable and alive.
- Finish by checking the histogram: a broad spread from dark to bright with no hard clipping in important areas signals a ready night photo.
Presets for dark sky long exposure
Long exposure night work benefits from presets that keep stars sharp without washing the sky. Start with a preset that lightly lifts the sky exposure, then adjust highlights to preserve star points. A good preset softens noise while maintaining foreground texture. For dark skies, favor cool tones with a touch of warmth in the foreground to separate star fields from the landscape. Use a slight clarity bump, dehaze, and selective color shifts to reveal faint star detail without turning the night gray.
Compare presets to identify those that preserve star points and foreground color. A solid preset keeps the sky midnight blue and the foreground natural, avoiding heavy halos or color spills. Subtle gradient filters can help reduce horizon haze while keeping star fields intact.
VSCO presets dark sky long exposure
- Use a filter that enhances clarity without over-sharpening stars. Avoid presets that push contrast too hard, which can look artificial; aim for crisp stars with a soft sky glow.
- Look for cool blues with magenta hints for nebula suggestions. Test haze reduction and color depth; avoid flattening the night shot. Save baseline presets and adjust manually for each shot.
- If you’re near water or reflective surfaces, choose presets that handle color latitude well to prevent skin tones or foliage from shifting oddly. Two or three strong baselines speed up editing across different scenes.
Best VSCO presets for night photos
- The best presets provide a clean base: detailed stars, true sky tones, and preserved foreground texture. They protect highlights and avoid turning the sky gray. A subtle clarity lift and gentle exposure increase help reveal faint stars without washing the sky.
- Presets should manage noise without a plasticky look, preserve color accuracy in textures, and maintain a believable balance between sky and foreground. Save multiple go-to presets for quick switching between different night scenarios.
- The right set lets you move between realism and cinematic mood, so readers feel the chill of night and the depth of your scene.
Preserve stars, adjust clarity
- Keep clarity and dehaze light to sharpen star edges without halos. Overdoing clarity can create artifacts; check at 100% zoom.
- A careful contrast lift and selective dehaze bring back faint galaxy light while keeping the sky dark. Use targeted tools (gradients or brushes) to brighten selective areas without washing out the whole image.
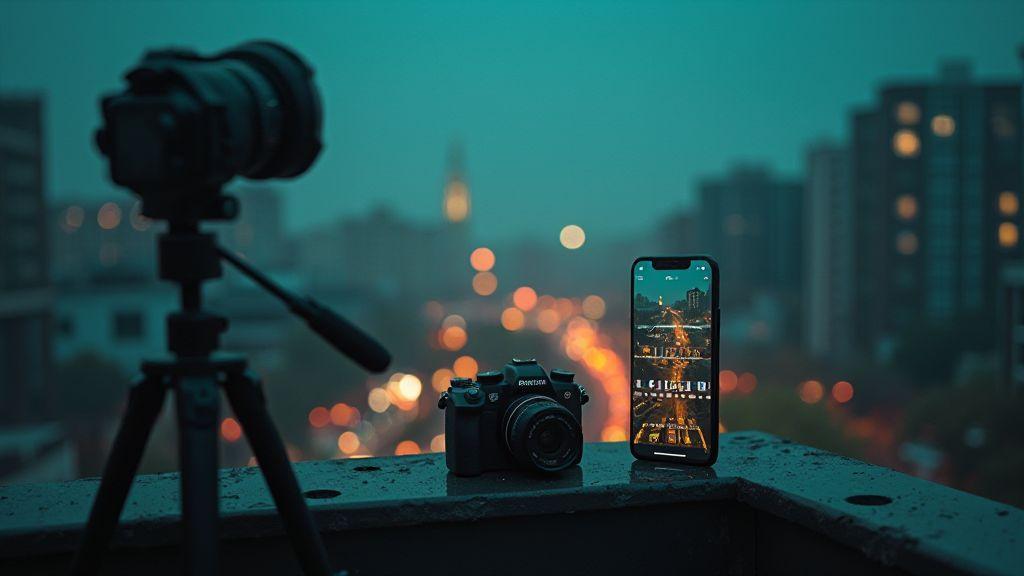
Mobile night photography VSCO tips
- For crisp, shareable night shots on a phone, stabilize your shot with a tripod or steady surface, clean lenses, and deliberate lighting choices. Proper exposure and focus will reduce noise and improve color accuracy.
- Compose with intention: slower than daytime, look for leading lines, keep horizons level, and shoot in RAW when possible. In editing, preserve highlights and reveal texture in shadows without overprocessing.
- Compare results over weeks: try the same scene with different settings and filters, then note which changes matter most. Editing history helps you speed up future edits.
Mobile night photography tips 2026
- Lock exposure manually to prevent blown-out highlights. Tap to focus on the subject, then shoot with a low ISO and short shutter when possible, using post adjustments to brighten shadows.
- Treat filters as starting points; adjust warmth, contrast, and saturation sparingly to keep colors true. If you see color banding, reduce contrast and lift shadows slightly. Save your favorite edits as presets for consistency.
- Optimize for sharing: resize for platforms, sharpen after resizing, and consider a light watermark for credit. Split-toning can separate sky and ground without sacrificing realism.
How to edit night photos in VSCO
- Start with a clean baseline: adjust exposure to avoid clipping highlights and recover detail in shadows. If the scene is flat, lift midtones rather than boosting the entire image. Increase clarity slightly to bring out textures, then reduce noise if needed.
- Tweak color and tone: adjust white balance to keep neon from shifting, refine saturation, and recover highlights. Add a subtle vignette to guide the viewer’s eye toward the subject.
- Save a clean reference version without a filter, then create a moodier variant for social posts.
Use tripod and RAW if possible
- The sharpest results come from a tripod and RAW files. Tripods prevent camera shake in low light, and RAW allows more latitude in post. If a tripod isn’t available, stabilize against a solid surface and shoot multiple frames to blend later.
Reduce grain vs preserve detail
- Night shooting often brings grain; your aim is to minimize noise while preserving detail. Tighten luminance noise, protect edge details, and compare side-by-side to judge what you’re sacrificing.
- Use selective noise reduction for shadows, then slightly lift shadows to reclaim texture. Excess smoothing erases character; small, careful adjustments yield natural results.
VSCO manual adjustments: low light (2026)
- In 2026, use manual adjustments to tailor noise reduction and detail without overdoing them. Start with Exposure, then adjust Contrast, Shadows, and Highlights. Balance Highlights so bright spots don’t explode, and Shadows so dark areas retain texture.
- For sharpness, apply sparingly. Pair Sharpening with Noise Reduction and use selective masking to protect smooth areas like skies or walls. Keep color shifts modest to preserve skin tones and street colors. Zoom to 100% to verify edge clarity.
Balance sharpening and denoise
- Denoise first, sharpen last to avoid exaggerating noise. Use masking to sharpen only edges and textures, preserving natural look in flat areas. If halos appear around lights, back off sharpening and adjust denoise.
Test at 100% before export
- Before exporting, inspect at 100% zoom. Tweak as needed and export a web-friendly version first, then the final high-res master. This ensures artifacts or softness aren’t surprises to viewers.
When to use presets vs manual edits
- Presets give a fast baseline and consistency for batches, great after a long shoot. Manual edits offer precise color, exposure, and contrast tweaks to fit a unique shot.
- Use a preset for speed, then apply targeted manual tweaks to perfect a frame. Save a small batch of tweaks you know work across similar scenes to speed up future edits.
Compare presets to manual tweaks
- Presets are fast and consistent; manual tweaks offer control over color balance, shadows, and highlights to fit a scene. A preset might set you in the ballpark, but manual tweaks help you fine-tune neon brightness, reflections, or star visibility.
- Combining both improves speed and precision. Start with a base preset, then refine as needed. Save your best tweaks for repeat use.
Save custom settings for repeat shots
- Save exposure, white balance, noise reduction, and color grading as a custom preset for repeat shots. Apply to similar scenes, then tweak one or two sliders per image. Use descriptive names like Night Downtown — bold to recall mood quickly.
Choose speed or precision
- If racing time, use presets to process batches, then spot-edit obvious issues. For precision, focus on lighting balance, color temperature, and noise. Mix both approaches: a fast preset followed by targeted refinements.
Edit, organize, and share night shoots
- Name files consistently and use folder structures for originals, edits, and exports. Preselect best frames based on silhouettes, reflections, and noise levels. Edit with a simple baseline: exposure, white balance, and contrast first, then sharpen and add texture where beneficial. Track changes to revert or compare later.
- Create a consistent naming convention and metadata: location, date, camera, lens, and settings. Tag shots with keywords like city light, neon reflections, or starry sky. This helps assemble themed galleries for clients or social posts.
- When sharing, export sizes suited to each platform and build a few portfolio stacks: a hero, a secondary shot, and a detail. Include a short behind-the-scenes note to engage your audience. If collaborating, share edit galleries to invite feedback.
VSCO for Night Photography: Best Filters and Manual Adjustments in 2026 workflow
You’ve got to be selective with filters. For night photography, avoid extreme color shifts unless they tell the story. Start with a clean base: adjust exposure and white balance first, then dial in contrast to keep quiet tones from clipping. When you bring in a filter, use it sparingly to enhance mood rather than mask noise or blur. A subtle cool tone or gentle film-like grain adds atmosphere without overpowering the scene. Keep edits reversible so you can compare the original against the version with a tweak.
Manual adjustments should be your main tool. Tweak shadows and highlights to recover detail in bright lights and dark corners. Increase clarity and texture only where you want more grit on buildings, water, or stars. If neon or LED signs are involved, sharpen just enough to define edges without halos. Use HSL to nudge color balance in shadows and midtones if the underglow feels off. Save a clean version without any filter as your reference, then create a light mood version for social posts.
When preparing a night gallery, create two or three presets that reflect your style but stay flexible. Name them clearly (e.g., Night Cool Mono or City Lights Warm). This gives you speed on future edits while keeping color science consistent. Remember, the best workflow uses VSCO for Night Photography: Best Filters and Manual Adjustments in 2026 as a guide, not a rule. Your eye should decide when to push or pull.
Backup originals and edited versions
Backups are essential. Save originals in a dedicated vault folder, separate from edits. Maintain at least two copies on different drives or in the cloud. For large batches, snapshot your folder at milestones so you can rewind without losing progress. Label backups clearly: Original, Edited v1, Edited v2, with date and a short note. This makes revisions easier and safer for clients.
Regularly audit backups: check for broken links, renamed files, or missing copies. Move older projects to archive storage so your working drive stays fast.
Export best size for platforms
Export the right sizes for each platform. Social posts: 1080px on the long side (2x or 4x where supported). For portfolios or print, export high-resolution versions with maximum sharpness and minimal compression. Save a master file in a Masters folder for re-exporting later. Keep color profiles consistent—use sRGB for web, with appropriate profiles for print as needed.
Closing note on VSCO for Night Photography
VSCO for Night Photography: Best Filters and Manual Adjustments in 2026 offers a structured path to strong night imagery. Use filters sparingly, rely on manual controls, and maintain a clear workflow from capture to export. With practice, you’ll build a signature look that feels authentic, cinematic, and true to the moment.

Smartphone Night Photography Enthusiast & Founder of IncrivelX
Vinicius Sanches is a passionate smartphone photographer who has spent years proving that you don’t need an expensive camera to capture breathtaking images after dark. Born with a natural curiosity for technology and a deep love for visual storytelling, Vinicius discovered his passion for night photography almost by accident — one evening, standing on a city street, phone in hand, completely mesmerized by the way artificial lights danced across wet pavement.
That moment changed everything.
What started as a personal obsession quickly became a mission. Vinicius realized that millions of people were carrying powerful cameras in their pockets every single day, yet had no idea how to unlock their true potential after the sun went down. Blurry shots, grainy images, and washed-out colors were robbing everyday people of memories and moments that deserved to be captured beautifully.
So he decided to do something about it.
With years of hands-on experience shooting city streets, starry skies, neon-lit alleyways, and creative night portraits — all with nothing but a smartphone — Vinicius built IncrivelX as the resource he wished had existed when he was just starting out. A place with no confusing jargon, no assumptions, and no gatekeeping. Just honest, practical, beginner-friendly guidance that actually gets results.
Vinicius has tested dozens of smartphones from every major brand, explored dark sky locations across multiple states, and spent countless nights experimenting with settings, compositions, and editing techniques so that his readers don’t have to start from scratch. Every article on IncrivelX comes from real experience, real mistakes, and real lessons learned in the field.
When he’s not out shooting at midnight or writing in-depth guides for the IncrivelX community, Vinicius can be found exploring new cities with his phone always within reach, looking for the perfect shot hiding in the shadows.
His philosophy is simple: the best camera is the one you already have — you just need to learn how to use it in the dark.